You are now in the main content area
Create & Edit Pages
For each new file you create, have the following information available before you begin:
- Title – this is a required field; it will become your Page Title (important for SEO; is viewed in browser), your H1 and your default navigation label (if shown in nav)
- Name – this is the filename that will display in your URL e.g. torontomu.ca/your-site/file-name.html
- If you leave the name field blank, the title will be used to automatically create a filename.
- File name character limit is 65.
- Titles that exceed 65 characters will be truncated in the file name.
Is this file to be shown in navigation?
- Organize your content; keep in mind that navigation is determined by your site organization
- By default, the file will be hidden. If you want it to display, go to the page properties and select the checkbox for “Show in Navigation”
Do I need a navigation title that is different from my Title field?
- If yes, go to page properties and add the alternative label in “Navigation Title”; otherwise, the Title will be the label displayed in navigation
If available, have the following metadata:
Tags/Keywords (these are predefined in AEM and are most useful for news and event lists)
Meta Keywords (user-defined)
- Meta Description - this description will display on search engine results pages but can also be used as information to display in page lists.
Navigate to the location where you want to create the new file.
From the start page:
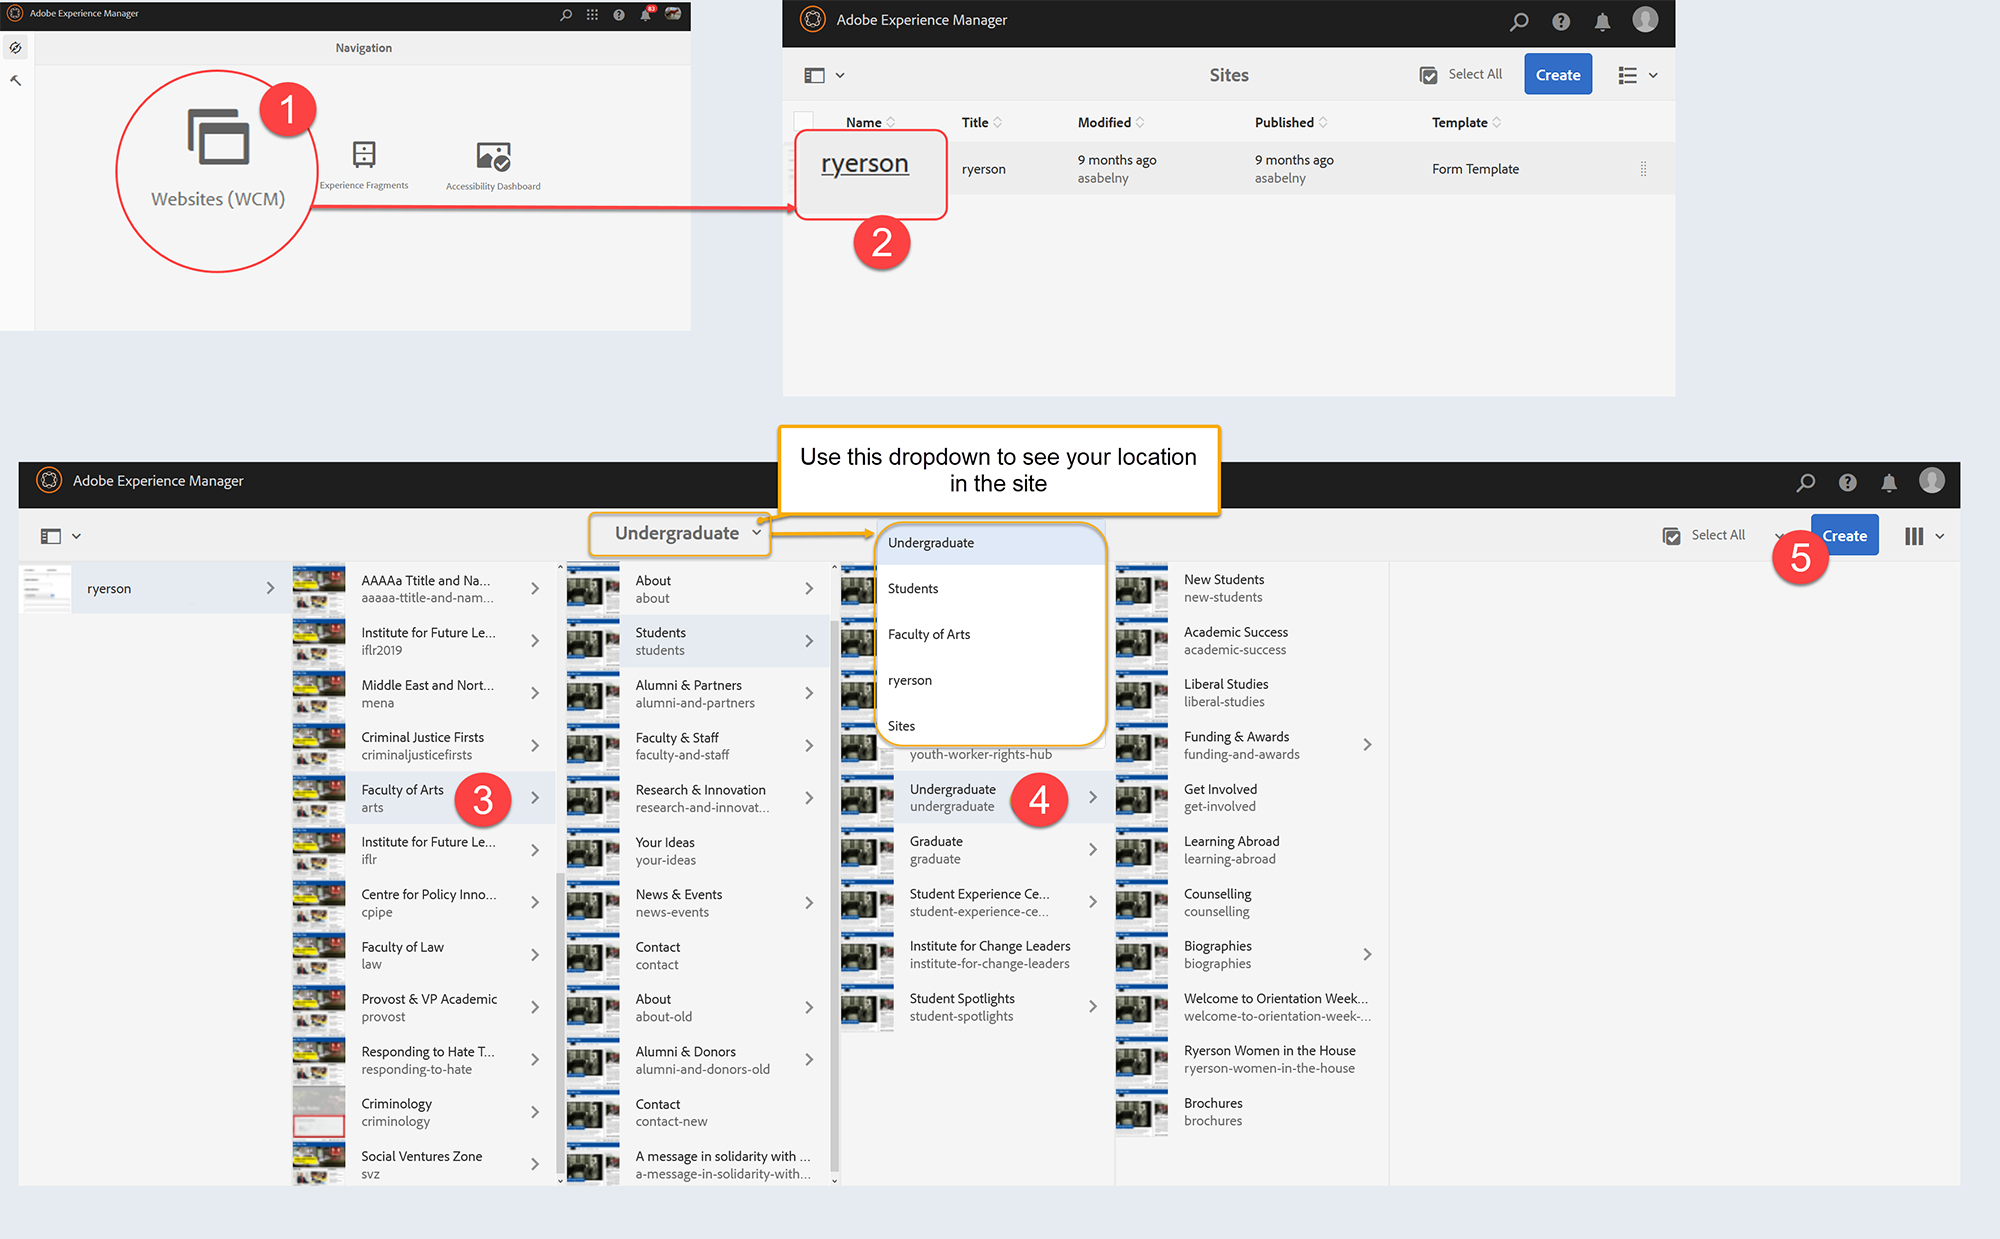
- Navigate to the Websites (WCM) console
- Select the name 'ryerson' (not the thumbnail)
- Locate your site's name (don't select the thumbnail)
- Navigate to the location for the new page
- In the top right, select the blue "Create" button, select "Page" from drop down
- Choose a page template ('Content' is the most commonly used)
- Select the blue 'Next' button in the top right corner
- Give your page a 'Title'
The title is a required field.
Choose a descriptive title as it will become your page title, navigation label and the H1 on your page. - Leave the name field blank to auto generate a filename based on the title, or add a custom name
- Select the blue 'Create' button
- A 'Success' message will appear once your page has been created.
- Select 'Open' to edit the new page, or select 'Done'
- Navigate to the Websites (sites) console, click on ryerson (name not thumbnail), and click through to the page you want to open
- Click on the thumbnail of the page you want to open.
- A toolbar will appear at the top. Either click “Edit” or hit “e” on your keyboard.
- Your page will open.
- To edit an existing component, double click on the component to make your edits.
Alternatively, you can click on a component, and click on either the pencil or wrench icon to edit.
Components are used to add content to a page. - To add a new component, make sure the Side Panel is visible. If it’s not, click on the “Side Panel” icon.
- Click on the components icon. A list of components will appear. Drag and drop your component onto the page; or
- Click on the drop down that says “All.”
Select what type of component you are looking for.
For example, select “Layout” and a list of layout components will appear. - Use search bar. If you already know which component you want to use, type the name of the component into the search bar and hit “enter” on your keyboard.
- Drag and drop the component into the boxes on your page that say "Drag components here".
- Click on the drop down that says “All.”