You are now in the main content area
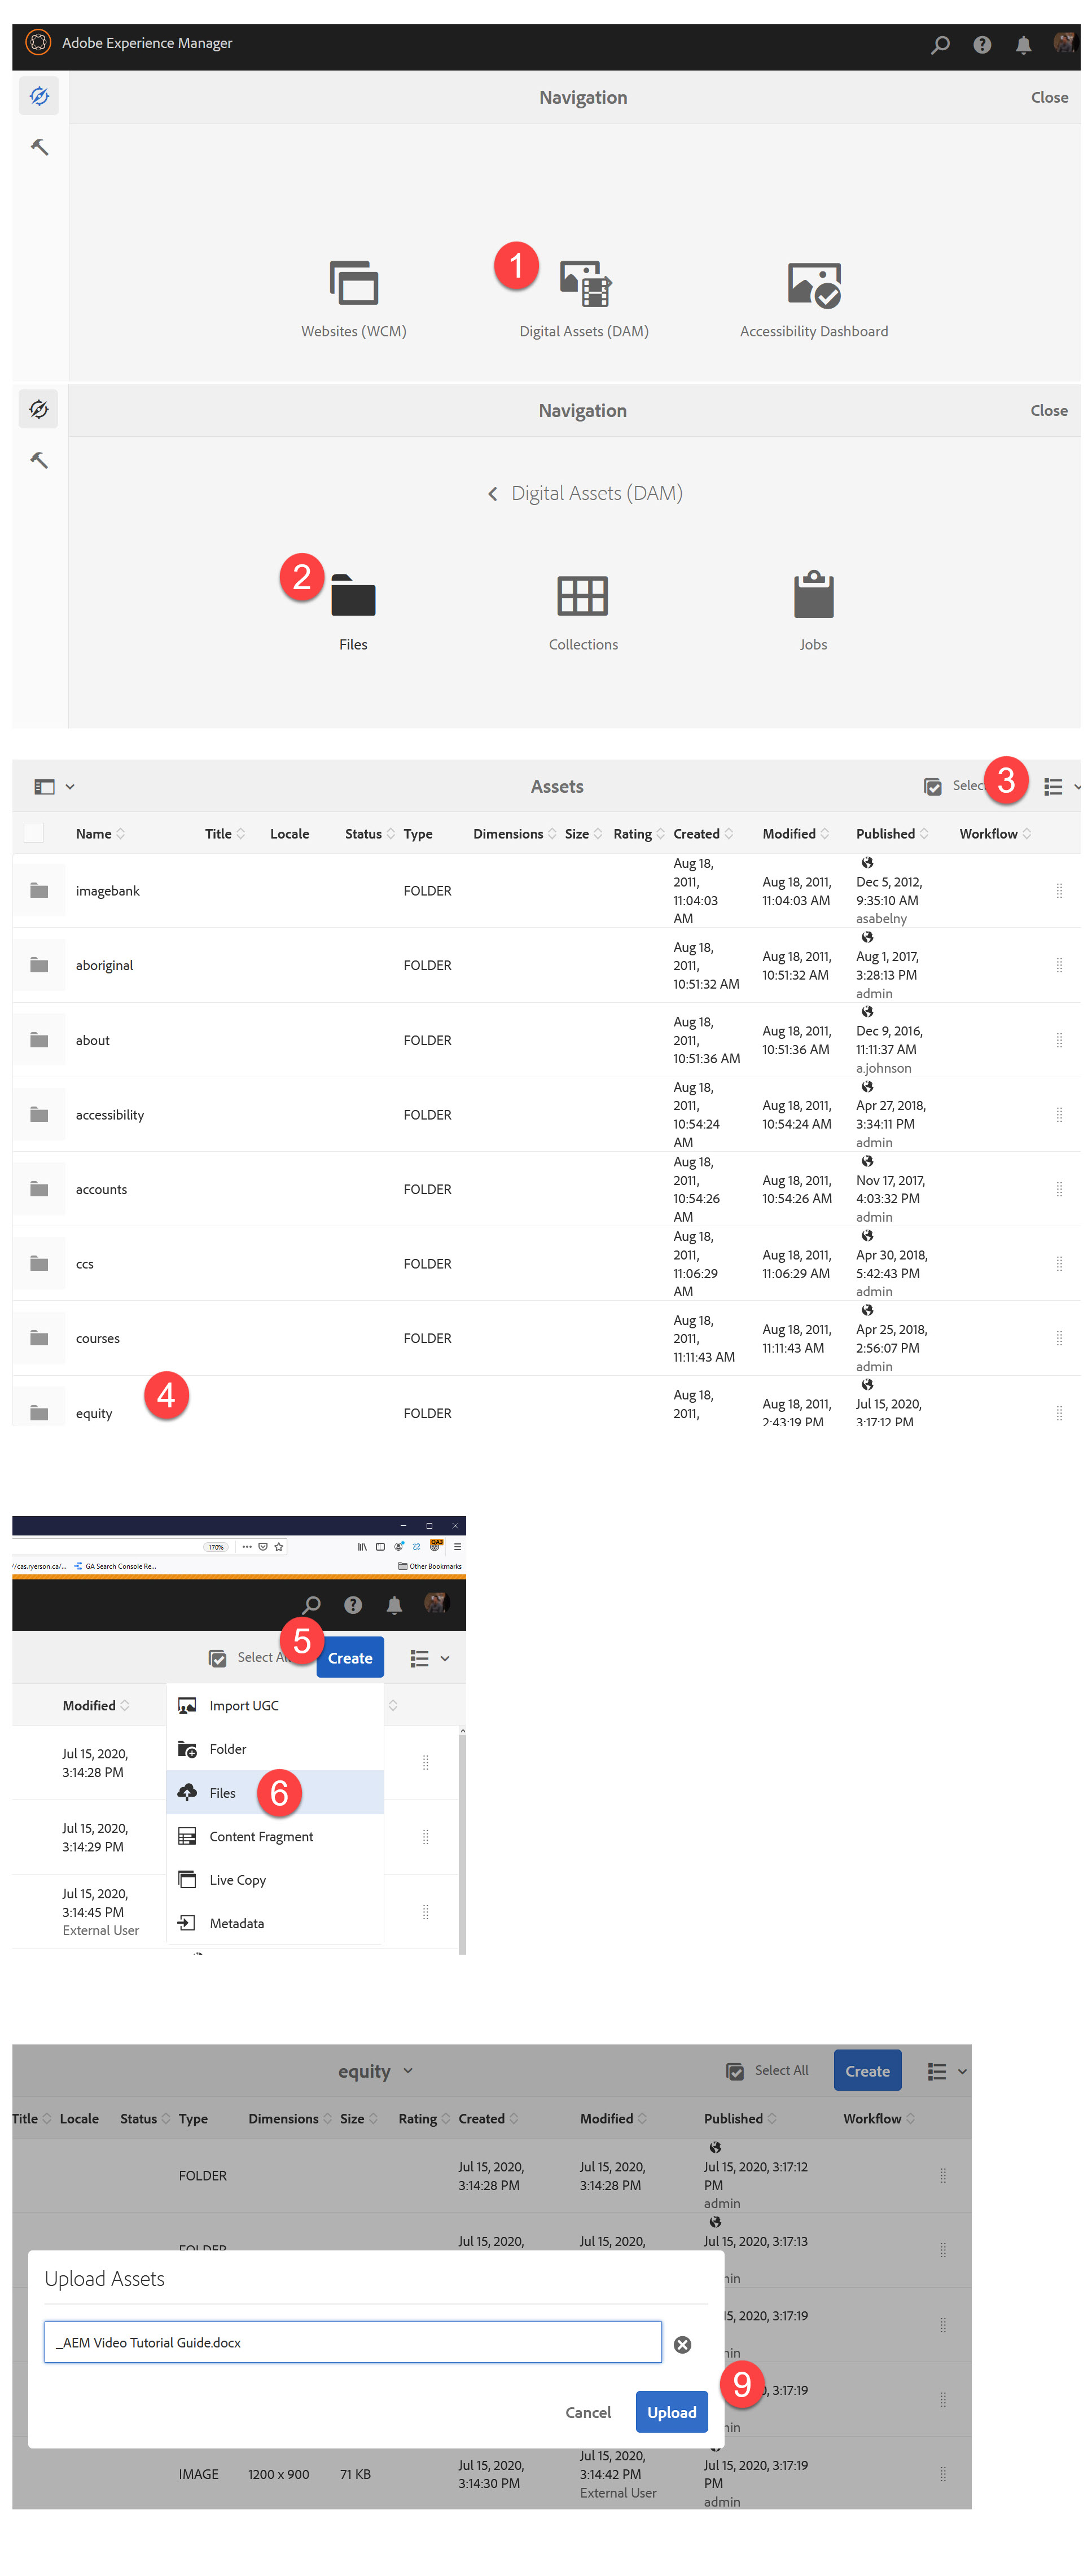
Digital Assets (DAM)
Assets such as images, PDFs, and word documents are stored in the Digital Assets Console, also known as the DAM.
View or upload assets
- Navigate to the Digital Assets (DAM) console from the start page (navigation panel).
- In the DAM console, select "Files".
- Navigate to the folder where you want to upload a file. Select the folder name.
- Choose the view that you are most comfortable with - card, column or list. Views are accessible via the top right corner of the page. Column and List are recommended views.
- Select the blue “Create” button in the top right corner.
- Select “Files” from the dropdown
- Find the file(s) on your computer.
- Select “Open.”
- In new window, select “Upload.”
Uploaded files will now appear in your folder.
Publish assets
To publish the image:
- Select the thumbnail, making sure the check mark appears.
- At the top, a toolbar will appear. Select “Quick Publish” to publish the image.
Images MUST be published or they will not appear on your webpages.

DAM toolbar actions
When you select the thumbnail of an image, the following actions will be available for that asset:
- Create - Versions
- Download - email option not available
- Checkout/Checkin
- Properties - metadata editor, scheduled activations and references
- Edit - crop, rotate, flip
- Annotate
- Manage Tags
- Copy
- Move/Rename
- Quick Publish
- Manage Publication
- Delete
Selecting multiple assets
When you select more than one asset, you can no longer:
- Edit
- Annotate
- Manage tags