Publish and unpublish pages
Publish (formerly called activation) is the process of moving modified content to your live website. Every time a change is made to a page or an asset, the file must be published in order for the change to appear on the live site.
What gets published?
Every file that you create or upload to AEM must be published. This includes webpages, PDF, Word documents, JPG, PNG, etc.
You can also select assets and pages to unpublish.
Related content:
Ways to publish your content
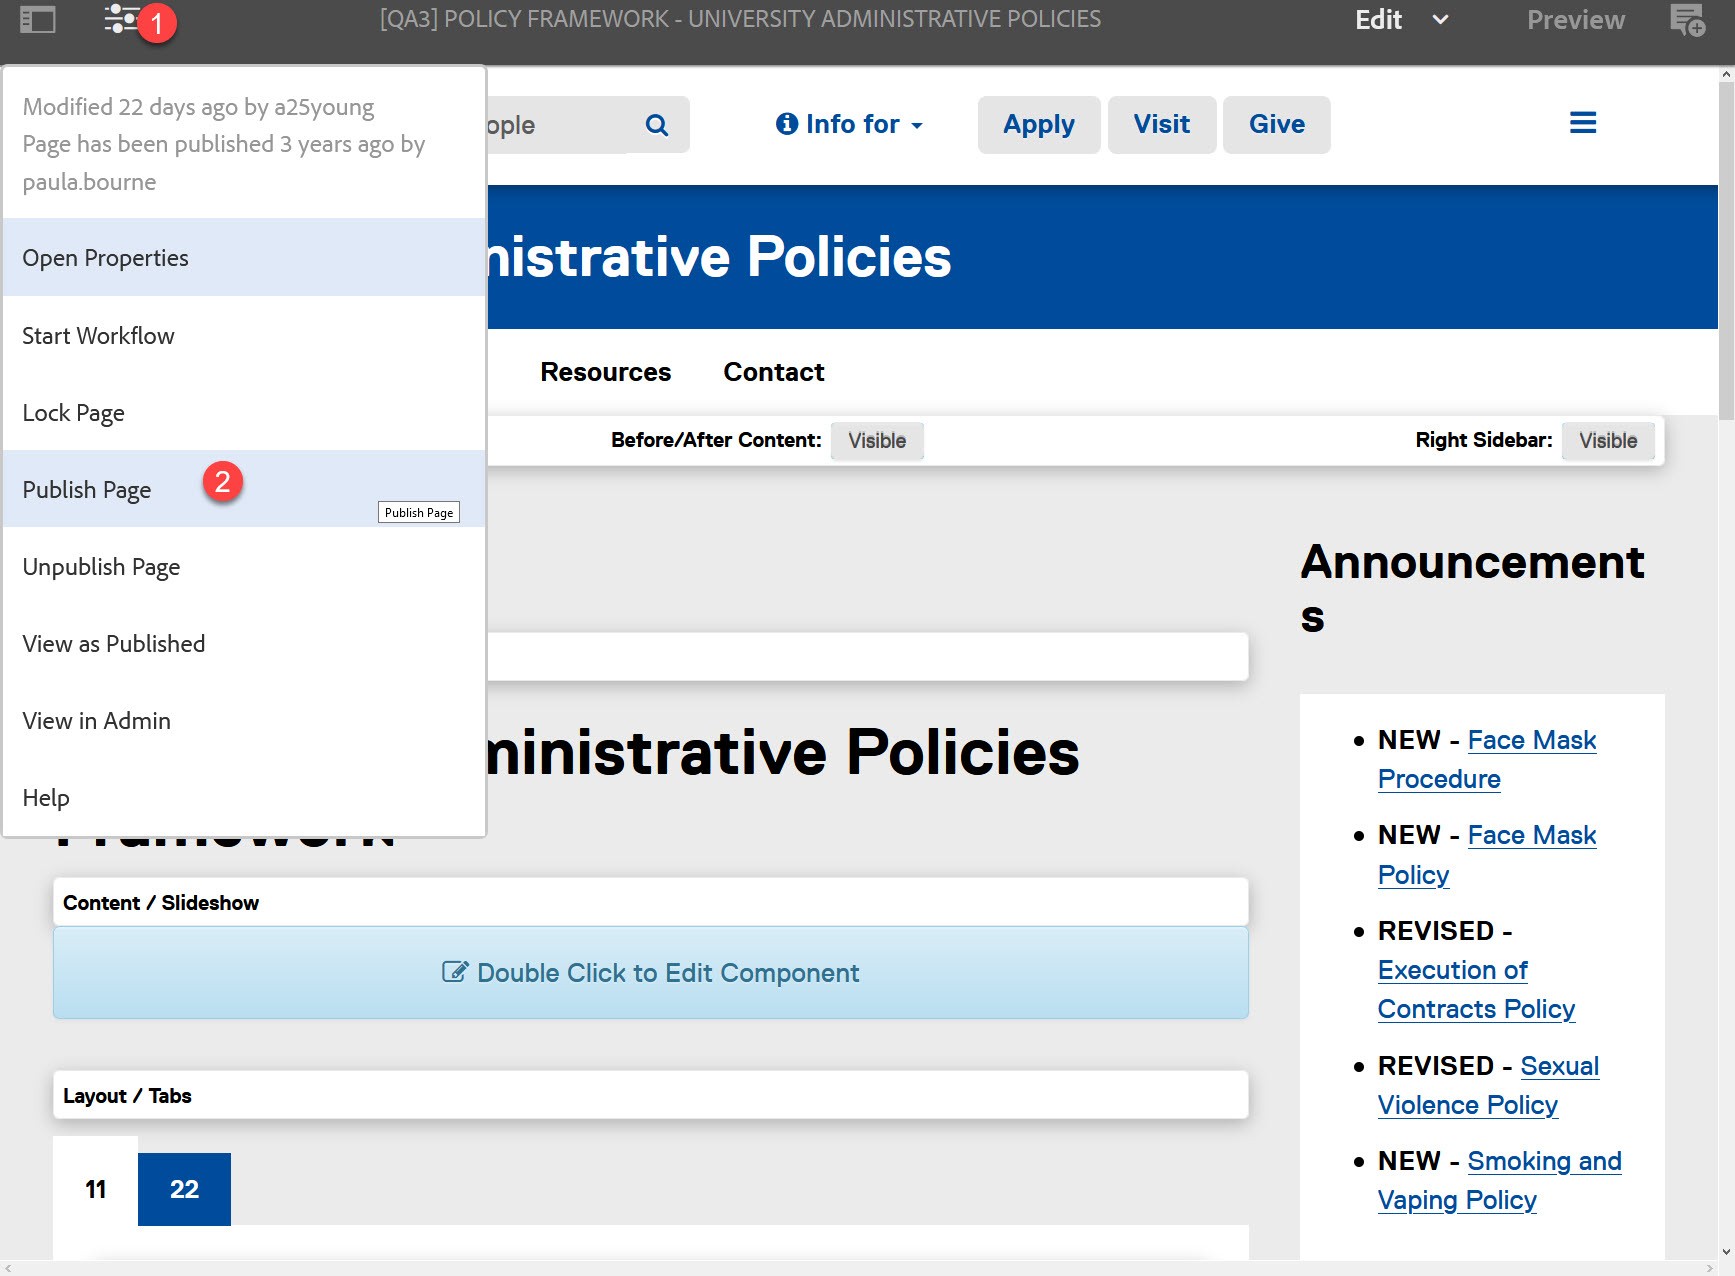
Publish from open page
- With the page open for editing, select the “Page Information” icon in the top left corner.
- Select “Publish Page.”
Your page is now published.
To Unpublish
- With the page open for editing, select the “Page Information” icon in the top left corner.
- Select “Unpublish Page.”
- Select “Confirm.”
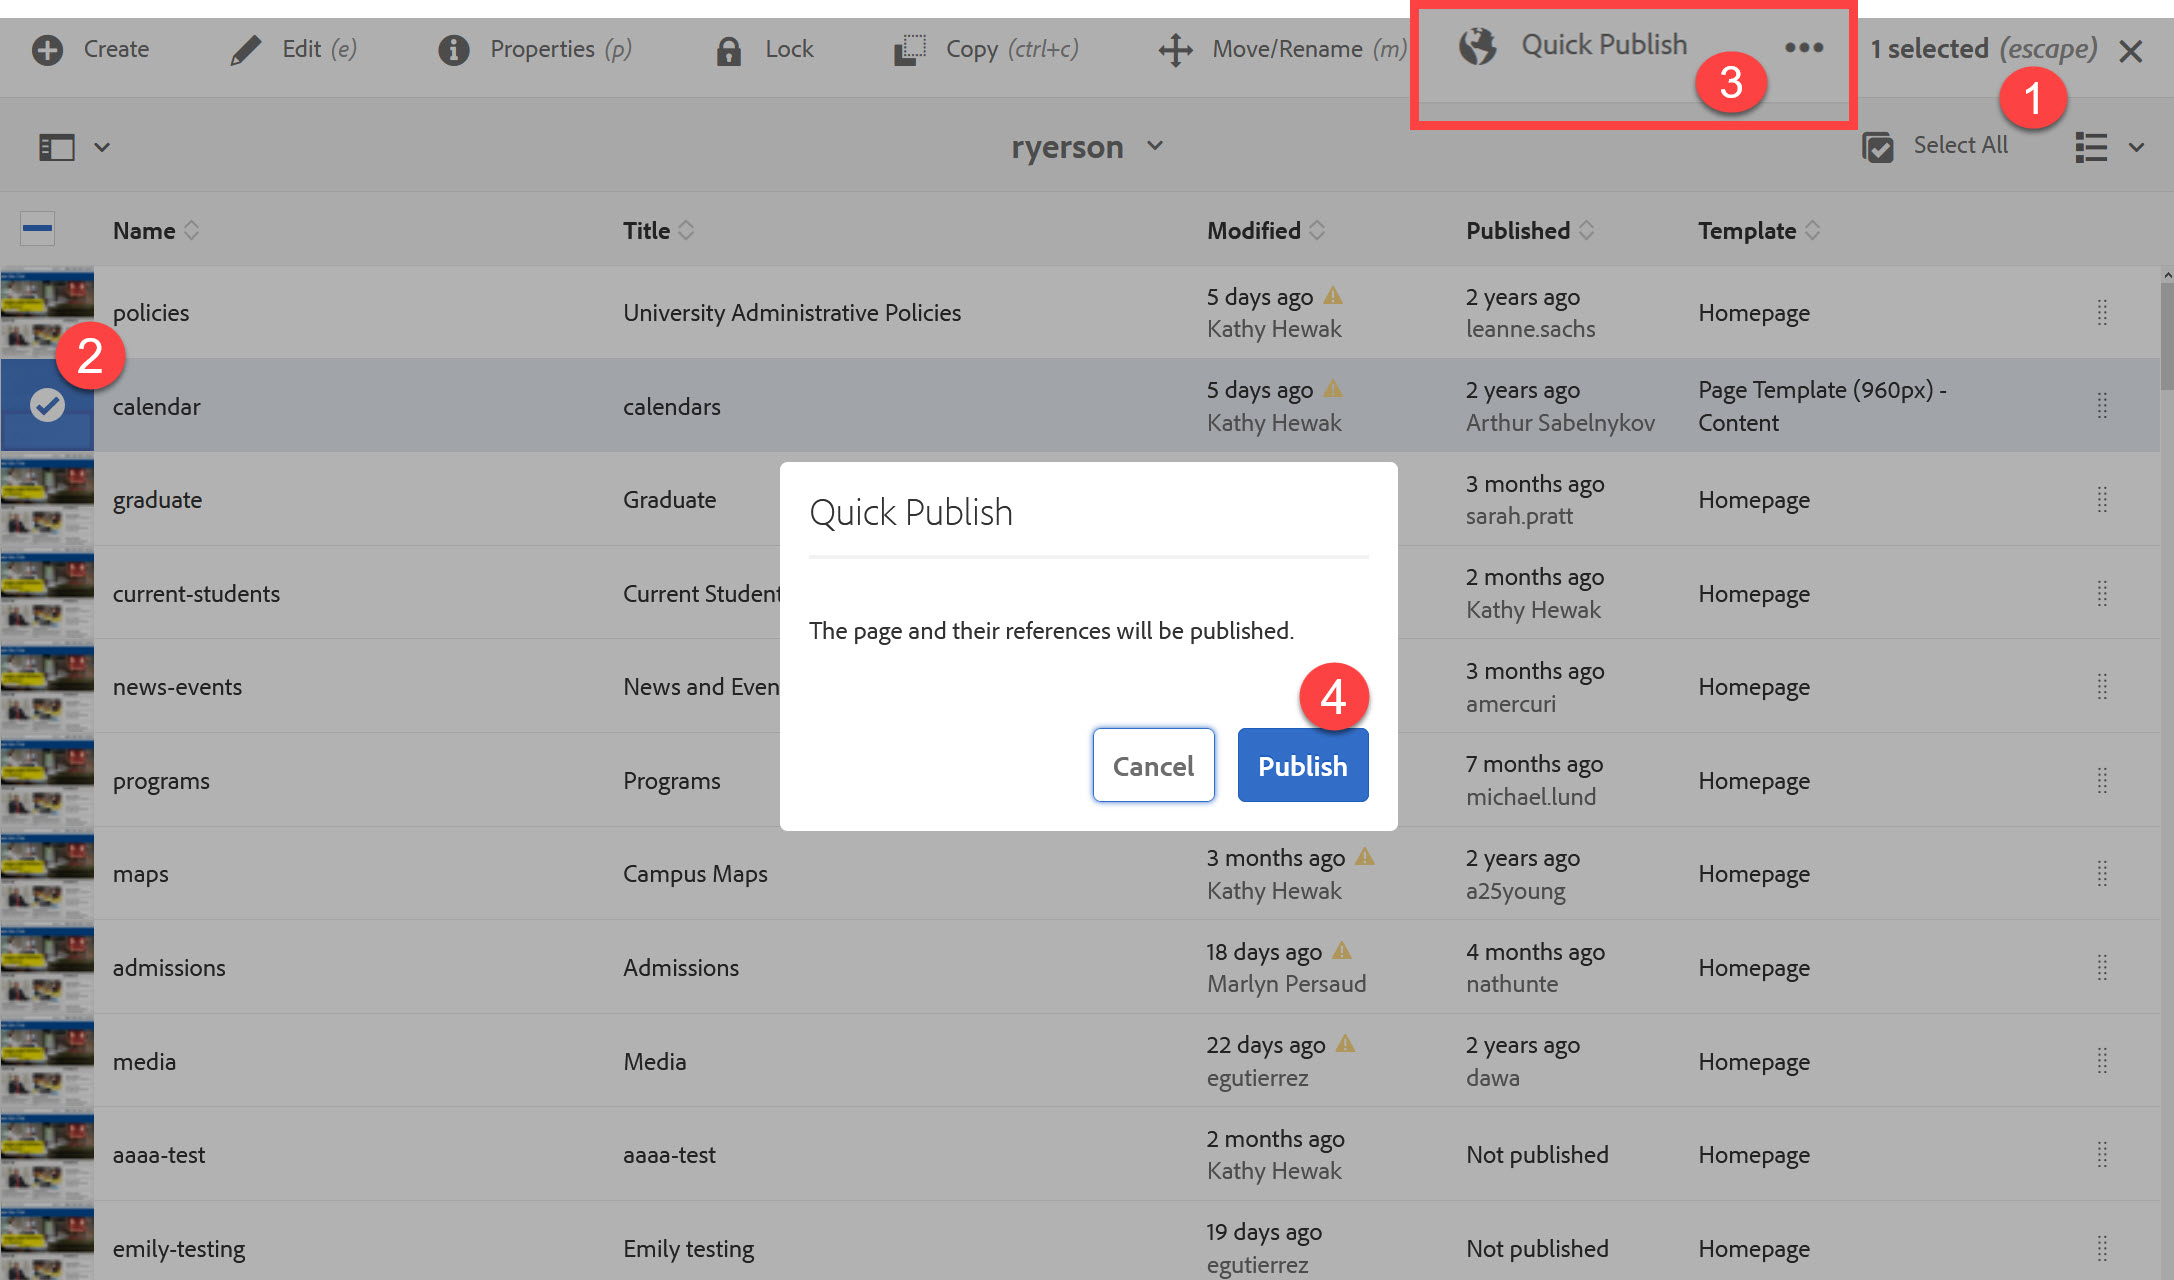
Publishing from Sites
From either the Sites or DAM console:
- Change view to either List or Column View. To do this, select the view icon in the far right corner.
- Select the thumbnail of the page or DAM asset you want to publish. Make sure you see a checkmark over the thumbnail.
- A toolbar will appear at the top. Select “Quick Publish” (alternatively, "Manage Publication").
- Then select “Publish.”
A blue bar will appear at the top of the console confirming that the page and references have been published.
Unpublish
When you unpublish a file it removes it from the live website. It does not delete or remove the asset from the AEM content management system.
Unpublish from open page
- With the page open for editing, select on the “Page Information” icon in the top left corner.
- Select “Unpublish Page.”
- Select "Confirm"
Your page or asset is now unpublished.
Unpublish from Sites
- Use List or Column View.
- Select the thumbnail of the page or DAM asset you want to unpublish.
Make sure you see a checkmark over the thumbnail.
A toolbar will appear at the top. - Select “Manage Publication”
- Under Action, select "Unpublish"
- Select the blue "Next" button
- Select "Unpublish"
- Select "Continue"
Pages can be set to automatically publish or unpublish on a specific date, at a specific time.
From the sites console:
- Choose a page to publish at a later date by
- Select the thumbnail next to the file
- Select "Manage Publication"
- Under Action, choose "Publish" or "Unpublish"
- Under Scheduling, choose "Later"
- Select a publication date and time using the calendar icon. Time selected must be at least one hour from now.
- Select the blue "Next" button
- Choose the file, include Children if required
- Select the blue "Next" button
- Add a descriptive Workflow title
- Select "Publish later"
A green message will appear at the top of the screen indicating the scheduled publish.