News template
- The news template is used to create an a news story or article.
- Two display styles are available
- Font body options: Replica and Lyon; three font sizes available for body text
- Custom Colours:
- Display option 1 - No
- Display option 2 - Yes; four colour options
- News templates must be created under a yearly archive template
- News are displayed in a News List or Grid component
Related content:
Pre-requisite to creating a news item:
Before you can create your first news story, you must create a yearly archive template.
News pages must be created as child pages of a year/month archive. Once you have created the yearly & monthly archives, navigate to the necessary month (01=January, 02=February, etc.)
- Select 'Create'> choose 'Page'
- Select 'News' and select the blue 'Next' button
- Add a descriptive Title; if name field is left blank, one will be auto-created using the title field content
- Select 'Create'
- Select 'Open' to edit the file
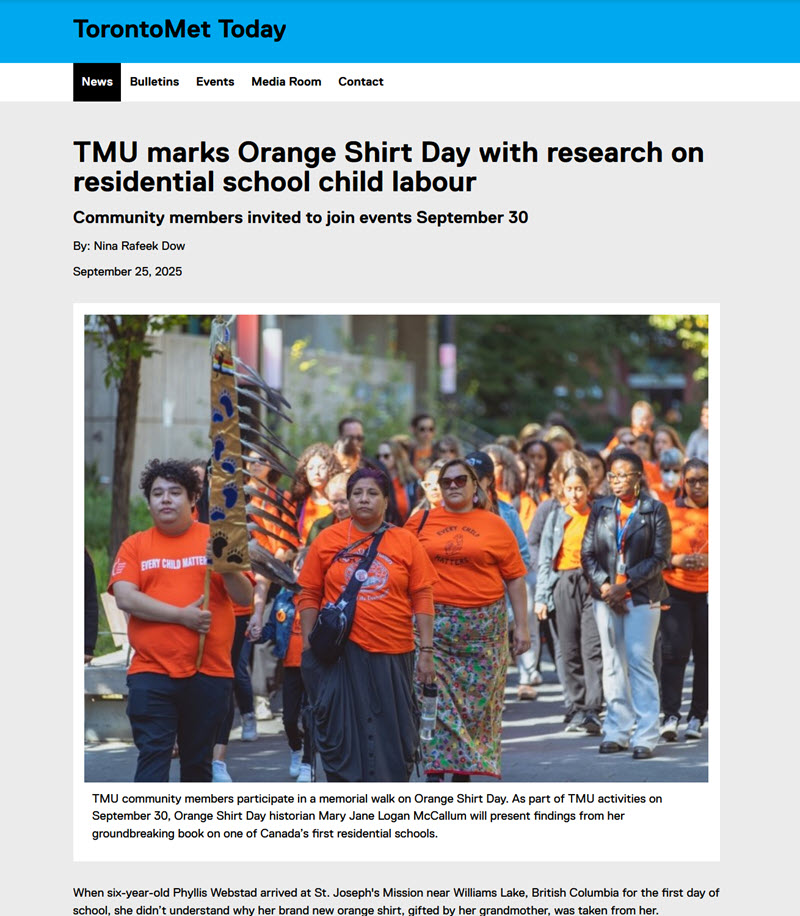
Style 1:
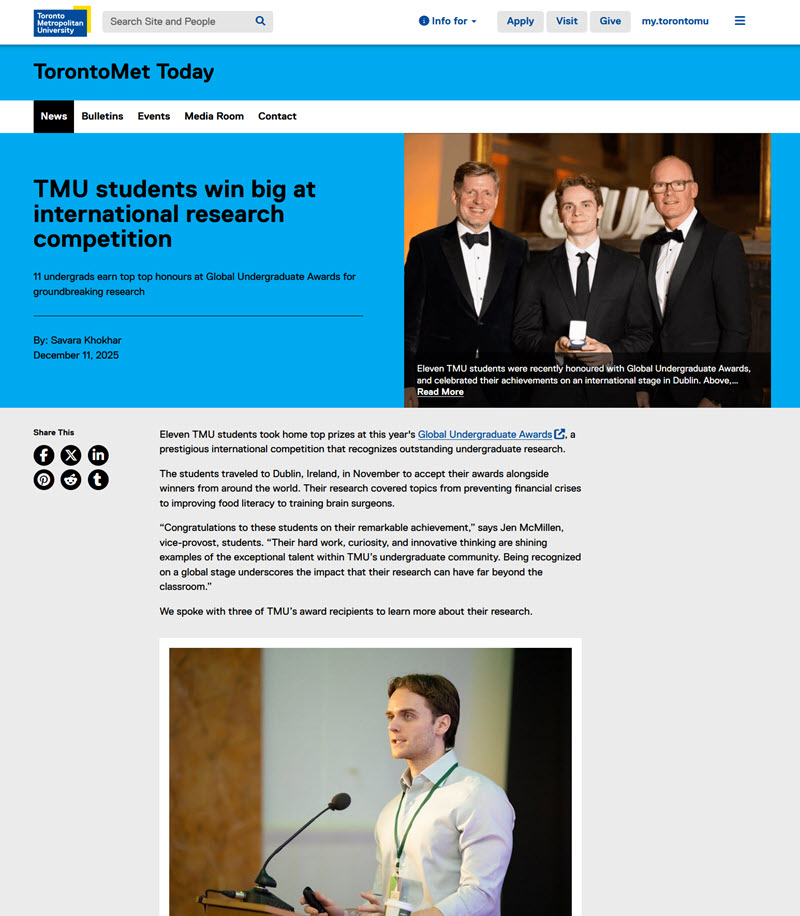
Style 2:
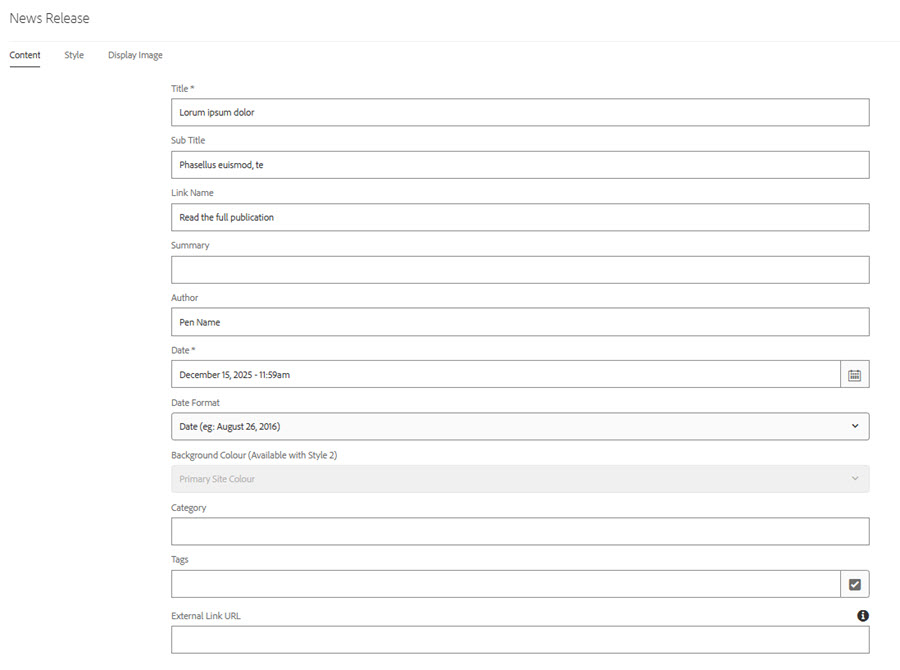
News template fields:
*Required fields. Template will not display correctly without these fields.
Title*: 110 character limit. The news story title becomes the default H1; however, the page title is still the 'Title' added when the page was created.
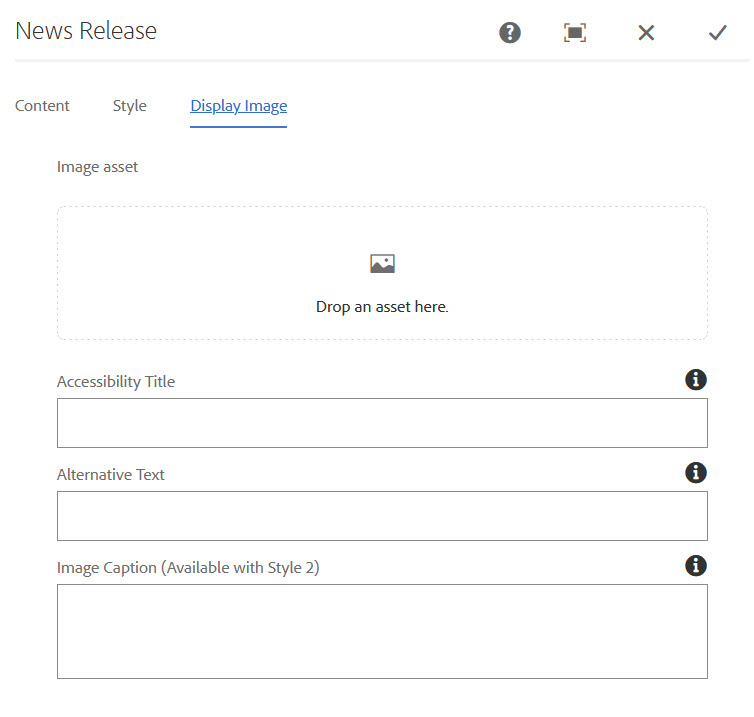
Thumbnail tab: Add an image to this tab if news stories are to be displayed in a news grid. (Images are added via the Side Panel> Assets)
Sub Title 140 character limit.
Link Name
Summary
Author
Date*
Background Colour (available with Style 2 only)
Category
Tags
Embedded Text Component - use for body copy
Other components can be added below the news release component
i.e. images, slideshows, layout components, etc.
Social sharing links can be displayed/or not displayed at the bottom of the release by enabling within the page properties, share page tab.
Sample news story path with required templates
| Domain | Parent | Child | Child | Child | Page |
| torontomu.ca | /psychology | /news | /2025 | /02 | my-news-story.html |
| Template to use: | homepage template | general content template | Archive (yearly) template | archive month | News Template |
External news
If a news story is hosted on another website you can use the News template to link to this story. When users select the headline they will be brought to the news story on the external site.
- Open up the news template
- Enter the Title, Link Name, and the External Link URL
- Select OK
How to create a news story (display option 1)