Image specifications
Responsive images should be high resolution.
- Images should be PNG, JPG or WebP
- Avoid GIF files
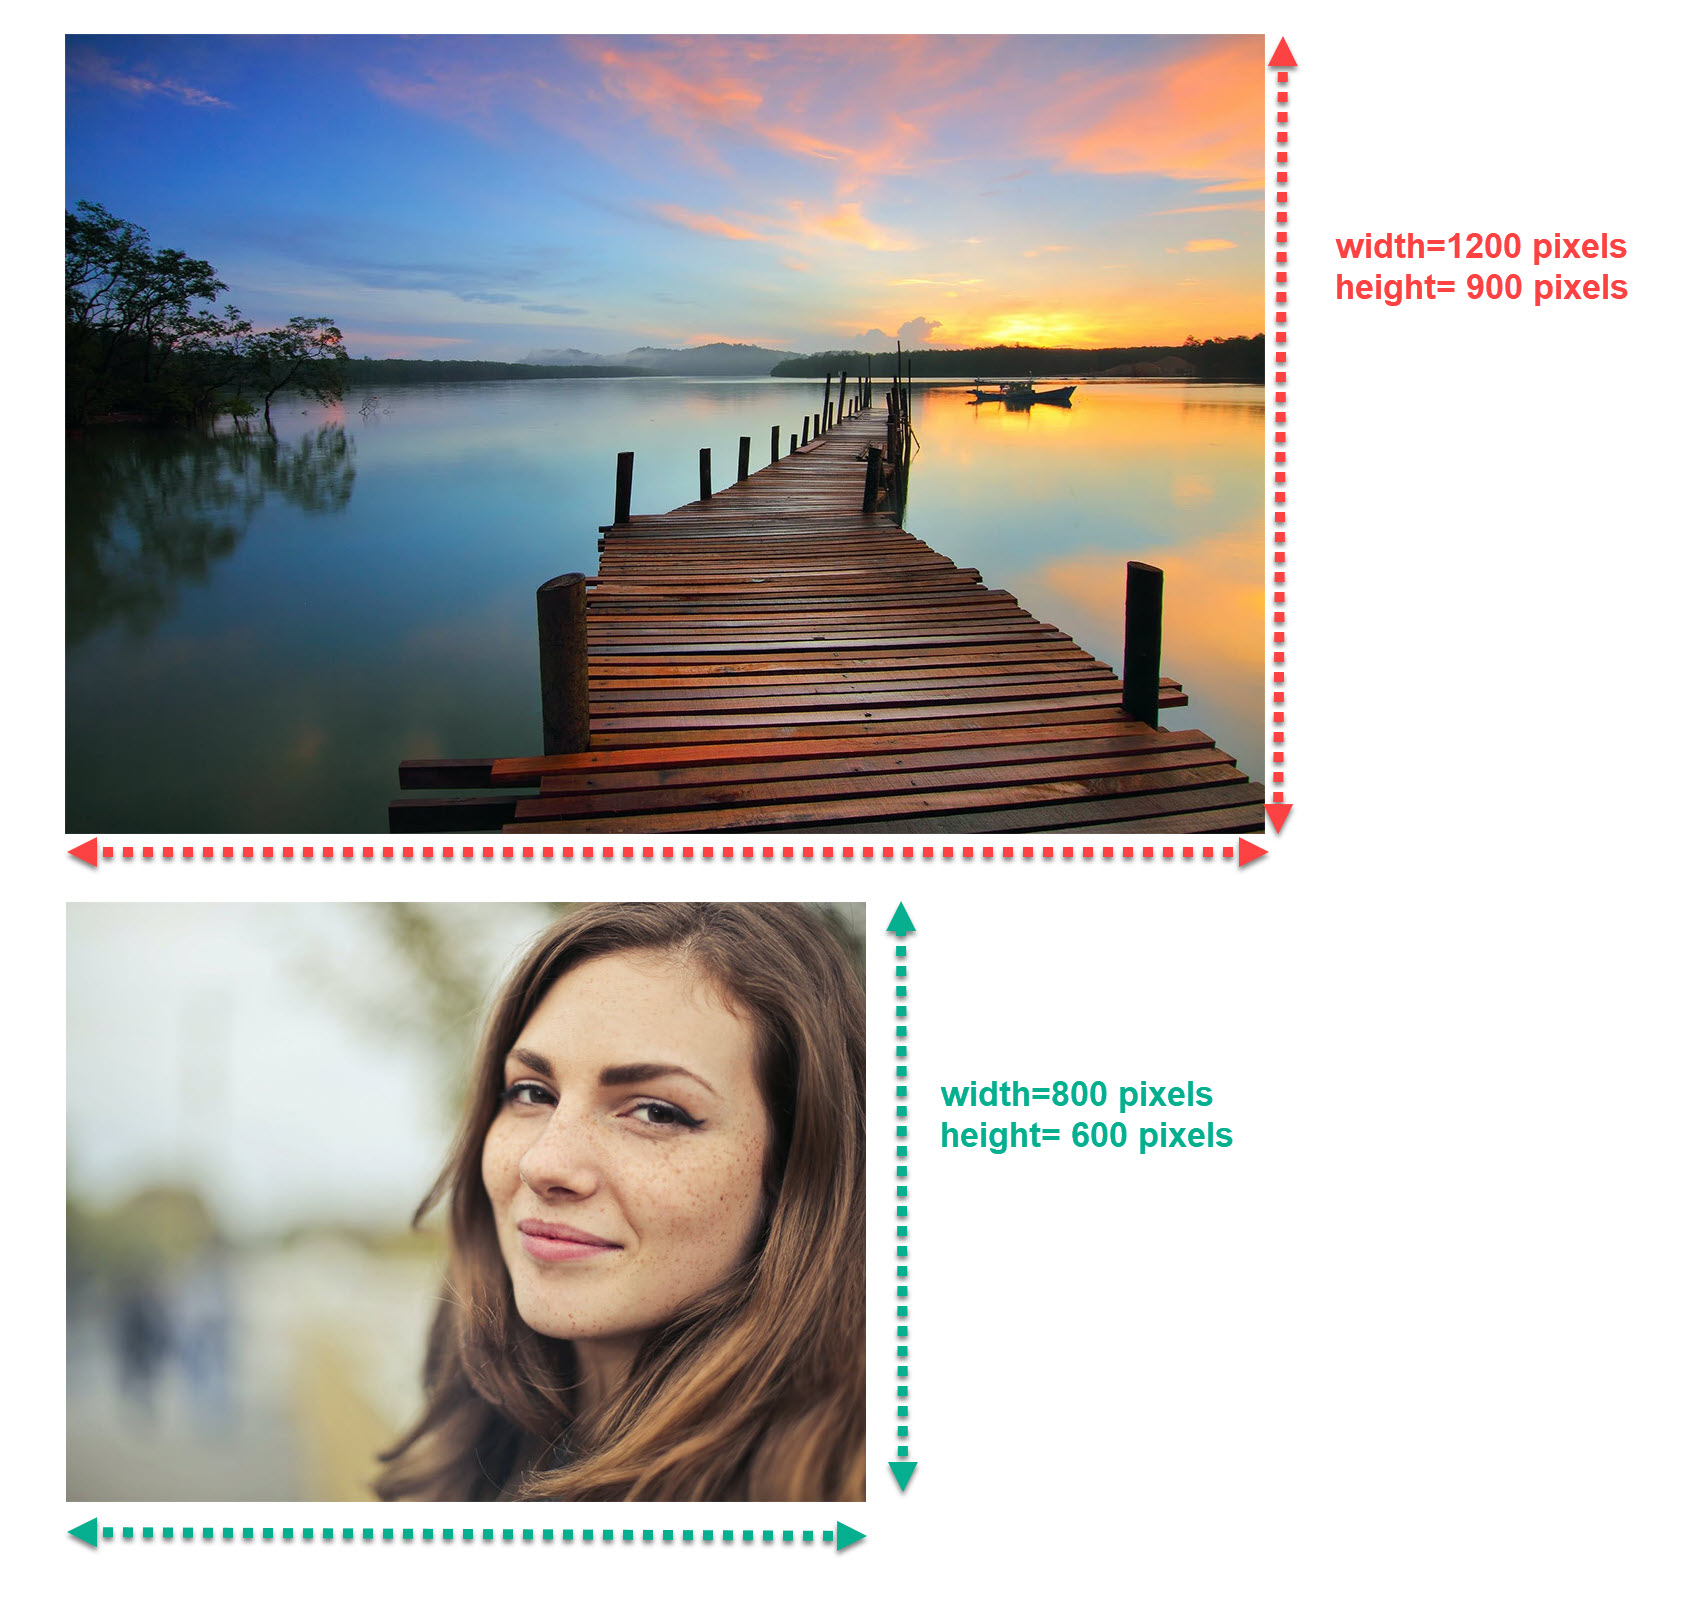
Minimum sizes (in pixels):
- 800X600 (particularly for news, events and page grid displays)
- 1200X900
Slideshow options:
- Homepage (full page width): 2000 by X
- Content width: 1200 by X
Please ensure that all images used in a slideshow are the same dimensions - same width and height.
When deciding on a height for slideshow images, choose a size that will not result in the slideshow being so large that it displaces critical content.
Currently, WebP images do not generate thumbnails in DAM folders.
Optimize the file size of all images! Do not upload images in excess of 1 MB. Ideally, images (even slideshow images) should ideally be less than 600-700KB.
- Rename files before uploading assets
- Use only letters, numbers, hyphens (or underscores)
- Do not use spaces in filename
- Image file sizes should not exceed 600 KB
- Optimize and crop images prior to upload
- Acceptable file formats include:
- PDF, Word, PPT, WebP, etc.
- Files that should not be uploaded include:
- Video files - please use stream.torontomu.ca or YouTube
- Executable files (.exe)
- Temporary files (.tmp)
Select an asset, and choose "Properties" from the horizontal tool bar. The Metadata fields will be visible. We recommend adding a Title to your file that can serve as default alternative text for screen readers.
You can also add a description, tags, as well as other information related to the file. You can also set a time for the asset to expire.
Editing images in Photoshop
Download this (PDF file) Photoshop Tutorial
When you add an image to your webpage make sure the file size isn’t too large. This will increase the pageload speed. Larger images= longer load time. At the same time, make sure that your file size isn’t too small as this will ruin the quality of your image. To do this you, save your images for the web in Photoshop.
- Open up your image in Photoshop.
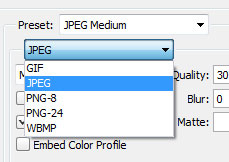
- Select File > Save for Web…
- There are several different file formats you can save your image as – GIF, JPEG, PNG, etc.
- You’ll notice tabs that say Original, Optimized, 2-Up, and 4-Up. If you select 2-Up you can see a side-by-side comparison of the original image and the optimized version of your image.
- Select the type of quality you want your image to be. Try selecting Medium or High from the dropdown and choose the one you believe looks best without taking too long to load. You can see the approximate load time below your image.
- Once you are happy with the quality and the load time of your image you can select Save.
- A “Saved Optimized As” window will appear. Give your file a name and save it to your folder.
File formats

- Open up Photoshop.
- Select File > Open and search for your image.
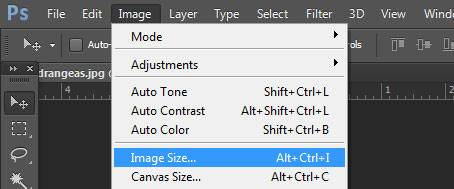
- At the top select Image > Image size.
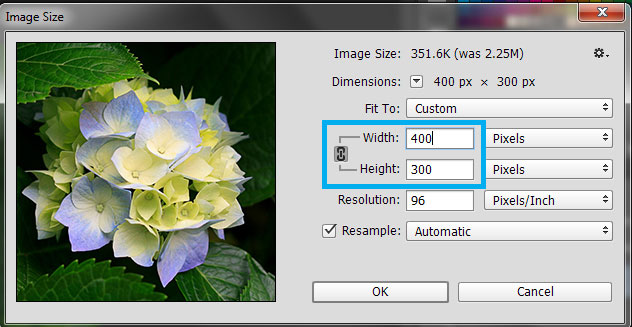
- A dialog box will appear with width and height fields.
- The best thing to do would be to change either the width or the height of the image while making sure the “chain-link” image is selected in between Width and Height. You’ll know it has been selected when you see lines connecting it to the Width and the Height.
- When you are happy with the size select “OK.”
- Save for the web.
- Open up Photoshop.
- Select File > Open and search for your image.
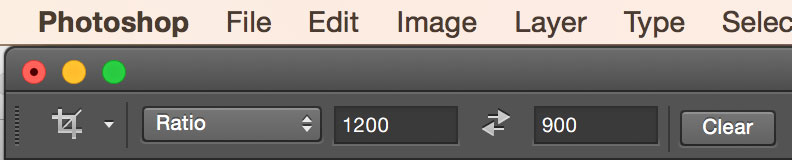
- Select the Crop Tool in the left-hand side.
- Crop your image to a specific width and height, select the Crop Tool.
- At the top you’ll see two fields for “Ratio.” Enter in the width and height in pixels and you’ll see that the crop tool box will adjust to match the size you entered. For example, you can crop your image to be 1200px by 900px.
- Select and drag the photo around if you want a different part of the image to be cropped.
- Hit Enter.
- Save for the web.
Crop tool
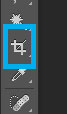
- Open up your image in Photoshop by selecting File > Open and search for your image.
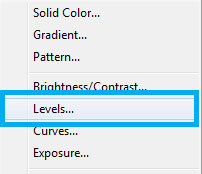
- Select the “Create new fill or adjustment layer” button.
- Select “Levels.”
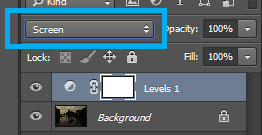
- You’ll see a dropdown that says “Normal” by default. Select on it and select “Screen.”
- If you’re happy with your image save it for the web.
- If you would like to brighten your image even more select the layer called “Levels 1” and drag and drop it to the “Create a new layer” button. You will see a new layer called “Levels Copy 1” which will make your photo even brighter.
- Save for the web.

Adjustment layer button
Levels
Screen