Table
The table component allows the author to create a custom table on a page.
- Found in Side Panel > Components > Table
- Styles available: Bordered (Default) | Borderless
- Required content: Text
- Optional fields: Accessibility Summary | Enable Plugins checkbox
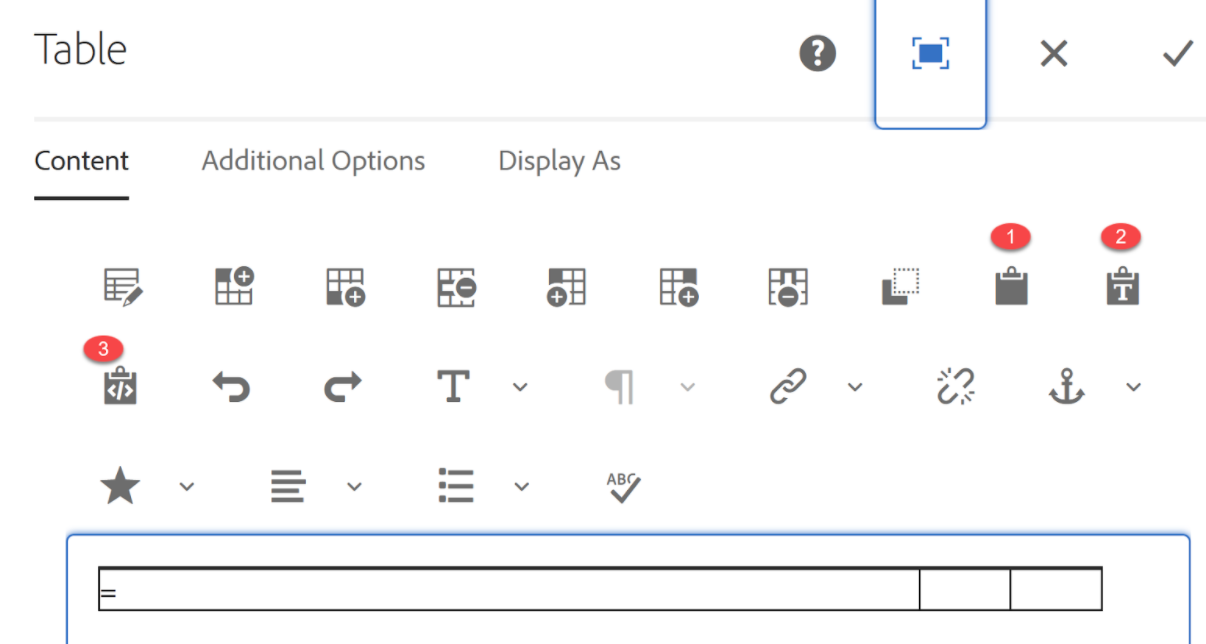
- Plugins allows you to Add Search/Sorting/Pagination and more to your table.
To use these enhancements, the table must be a standard column-row layout and cells cannot be merged. - Custom Colours Applicable: Yes, in Options tab, plugins must be enabled with first row header selected
Avoid adding tables to layout components that constrain the table contents. Tables are not 100% responsive. Keep tables as simple as possible, without merging.
The Table component shows multiple rows and columns when created in Chrome, but in Firefox, it may just look like a single line.
Do not paste a table into Firefox. Use Chrome or Safari to paste a Table in order to prevent display issues.
Tips:
- The table works if you add rows and columns manually
- It is not responsive
- It is finicky! When copying and pasting from a table in word, excel or google sheets, we highly recommend using the “Paste” options - 1, 2 & 3 - for adding tables to this component.
Bordered Table (Default)
| Table with Border |
Table with Border | Table with Border |
| data | data | data |
| data | data | data |
| data |
data | data |
Borderless (plugins enabled)
| Table - Borderless | Table - Borderless | Table - Borderless |
| data | data | data |
| data | data | data |
| data | data | data |
| data | data | data |
How to use
- Select the "Side Panel" button in the top left corner
- Select the Components button
- Drag and drop the Table component onto the page
- Double click to edit
- Under the Content tab, add text to pre-populated table cells or customize using the toolbar above the component
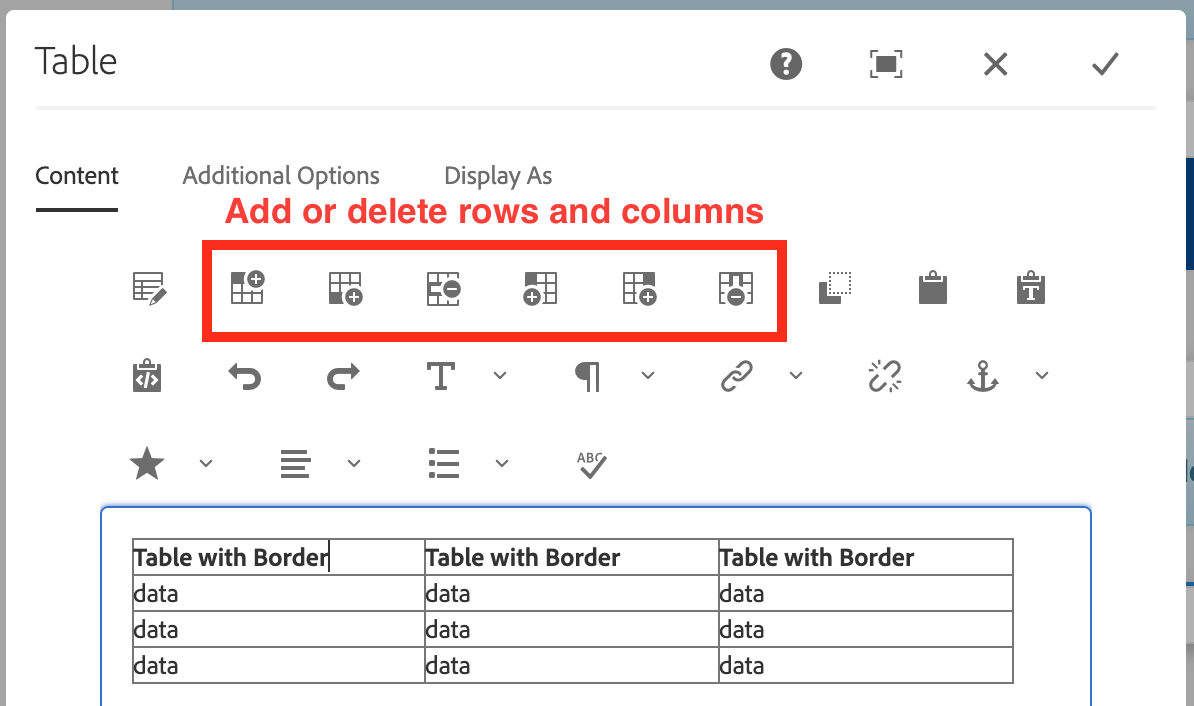
- Optional: You can add and/or delete rows and columns by using the toolbar
- Optional fields: Accessibility Summary | Enable Plugins
- Under the Options tab > Accessibility Summary [provide a brief overview of how the data has been organized into a table or add a brief description of how to navigate the table]
- Enable Plugins checkbox [Add Search/Sorting/Pagination and more to your table. To use these enhancement, the table must be a standard column-row layout and not merge cells]
- Select "Display as" tab, and choose between Bordered (default) or Borderless
- Select the checkmark when complete
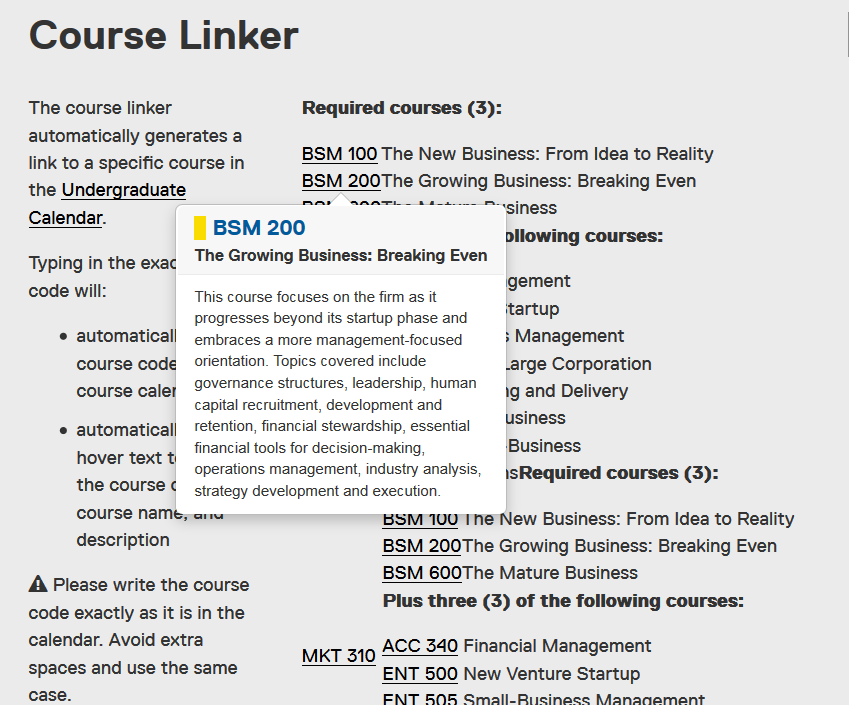
Course link feature
The course linker automatically generates a link to a specific course in the current Undergraduate Calendar.
Typing in the exact course code will:
- automatically link the course code to the course calendar
- automatically create hover text to show the course code, course name, and description
Please write the course code exactly as it is in the calendar. Avoid extra spaces and use the same case.
For example, type CMN 100 and not cmn 100
This feature is available in the following components: