Adobe Creative Cloud Troubleshooting Guide and FAQ

The Adobe Creative Cloud troubleshooting guide and frequently asked questions is to support Toronto Metropolitan University (TMU) faculty and staff with Adobe Creative Cloud inquiries.
You will need to use Multi-Factor Authentication for Microsoft Office 365 to access Adobe Creative Cloud. Please set it up if you have not already.
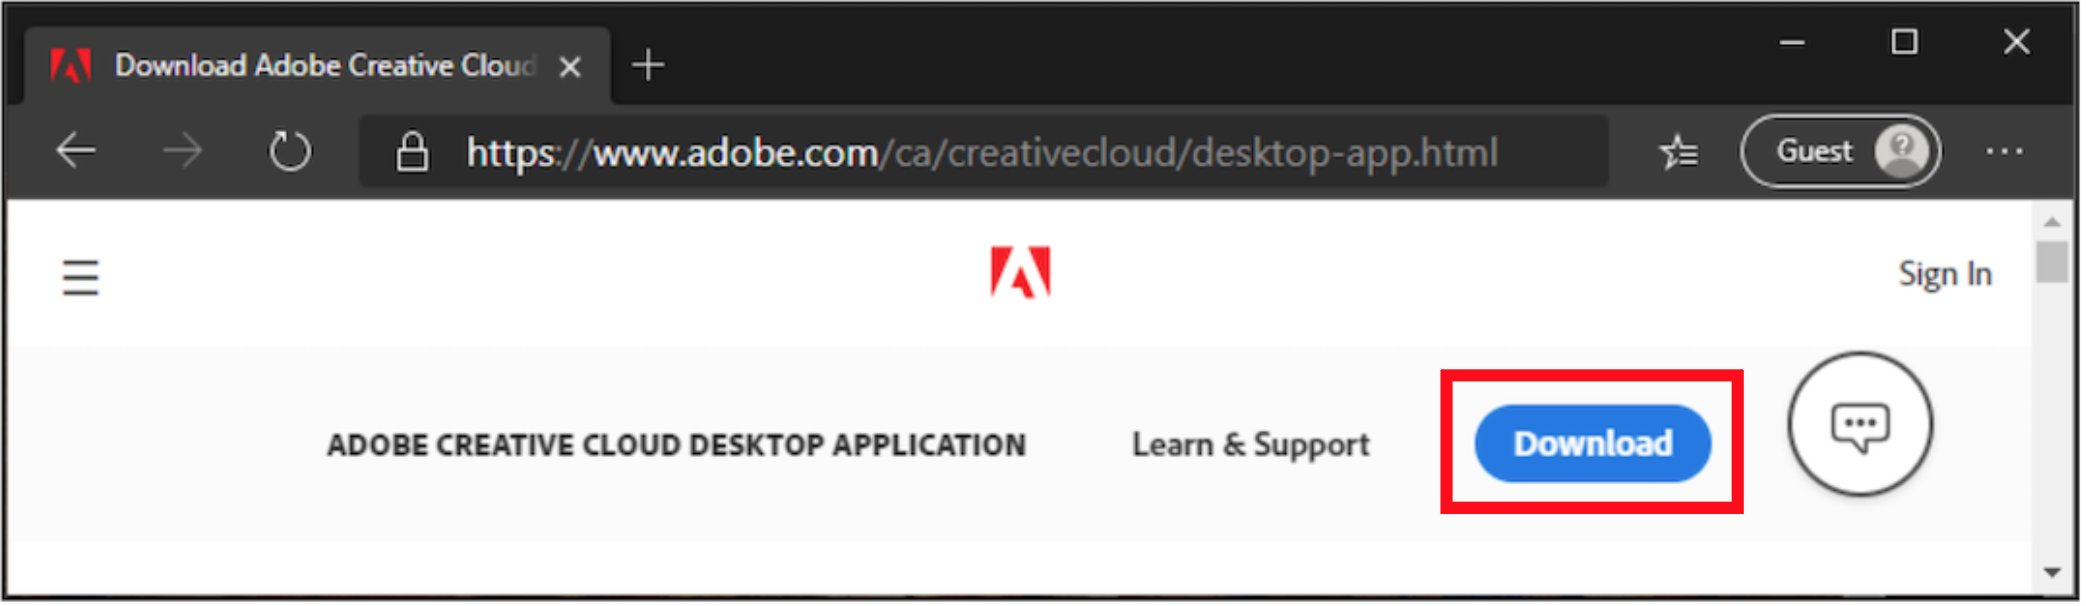
1. Download the Adobe Creative Cloud Desktop App (external link, opens in new window) .
2. At the Adobe sign in screen, type your TMU email address and select Continue.

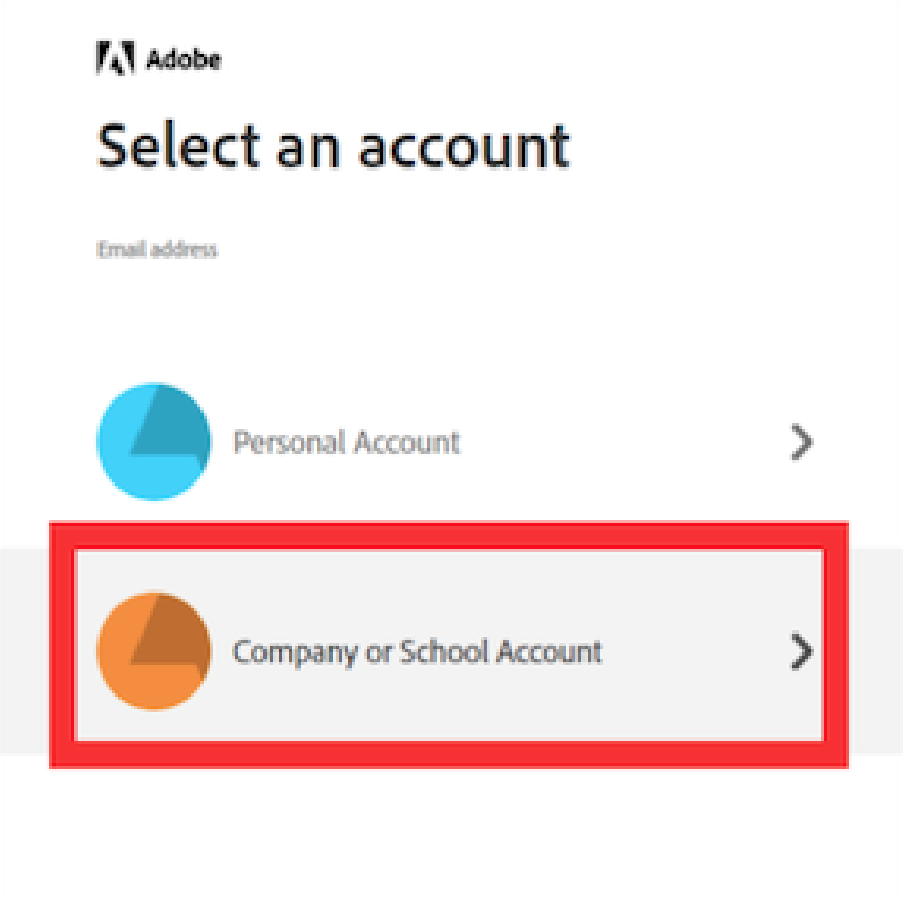
3. You will be prompted to select an account. Choose Company or School Account.
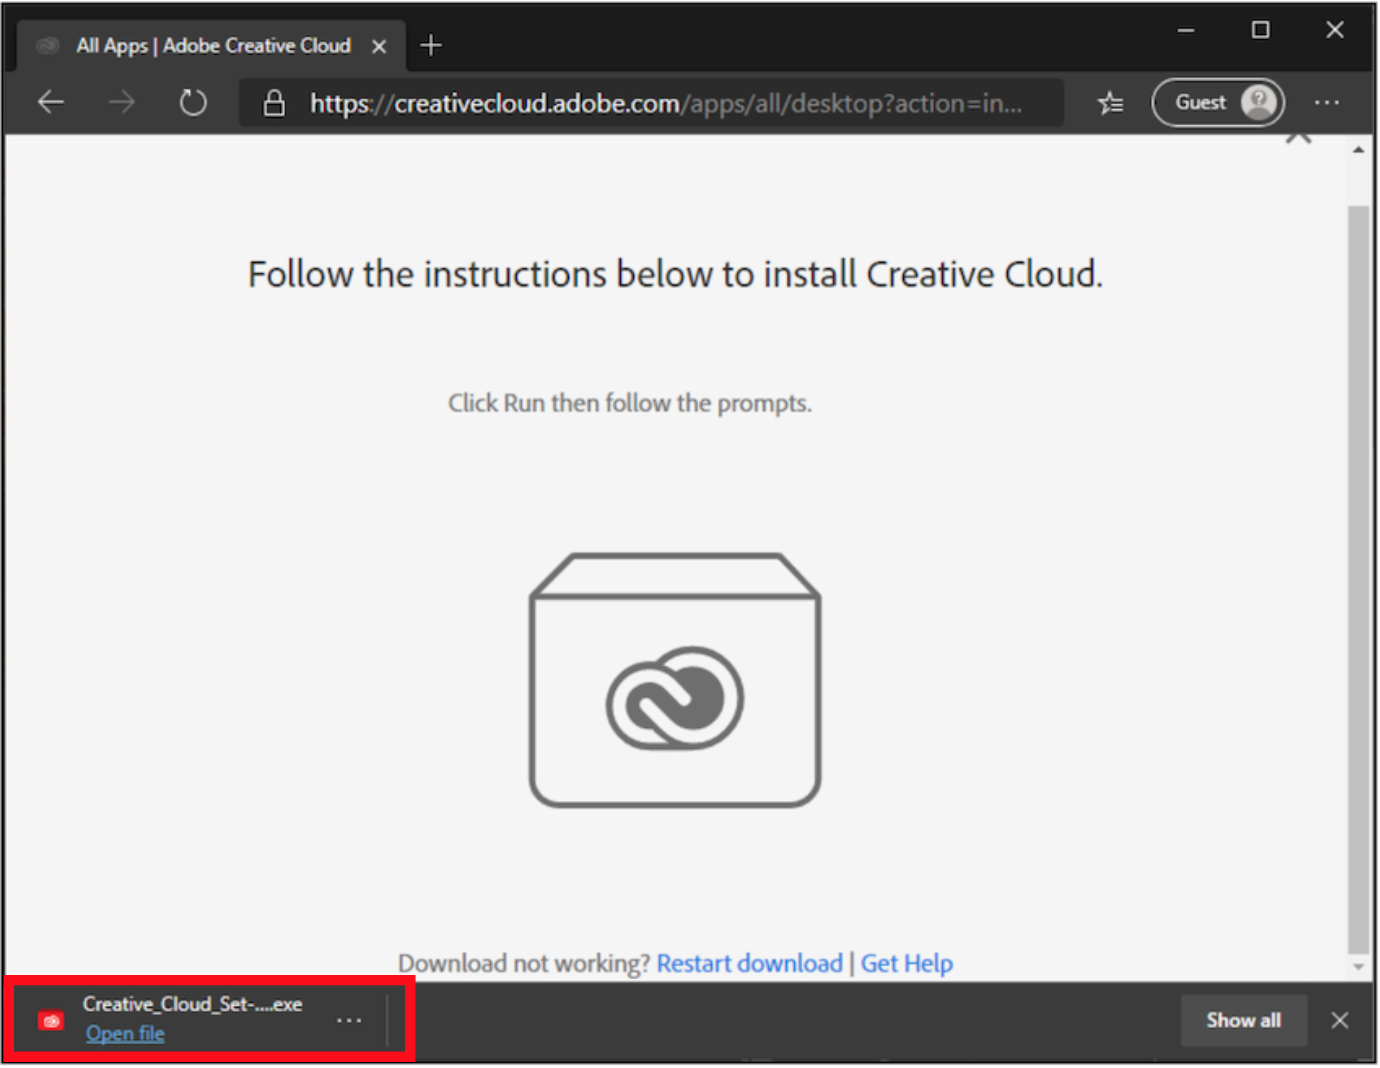
4. After you sign in, the program will download by using the installer.
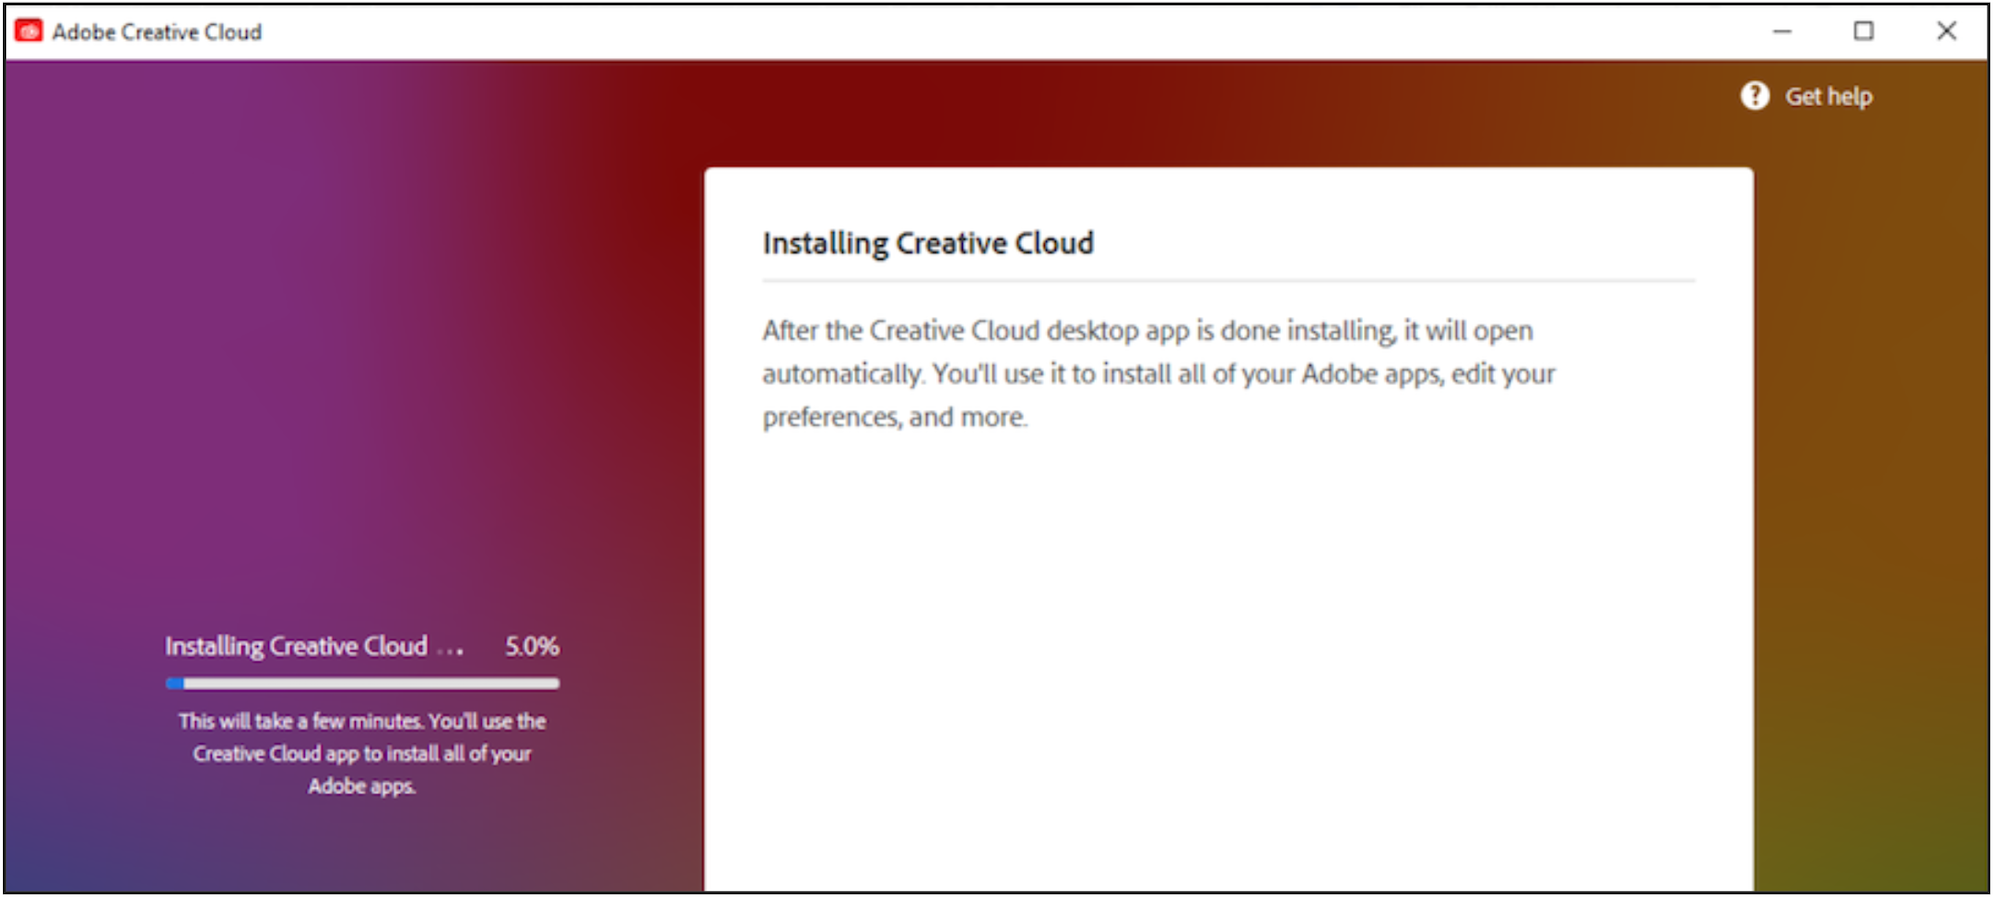
5. Follow the installer prompts. If a security message pops up, grant permission to install the Adobe Creative Cloud app.
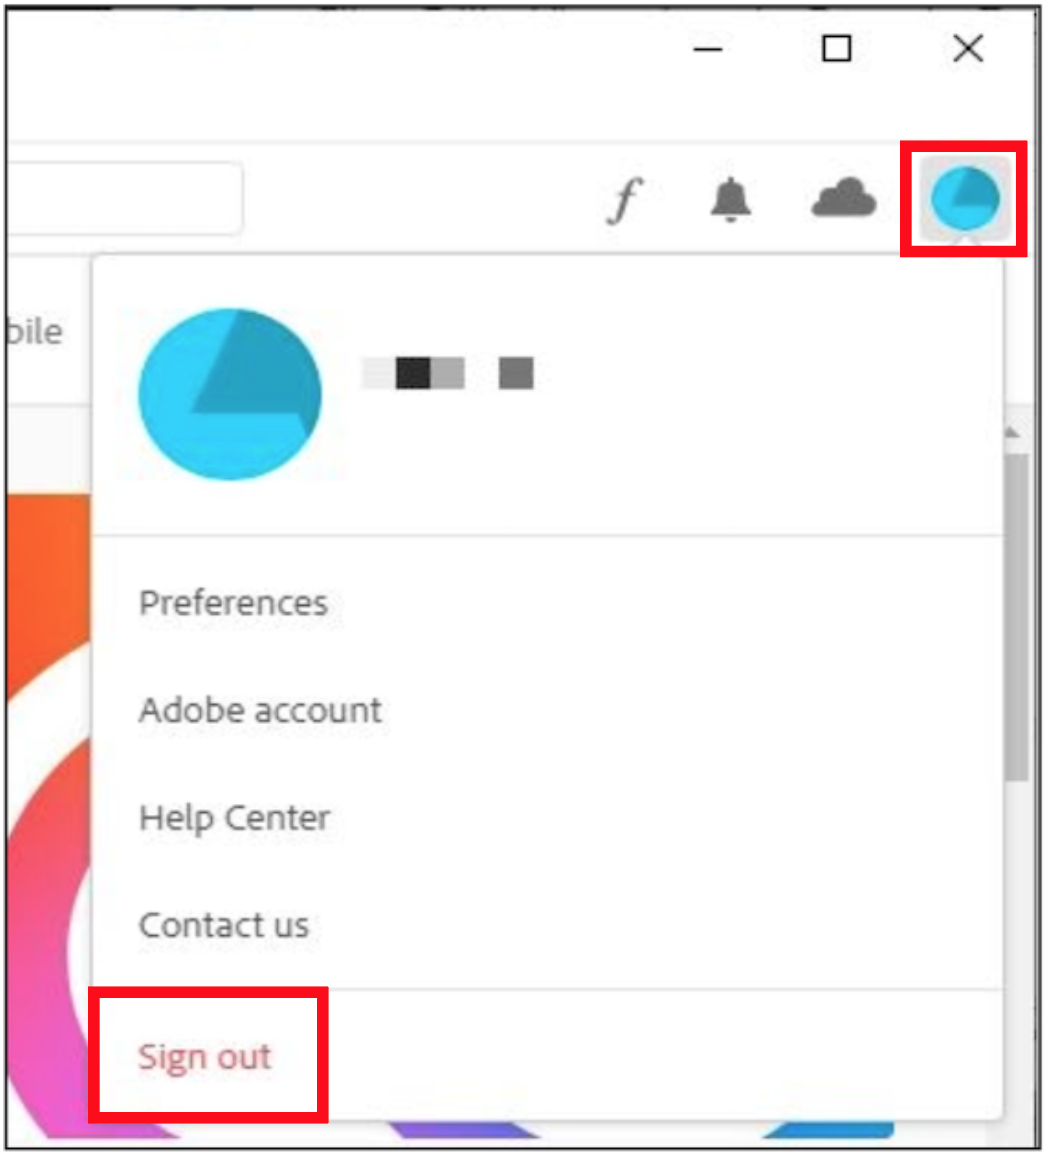
6. The application will launch after the installation completes. Sign in/out by clicking on the blue circle, and then select, Sign out. This should allow the Adobe Creative Cloud to update to your new license.
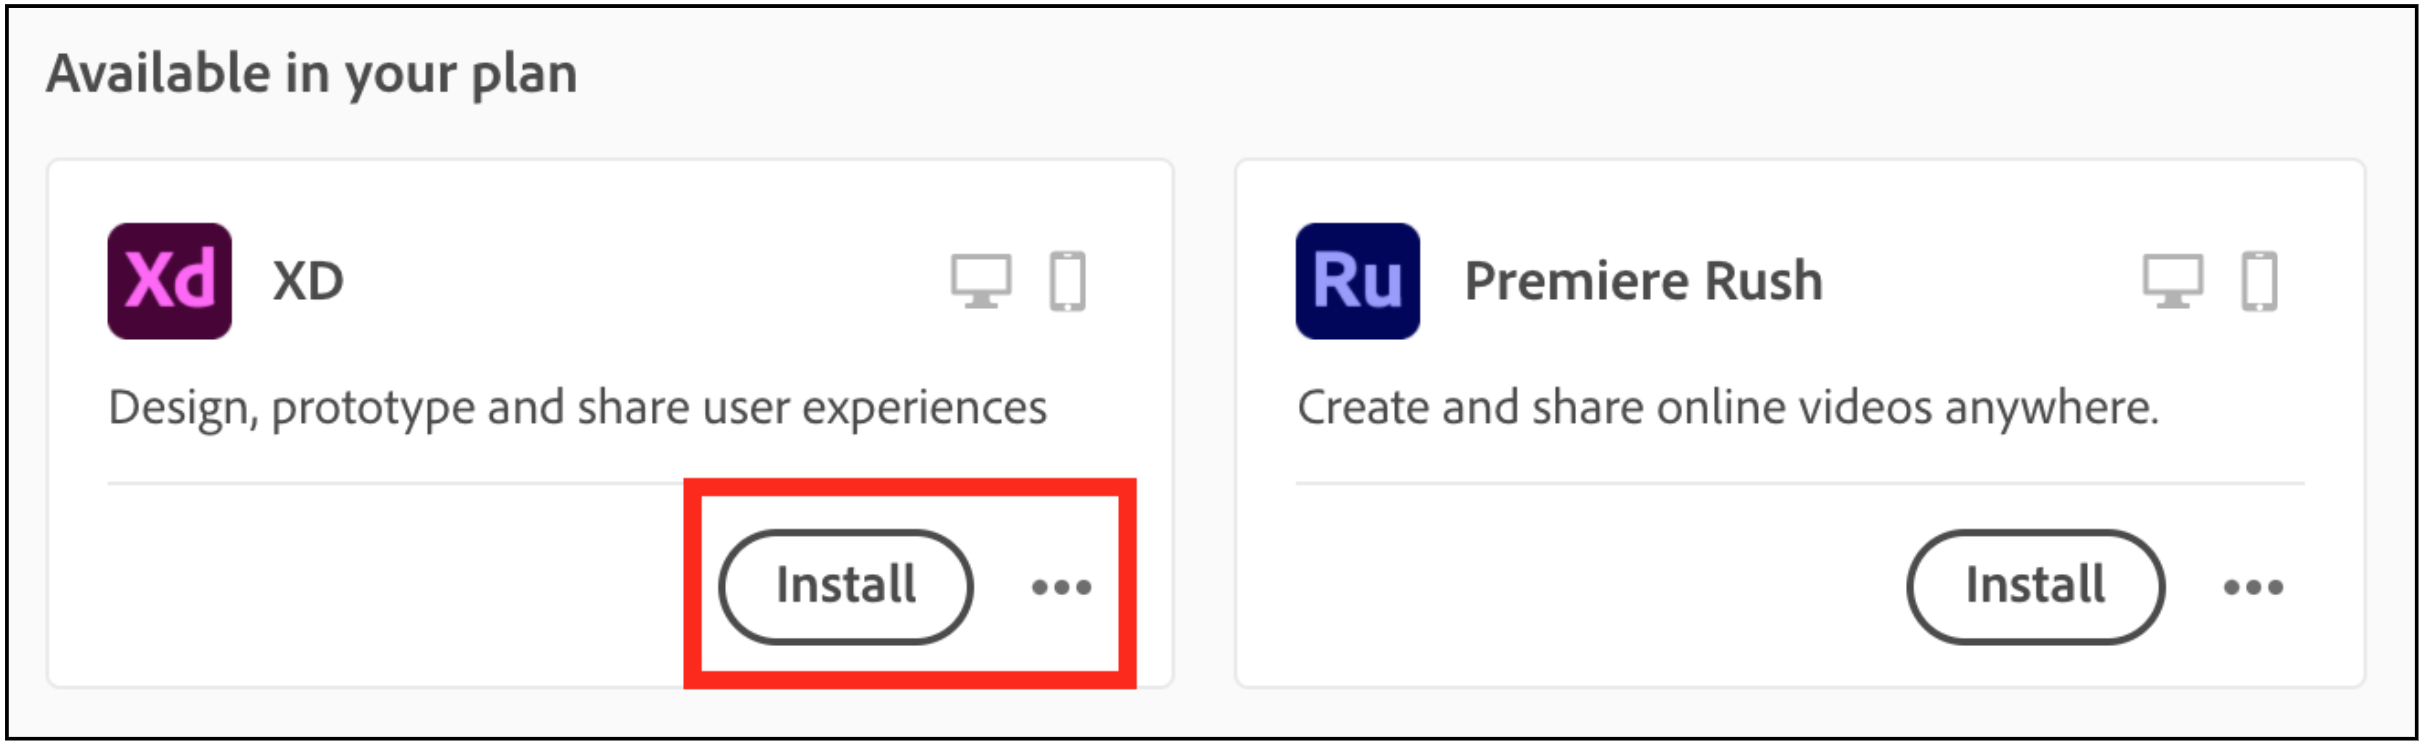
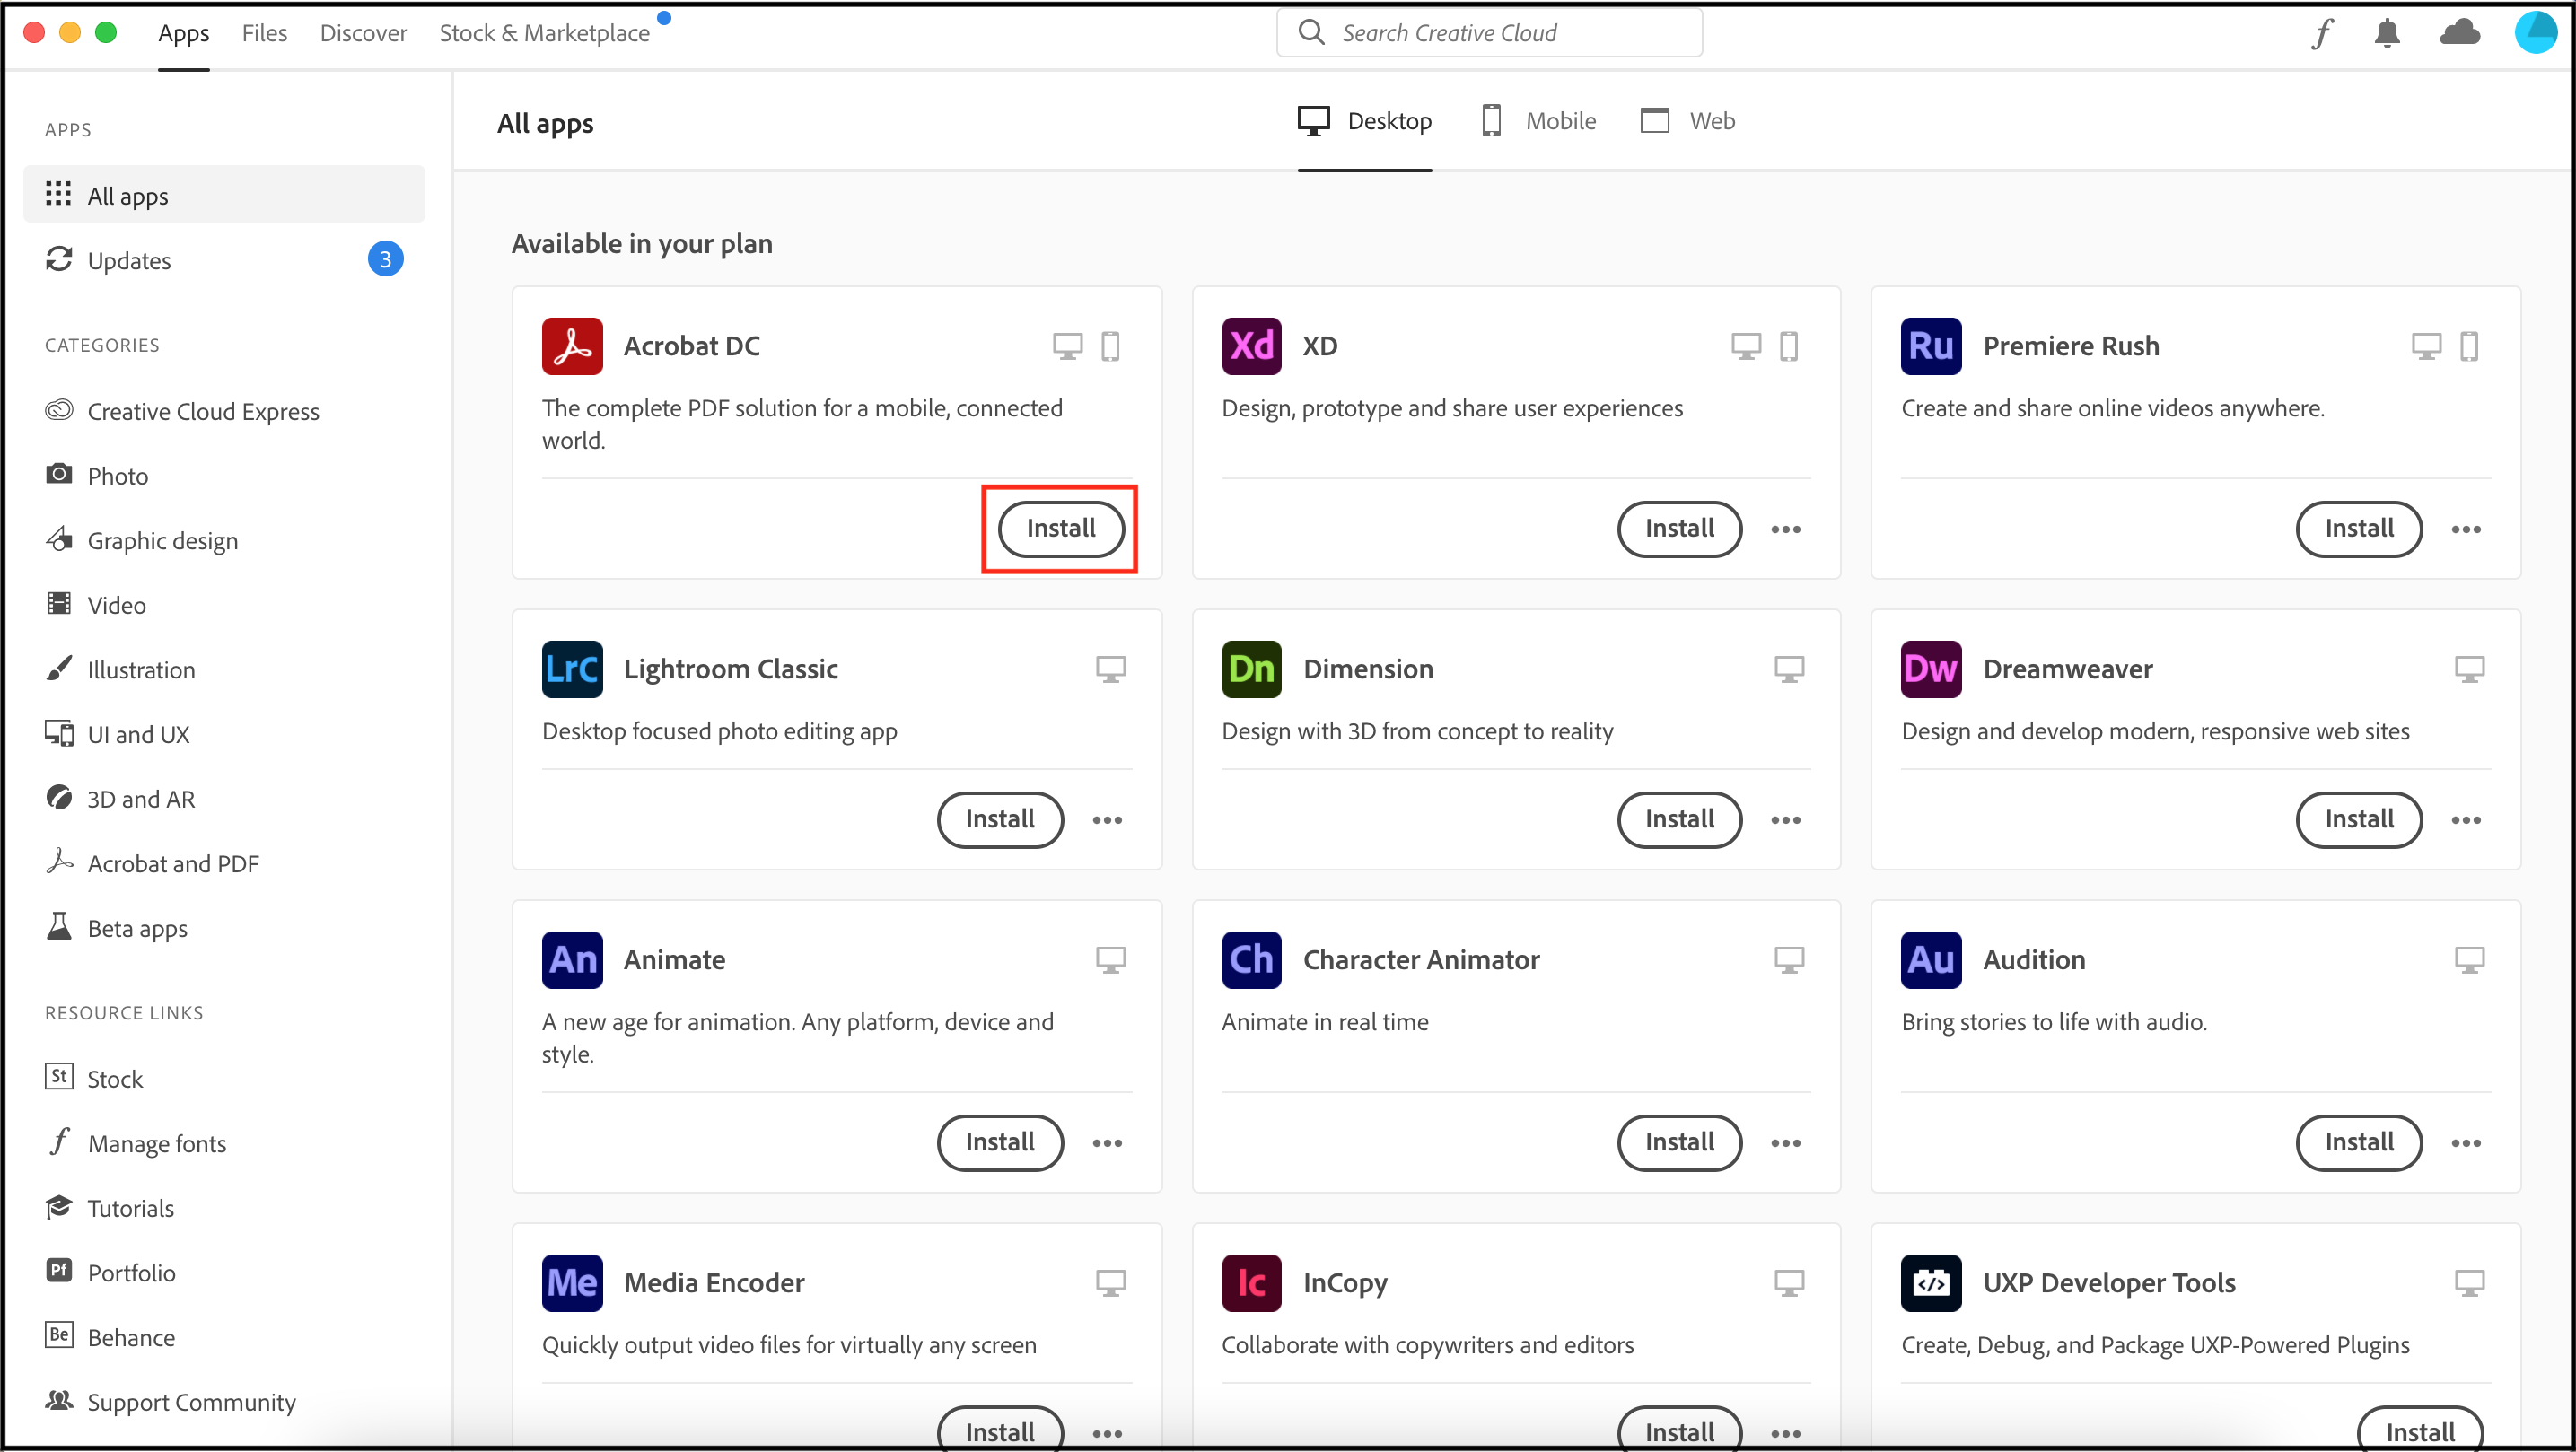
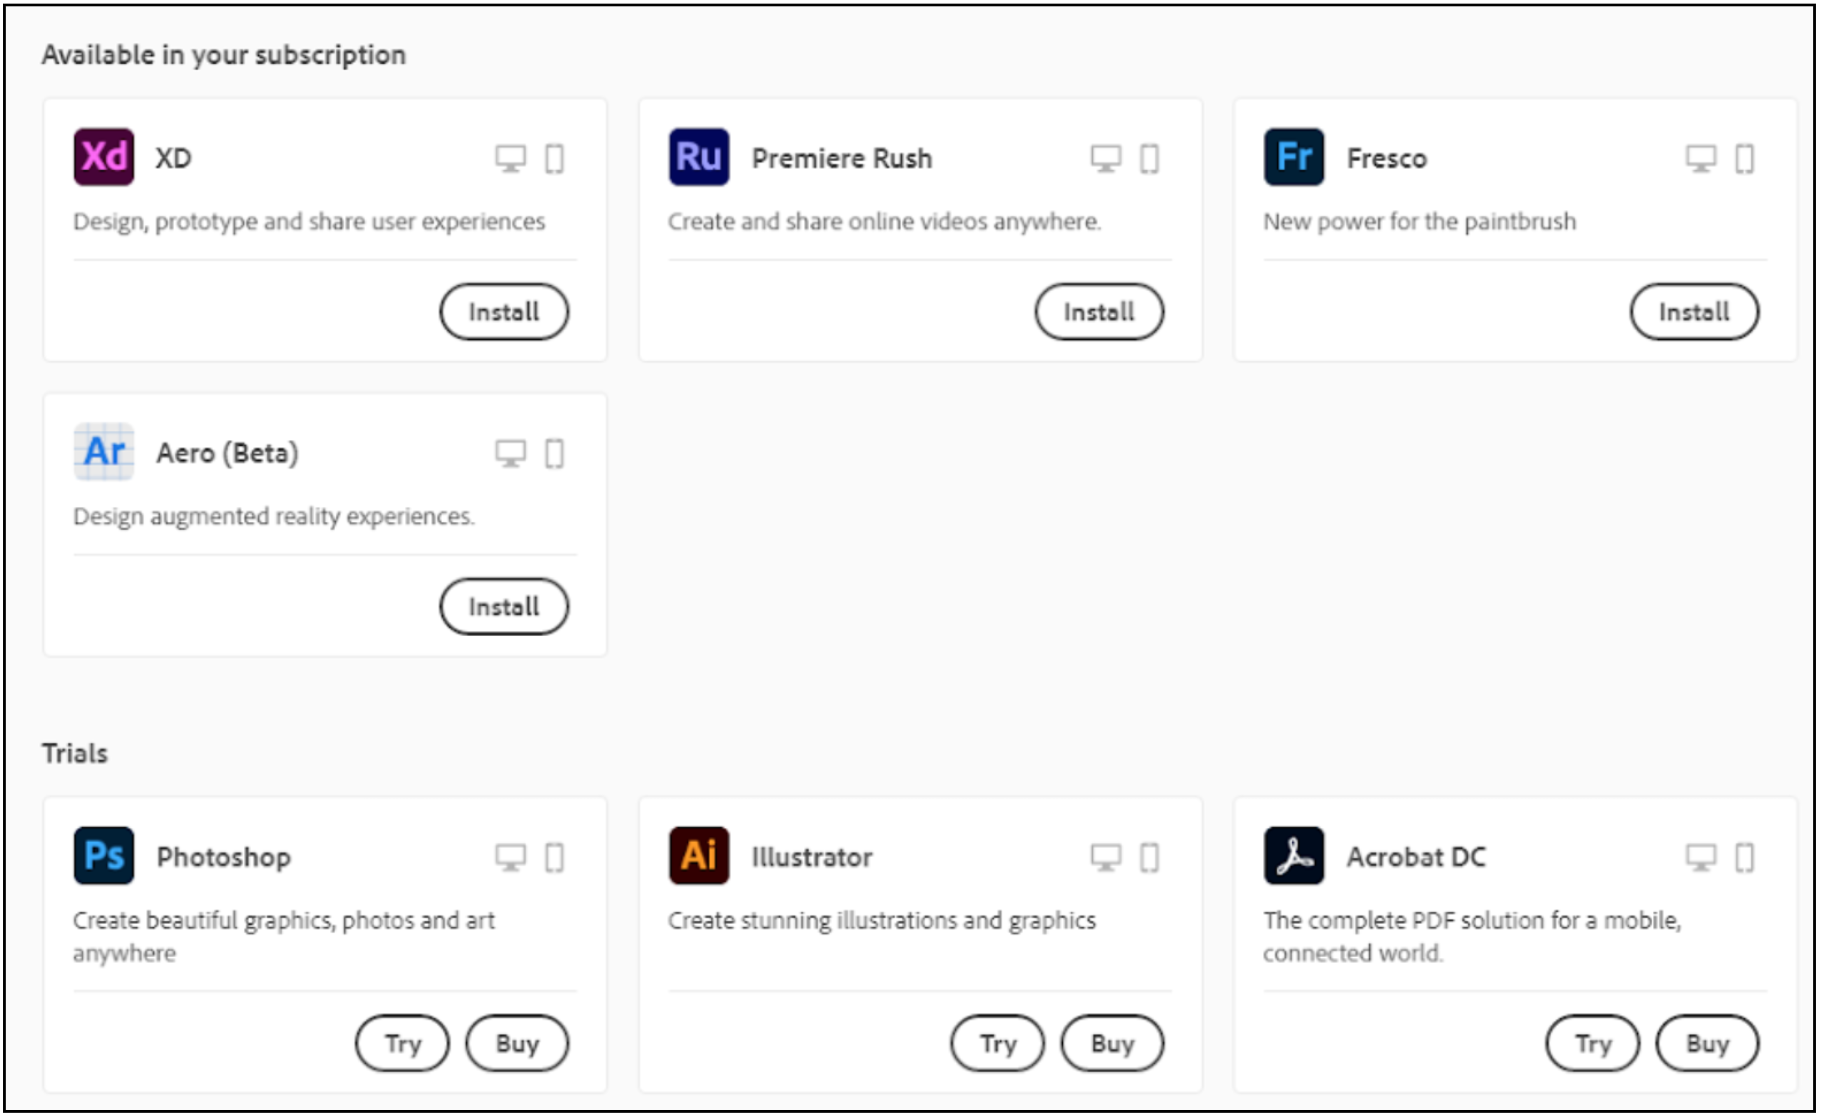
7. All Adobe applications available in your subscription will be under "Available in your plan." To download your desired app, navigate to the app, and select install.
Video Tutorial: How to Download and Install Adobe Creative Cloud Desktop Application
1. Log in/out of the Adobe Creative Cloud desktop app using your @ryerson.ca email address, password and MFA. Next, select Company or School Account. You will then be prompted to enter your password. Once completed, select Sign In.
Note: Do not login with your @torontomu.ca account here. Please continue using your @ryerson.ca account for Adobe and Microsoft services until further notice.

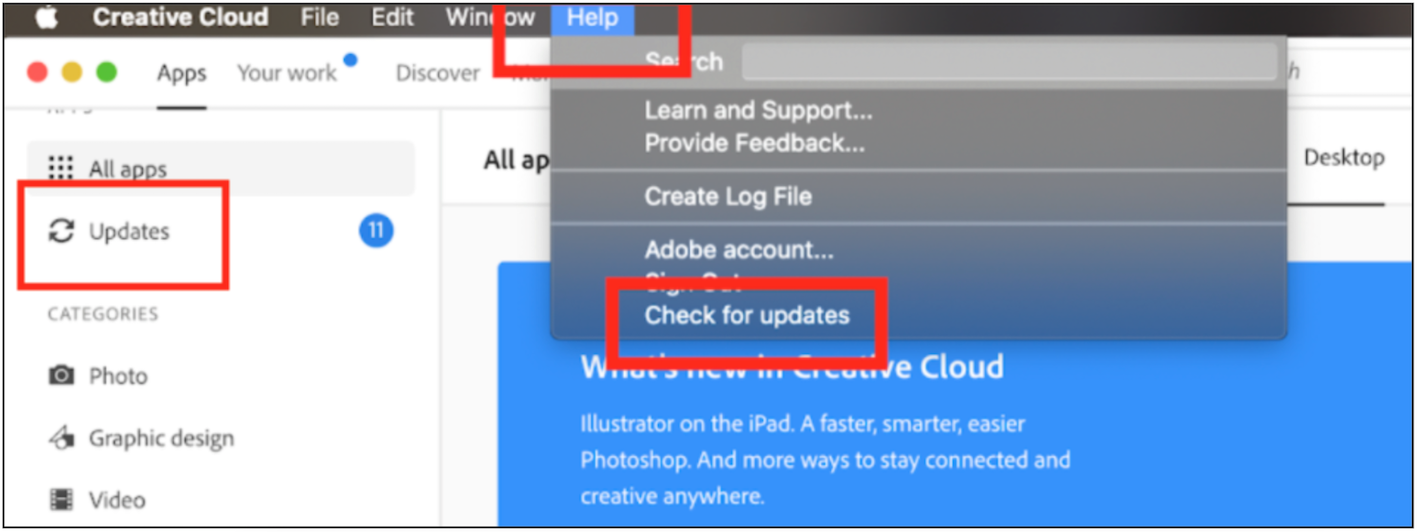
2. To update your Adobe Creative Cloud apps, open the Adobe Creative Cloud desktop application located at the top of the page.
3. At the top-left of the window, select help and then select check for updates. You can also select on updates on the left panel. Before updating, ensure your system clock is correct.
Example message: “Access denied. You don't have access to this service. Contact your IT administrator to gain access, or sign in with Adobe ID.”

A) Update the Adobe CC application. Please refer to step 2, "How to update the Adobe Creative Cloud desktop application," for instructions on updating Adobe CC.
B) Uninstall Acrobat DC from the Control Panel
i) Open the Run command box - press the Windows key and R key.
ii) In the Run command box, type Control Panel and press OK.
iii) In the Control Panel, select Programs > Programs and Features.
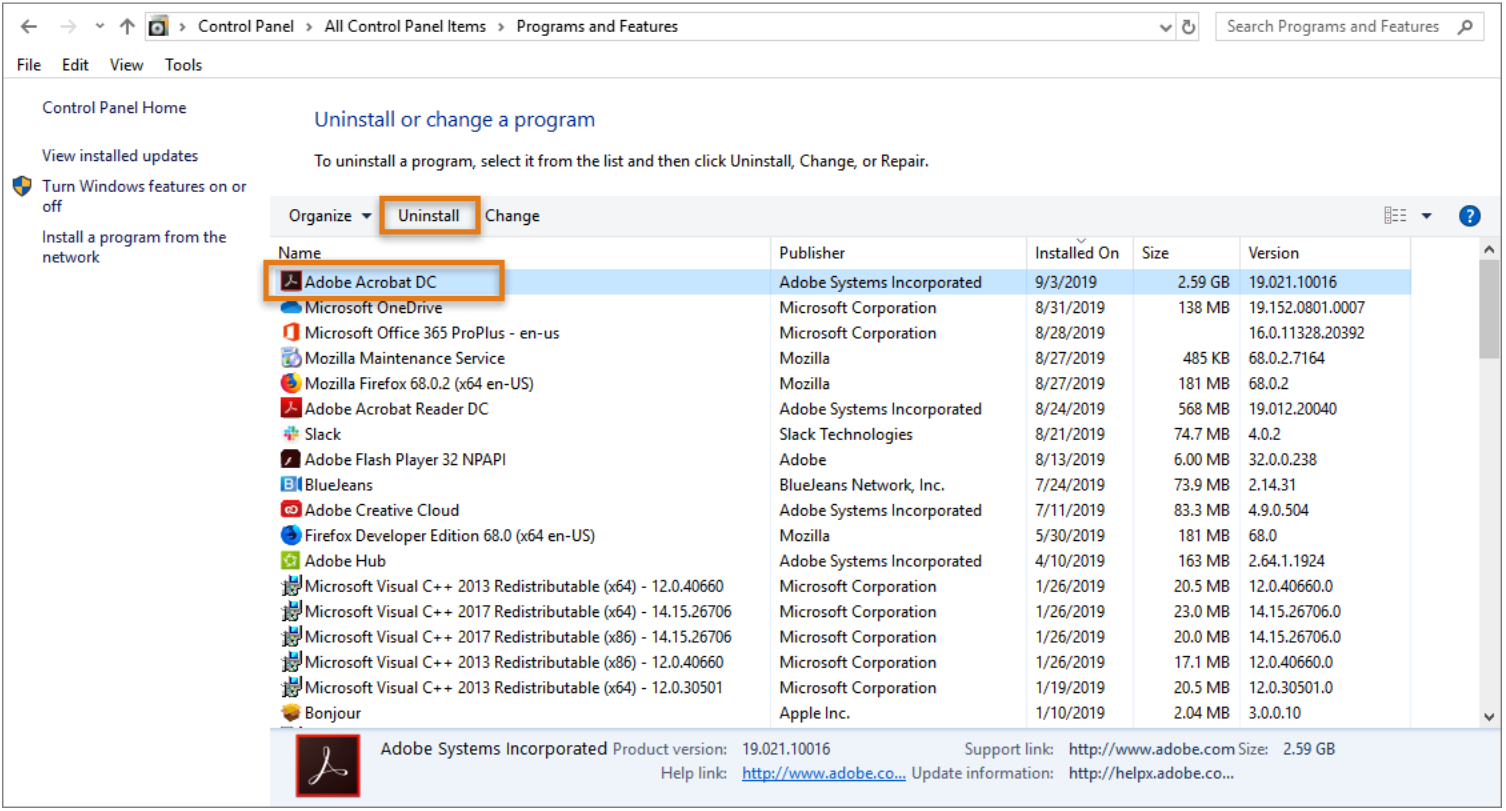
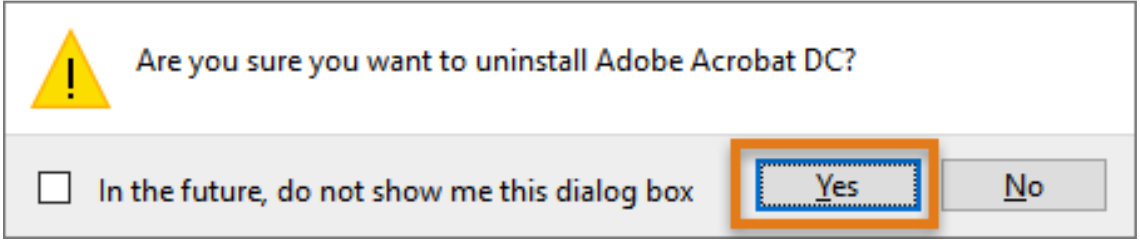
iv) Select Yes in the confirmation dialog. After Acrobat is uninstalled, restart your computer.
C) Reinstall Acrobat DC using the updated Adobe CC application.
i) In the Creative Cloud desktop application, under Available in your plan, locate the Adobe DC app. Select Install in the bottom right corner.
Some of the common Adobe CC problems that users may face are shown below:
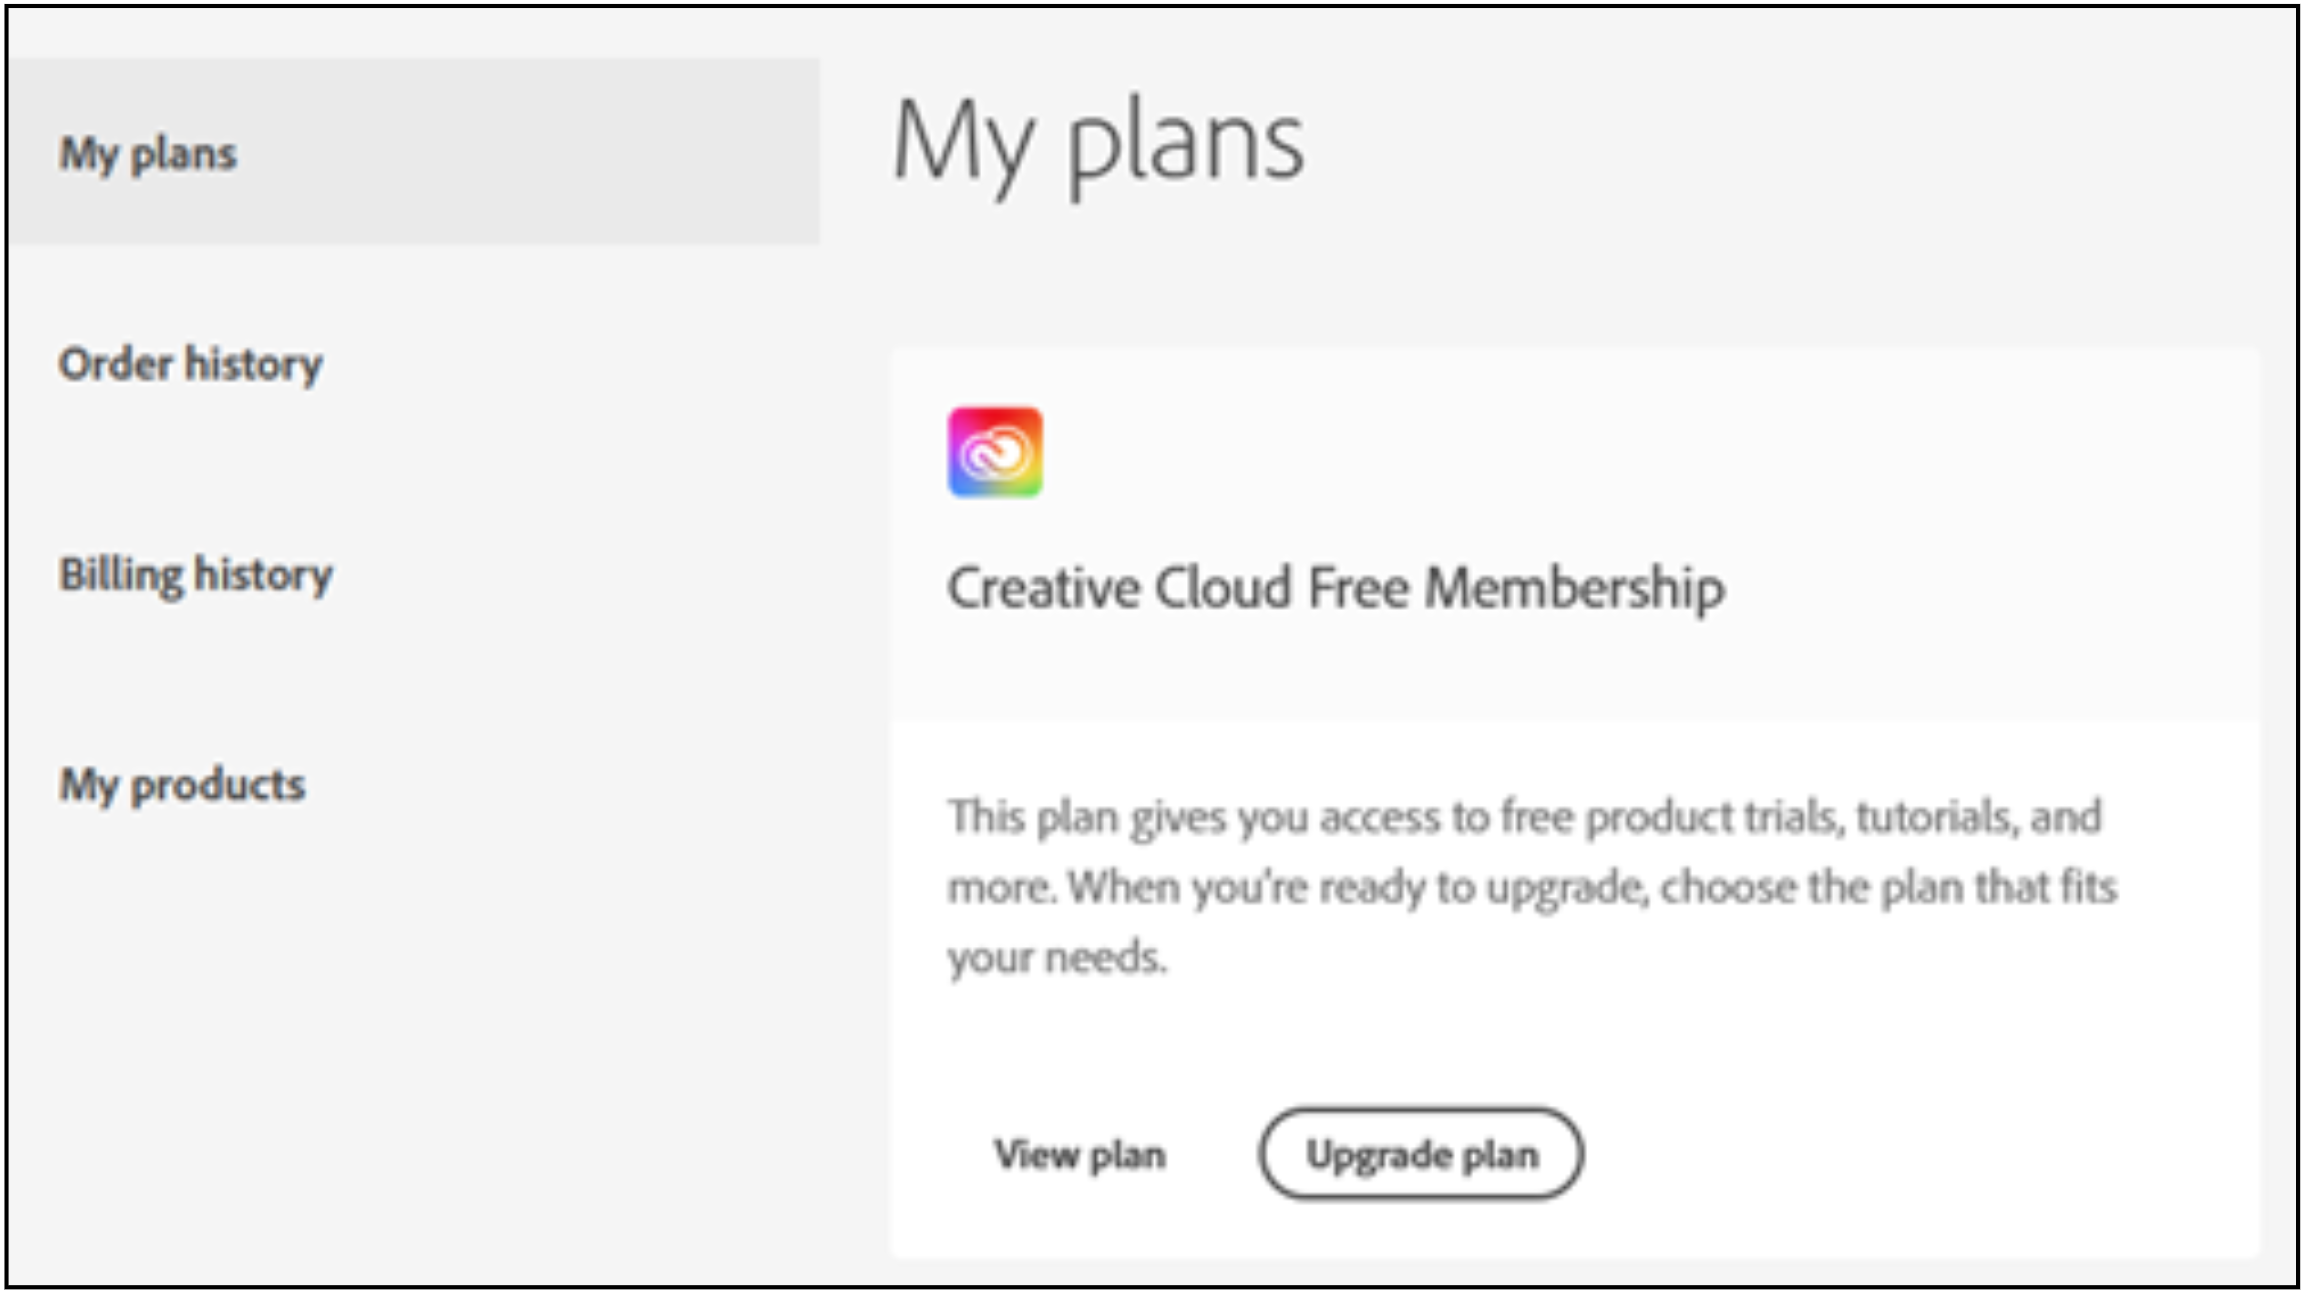
1. Appears as a free plan despite having the correct license (all adobe apps should be available, not partially).
2. If the user has an upgraded Adobe license but still it shows a trial/free version.
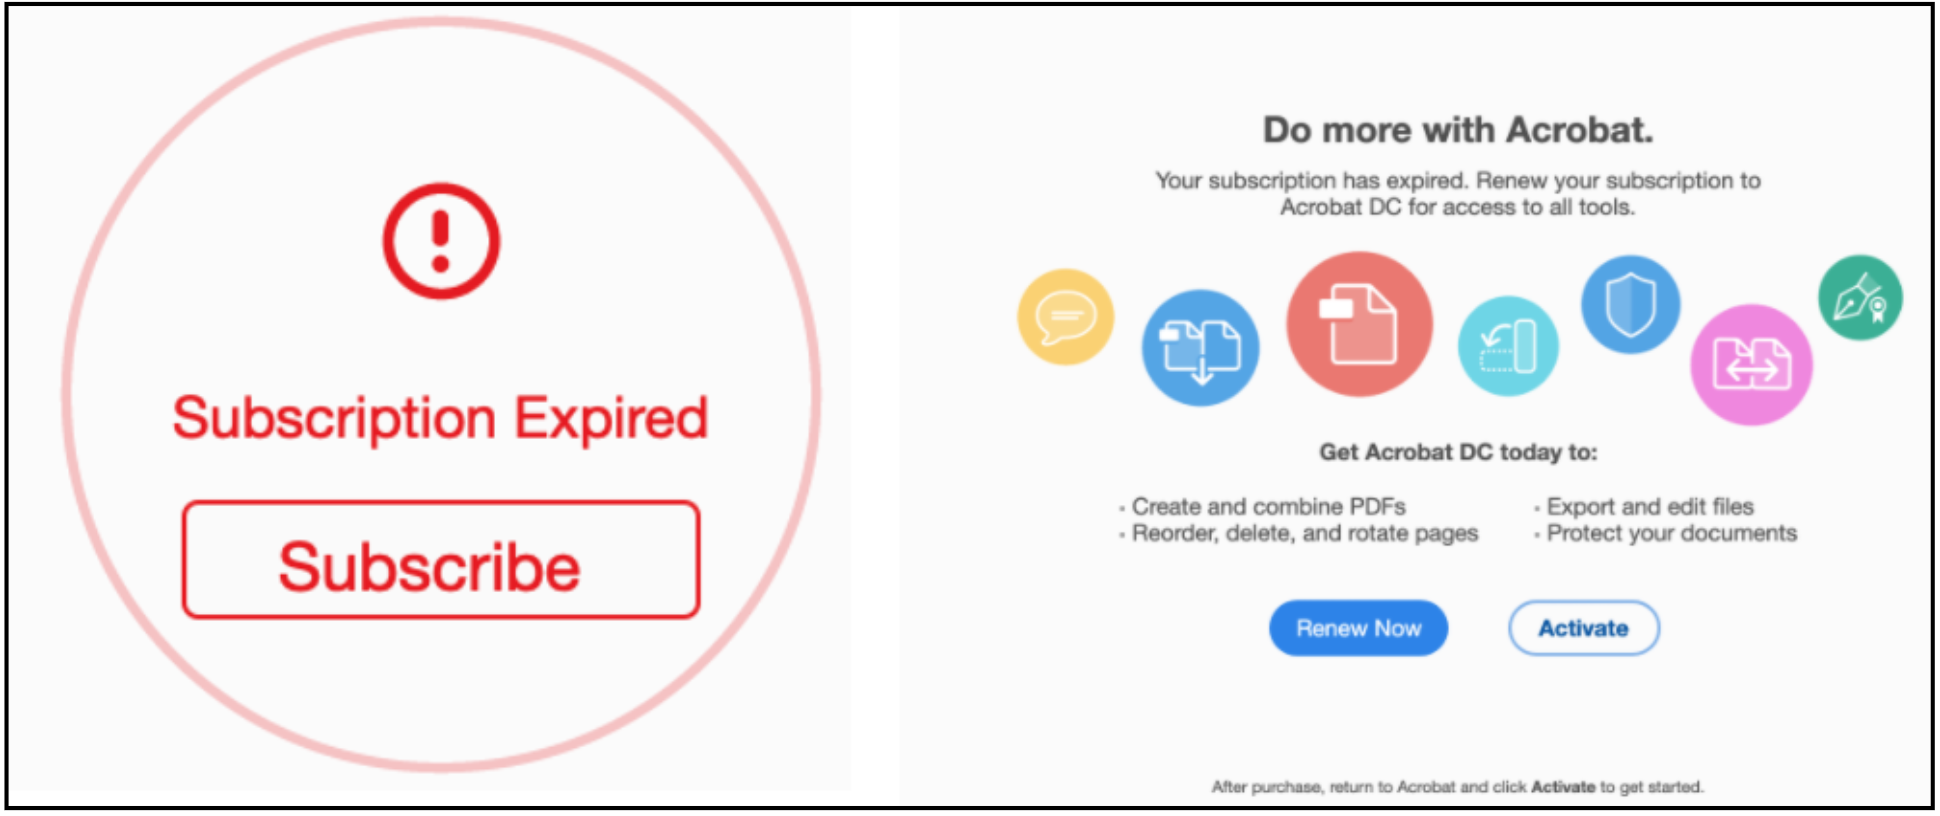
3. If the user is unable to access apps and gets the subscription expired message which is then presented with pricing information.
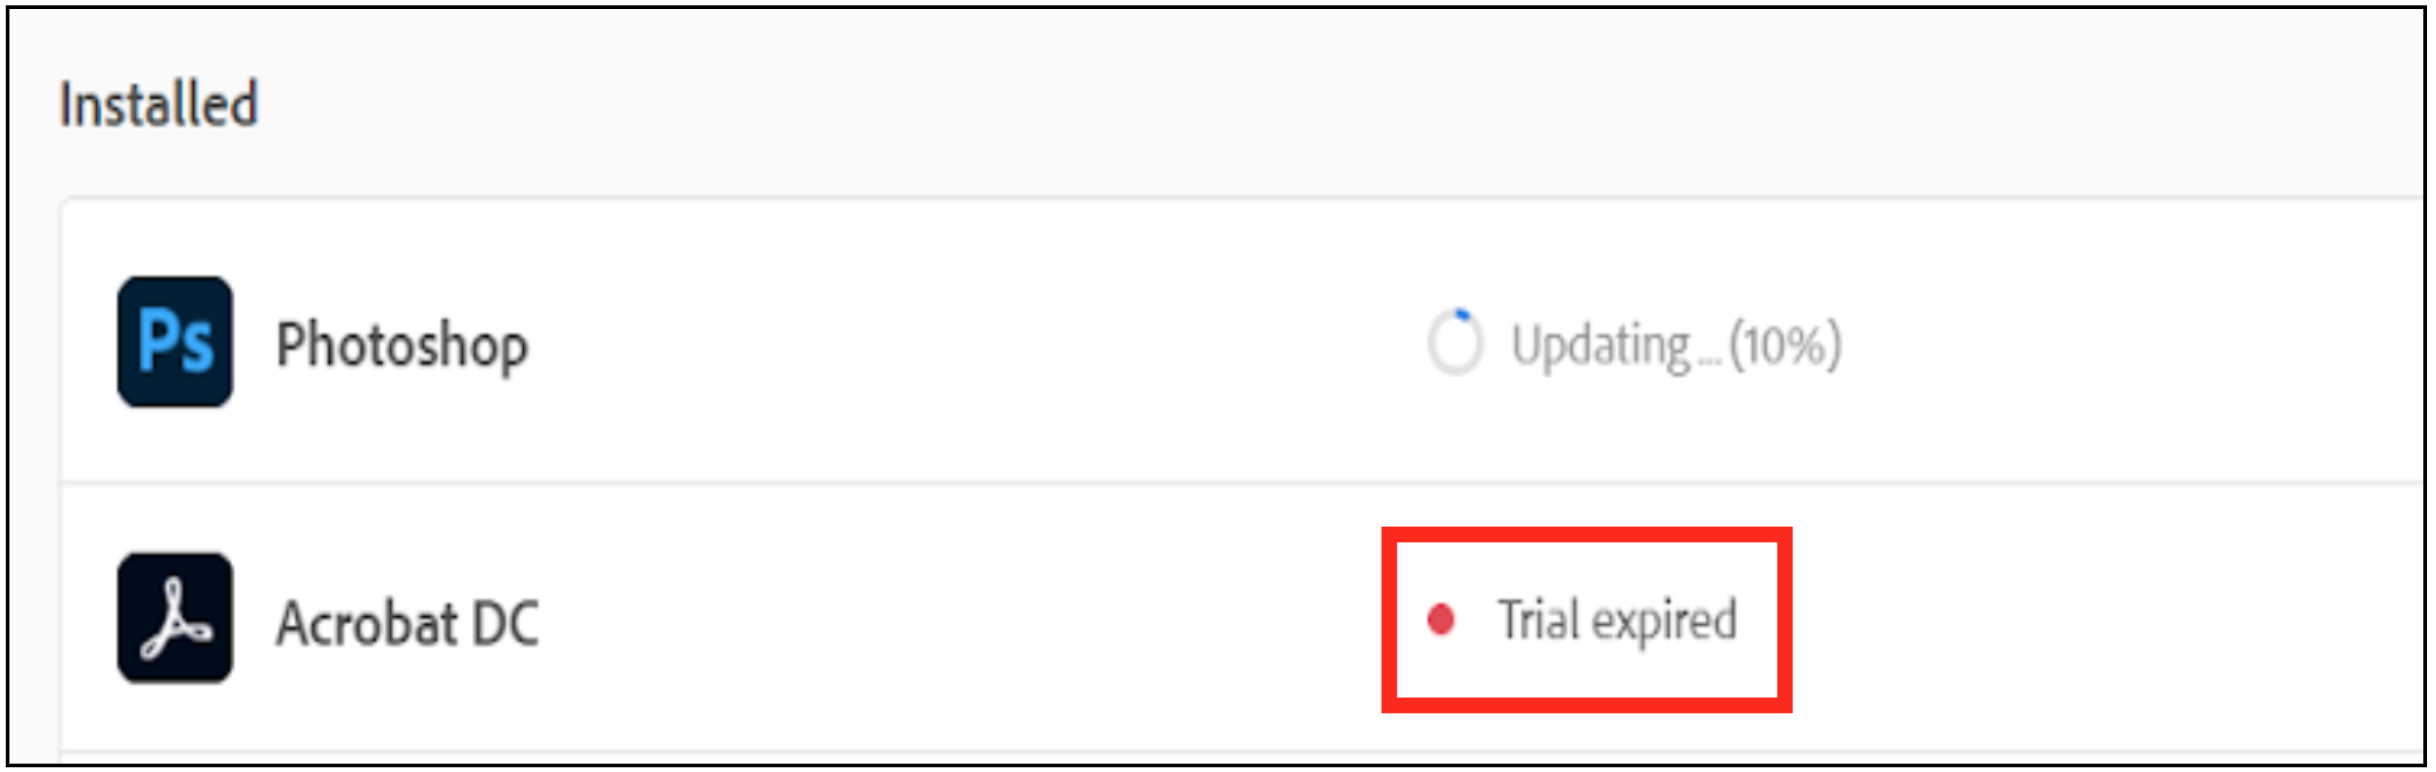
4. “This feature is not included in your current Acrobat license,” trial expired.
A recommended solution to all these issues is to sign out and sign back in the Adobe Creative Cloud application as previously demonstrated.