Multifactor Authentication (MFA) for TMU Microsoft accounts and Office 365

Multi-factor authentication (MFA) is a security control that adds an additional layer of security to protect your online account. If you’ve been prompted to set up MFA on your Microsoft Office 365 account, this page will guide you through the process.
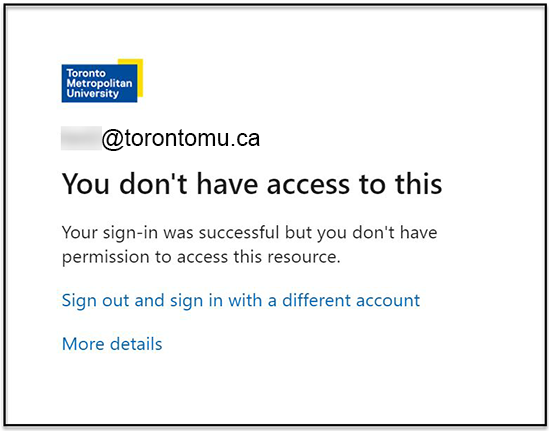
If you see the message "Your sign-in was successful but you don't have permission to access this resource"
Means you either have no access to the resource or you did not set up your MFA.
To check and activate MS MFA for your account:
1. Log into the my.torontomu.ca portal with your username and password.
2. In the Self Service box, select Personal Account.
3. Find the Security section, select Microsoft Multi-Factor Authentication.
4. From here, select Proceed to Microsoft MFA Setup and your Microsoft account will automatically be reactivated.
Note: If you continue to see an error message, sign out and sign back into your Microsoft account.
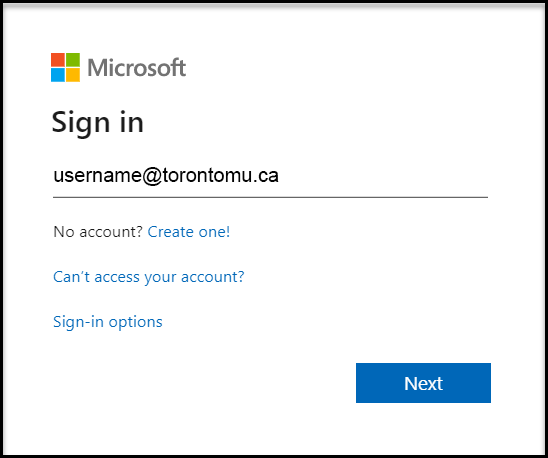
Open your preferred Internet browser and visit https://portal.office.com/ (external link) to initialize MFA process.
1. When prompted for a username on the Microsoft sign-in page, please enter your TMU email address.
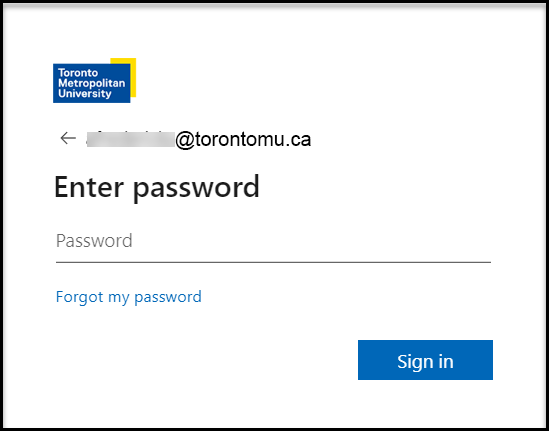
2. Enter your my.torontomu password.
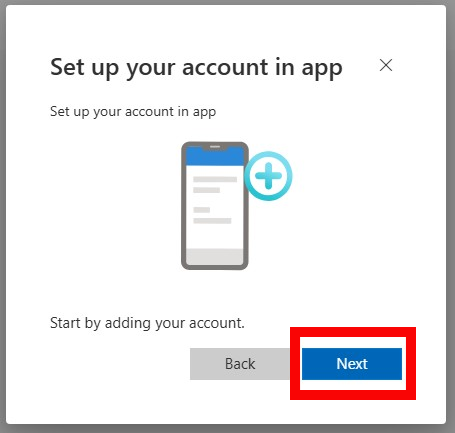
3. On the “Keep your account secure” screen, you can begin setting up MFA.
You’ll have the option of generating authentication codes using the Microsoft or Google Authenticator apps.
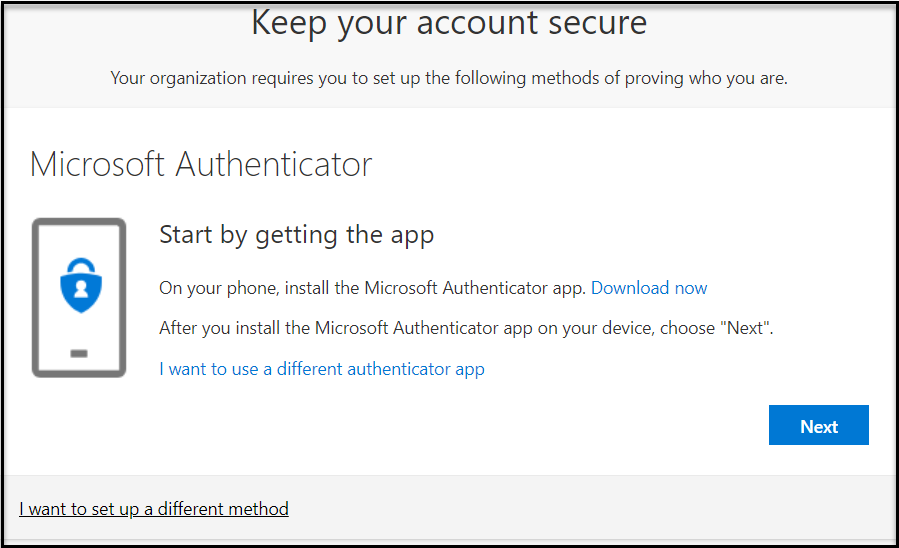
4. As the setup differs for each choice, please select instructions for either Installing Microsoft Authenticator for Android devices (external link, opens in new window) or Installing Microsoft Authenticator for Apple devices (external link, opens in new window) .
Review your current authentication methods.
https://mysignins.microsoft.com/security-info (external link)
Add/remove as needed,
It is recommended to have at least the following methods:
- Password (required)
- Microsoft Authenticator
- Device linked Passkey
Make sure to have at least two additional authenticathon methods in addition to Password.
Some versions of Microsoft authenticator require login. The second authenticator might be required to avoid a catch-22 situation that requires MFA to login to Microsoft authenticator using the same authenticator.
If you’re planning to get a new phone or device or reinstall the Authenticator App, make sure to backup your accounts.
To add additional methods visit this page:
https://mysignins.microsoft.com/security-info (external link, opens in new window)
Or if you’re already logged in, click on ‘Your account name’ (usually in the bottom right corner) -> View Account -> My account -> Security info
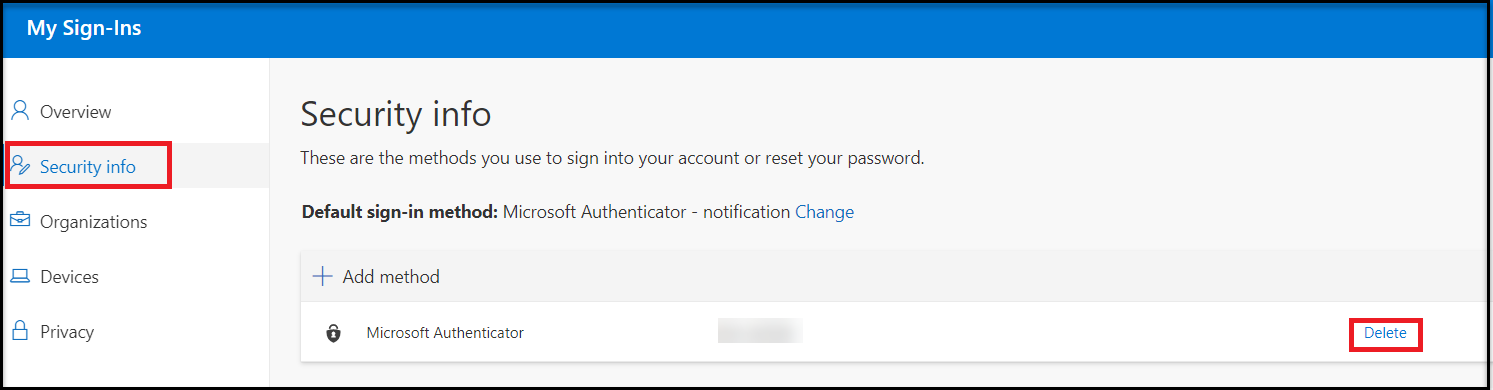
Once signed in, you can choose to add a security key as second factor by clicking Add a method and selecting the Security key option in the drop-down menu. Please note FIDO2 key is required.
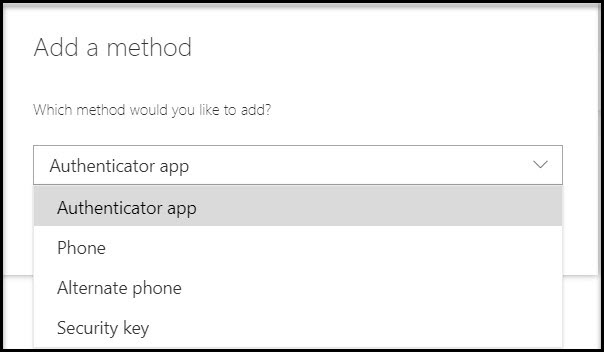
Example with Passkey
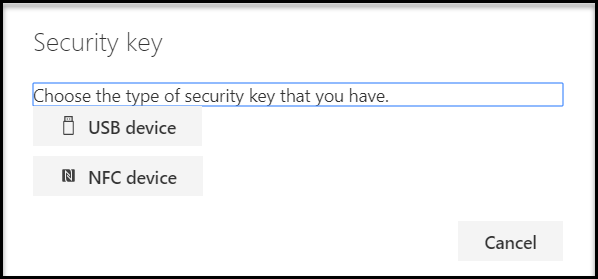
Follow prompts to complete setup
To use Google authenticator, Software authenticators, 1Password, or other software utilizing One-Time Passcode (OTP), click on Microsoft Authenticator.
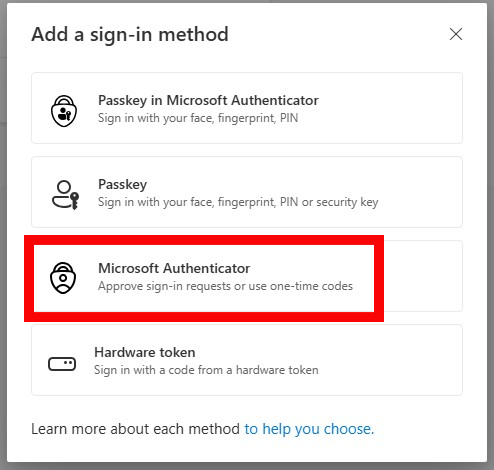
Then select ‘Set up a different authentication app’.
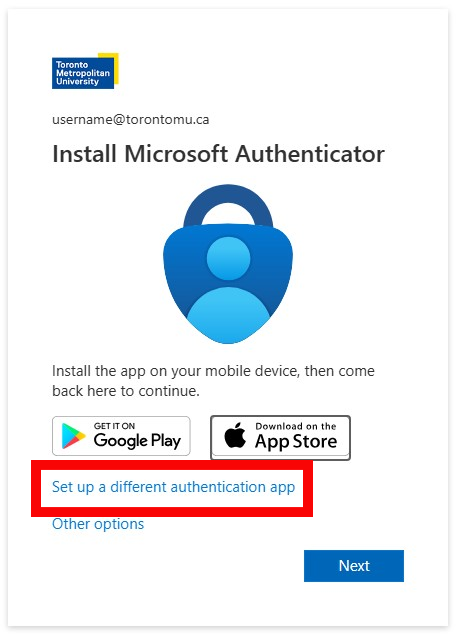
If you’re using software authenticator that does not have the ability to scan QR codes, click on ‘Can’t scan the QR code?’, otherwise, click Next and follow the instructions as prompted.
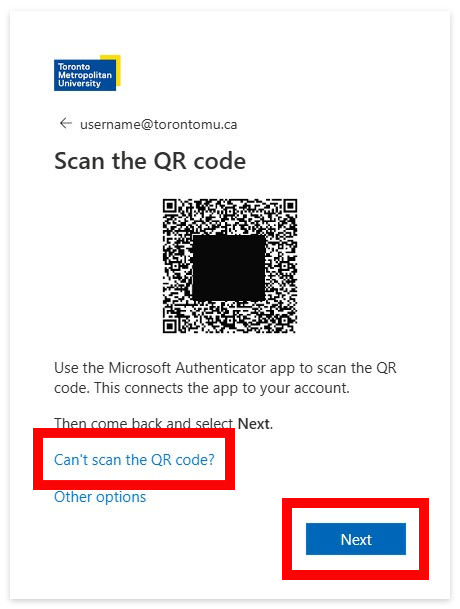
Follow prompts to complete setup.