Using XM Fax (Formally XMedius Fax)

XM Fax is a network fax server solution which enables users to send, receive and manage faxes using their own PC, instead of a fax machine or a fax modem. XM Fax can be accessed using XM Fax client or the XM Fax web interface.
Using the XM Fax client or the XM Fax web interface you can attach documents with the file type HTML, PDF, DOC, DOCX, XLS, XLSX, WPD, RTF, TXT or images with the file type GIF, JPG, BMP, TIFF to your fax. To use the SendFax client, you need to download and install a driver available from the CCS website at Software for Phones and Fax.
Requirements:
- Hardware: Any x86 or 64-bit desktop
- OS: Windows 11/10/8/8.1
- Supported browsers: Microsoft Edge, Mozilla Firefox, Google Chrome
Before you use XM Fax, please ensure that you have an XM Fax username and password. For assistance with XM Fax please call the CCS Help Desk.
Using the SendFax Client
You can start SendFAX in one of the following ways:
1. Choose Start > Programs > XM Fax > SendFax.
See below for more information about SendFax.
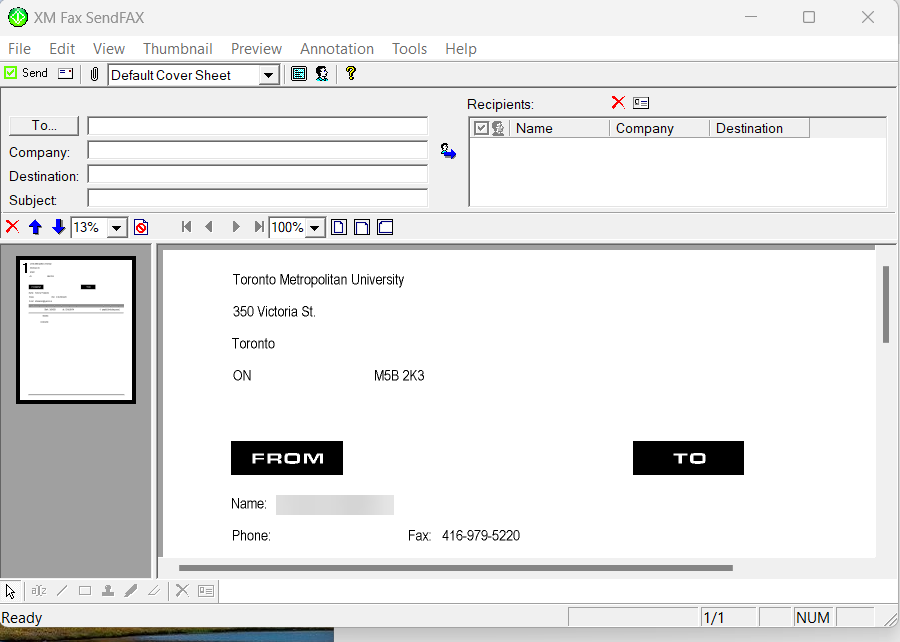
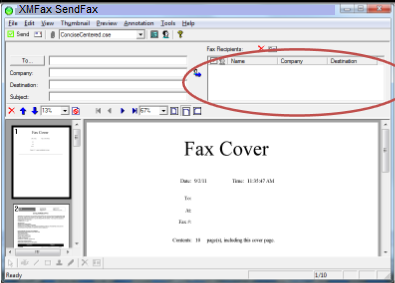
The SendFax Screen
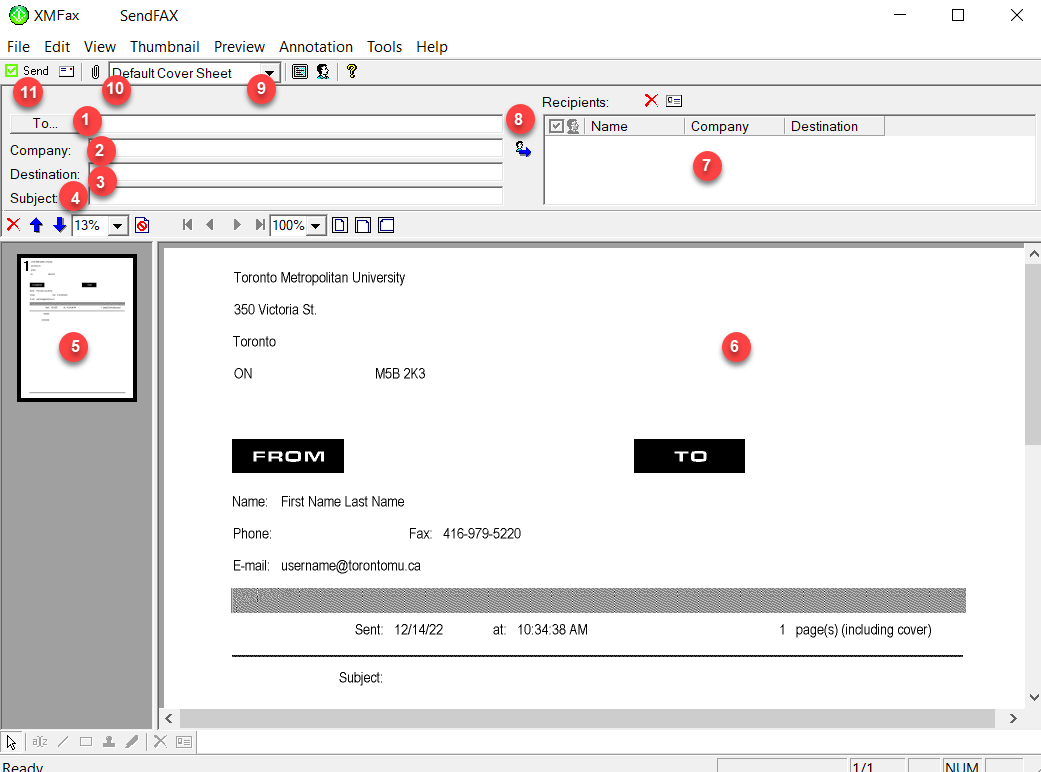
Different Options on the XM Fax SendFax Screen are Described
| No: | Name | Description |
|---|---|---|
 |
To | This field receives the name of the fax recipient. Manually enter a recipient's name, or select the To... button and select from your personal Fax phone book. |
 |
Company | Recipient's company name. |
 |
Destination | Fax number of the recipient. This is the only mandatory field. Note: All fax numbers external to TMU must begin with a "9," (the number nine followed by a comma). |
 |
Subject | Subject heading of fax. |
 |
Thumbnail View | Displays a small image of each page of the fax. Selecting a page in the Thumbnail view displays the page in the Fax Preview portion of the screen. Use Thumbnail View to reorder or delete pages from the fax you are composing. |
 |
Fax Preview | Displays a single page of the fax at a time. It is here that you add annotations to a fax before transmission. Annotations can include text; highlight; bitmap images; and shapes like lines, squares, circles, etc. |
 |
Fax Recipient List | Displays individuals and groups who are to receive the transmission, either selected from a phone book or typed directly into the To field (item 1). |
 |
Add to Fax Recipients | Used to add a fax recipient to the Fax Recipient List when entered manually. When adding to the recipient list, the Destination field is the only required field. |
 |
Cover Sheet | Select a different cover sheet by clicking on this drop down menu. |
 |
Insert File | Button used to insert a document or image file you would like to fax. |
 |
Send | Used to send the fax to the Recipient List, when at least one recipient has been added |
SendFax from an Application
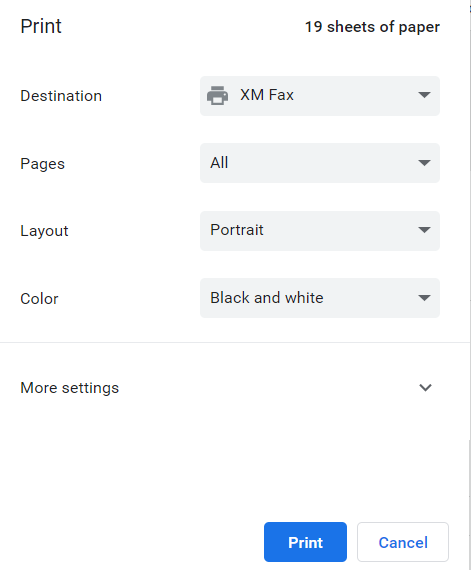
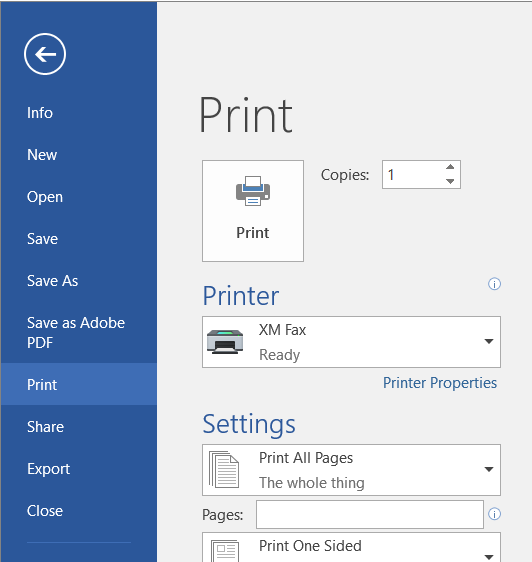
1. From within an application (i.e. MS Word, Excel, IE) select File > Print. The Print window displays. In most cases, there will be a drop-down menu labelled Name, with a list of installed printers. Select the printer named XM Fax, then select on OK.
Note: Your current printer driver is now set to print to XM Fax. When you have completed sending your fax, to change the print driver back to your default printer, either:
Exit the application you are using or use the application's Print menu to change back to your default printer.
2. SendFax will automatically start when you print to the XM Fax driver from within any application. The SendFax window displays.
You should now see all the pages of your document in the Thumbnail View.
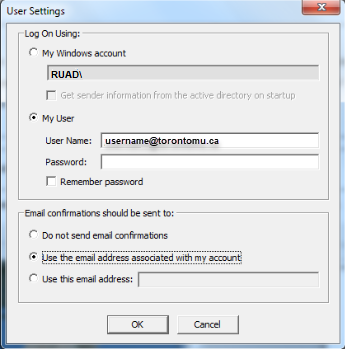
3. On your first use of SendFax, you will be prompted for your User Settings. Select My User and enter your my.torontomu username appended to @torontomu i.e. jsmith@torontomu.ca Your initial password will be provided by the CCS Helpdesk.
See below for more information about SendFax.
Using the XM Fax Web Interface
XM Fax can be accessed using a Web browser. Use this interface to display the status of sent, received and queued faxes. Even though the XM Fax web interface can be used to send faxes, CCS recommends using SendFax or Print to XM Fax from within an application so that you can preview the fax in SendFAX before you send. The XM Fax web Interface does not provide a preview.
Web Interface
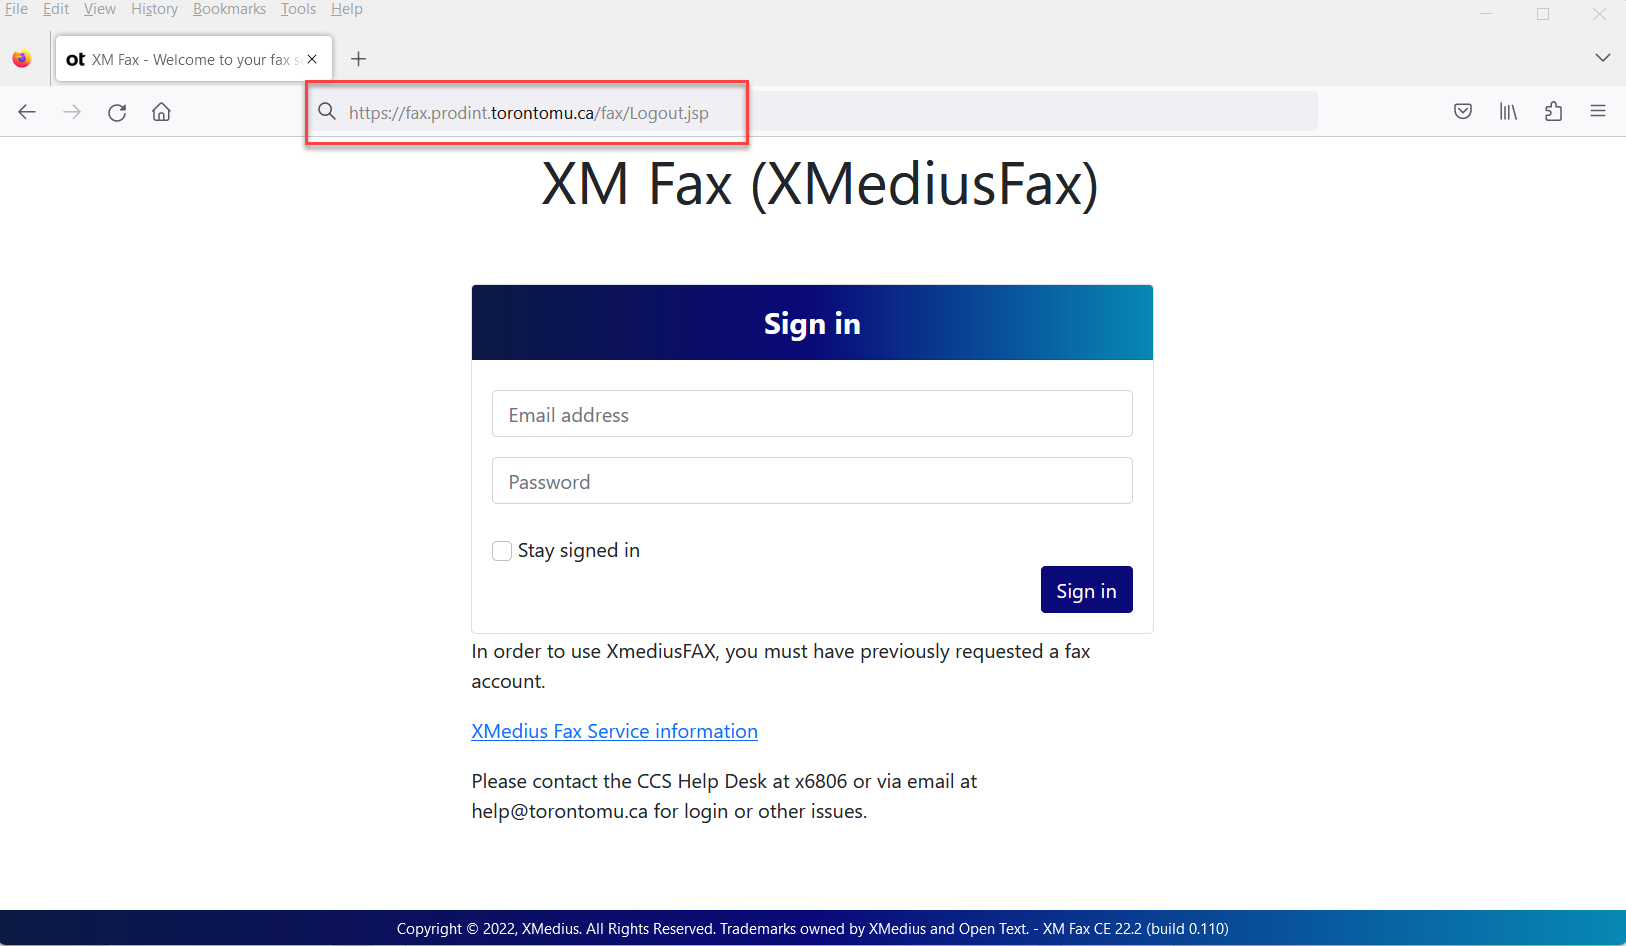
- Using a Web browser such as Internet Explorer or Firefox, connect to XM Fax to access the XM Fax web interface.
- Login with the XM Fax username i.e. jsmith@torontomu.ca and XM Fax password.
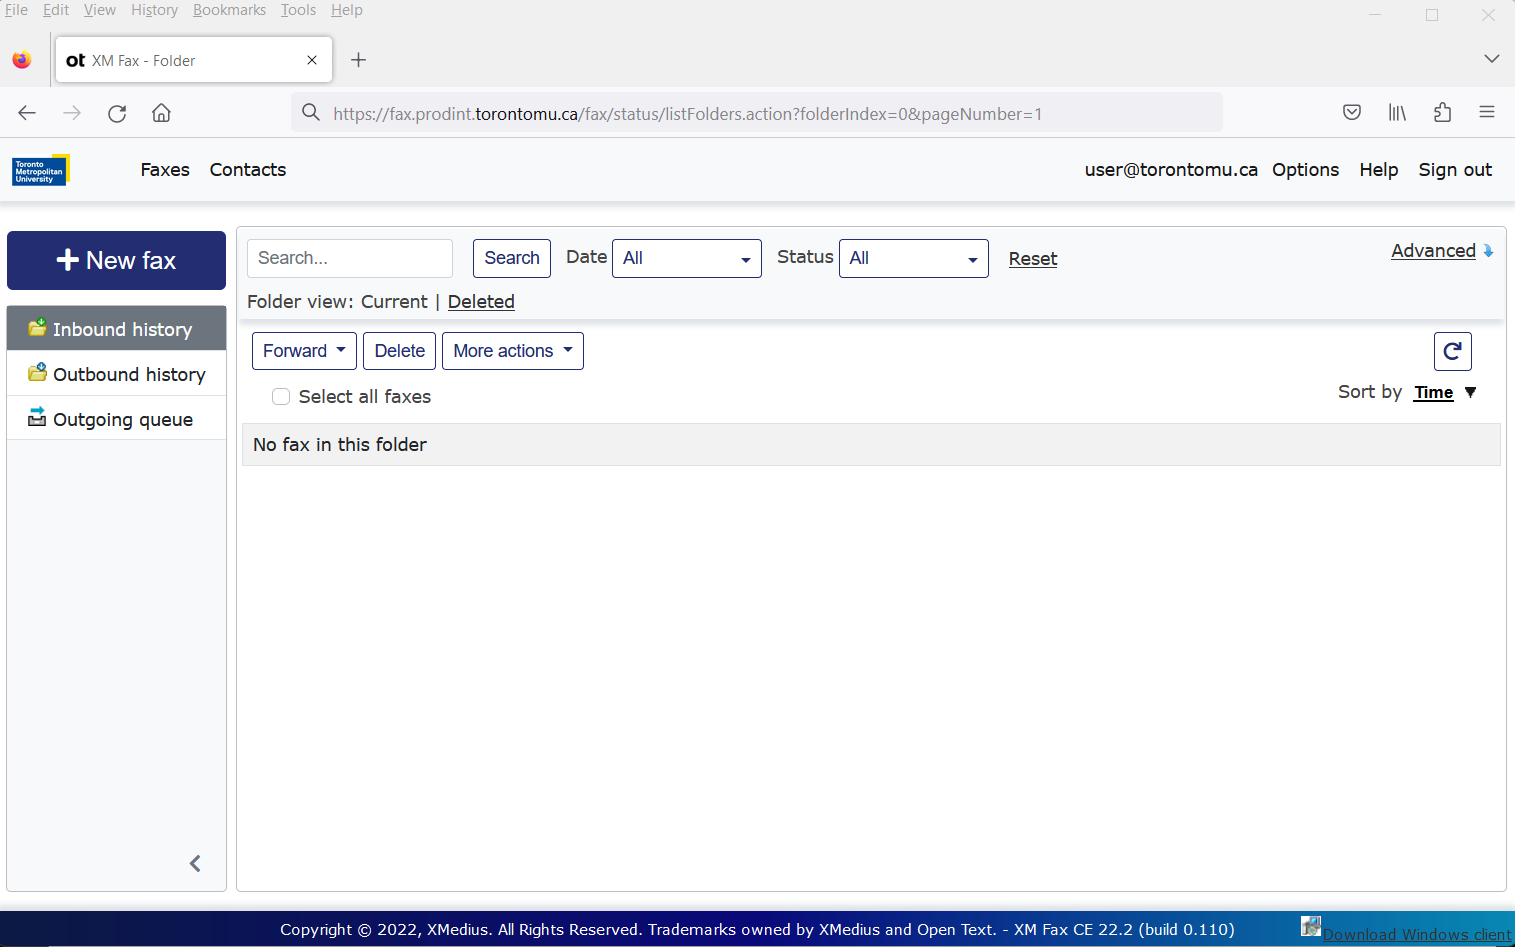
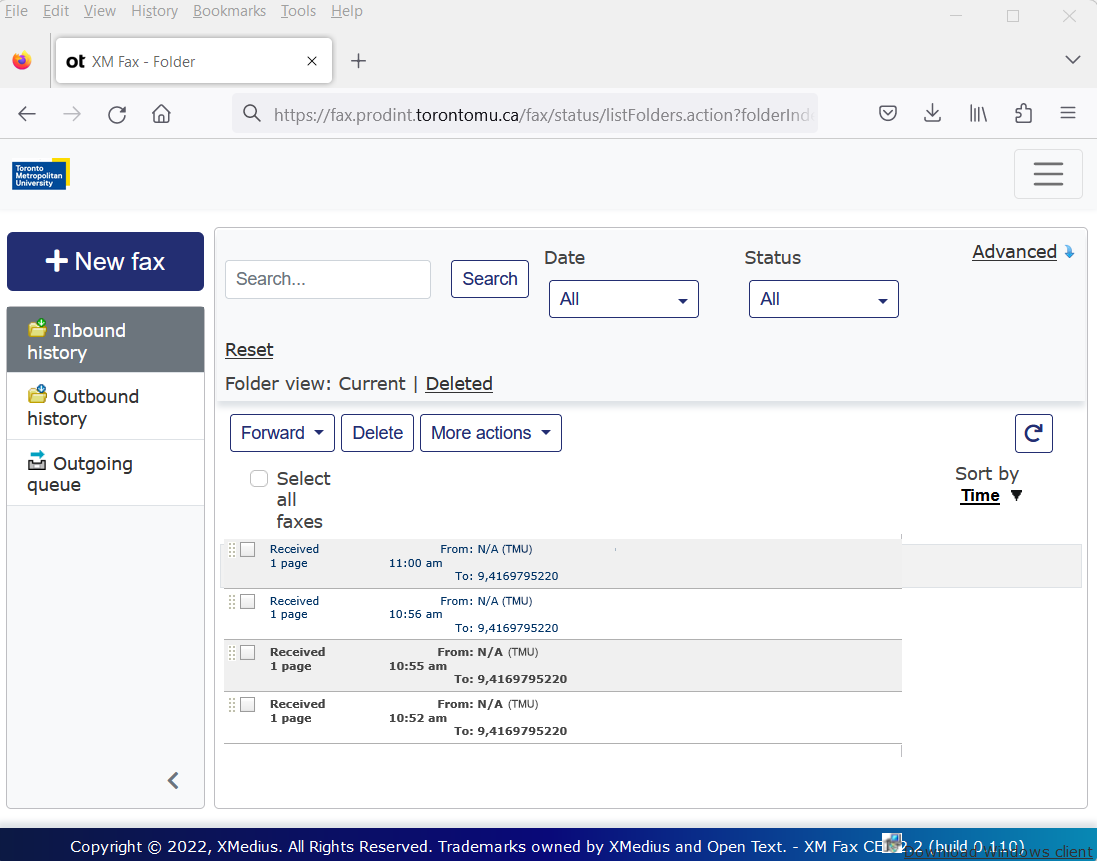
- Inbound History is the folder with all received faxes.
- Outbound History is the folder with all faxes sent from your account.
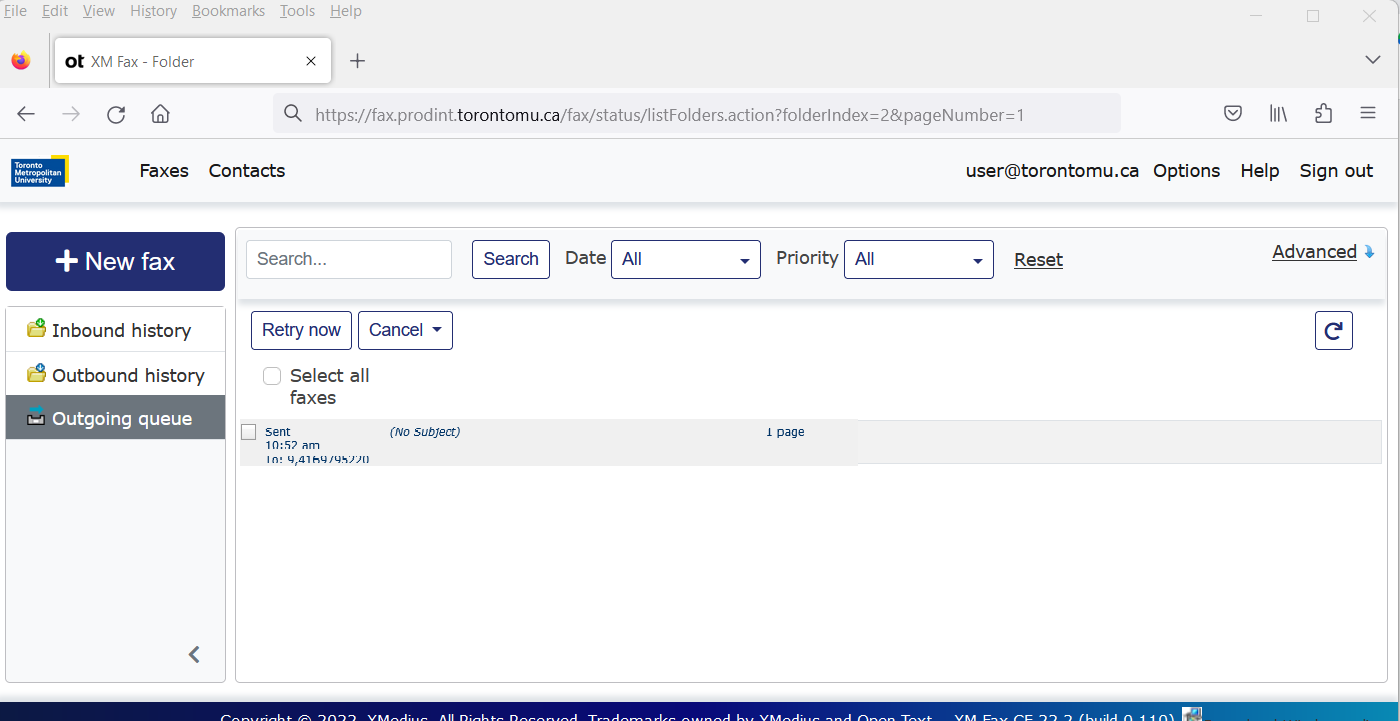
- Outgoing Queue displays faxes that are currently being sent from your account. You can view the status of a fax here.
Online help is also available at the top right of the screen.
Composing a New Fax
Note: CCS recommends using SendFax or Print to XM Fax from within an application so that you can preview the fax in SendFax before you send. The XM Fax web Interface does not provide a preview.
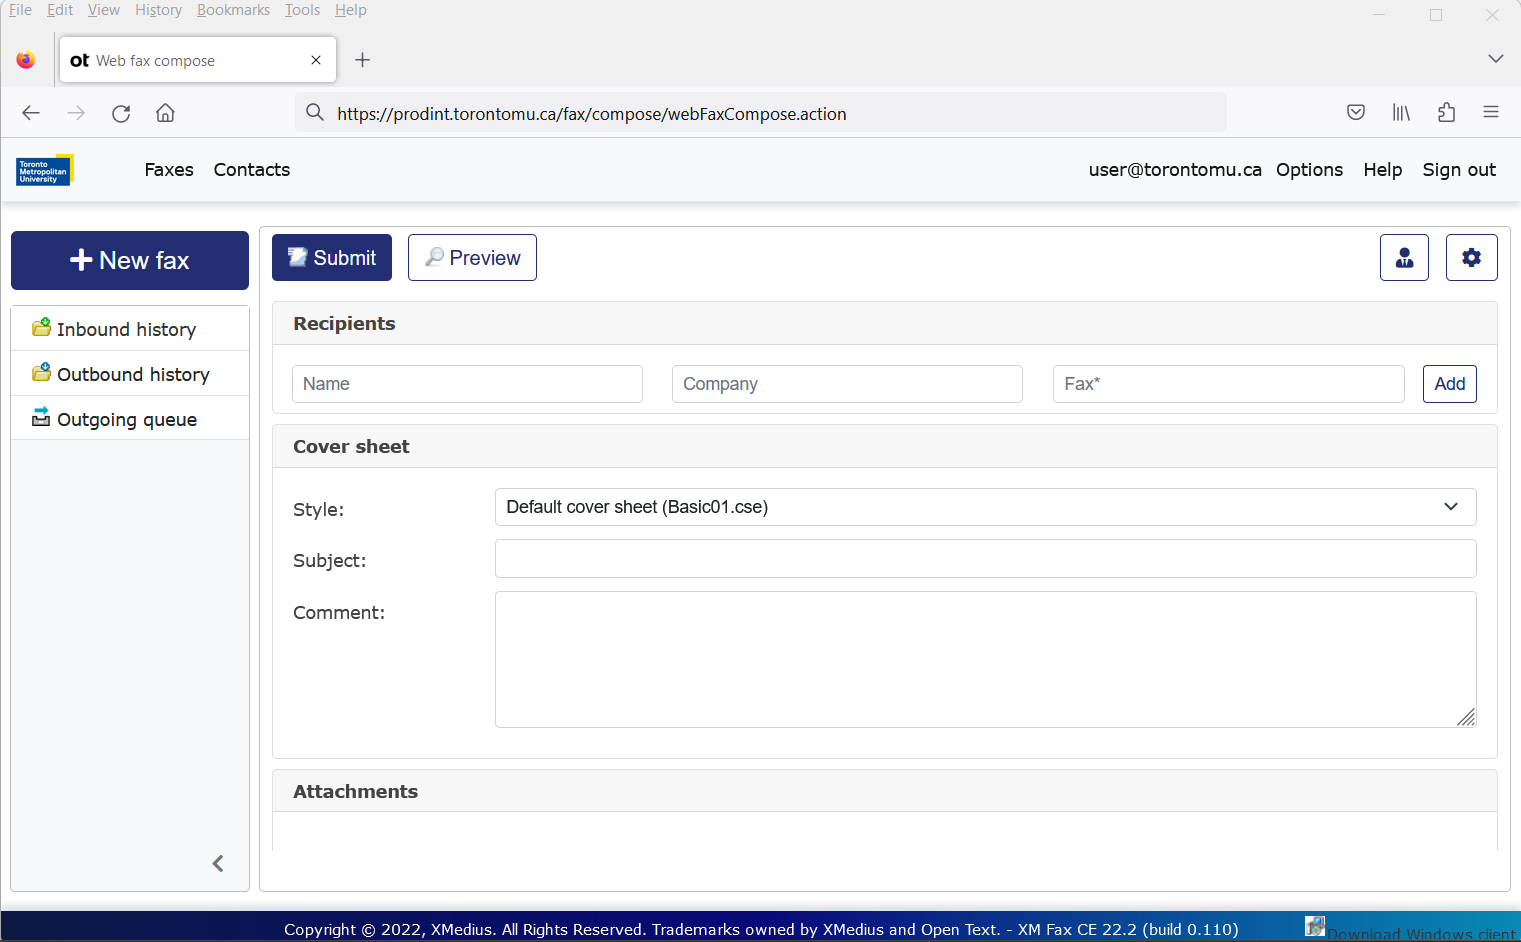
- Select New Fax to create a new fax.
- Enter the recipient’s information, including the Fax number.
- Select a Cover Sheet if desired.
- Enter a Subject.
- Enter a Comment if desired.
- To attach a document to the fax, select Browse and select a file.
- To send the fax, select Submit.
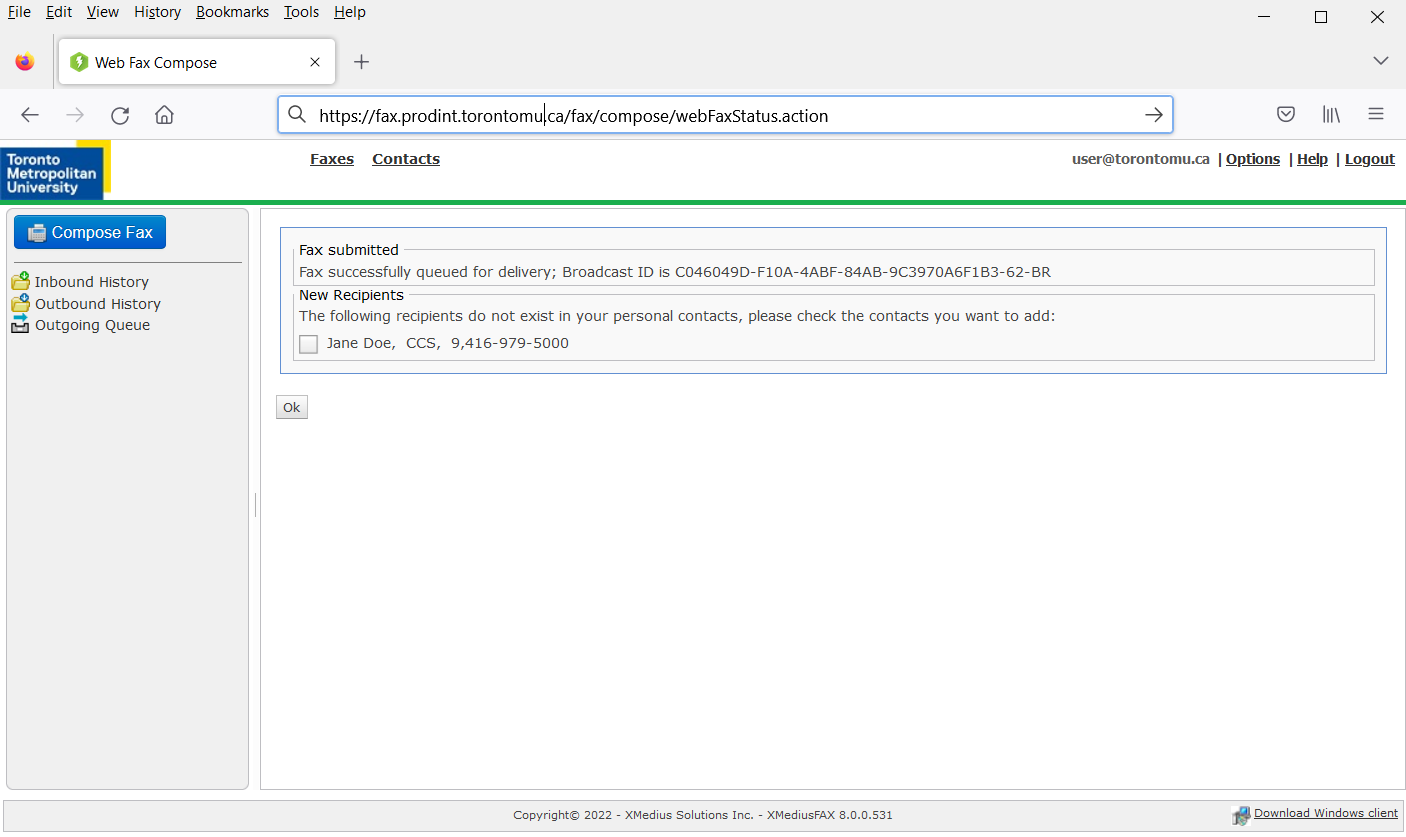
- A Fax submitted message is displayed confirming that the fax is being queued for delivery.
- You may also be prompted to add the recipient to your Contact list. If you wish to add the recipient to your contact list, select in the checkbox.
- Select OK.
Fax submitted confirmation web page.
Outgoing Queue
The XM Fax Web interface has a feature which allows you to keep track of the status or progress of your sent faxes. Faxes sent using XM Fax SendFax or the XM Fax web interface will display here. This can become handy when sending large faxes and you wish to know how many pages have been sent or are remaining. You can monitor it by:
- After you have sent a fax, select on Outgoing Queue.
- All your sent faxes are listed on the right side. Select on the Status of your Fax. Here you can view your fax, and see information about your fax such as the Status, the Original Destination, Priority, Number of Retries, Pages Submitted and Error Code.
Select Back to return to the Outgoing Queue.
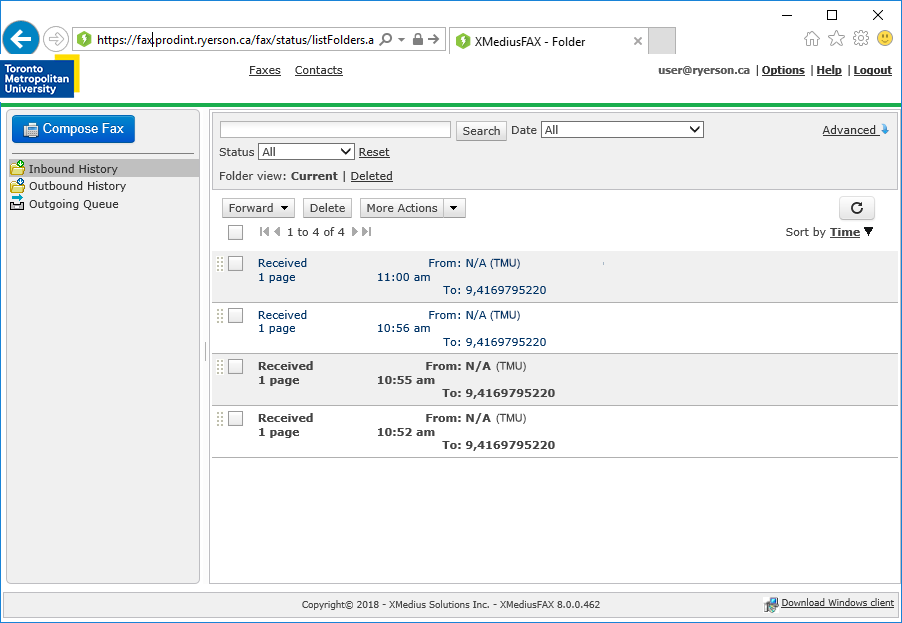
History of Received Faxes
- To see a list of your received faxes, select Inbound History.
- A list of your received faxes is displayed. You will see the Received Time and who the fax is from.
- Select on the small icon at the start of the row with your fax details, to view the fax.
OR
Select on the Received Time of the fax. This will display the Fax Properties where you can then select on View fax.
- You will be asked to View or Save the Fax.
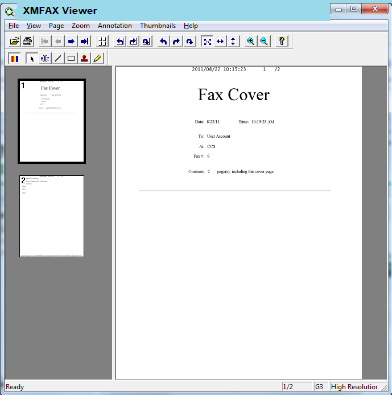
- To view the fax, select Open and the fax displays in the XM Fax Viewer.
OR
To save, select Save As, and then specify where to save the fax.
- Your deleted files are stored in the Deleted folder view. The fax will remain here until you do a final delete.
Please see below for more options:
- To enter a fax recipient, complete the To, Company, Destination (mandatory fax number) and Subject entry boxes and press the Add Fax Recipient List icon.
- Add all fax recipients to Fax Recipient List, by either manually or by selecting them from your address book.
- Select a different cover sheet if desired.
- Select the document you would like to fax by clicking on Insert (represented by a paper clip to indicate attachment), or by clicking on File > Insert. Choose the desired file when asked and select on Open when finished. Multiple documents can be sent within the same fax by repeating this step.
Note: The software needed to view the type of document you wish to fax must be installed on your PC in order to successfully fax your document. (i.e. To successfully fax an MS Word document using SendFax, you must have MS Word installed on your PC). SendFax may open the corresponding application temporarily.
- Re-order pages if desired.
- Complete the required fields to send your fax.
- Press Send to send the fax.
- At the User Settings screen enter your XM Fax username and XM Fax password. Select OK.
- The fax will be sent and you will see the confirmation window.
- Select Edit > Fax Properties. This option only sets the information for SendFax.
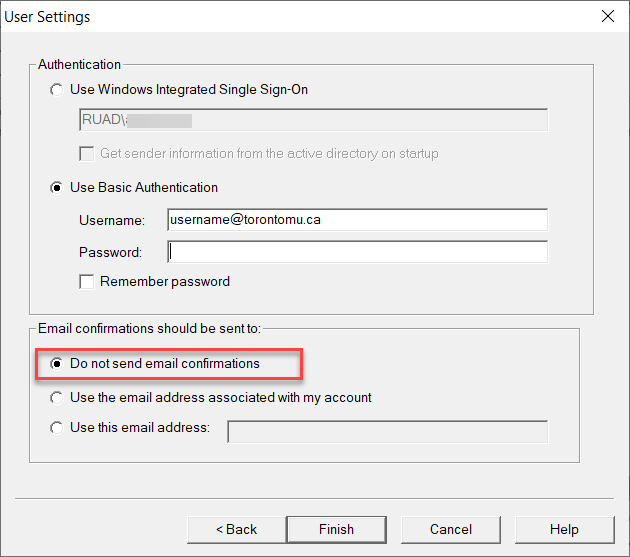
An email notification is sent to you informing you of new faxes. You will also receive a notification if you successfully or unsuccessfully sent a fax. Attached copies of received faxes are forward to your email in picture, .tif format.
- From SendFax, select File > User Settings.
- Select Do not send email confirmation.
- Select OK.
Once the XM Fax Viewer is open you can Print, Save or Mail the fax.
- Printing Fax
From the Menu choose File > Print Fax
- Saving Fax to a Local Drive
From Menu choose File > Save As
The fax will be saved as a Tif image.
- Mail Fax
From Menu choose File > Send to > Mail Recipient
Your Windows default email client will open with the attached fax. Enter the recipient's email address and send your email.
This option keeps a copy of fax in the XM Fax folder and sends a copy to another user’s email account.
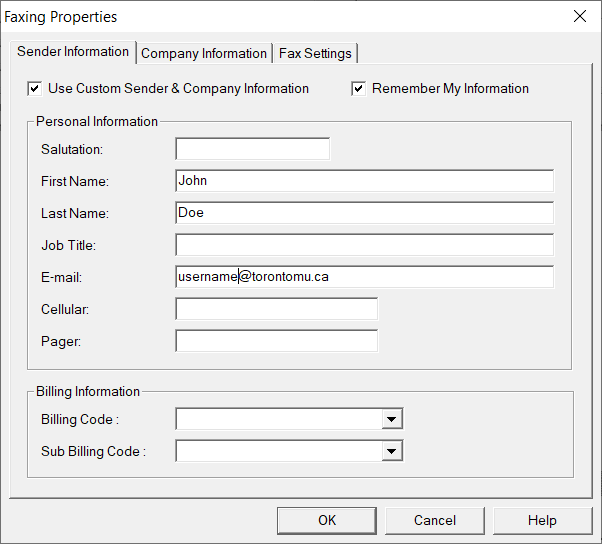
- From the SendFax select Edit > Faxing Properties.
- Select the checkbox for Use Custom Sender & Company Information. Complete the information you want updated.
- Select OK to save your changes.
- From the XM Fax screen, select Options then select Change Password.
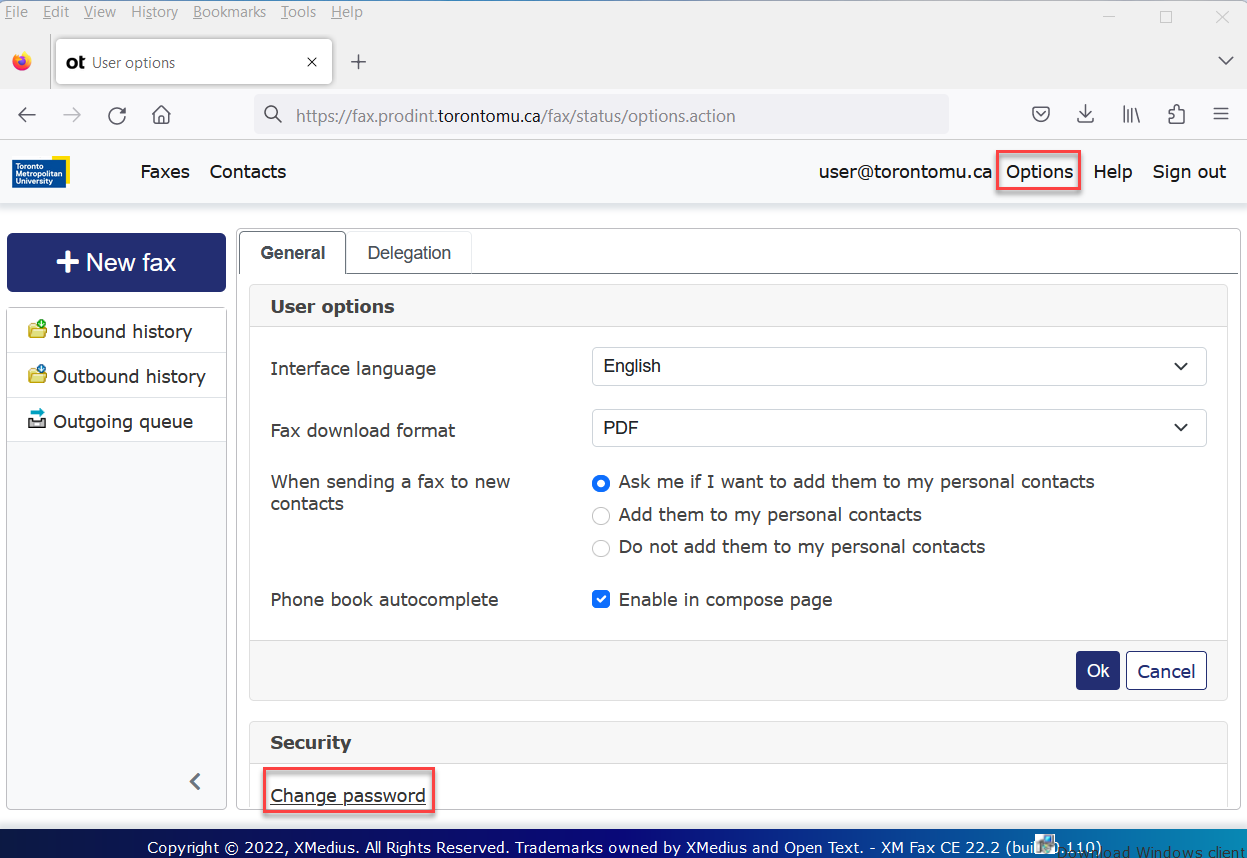
- Enter your current password, then your new password and the new password once again in the Confirm Password box.
- Select OK.

- Your password is changed immediately. Make sure to use your new password on your next login.
- From the Inbound History screen, select the fax and select Forward.
- Enter the user you wish to route this fax to. You can route a fax to any other XM Fax user at TMU.
- To search for the user, type a username. You can also use * as a wildcard. For example to search for someone with Smith in their name you can enter *smith*. This will search for anyone who has "smith" somewhere in their username. Make sure to select Type User and press Search.
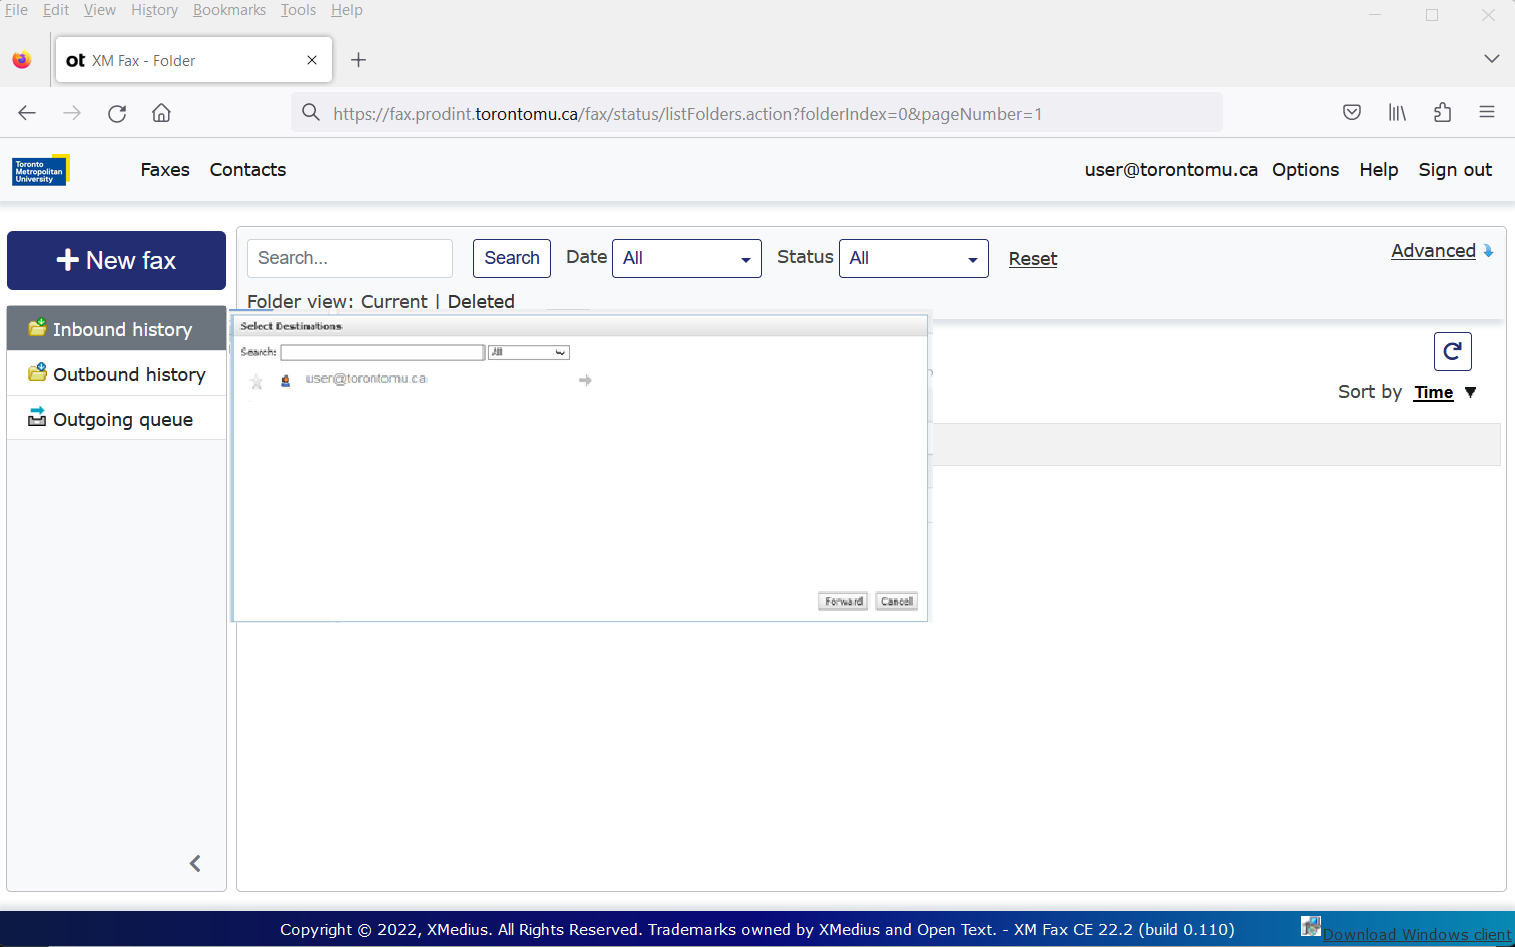
- Select the user from the list of addresses displayed and select Add.
- Select Forward. Once forwarded, the fax will appear in the other user’s Inbound History folder