Using Hyflex in TRS 1-067
Please follow the information and steps outlined on this page in order to use the Hyflex setup in TRS 1-067. The information includes panel setup, microphone use, camera configuration and document viewer steps.
If at any point during your class, you realize you will need some extra technology assistance, please use the room phone to call ext. 557455.
Here are the steps to setup the Creston panel:
- Select the mouse or keyboard to wake up the desktop, or press power to turn ON.
- Enter your Toronto Metropolitan University Credentials to sign on.
- While the screen is loading, find the projector screen control panel on the wall by whiteboard; bring down the projector screen by pressing the “down” arrow.
- Once the desktop is loaded, navigate to the lock icon and application called PT Control on the home screen; ensure that there is a check mark on the window stating that you have authorized access, then select unlock PT.
If you do not have authorized access and see an “X” then please contact Bizhelp Desk for support. - Touch the Creston Panel to wake up; then select touch here to start to load the system.
- Select the input you wish to use: PC, Laptop or Document Viewer.
Note: Hyflex setup can only accommodate PC Laptops, Macs may be used for in-person sessions. If using a Mac, ensure to bring a dongle or adapter for the HDMI cord.
a) The panel will prompt to display or mute projector image. If ready, select Project Image. If not yet ready to share screen, select Picture Mute.
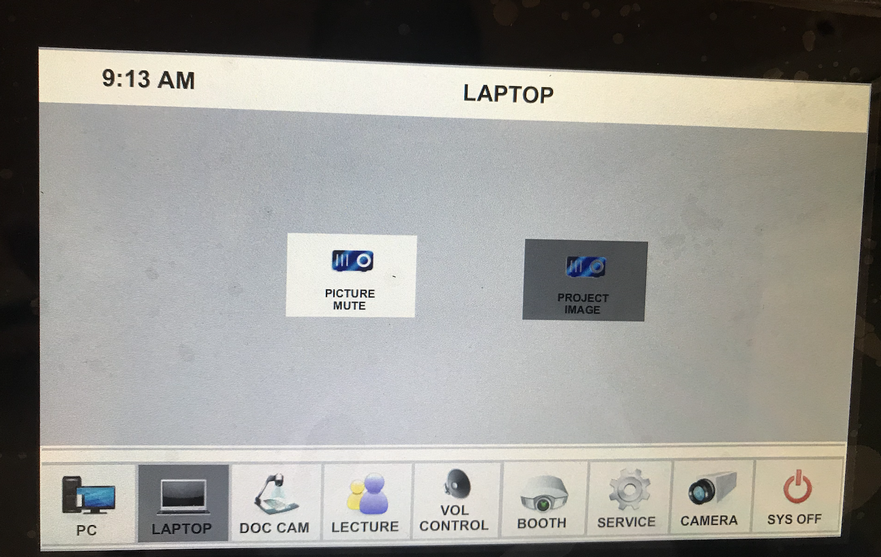
- When you select Project Image the Creston panel will open camera settings for configurations. Once content with setup, select Exit.
Note: The input should still be the initially selected on, and will show as selected while you operate other Creston panel settings. You can switch from inputs by simply selecting on the panel home bar and repeating through the steps, input will remain until otherwise changed again.

- Navigate to the windows desktop icon menu and search for Zoom.
- Sign into your zoom account and open your booked or pre-created session. Video display settings will be ONELINK BRIDGE and audio settings will be CRESTON INTEL; these will usually be preset configurations.
- Display zoom on the 2nd monitor screen, and your teaching content to the 1st monitor screen.
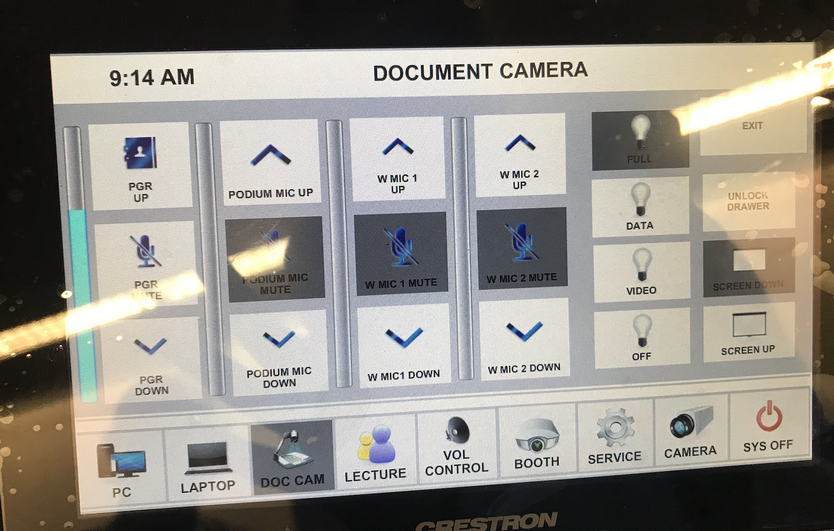
Here are the steps to setup the microphone:
- Navigate on Creston Panel to the desired input (eg. PC or laptop), then select Vol Control.
- Inside you may select the lapel microphone (W MIC 1), Podium Mic, or the handheld microphone (W MIC 2).
Lapel Mic Note: Press and hold to turn on until you see the green light. - Select the Unlock Drawer button then Exit.
**PLEASE TURN OFF MICROPHONES AFTER USE**
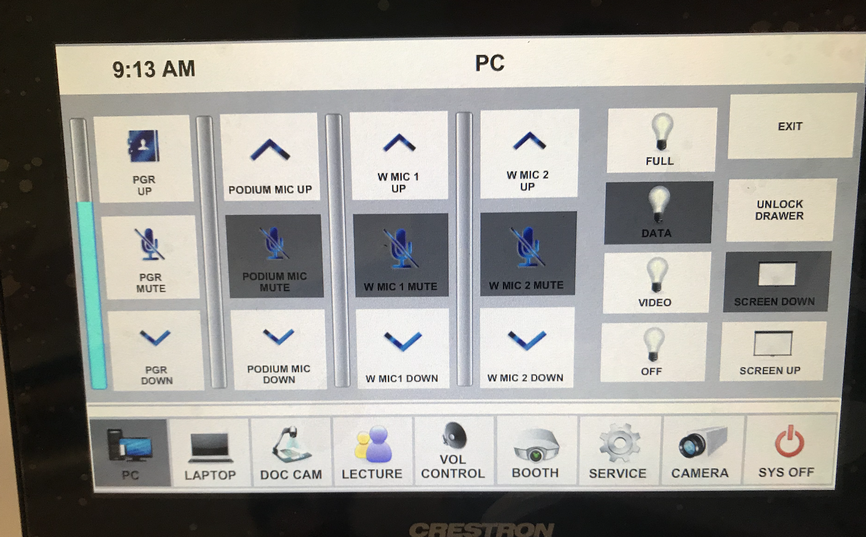
Here are the steps to setup the camera:
- Confirm input is correct (PC or laptop), then select Camera to configure.
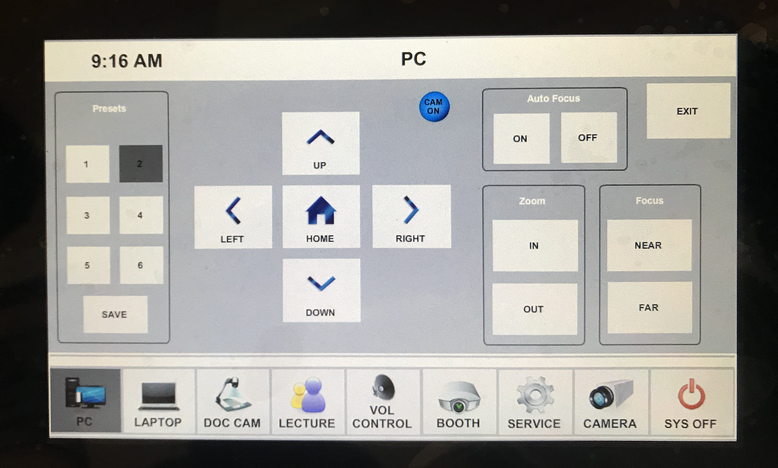
Camera Presets
Note: Configured by unique user. Each must set their own presets if desired.
- Press desired Preset #, change the view by using the arrows on Creston Panel.
- Press Save, then press desired Preset # again.
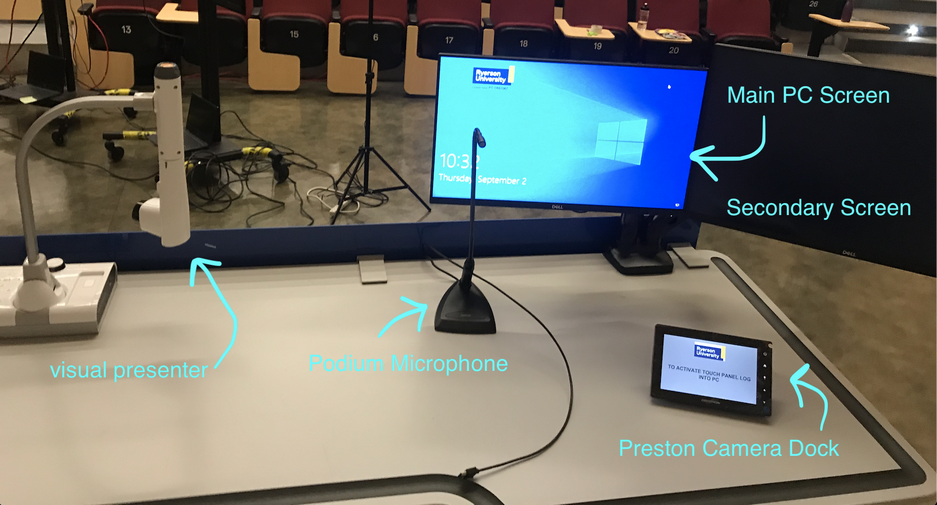
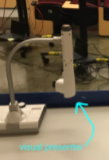
You may use the visual presenter, also known as the document viewer to project tangible content like papers or textbooks onto the projector screen.
- Select document viewer input Doc Cam (document camera).
Note: this will trigger classroom lights to dim.

- Walk to document viewer, select power ON.
- Locate the light button (found on the arm/head side) and turn ON.