TMU-VPN - GlobalProtect Installation for Windows

Use TMU-VPN for a secure connection to Toronto Metropolitan University (TMU)'s Administrative system via the Internet. To use TMU-VPN, you will need to install and use client software called GlobalProtect which allows authorized users access. It provides further security by creating a Virtual Private Network (VPN), which is like a “secure tunnel” through which all communication between the user PC and TMU must pass. All data transmissions are “encrypted” so that they cannot be read while travelling across the Internet. GlobalProtect runs on your PC, laptop computer or mobile device, protecting you with the same security policies that protect the sensitive resources on Toronto Metropolitan University (TMU) network.
Requirements
- Access to the Internet
- A valid my.torontomu username and password
- VPN access enabled
- Two-factor authentication enabled for "applications that require two-factor authentication"
Note: If you do not meet or understand the above requirements, contact the CCS Help Desk for information before proceeding.
Download, Install and use TMU-VPN:
Before you download and install TMU-VPN, you will need to request VPN access by visiting https://my.torontomu.ca, navigate to the Self Service in your Personal Account where you can manage your VPN access and requests.
To use TMU-VPN, you will need to setup two-factor authentication. Please complete the instructions outlined on the two-factor authentication webpage before proceeding with the download and install of TMU-VPN, GlobalProtect.
1. There are three versions of the TMU-VPN client for Windows available for download. Please select either TMU-VPN (64bit), TMU-VPN (32bit), or TMU_VPN (ARM64).
Determine which version of Windows your computer is running and select the correct TMU-VPN client software. You cannot install the 64-bit client on a 32-bit version of Windows or vice versa.

Check operating system information in Windows 10:
Locate on your desktop, icon. Right-click and select Properties. Look for System type to see if you are running a 32-bit or 64-bit version of Windows.
Select the appropriate software for your computer.
- 32-bit Operation System, download TMU-VPN 32-bit.
- 64-bit Operating System, download TMU-VPN 64-bit.
Check operating system in Windows 11:
Select Start > Settings > System > About.
Open About settings
2. Save this file to your desktop or your Local Disk (C:).
To use TMU-VPN, you will need to install and use the GlobalProtect client software. This is the software included in the files you downloaded.
1. Before install, make sure that the GlobalProtect.msi or GlobalProtect64.msi file is located on your desktop.
2. Locate the downloaded file. Install the GlobalProtect client by double-clicking on the file GlobalProtect.msi or GlobalProtect64.msi and select Run as administrator.
Note: Running as administrator is mandatory. If you are not in the administrator group, please get help from your system administrator.
3. If the Security Warning screen will appear, select Run to continue.

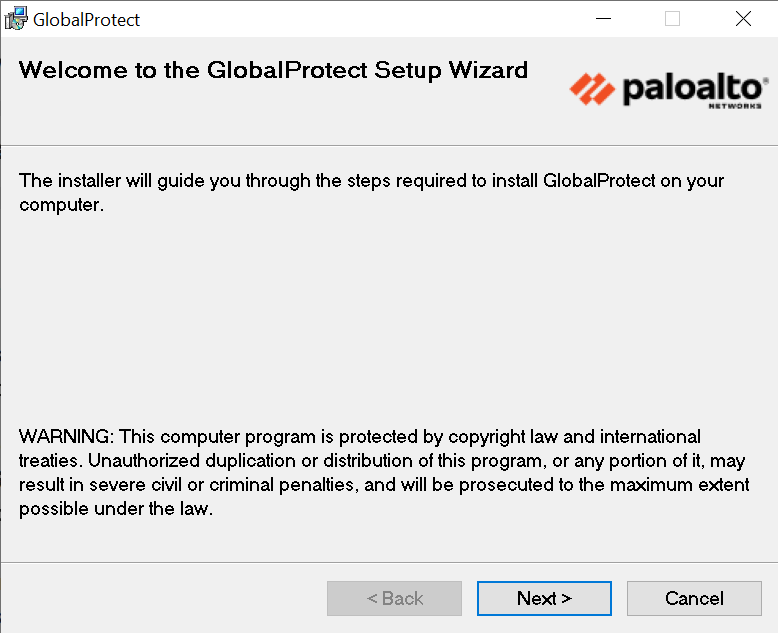
4. At the Welcome to the GlobalProtect Setup Wizard screen, select Next.
5. At the Select Installation Folder window, accept the folder and select Next.

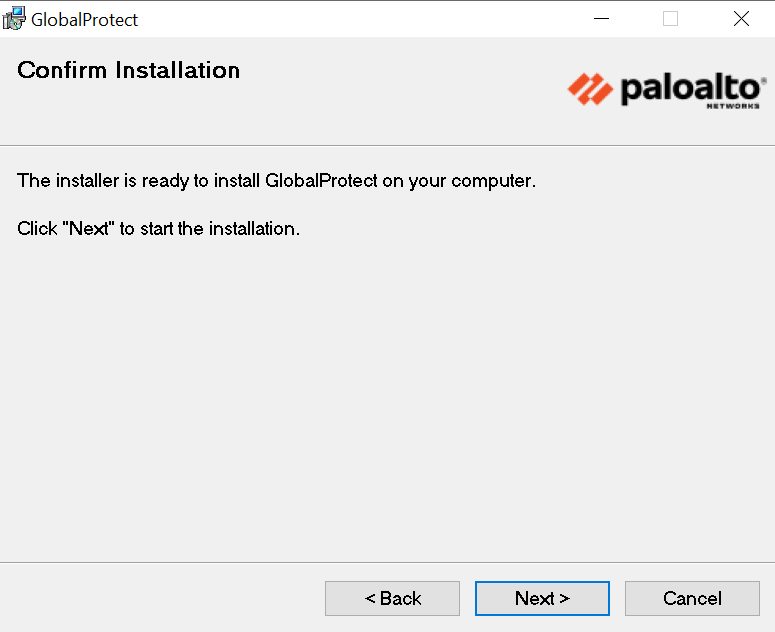
6. At the Confirm Installation screen, select Next.
7. If prompted accept the installation for the Palo Alto Networks software, select Yes.

8. GlobalProtect will begin installation.

9. At the Installation Complete screen, select Close to end the installation.

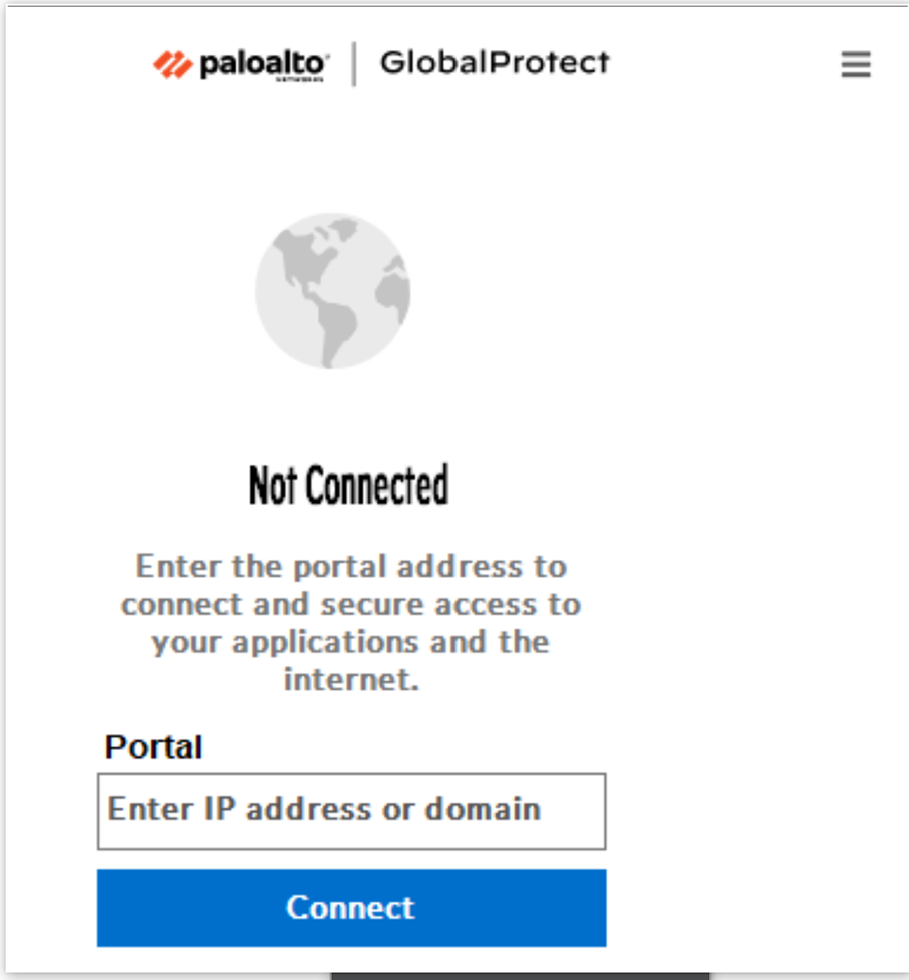
1. After installation, please wait and GlobalProtect will open a "Welcome" window. At the Welcome to GlobalProtect window, select "Get Started".

2. A new window will open. Enter the portal address as net.torontomu.ca and select "Connect".
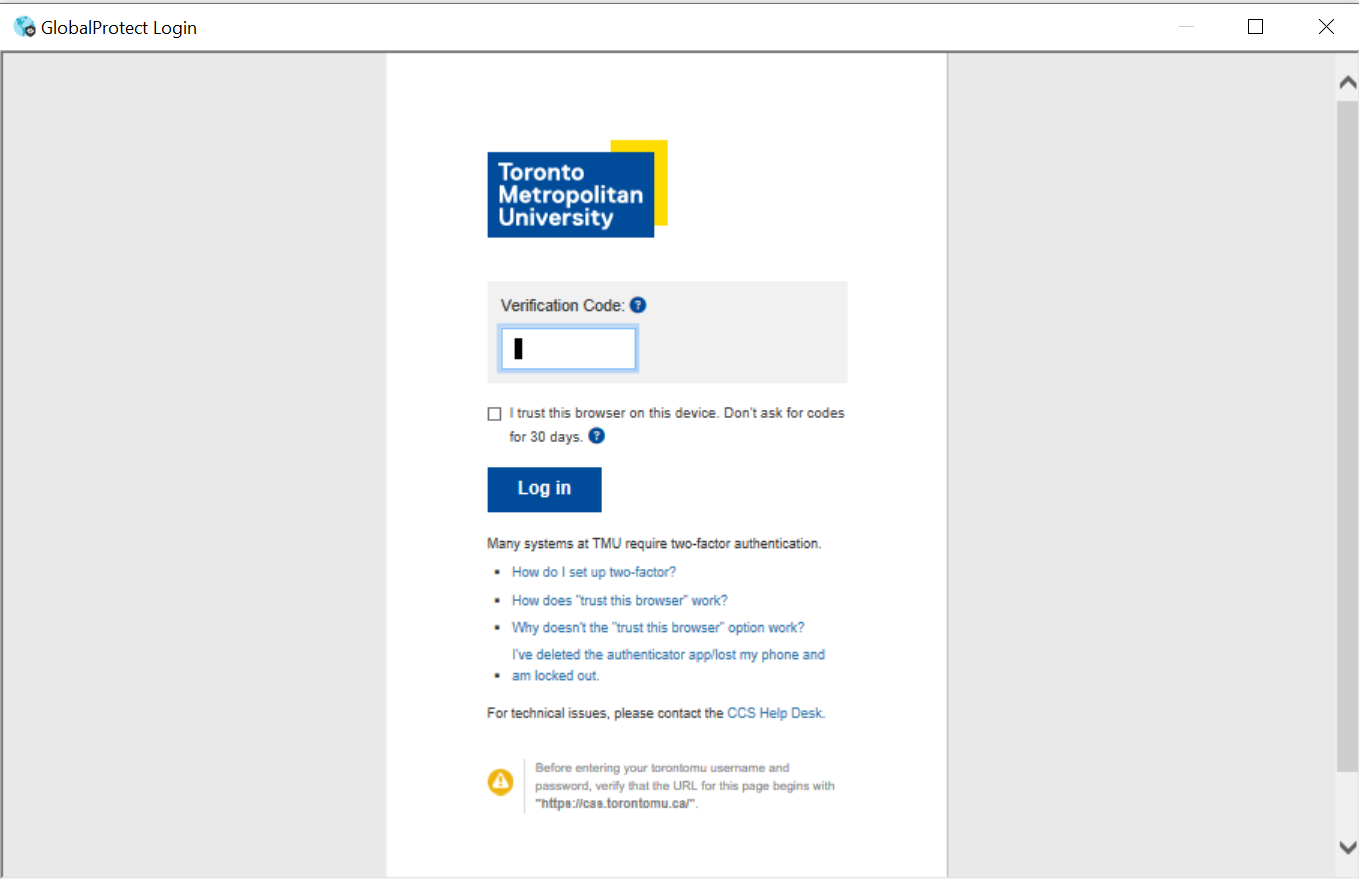
3. At TMU Login screen, enter your my.torontomu username and password. Select "Log in".
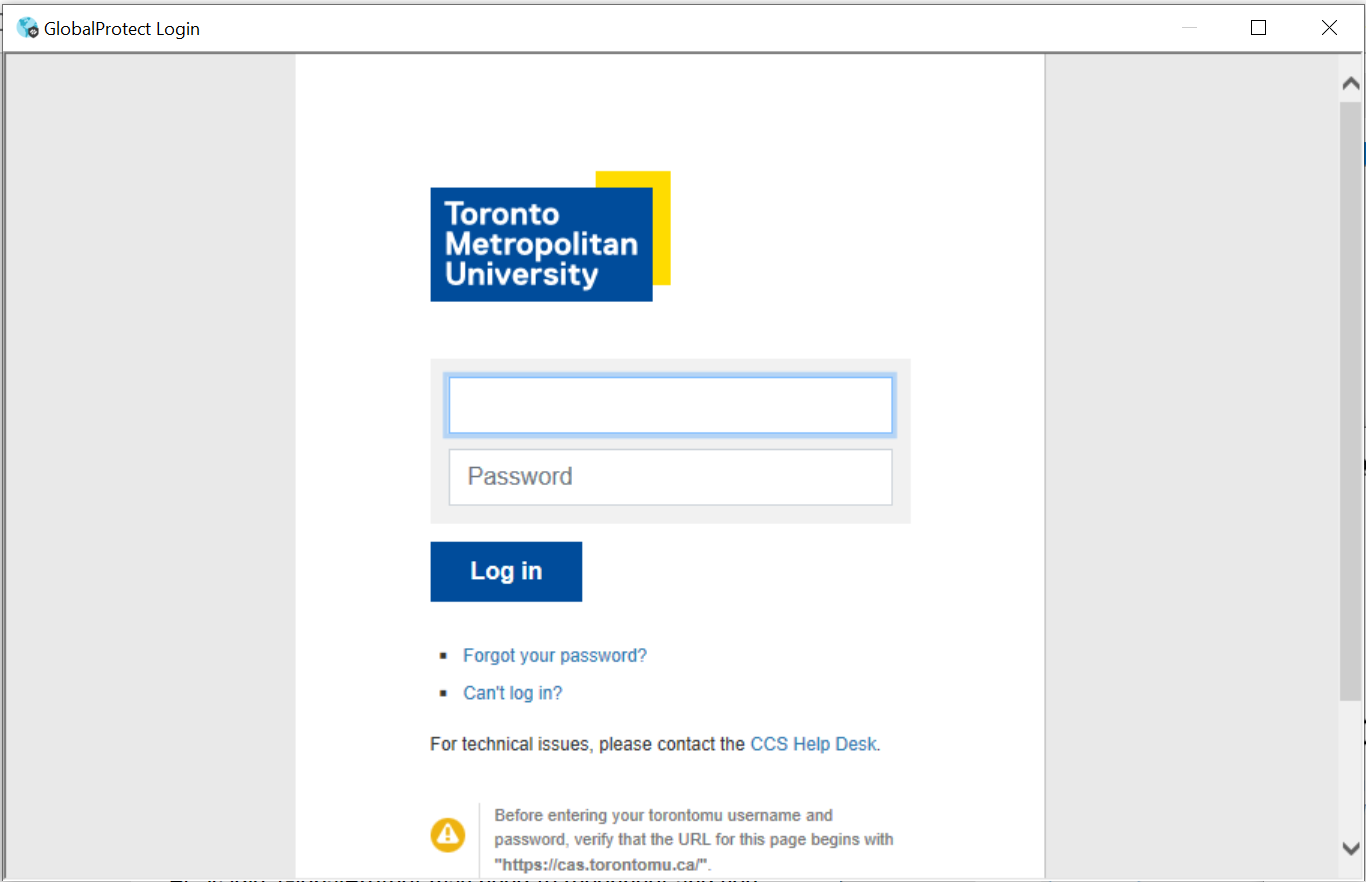
4. Next you will be prompted for your Two-Factor Verification Code. You can select the checkbox to trust this browser for 30 days, so that you will not be prompted during that time period.
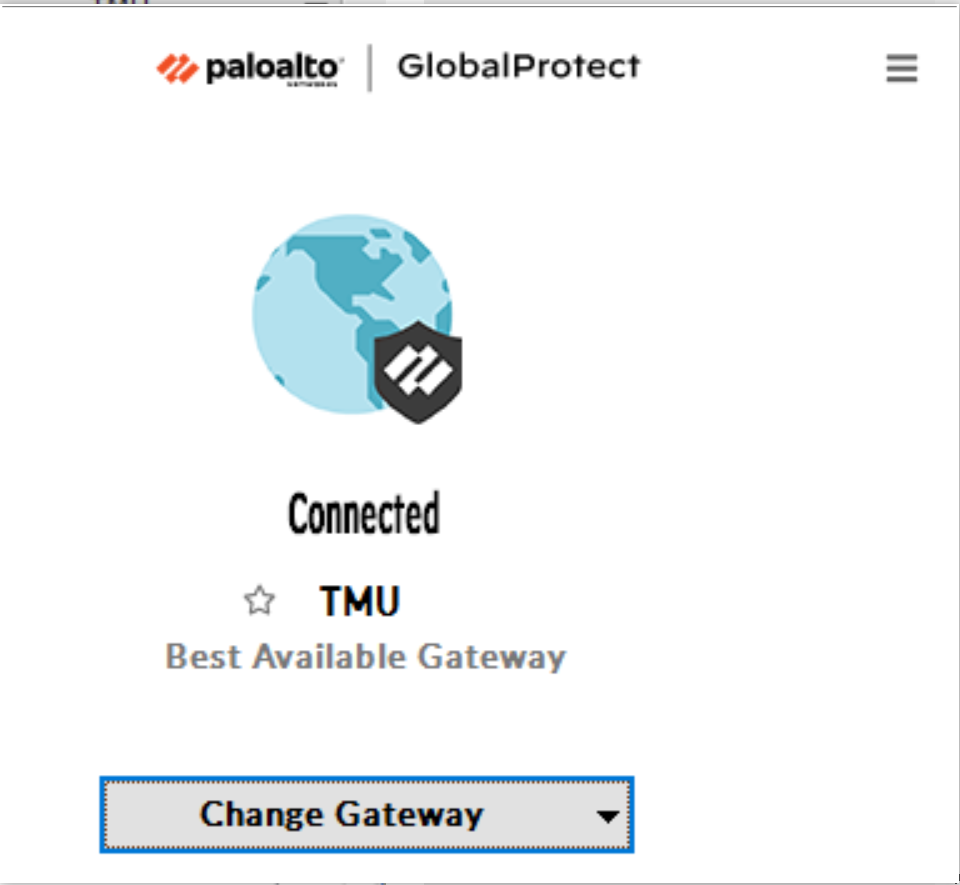
5. A Global Protect Connected window displays when connection is made. You can now access sites that require VPN.
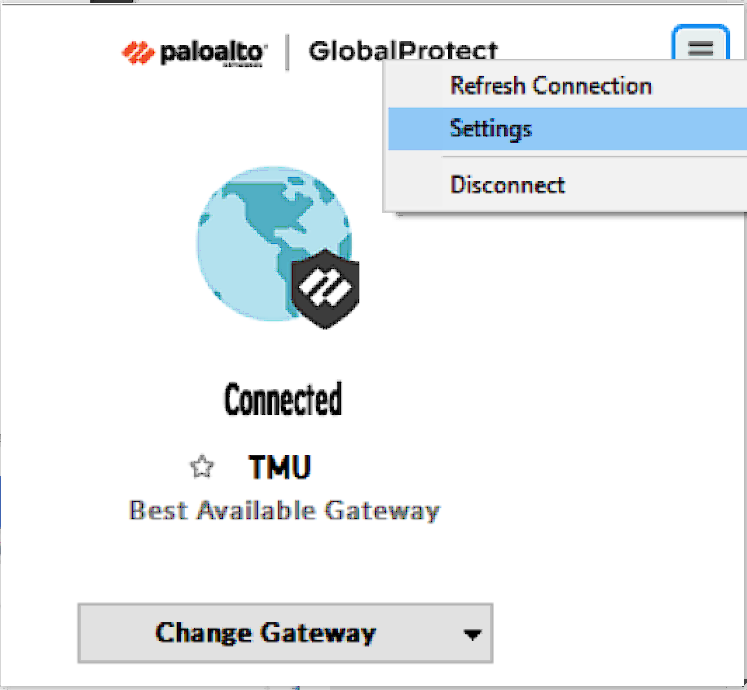
6. You can show your VPN settings by selecting "Settings" from the dropdown menu after selecting the setting gear at the top-right corner.
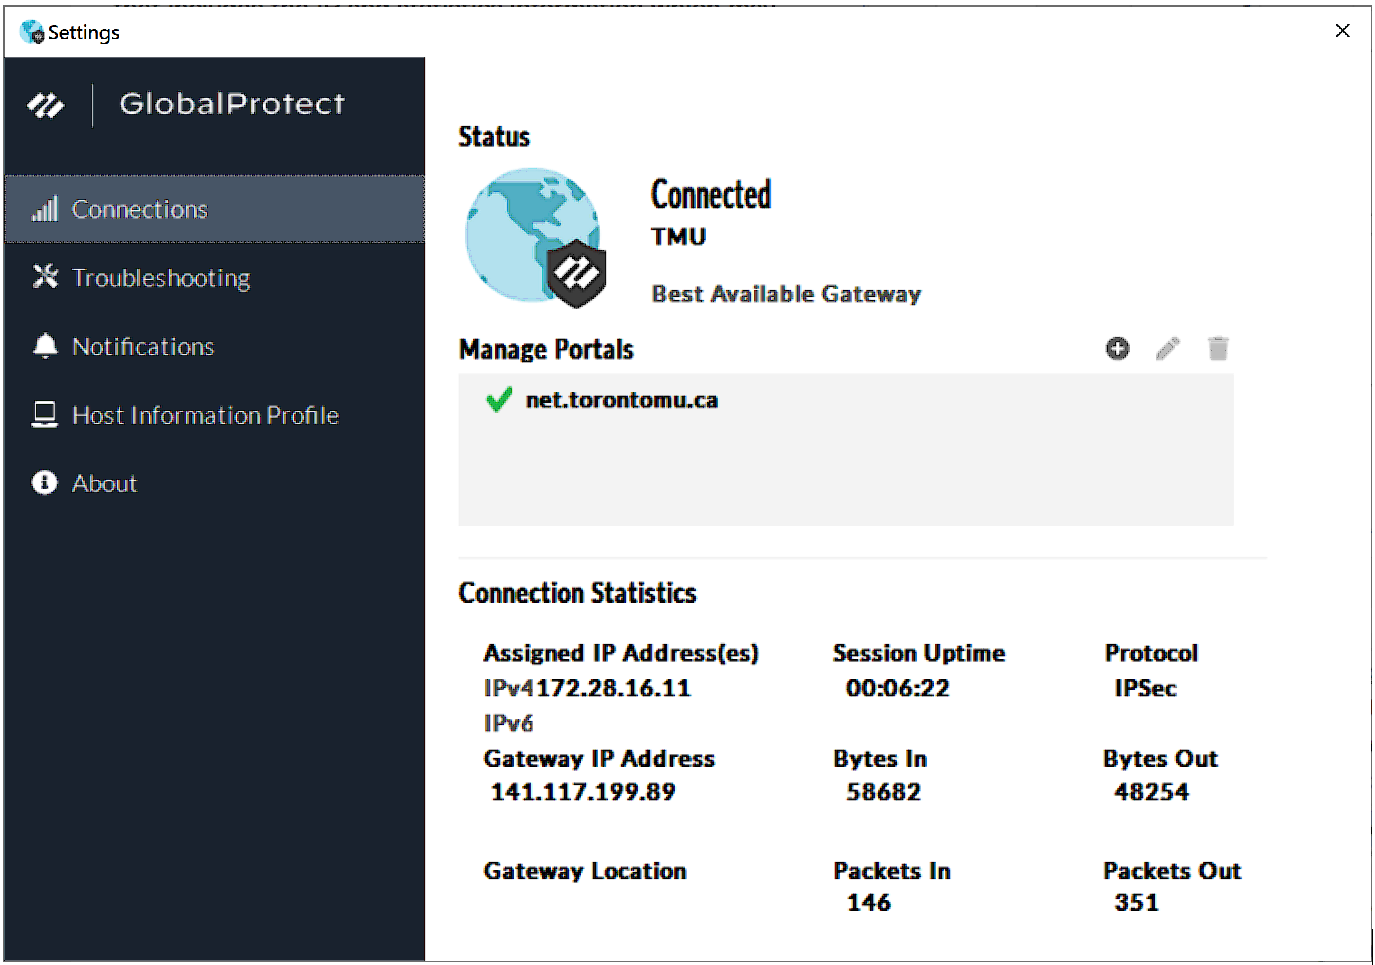
7. A detailed view is provided that includes the IP and statistics information which may differ from your instance.
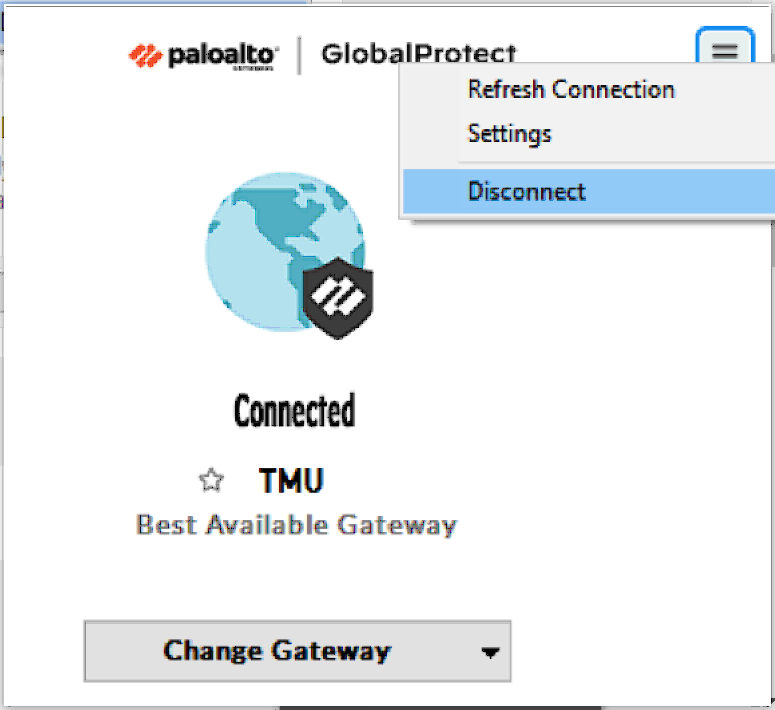
8. When you are finished using GlobalProtect, select on the GlobalProtect icon found on your taskbar. Next, select on the setting gear at the top-right of the screen. Select "Disconnect". This will end your connection to VPN.
9. You can now delete from your desktop the GlobalProtect.msi or GlobalProtect64.msi file.
Remove old VPN, GlobalProtect
If you need to remove an old version of GlobalProtect, open the Windows Control Panel or Settings panel.
- For Windows 7, select on Programs and Features.
- For Windows 8.x, select on Uninstall A Program.
- For Windows 10, select on Apps.
Select GlobalProtect. Select Uninstall.
Connect and Deactivate VPN Access
2. At TMU Login screen enter your my.torontomu username and password. Select Log in.
3. Next, you will be asked for your Two-Factor Verification Code. You can select the checkbox to trust this browser for 30 days, so that you will not be prompted during that time period.
4. A Global Protect Connected window displays when connection is made. You can now access sites that require VPN.
1. Select on the GlobalProtect icon found on your taskbar. Select on the settings gear found at the top right of the GlobalProtect screen and select Disable. This will end your connection to VPN.
FAQ
The VPN status icon, that displays on the taskbar, at the bottom right of the screen, will indicate the current connection state:
 GlobalProtect is connected successfully.
  GlobalProtect is not connected, either because authentication failed or you chose to deactivate your connection.
Remove old VPN, GlobalProtect
If you need to remove an old version of GlobalProtect, open the Windows Control Panel or Settings panel.
- For Windows 7, select on Programs and Features.
- For Windows 8.x, select on Uninstall A Program.
- For Windows 10, select on Apps.
Select GlobalProtect. Select Uninstall.
If your computer is a TMU computer and supported by CCS, please contact the CCS Help Desk at help@torontomu.ca or extension 556806. Otherwise, you must contact the person who has administrator rights on the computer.
This may be caused by entering an incorrect or invalid my.torontomu username, password or verification code. Make sure you are entering your my.torontomu username and password. Remember that usernames and passwords are case-sensitive. If you are able to log on http://my.torontomu.ca using your my.torontomu username and password, the problem may be your two-factor authentication setup. Try resetting your two-factor authentication by revoking your two-factor authentication and then reactivating two-factor authentication.
Follow the Deactivate GlobalProtect instructions.
1. Select on the GlobalProtect icon found on your taskbar. Select Enable.

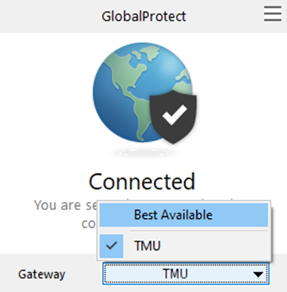
If you are connecting from an Administrative network, not Academic or from off campus or TMU, and require full VPN to access your application please do the following:
1. Select on the GlobalProtect icon found on your taskbar. Next select on the Gateway dropdown selection and choose TMU. You will now have full VPN access.
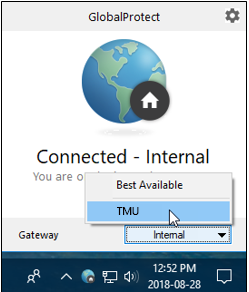
2. When you no longer need access to your application that required full VPN, you can disconnect. Select on the GlobalProtect icon found on your taskbar. Next select on the Gateway dropdown selection and choose Best Available.
Find the GlobalProtect icon in the taskbar. Select the Settings gear at the top right of the screen and select About.


GlobalProtect is preset to check if there are new versions available. Once you have installed GlobalProtect and establish a VPN connection, the software will download the new version and put it in a queue. It will install by itself. You may see a message, "GlobalProtect agent upgrade is in progress". Please wait, application will restart once the upgrade is complete."
If the information here did not help to resolve your problem, you can contact the CCS Help Desk at help@torontomu.ca. Please include details of:
- Your operating system version, e.g. Windows 7 Professional with SP1, Mac OS X 10.10.2 etc. Your GlobalProtect Client version
- Your ISP (Internet Service Provider)
- Your TMU email address
Important Note
TMU is taking the issue of security very seriously. It is imperative that you disconnect your VPN session when you are finish with accessing any of the TMU systems or when your computer will be left unattended and unsecured for some period of time during the day.
Leaving your active VPN session open and unattended provides others with the opportunity for message forgery and other misuse, attributing them to you and creating an embarrassment to you and possibly compromising the integrity of TMU. This is especially important for people who share computers or have their computer located in a public area.
Some basic safeguards which can be used to aid data security are:
- Disconnect your VPN session and logout from your PC during periods of absence. (e.g. coffee break, lunch, meetings etc.)
- Lock your office or room during periods of absence during normal working hours.
- Always use a screen saver password and a computer power-on password.