How to Enrol (With and Without Validation)
This tutorial is for Continuing Education students.
For all other student tutorials, please refer to the main Academics page.
This page includes a tutorial for enrolling with and without validation. Select the tab that applies to you for details.
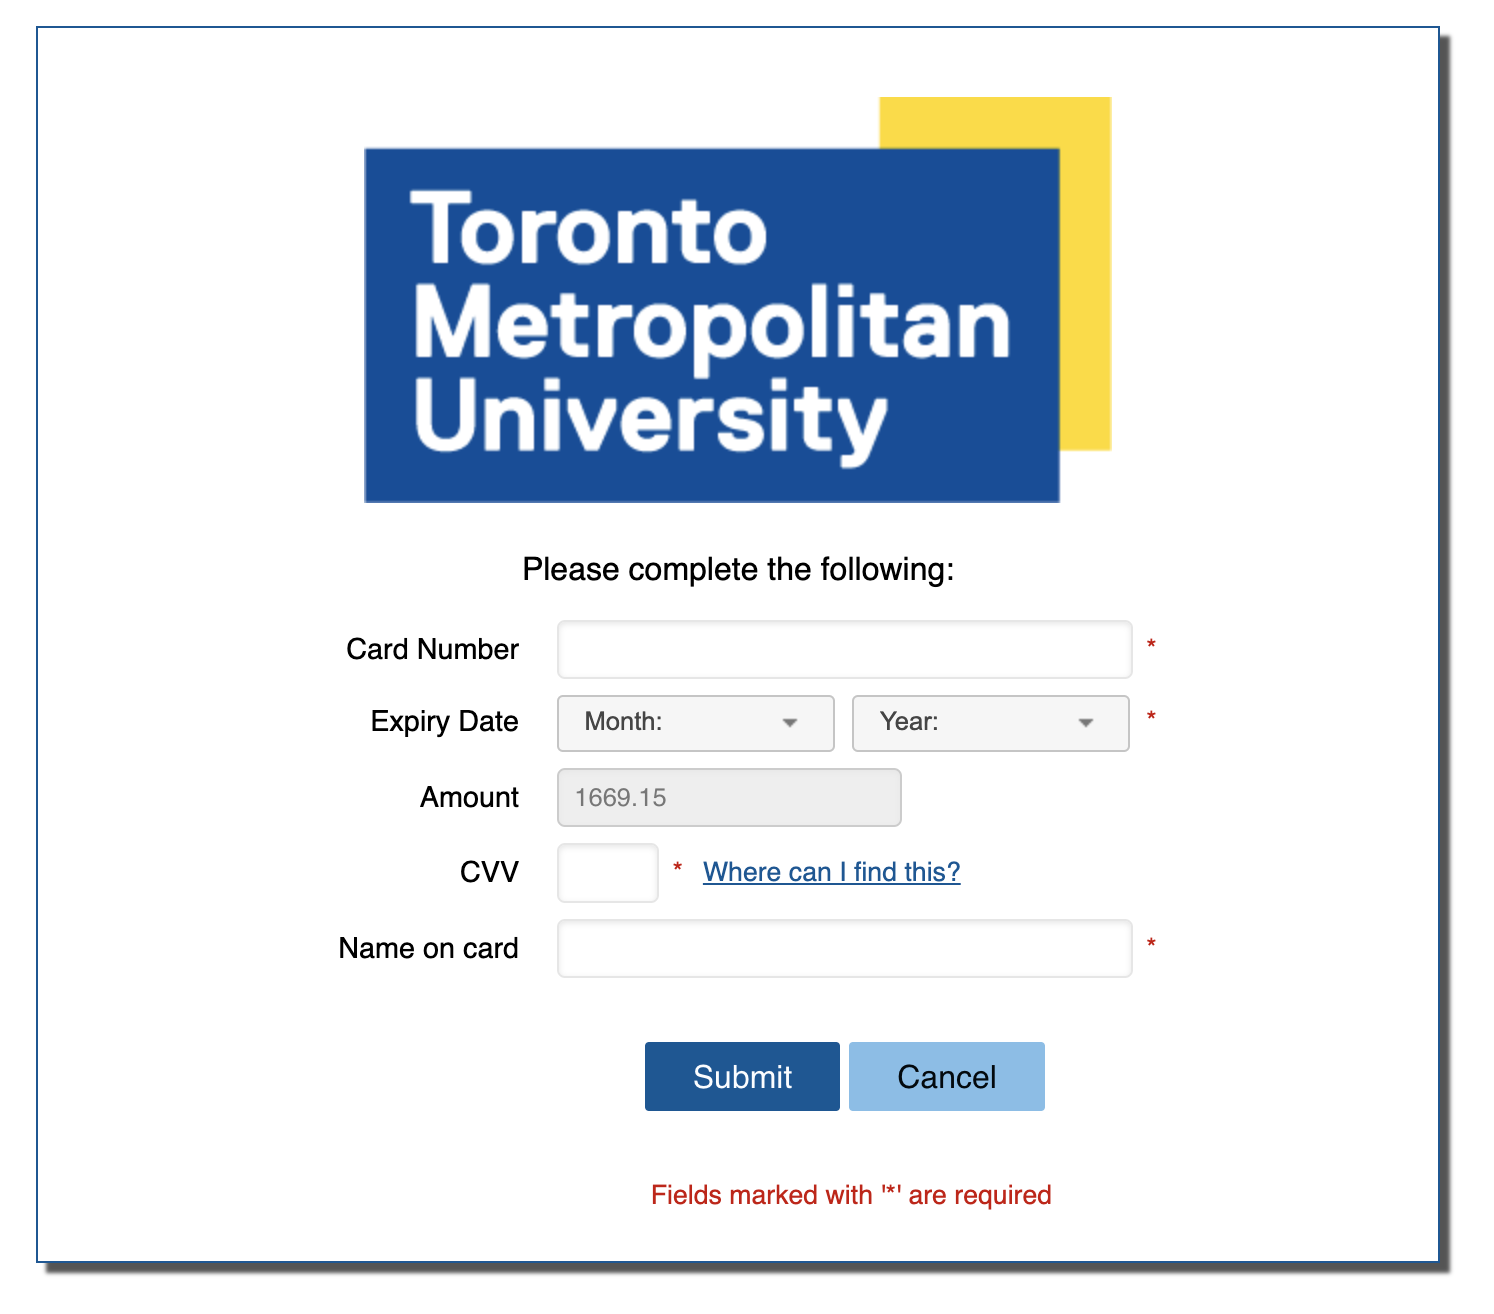
Note that when enrolling, Continuing Education students must pay all applicable course fees. The last step in the enrolment process is for you to pay these fees. Once payment is made, you will be enrolled in the course.
Make sure you have your credit card handy before you start!
When you have finished building your class schedule and your Shopping Cart contains all the classes you want to enrol in, you are ready to do a validation. This ensures that when you go to enrol in these classes, you will not encounter any problems.
Some of the things that validation checks are:
- Is there a seat available in the class?
- Does the class schedule conflict with another class that you have already enrolled in?
- Have you met the requirements for the class?
- Is there a hold on your account?
If a class does not validate, you can delete it from your Shopping Cart and add another one. You continue this process until all your selected classes validate successfully.
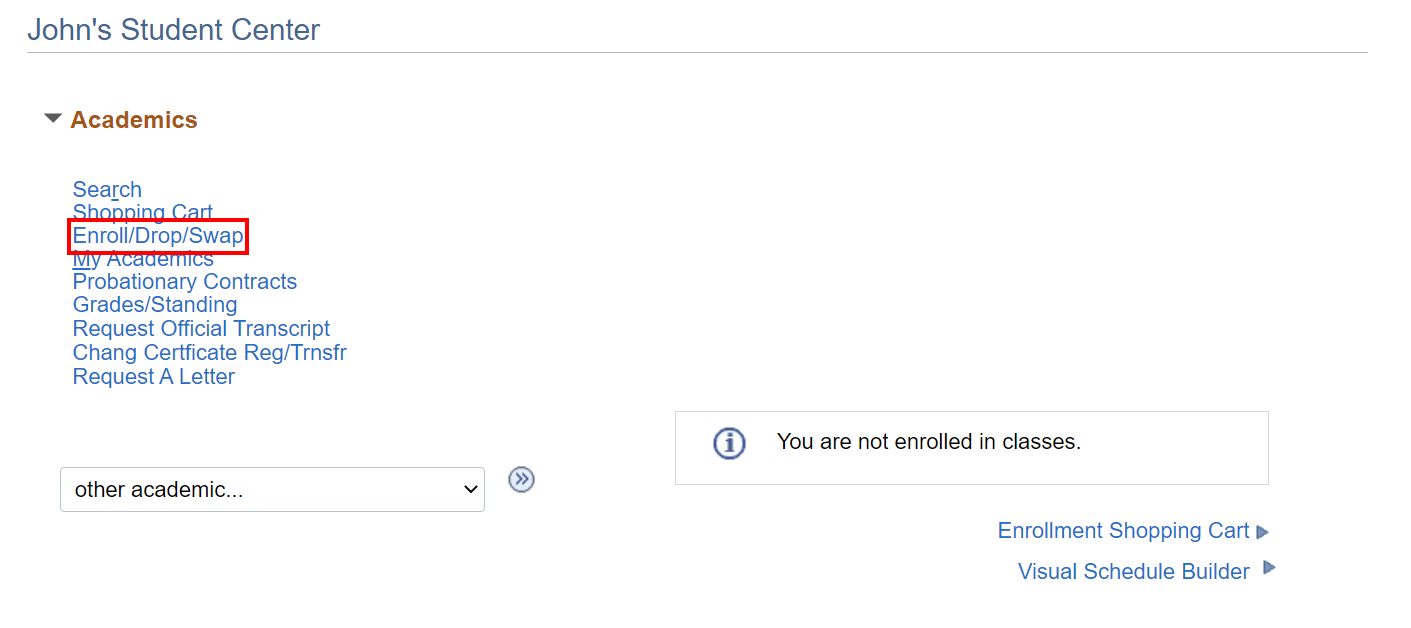
You can enrol in classes without validation using the Enrol/Drop/Swap link in the Academics section or your home page.
-
Click the Enrol/Drop/Swap link.
-
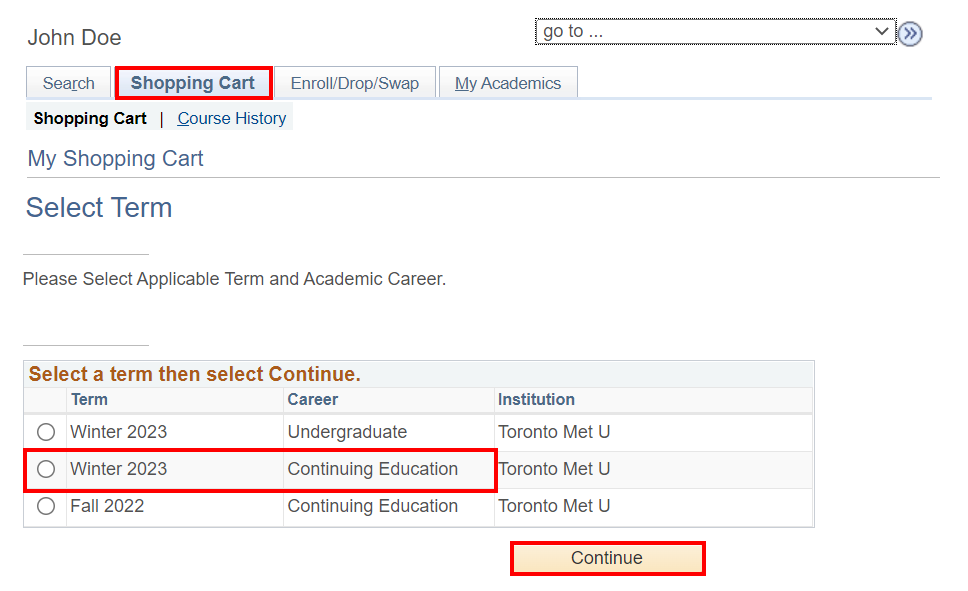
Click the Shopping Cart tab. Select the appropriate term and click Continue.
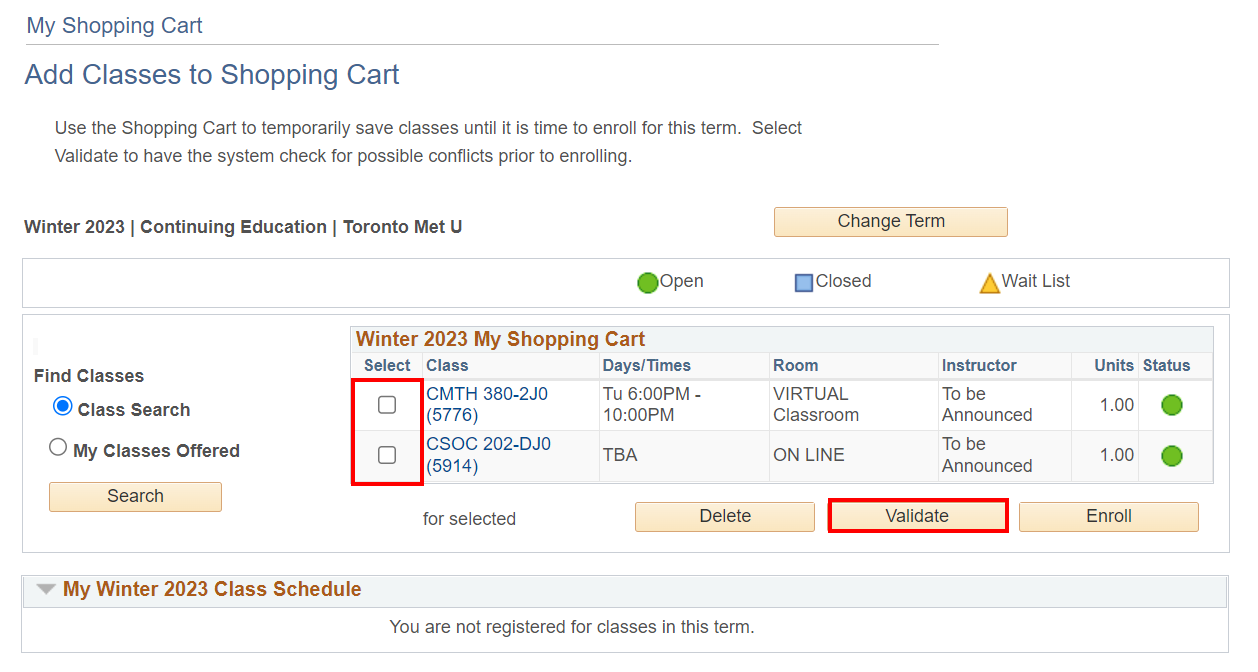
This shows the classes that are already in your Shopping Cart. Your current class schedule is shown at the bottom of this page.
To add more classes to the Shopping Cart, click the Search button. See the How to Search for Classes tutorial for the steps.
To delete classes, click the checkboxes beside the classes to be deleted and then click the Delete button.
-
Click the check-box beside the classes you want to validate. Click Validate.
-
The selected classes are evaluated and a status for each class displays along with a message describing the status.

Validation is like a "test-drive" for enrolment. You are not actually enrolled in the selected classes at this point.
There are two types of messages that you might receive from validation:
Message Status OK to Add - You can enrol in the class with no problems Error - A potential problem has been found that could stop you from enrolling in a class. If this occurs, you can select another class and try again. or If you have a Hold on your academic record, this needs to be addressed before proceeding with any further enrolment.
The (
 ) Results Help link will help you interpret some of the messages that you may encounter during validation.
Once you have finished building your class schedule and all your selected classes validate, you can proceed to enrol in them.
-
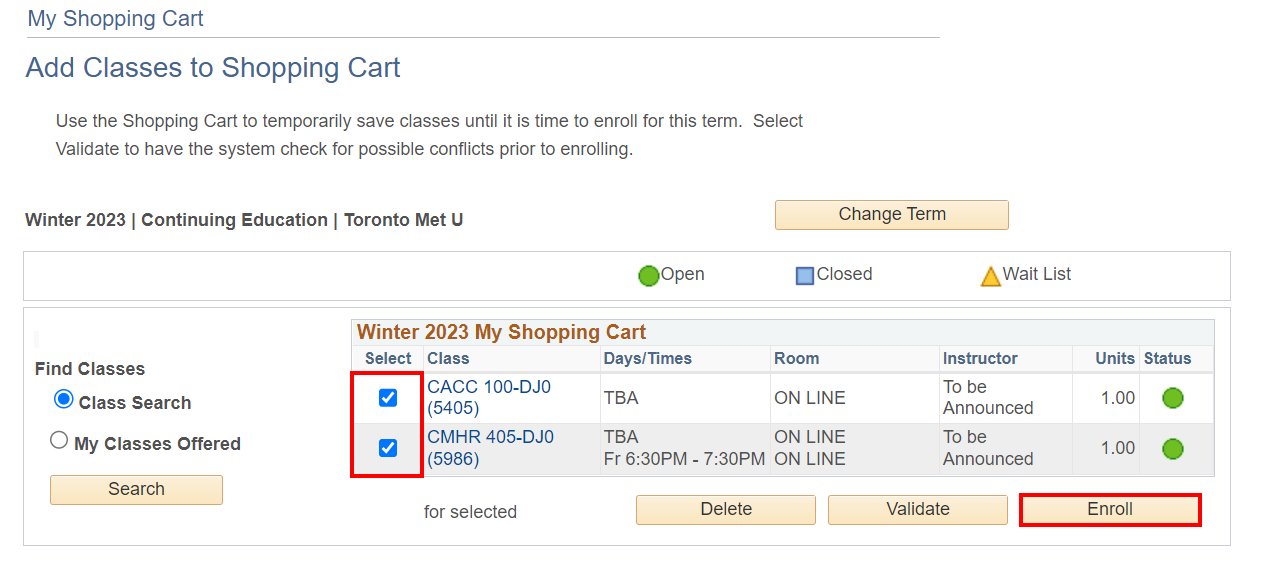
Click Shopping Cart. Click the checkboxes beside the classes you want to enrol in, then click Enroll.
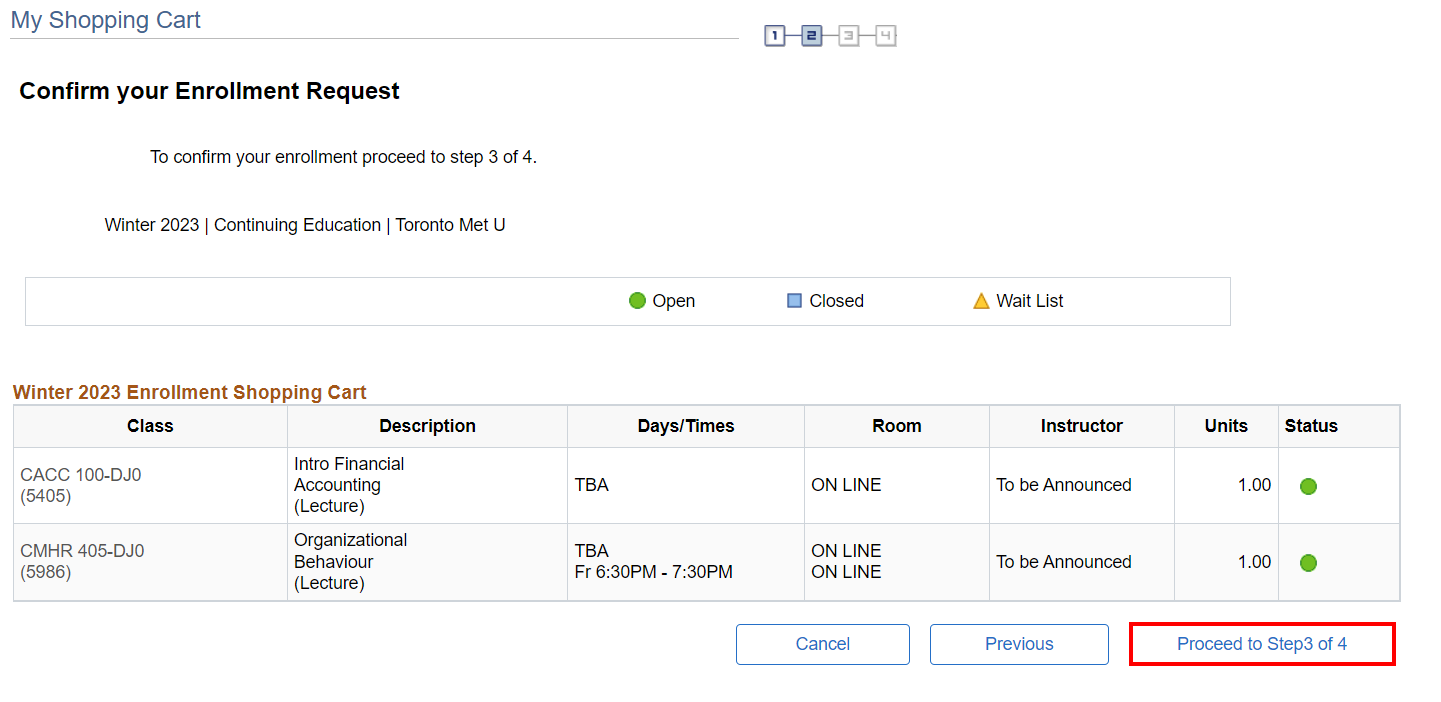
This is where you confirm that you have selected all the right classes for enrolment. To make changes, click the Previous button at the bottom of the page.

-
Confirm that you have selected the correct classes for enrolment. Then click Proceed to Step 3 of 4.

Your submission has been evaluated and the result is shown in the Message column. If you validated all your classes, enrolment should be problem-free!
For help interpreting some of the resulting enrolment messages, click the (
) Results Help link.
Multi-Term Courses
Some courses span multiple terms. For example, CBLG10A/B is a multi-term course where:
- Part A – is taught in the first term
- Part B – is taught in the subsequent term
If you selected a multi-term course, you are enrolled in a class for Part A. You will automatically be enrolled in the class for Part B of the same course in the subsequent term.
Enrolment in Part B is not done immediately, but will occur prior to the opening of enrolment for the subsequent term.
Click the My Class Schedule button to see the effects of the enrolment on your class schedule.
-
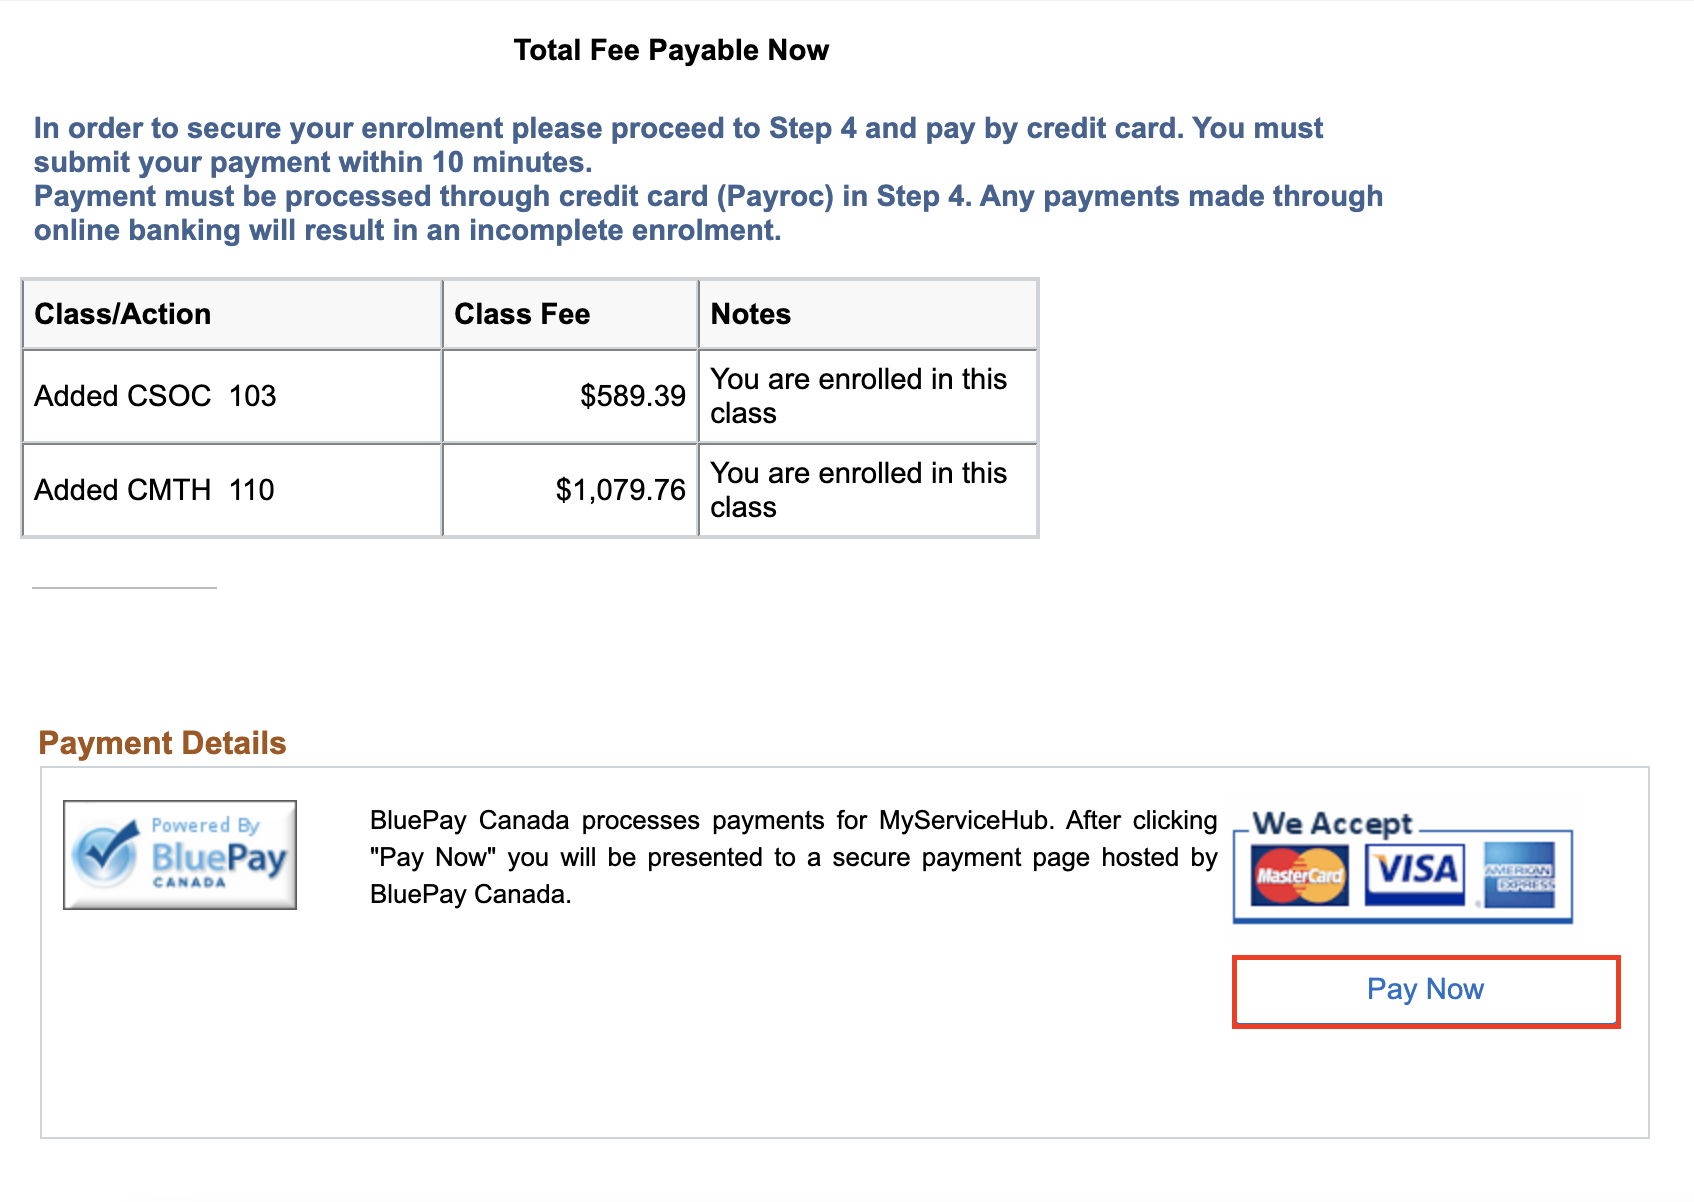
Click Pay Now to complete your enrolment. Enter your credit card details in the pop-up window.

When you enrol in a class without validation, you enrol in your classes directly without validating the schedule and requisites beforehand.
This can be a long tedious process. You might want to consider enrolling with validation instead. This option lets you build your class schedule, check that the classes fit your schedule and that your requirements are met before actually submitting your final request to enrol in the classes. See the How to Enrol With Validation tutorial above for details.
You can enrol in classes without validation using the Enrol/Swap/Drop link in the Academics section or your home page.
-
Click the Enrol/Drop/Swap link.

-
This shows the classes that are already in your Shopping Cart. Your current class schedule is shown at the bottom of this page.

To add more classes to the Shopping Cart, click the Class Search button. See the How to Search for Classes tutorial for the steps.
-
Select the classes you wish to enrol in, then click on the Enroll button.
At this point you must confirm that you have selected all the right classes for enrolment. To make changes, click the Previous button at the bottom of the page.
-
Confirm that you have selected the correct classes for enrolment. Then click on the Proceed to Step 3 of 4 button.
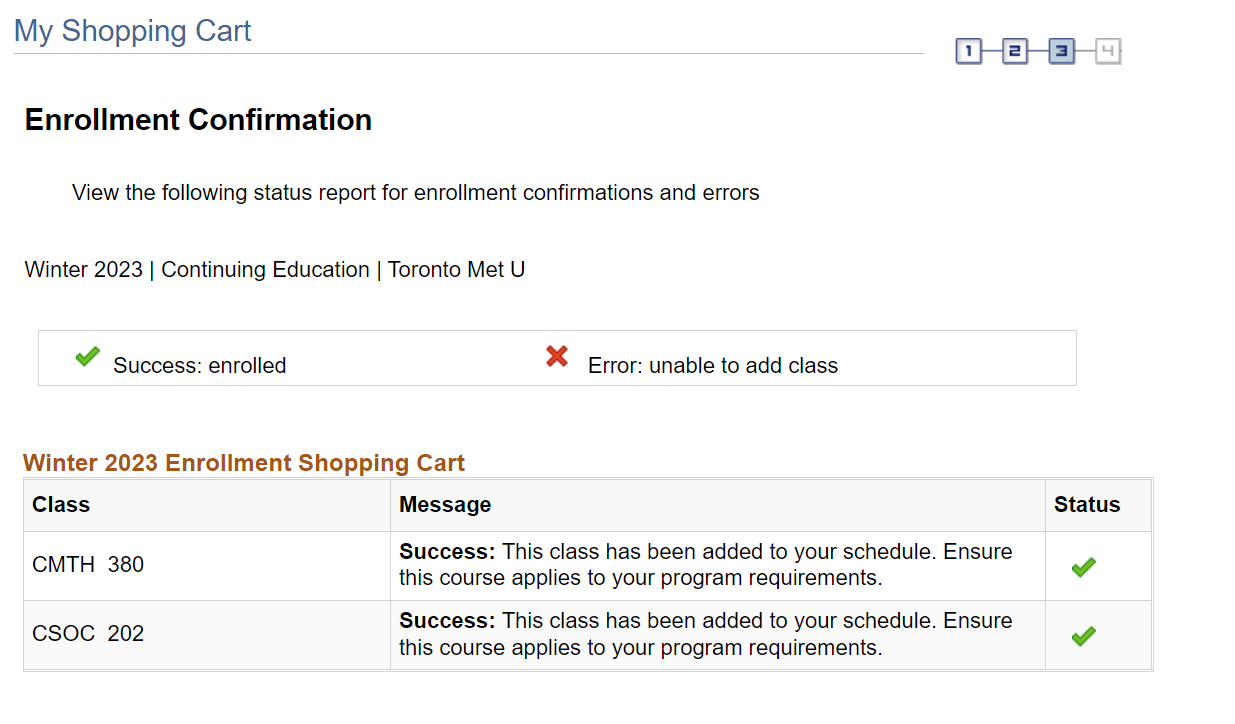
Your submission has been evaluated and the result is shown in the Message column.
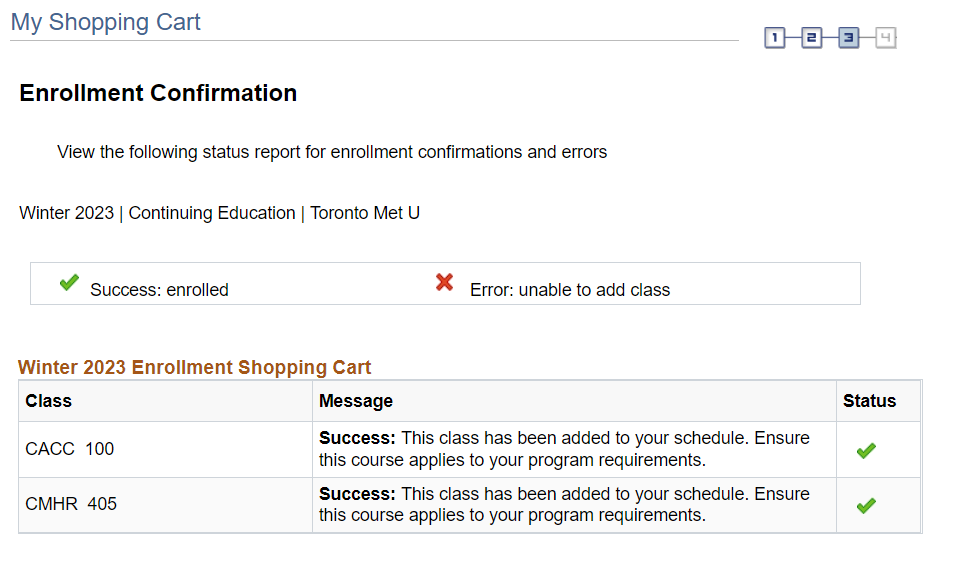
There are two types of messages that you might receive:
Message Status Success - You have enrolled in the class successfully. You now have ten minutes to make the payment. Error - A potential problem has been found that has stopped you from enrolling in the class or The (
) Results Help link will help you interpret some of the messages that you may encounter.If errors are encountered, you may have to add, drop or swap classes and try enrolling again. To do this click the Add, Drop or Swap tab. See the How to Drop a Class and How to Swap a Class tutorials for details.
Multi-Term Courses
Some courses span multiple terms. For example, CBLG10A/B is a multi-term course where:
- Part A – is taught in the first term
- Part B – is taught in the subsequent term
If you selected a multi-term course, you are enrolled in a class for Part A. You will automatically be enrolled in the class for Part B of the same course in the subsequent term.
Enrolment in Part B is not done immediately, but will occur prior to the opening of enrolment for the subsequent term.
Click the My Class Schedule button to see the effects of the enrolment on your class schedule.
-
Click Pay Now and enter your credit card details in the pop-up window to secure your enrolment.

![]()
We're part of the Office of the Vice-Provost, Students.
Your university experience is made up of many opportunities to learn, grow and thrive — academically, personally and professionally. From orientation to graduation, we’re all yours.