How to Enrol a Student in Classes
The following content is for administrative staff using MyServiceHub.
If you are a student seeking help with your MyServiceHub account, please visit the Student Tutorials section.
If a student is having problems enrolling in a class, you can use the Quick Enrolment link on the Academic tab of the Admin Center to address some of the issues.
Student's may come to you with questions such as:
- I can't enrol in a class because my prerequisites are not met
- I have a class conflict
- There is a hold on my account
You can attempt to enrol the student in the class and may be able to override errors that would allow for successful enrolment.
If you look in the student's Shopping Cart before you start, you may be able to view the student’s unsuccessful attempts to enrol.
You can enrol a student in a class from the Quick Enrolment link on the Admin Center's Academics tab.
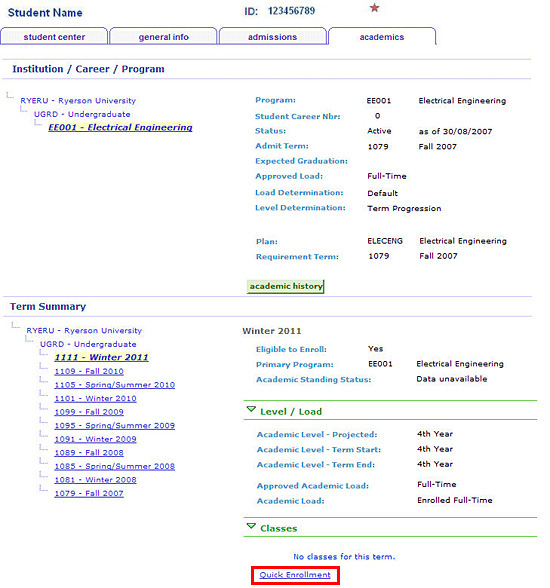
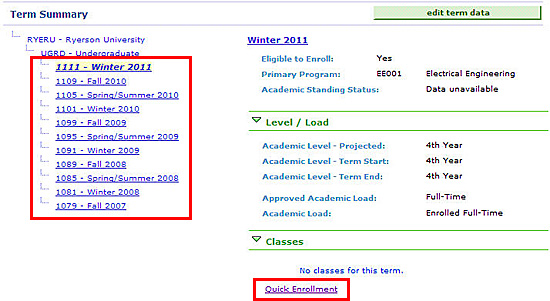
- Click the check-box beside the applicable Term.
- Scroll down and click the Quick Enrolment link.
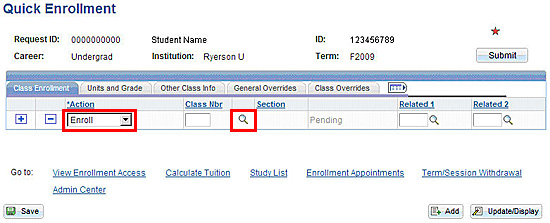
This is the main screen used for enrolment, dropping and swapping of classes. There are two ways you can do this:
- One class at a time – details of the class are entered and submitted for processing.
- Multiple classes – details for several classes are entered and then submitted for processing all at the same time.
The first time you come to this page there will be one row available with a default action of Enrol. If you want to enter more rows, click  to add a new class-entry line.
- Select Enrol from the Action drop-down box.
- Click
 beside the Course Nbr box.
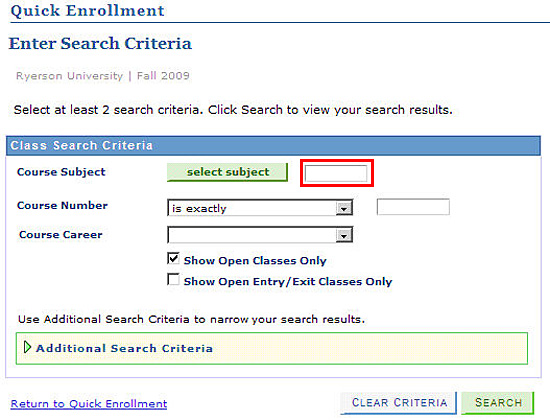
This is where you enter your search criteria. You can do a simple search by selecting a Course Subject, Course Number and Course Type.
For a more advanced search, click the Additional Search Criteria link. You can then search on items like class schedule, location, instructor, etc.
- Enter the three or four-letter code for the Course Subject from the academic calendar. For example:
- ENG – for Undergrad English courses
- CENG – for Continuing Education English courses
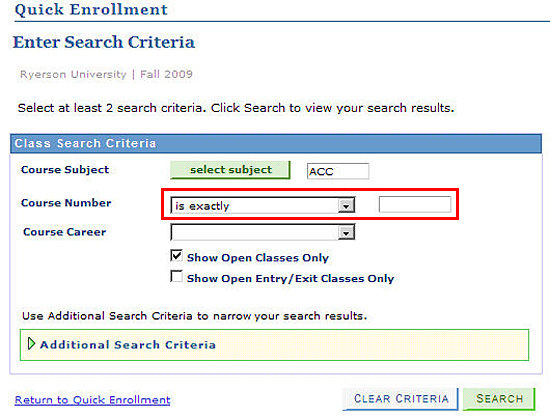
- Select a filter for the Course Number from the drop-down and enter a corresponding number.
If you want to include all classes including those classes closed for enrolment in your search, click the checkbox beside Show Open Classes Only to de-select this option.
- Click Search.
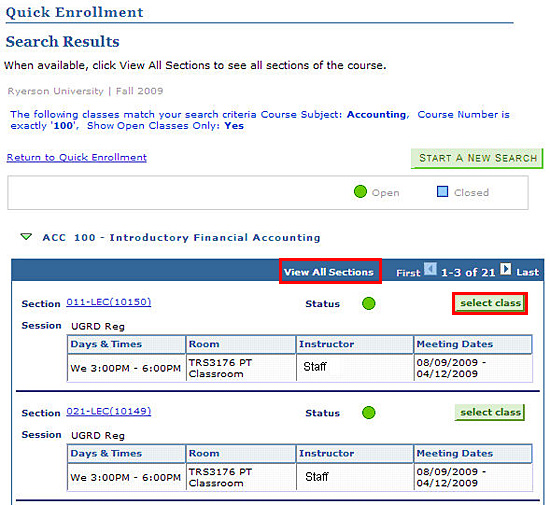
This shows all the classes that meet your search criteria. You can browse the list and select the one that best meets your needs.
If the list of classes is long, only a partial list displays. Click View All Sections to see the whole list.
- Click select class beside the class you wish to choose.
- Click

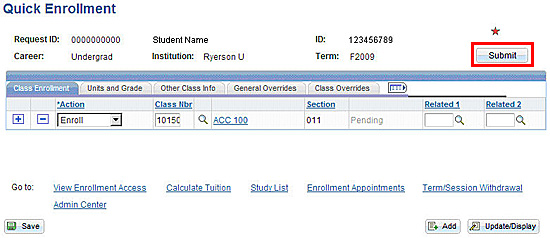
Important: The Save button at the bottom of the page does not perform the enrolment. It only saves the enrolment request.

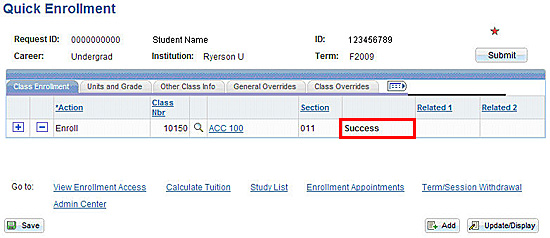
Your submission is evaluated and assigned a status that is shown in the column next to Section. Possible values for status are:
- Success: the student was enrolled in the class with no errors.
- Messages: the student was enrolled in the class but warning messages about possible problems were generated. Click the Messages link to see them.
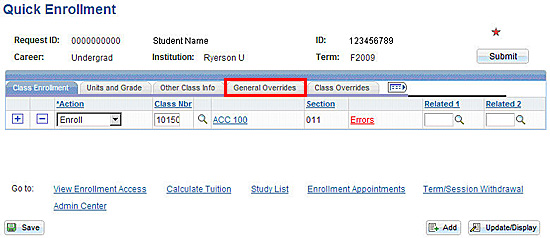
- Errors: errors occurred and the student was not enrolled in the class. Click the Errors link to see the error messages. You may be able to deal with the error with one of the following methods:
To enrol in another class, click to add a new row.
You can override an enrolment requirement from the Quick Enrolment General Overrides tab.
Overrides

The overrides that you might use are:
- Appointment: to allow the student to enrol outside of the student's valid enrolment appointment.
- Time Conflict: to override a student's time conflict for a selected class.
- Requisites: to override the pre-requisite, co-requisite or anti-requisite for the class.
Your security may let you select more overrides than described above.
- For the class with the errors, click the check-boxes below the error to be overridden.
- Click
Once the override is submitted, you return to the Class Enrolment tab where the status of action after the override shows.
Your security may permit you to override class permissions. You would do this by clicking the Class Overrides tab and proceeding as described above.
If you get another error, you may need to select another override and try again until you successfully enrol in the class.
If you are still not able to enrol the student in the class, send an email to adminsupport@torontomu.ca to ask for assistance.
![]()
We're part of the Office of the Vice-Provost, Students.
Your university experience is made up of many opportunities to learn, grow and thrive — academically, personally and professionally. From orientation to graduation, we’re all yours.