How to Create a Class Block
If you want to to enrol, drop or swap one or more students into multiple classes, you can create a Class Block.
For example:
If you need to drop a student from three classes, you can create a Class Block containing the three classes and drop the student from the block of classes with one enrolment request.
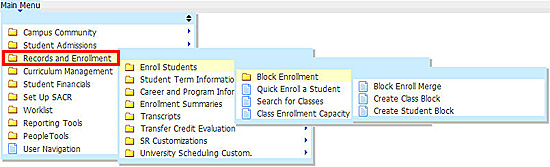
You can create a class block from Records and Enrolment on the Main Menu.
-
On the menu bar, click Main Menu and then click the following:
- Records and Enrolment
- Enrol Students
- Block Enrolment
- Create Class Block
-
Click Add a New Value tab.
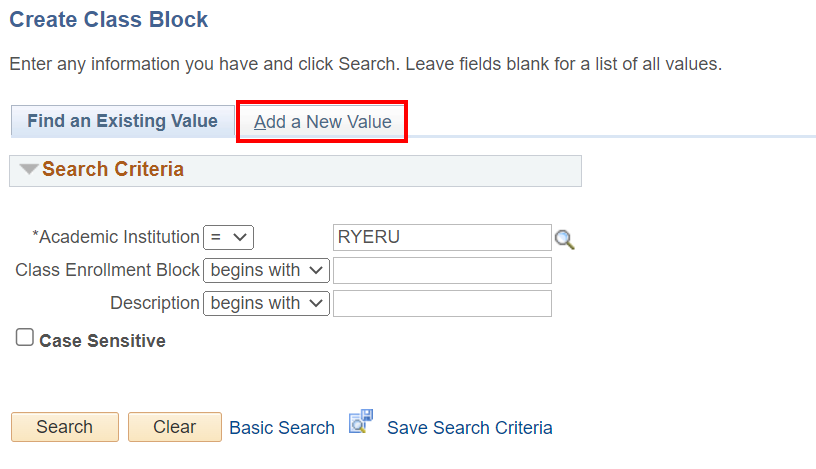
The first thing you must do is give your Class Block an identifier that you can use to call it up at a later time. You can use up to five letters, five numbers or any combination of both for this identifier.
-
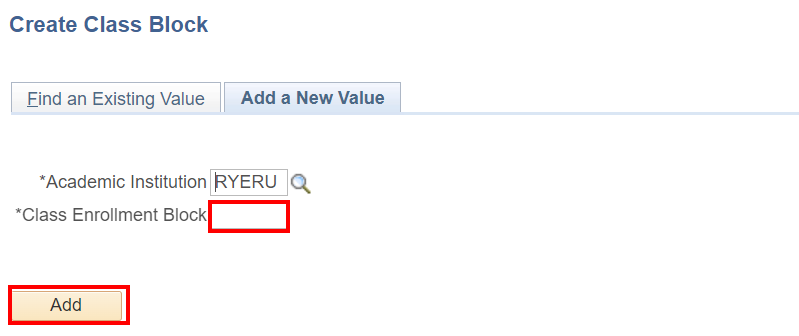
Enter an identifier for the Class Enrolment Block.
-
Click
 .
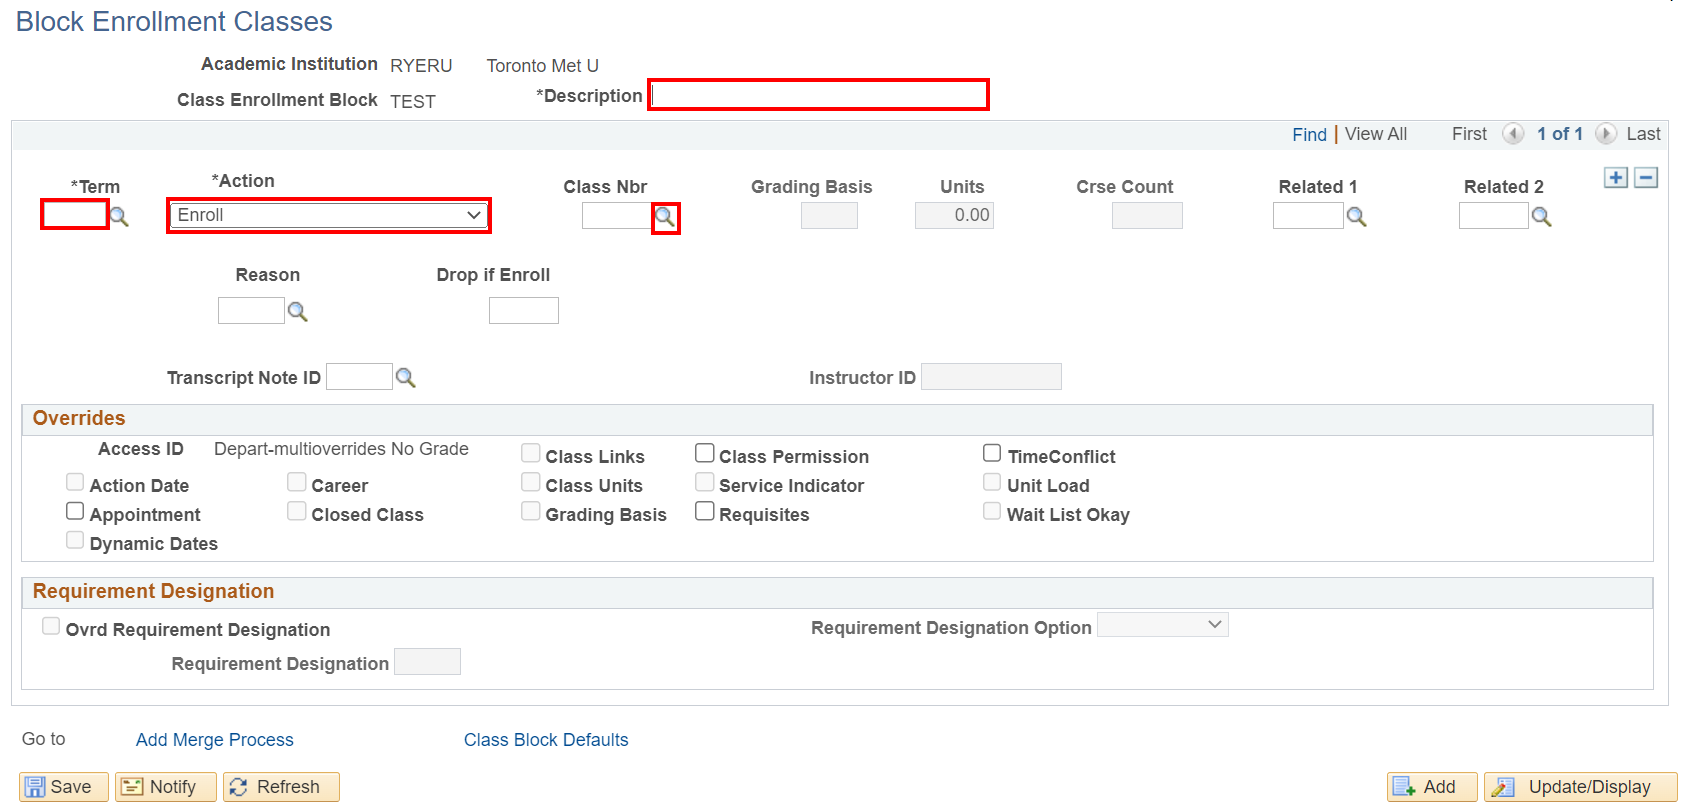
.You must now enter a Description of your Student Block to help you further identify the block if you call it up at a later time.
-
Enter a description in the Description box.
-
Enter the Term.
-
Select an Action from the drop-down box.
-
Click
 to search for the Class Nbr.
 -
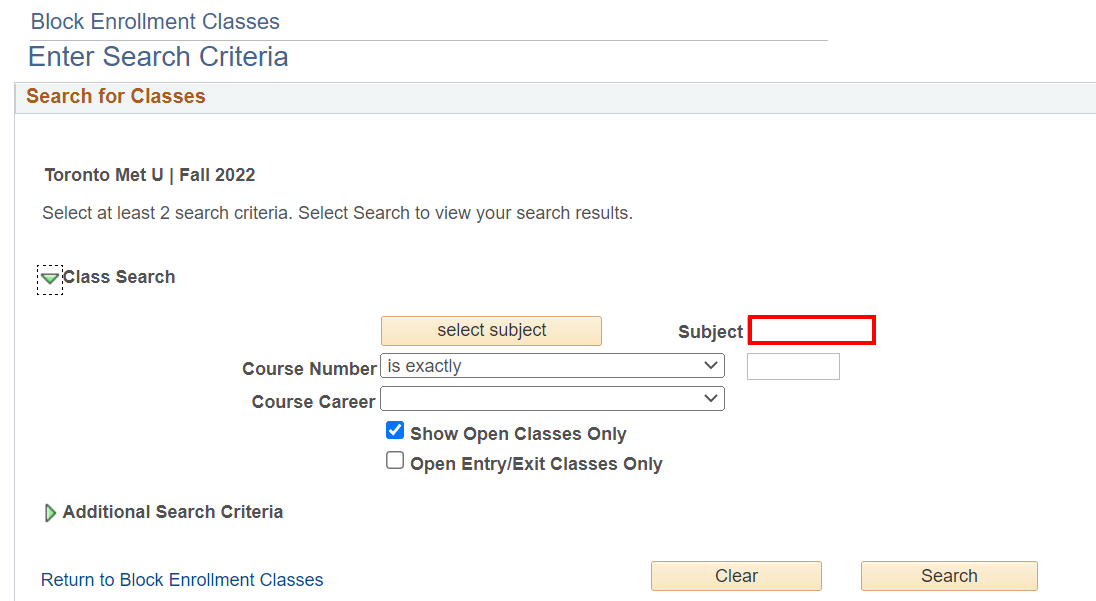
Enter the three or four-letter code for the Course Subject from the academic calendar. For example:
- ENG – for Undergrad English courses
- CENG – for Continuing Education English courses
-
Enter the Course Number.
-
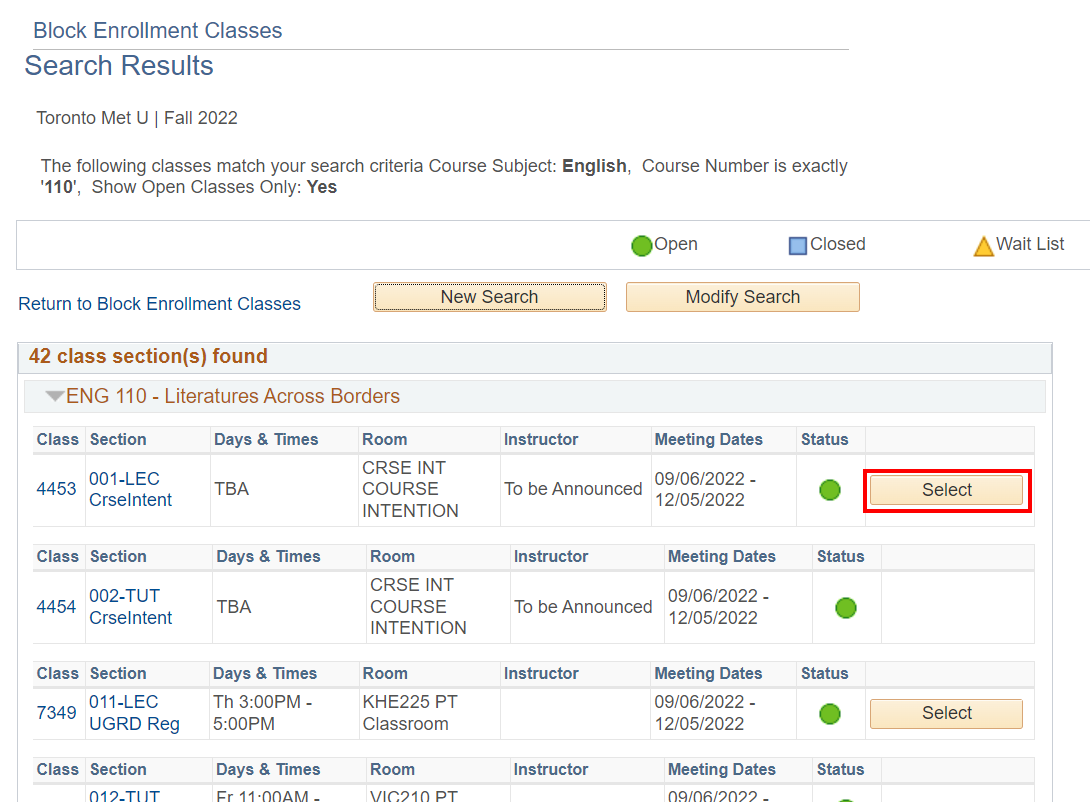
Click Search.
-
Click Select beside the class you wish to choose.
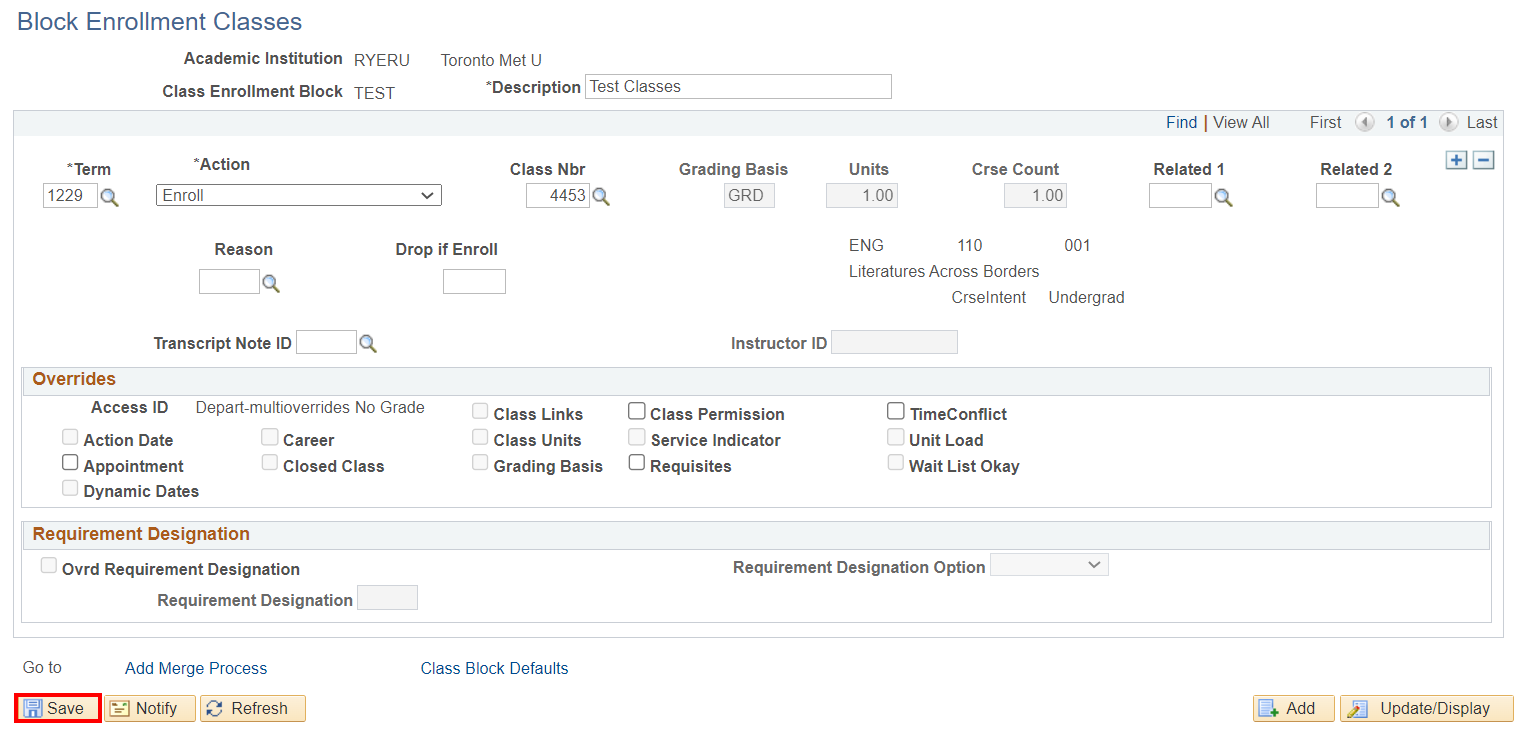
You may need to override some of the requirements to get this enrolment request to complete successfully with no errors. Your security level will determine which overrides you can select.
-
Select the Overrides that you want to apply.
You can add another class by clicking
 in the top right-hand corner. This will add a new row where you can add a class.
To view all the classes and their overrides, click View All.
-
Click
 .
.You can proceed to use the Class Block to enrol, drop or swap one or more students in classes by clicking the Add Merge Process link.
![]()
We're part of the Office of the Vice-Provost, Students.
Your university experience is made up of many opportunities to learn, grow and thrive — academically, personally and professionally. From orientation to graduation, we’re all yours.