Rubrics
A rubric is a type of marking scheme that outlines the criteria for evaluation. Rubrics are usually laid out in a chart or matrix format.
Brightspace has a rubrics tool that aids in providing consistent assessments, with clear feedback. These can be associated with assignments, graded discussion topics and grade items.
A well-made rubric can:
- Standardize and simplify assessment, especially across a grading team
- Be reused (they can be copied and used in multiple course shells)
- Set out expectations and criteria to the students, if the rubric is shared with them prior to the assessment
- Provide grading transparency to the students, if the full results are shared with them
Be consistent! Always attach the rubric to the assessment (assignment, discussion or written response question in a quiz) where applicable and grade all students using the same workflow.
Find Rubrics in the Course Admin. If it isn't there, review how to enable course tools.
For more information on rubrics, read Wikipedia's detailed definition (external link) of academic rubrics, and for advice about designing rubrics for your courses at Toronto Metropolitan University, consider reaching out to the Centre for Excellence in Learning and Teaching.

Brightspace rubrics are structured using groups of evaluation criteria assessed across levels of achievement
Criteria group
- Criteria for assessment (indicated by rows in D2L rubrics)
- Levels of achievement (indicated by columns in D2L rubrics)
Be consistent! Always attach the rubric to the assessment (assignment or discussion) where applicable and grade all students using the same method.
Create a rubric
- Go to the "Rubrics" tool in Course Admin.
- Click New Rubric.
Please note that as you are creating your rubric, all of your changes are auto-saved.
First steps
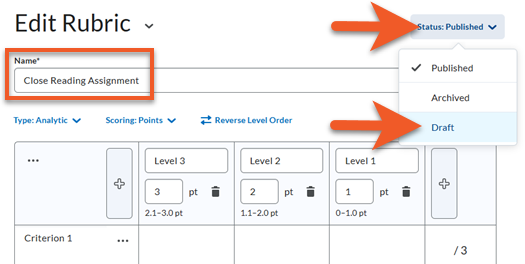
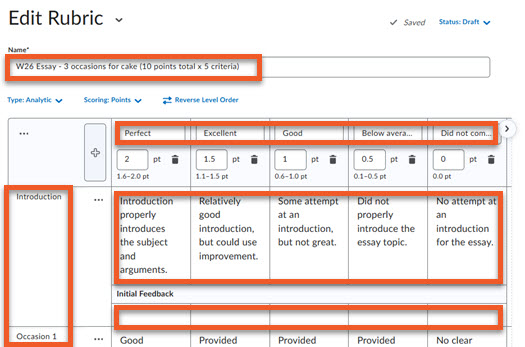
- Give the rubric a name
- Set it to "draft"
By default, all rubrics have a status of "Published". We recommend that you switch this to Draft until you are finished creating the rubric.
This will ensure that you won't accidentally associate the rubric with an assessment and start grading with it when it is not ready, which could cause inaccuracies.

A rubric can be holistic or analytic, depending on the requirements for assessment.
- Select the rubric type from the dropdown menu
Analytic rubrics
Most rubrics are analytic, which means the rubric breaks down achievement requirements into multiple criteria. You assess each criterion separately, resulting in an overall assessment score.
For example, an analytic rubric for assessing essays could have separate criteria for spelling, grammar, and expression. Each criterion can be assessed as poor, good, or excellent, resulting in an overall assessment that adequately evaluates performance
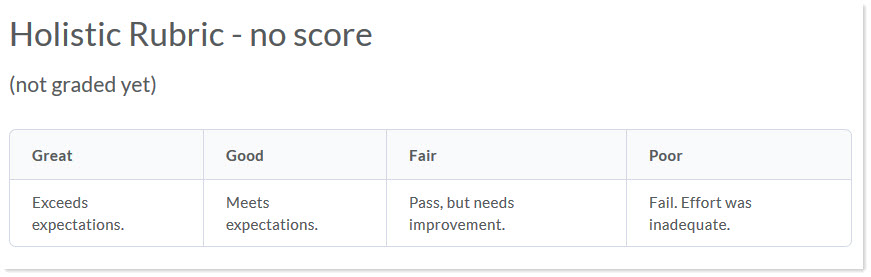
Holistic rubrics
Holistic rubrics do not break performance into separate criteria. Performance is assessed holistically, so that you consider several different criteria, but make only one overall assessment.

There are several ways to score a rubric. You can assess rubrics with textual performance levels such as, "Excellent", or with text and a numeric score such as, "Excellent (5 points)".
- Select the rubric scoring method from the dropdown menu
No Score
Performance levels indicated by text only. For example, three performance levels for a rubric can be "Poor", "Good", and "Excellent". This method does not contribute to a numeric grade for the assessment.
Points
Includes points to assess performance. For example, three performance levels for a rubric can be "Poor (0 points)", "Good (3 points)", and "Excellent (5 points)".

Custom points
This scoring method is only available to analytic rubrics.
The Custom Points scoring method is similar to the Points scoring method, but you can customize the points given for each criterion. For example, if performance levels are "Poor", "Good", and "Excellent", then the criterion "Spelling and Grammar" can be worth 1 points, 2 points, and 3 points for each level, and the criterion "Expression" can be worth 2 points, 4 points, and 6 points, making it worth three times the points of "Spelling and Grammar".
Percentages
The Percentages method is only available to holistic rubrics.
A holistic rubric using Percentages can be automatically assessed based on the score of its associated item (for example, a Grade item).

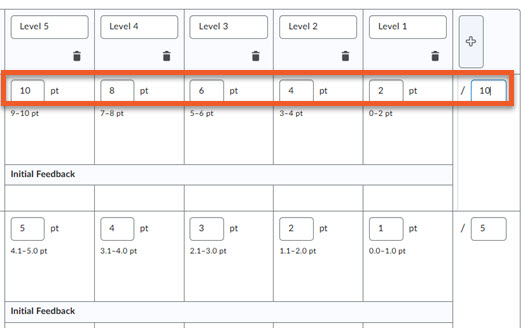
Add and remove levels
Levels are the scores to be awarded, and are indicated by columns in the rubric. Decide how many levels you need in your rubric. You can also select Reverse Level Order to determine whether levels are displayed highest to lowest or lowest to highest, depending on your preference.
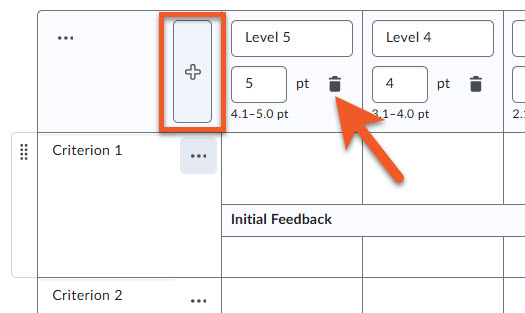
9. To add a level, click on the '+' to the left or right of the levels currently listed. Note that the new level will be added to either the top or bottom of the range, depending on which '+' icon you click on.
There is no way to add a level to the middle of the range (or move a level), so if you need to add a level after you have made some changes, choose the most appropriate end of the range, and then edit as needed.
10. To remove a level, click on the trash can icon for that level.
Level names and score
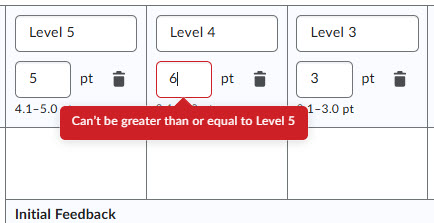
Edit the name of the level or the score by clicking on it and replacing the existing text.
To avoid score conflicts, start by editing the highest level, and work your way to the lowest level.
Note that the total score, located on the far right of each criteria, is automatically updated when you update the score for the highest level.
Criteria
Criteria are the areas being assessed, and are indicated by rows in the rubric. Decide how many criteria you need in your rubric.
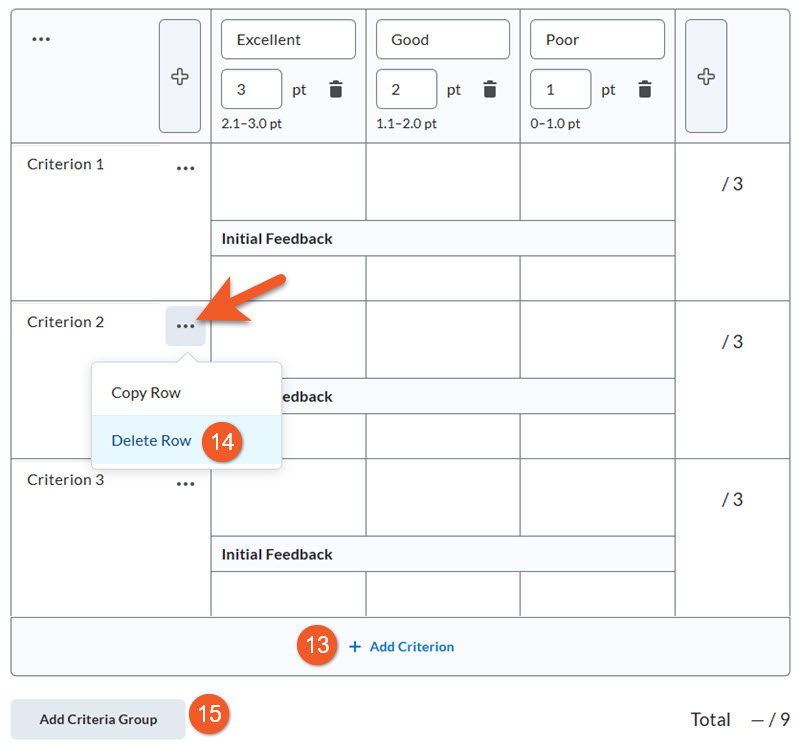
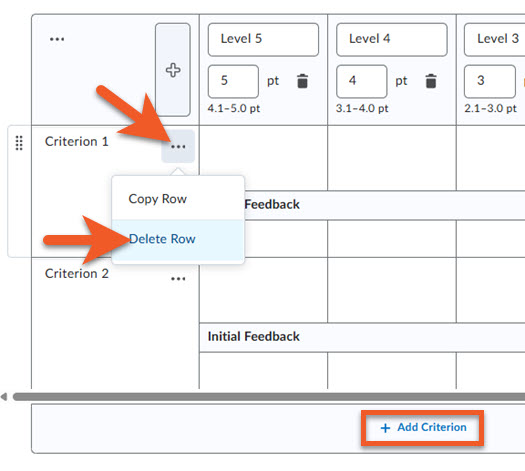
13. To add a criterion, scroll to the bottom of the list of criteria, and click on + Add Criterion. You will notice the new row added to the bottom of the rubric.
14. To remove a criterion, click on the 3 dots [...] next to the criterion label, then click on Delete Row.
A Criteria Group is a way to group a number of criteria together. If you are using Custom Points scoring, this is also a great way to list criteria that have different scores or a different number of levels than other criteria in the rubric.
15. To create a Criteria Group, scroll to the bottom of the list of criteria, and click on the grey Add Criteria Group button. A new criteria group will be created, with one criterion in it. The scores default to the same as above, but you can edit as desired. To add additional criterion, at the bottom of the new group, click on + Add Criterion, as noted above.
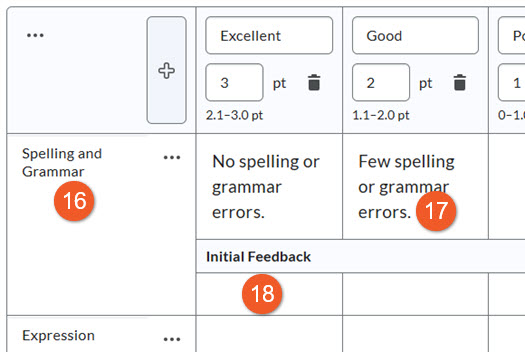
16. Edit the names of the criteria, by clicking on the existing name and typing.
17. (Optional) Edit the detailed description for each level for each criteria by clicking on the box and typing.
Note: Your criteria description can contain up to 500 characters, but when you are grading using the rubric, you will initially only see the first 3 lines of text.
18. (Optional) If you wish, you can also provide standardized feedback for each level/criteria by clicking on the box and typing.
D2L recommends using the feedback field in the assessment to provide personalized feedback instead, as it will display in a way that is easier for students to view. Feedback in the rubric is not copied to the feedback field in the assessment.
There is a basic text editor with some formatting options, including bold, italicize, create bulleted lists, etc. We recommend keeping formatting to a minimum though, to ensure readability.
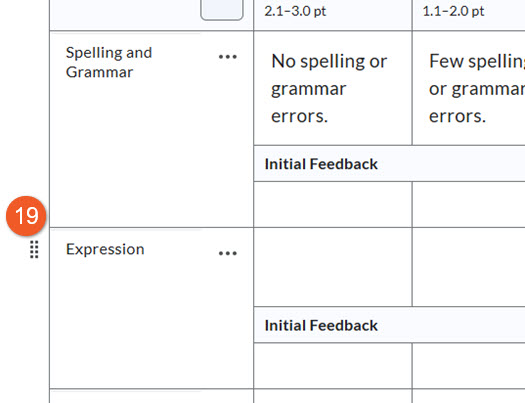
19. If you need to reorder criteria, grab the handle to the left of the row (by holding your mouse button down) and drag up or down. Let go when your mouse is over the desired location.
Tip: This is easiest if you drag an criteria row that is not the very first or very last item (ie. drag the 2nd item to 1st place, rather than dragging the 1st to 2nd place).

Options
Below the rubric, click on Options, to see additional settings for your rubric.
20. Choose the Rubric Visibility setting to choose the conditions under which the student can or cannot see the rubric:
- Rubric is visible to students: The student will see the rubric prior to submitting, which can set expectations. They will also see the rubric after their submission is graded, so they can see how they performed.
- Rubric is hidden from students: Only people with an Instructor, TA, or Grader role in your course shell can see and use the rubric for grading purposes. The student never sees the rubric.
- Rubric is hidden from students until feedback is published: The student only sees the rubric after their submission has been graded, and the feedback has been published, so they can see how they performed.
21. Score Visibility: Check Hide scores from students if you wish to direct students toward the criteria and de-emphasize the marking scheme.
22. If you wish, you can add a description of the rubric, which will be only for your use. This can help you distinguish this rubric from others, if you use similar rubrics in your course shell.
23. Under Advanced Availability, please ensure that the Competencies checkbox is selected. This is required, as it is a dependency for rubrics to work in your course. (You also need to ensure that in your course, in Course Admin > Tools, Competencies are enabled.)
24. Review your rubric to ensure it is accurate. When you are done making changes to your rubric, you can click on the Close button. Remember that in order to associate your rubric with an assessment (Assignment, Discussion or Grade Item), you must change the status to Published first (see the “1. Create a draft rubric” section, above)!
NOTE: Once you start marking with your rubric, you will not be able to make any changes to the points or levels in the rubric, so double-check that it is accurate before you start grading. (You can still edit text areas, such as the criteria.)
Now that you have a rubric, you will need to associate the rubric with an appropriate assessment and then use it to evaluate the student's work!
Copy, edit, or update an existing rubric
You may find that you want a rubric that is quite similar to one you’ve created in the past. It’s always a better idea to make a copy, and make changes to the copied version, so that the original remains intact, in case you need it again, or need to see what your original looked like.
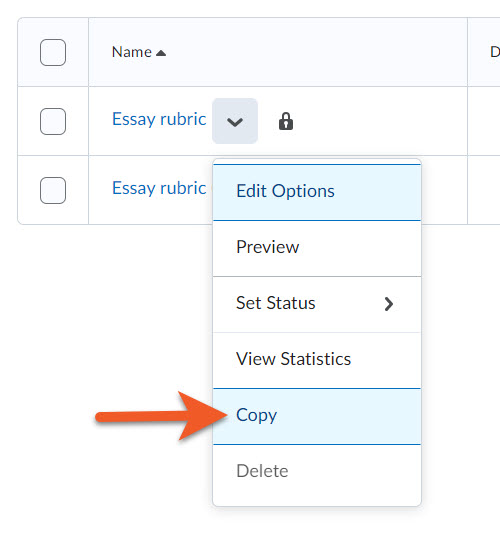
In your course shell, go to Course Admin > Rubrics.
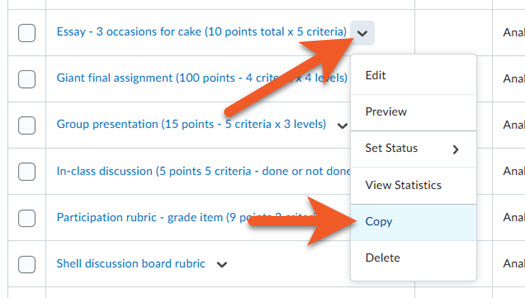
Find the rubric you wish to copy, click on the contextual menu (down arrow) to the right of the rubric name and select Copy.
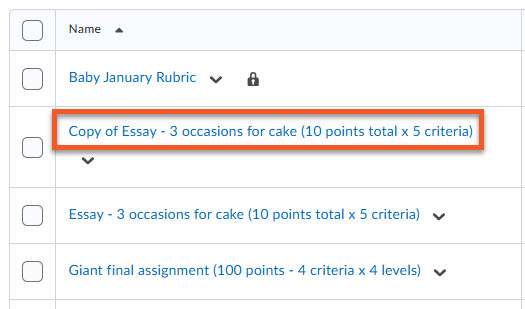
The new rubric will appear in the list of rubrics. The name will be “Copy of“ followed by the name of the old rubric, and may appear in alphabetical order in the list.
Please rename the new version immediately, ensuring that you choose a meaningful name. If you’re making improvements to an older rubric, for example, perhaps include the date or an indication of the term this new rubric was created in, such as including “W26” to indicate Winter 2026. This will make it easy to keep track, when you have numerous rubrics in your shell.
To rename a rubric:
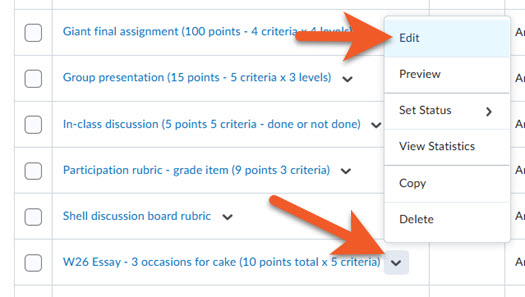
- Click on the contextual menu (down arrow) to the right of the rubric name.
- Select Edit.
- Change the name.
- Wait for the “saving” message to disappear in the upper-right of the page.
- Scroll down and click on Close.
Edit a rubric
If you may wish to refer to the original rubric at some point, use the instructions above, to make a copy, then work in the new version.
To edit a rubric:
- In your course shell, go to Course Admin > Rubrics.
- Click on the contextual menu (down arrow) to the right of the rubric name.
- Select Edit.
Edit text fields
To edit any text fields, such as the level labels, criteria, detailed description for each criteria level, or initial feedback, just click on the text in the field.
You can then delete or edit as you wish.
Click somewhere outside of the field (such as in the whitespace off to the right of the rubric), and the system will automatically save your changes.
Add or remove criteria (rows)
To add or remove criteria to/from your rubric, refer to the instructions above on this page, in the section called “5. Criteria”.
New criterion or criteria groups will appear at the bottom of the rubric, but you can reposition them, using the instructions in step 19 in the section above called “5. Criteria”.
Add or remove levels (columns)
To remove any level, click on the trash can icon for that level.
Keep in mind that you will probably need to adjust point values, etc in the remaining columns, to accommodate any levels you have removed.
You can only add a level to the very top or very bottom of the range, by clicking on the appropriate “+” button. You can’t move levels, so you will need to edit/adjust level labels, point values, etc in the other levels to reflect what you want your final rubric to look like.
Change points values
Reminder: The points value for each level is the maximum points for that level. You can see the points range for that level listed just below that value. The range will update if you change the points value.
If you want to adjust points values for multiple levels, it is best to start with the highest point value, then work your way to the smallest. If you try to do this in any other order, you will see red warning indicators until you fix the values, because the math in the rubric will not work correctly until those values are adjusted.
Change total points for criteria
If you want a criterion to be graded out of a different total number of points, there are two ways you can do this:
- Recommended: Start with the highest point value column. Adjust those points, then work your way to the smallest.
- Alternate: To the far-right of the criterion, you can click on and edit the denominator.
Warning: If you use this method in a custom points rubric, the values between the highest and lowest will be automatically calculated and updated by Brightspace to have equal ranges. There is no way to undo this. If you want each level to have different ranges, please use method #1.
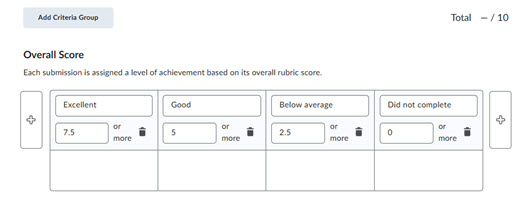
Update the Overall Score section to reflect all changes to your rubric
Make sure to complete all changes to your rubric first. Then, scroll down to the Overall Score section below that.
Make sure to update the number of levels (1 less than are in the rubric), level labels, and points values to reflect your updated rubric, so that students see an accurate Overall Score.
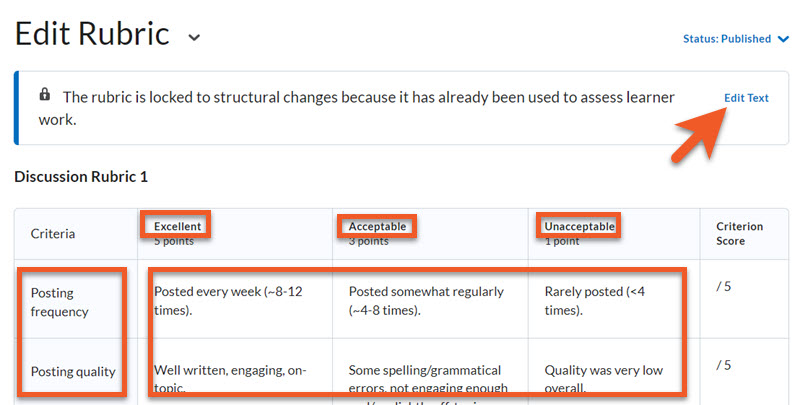
Text-only edits
If you only need to make text edits to the criteria, level titles, or feedback after you have started assessing students, this is possible.
Go to Course Admin > Rubrics. Edit the rubric. Click on Edit Text, and make the desired changes, then close.
When you return to the assignment to assess students, you will notice that the edited version of the rubric appears.
It is not possible to edit points values, the number of levels, number of criteria/criteria groups, or any of the Overall Score details after you have started assessing students. If you need to make those types of changes, see the instructions below, for creating a copy of the rubric.

Note that while you are making text edits, you will see an "(Edited)" note appear in the fields you have changed. This is just a visual reminder, while you are working. Once you save/close the edit screen, this will disappear.
Switch to an updated rubric
You cannot make structural changes to a rubric once you start grading, but if you realize that the rubric you started grading with has problems, you can switch to an updated rubric (without losing your work, in case you need to refer to it), here's how to do that:
Go to Course Admin > Rubrics, and find the rubric you've been using.
If you want to update the rubric, to incorporate any changes/improvements, copy the old (incorrect) rubric, and edit the new version. It's a good idea to indicate the new version in the name, so it's clear which rubric you are working with.
To copy, click on the down arrow to the right of the rubric name, then click on Copy.
Once you've finished fixing the new version of the rubric, make sure you change the status to Published, then close.

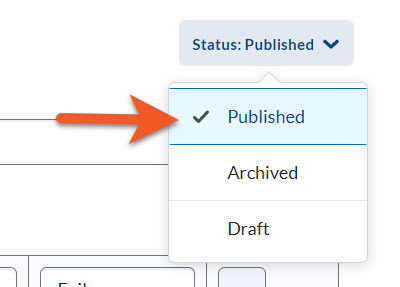
Back on the page that lists all of your rubrics, change the original rubric's status to "Archived" by click on the down arrow to the right of the rubric name, click on Set Status > Archived.
This will ensure that you cannot connect this outdated rubric to assessments in the future. You will still retain a copy of it though, and if needed, you can continue to use it to assess student submissions in the assignment it was already connected to. This also ensures that if you already started grading using the outdated rubric, you will not lose that information, can still refer to the old rubric, and can decide how to proceed.
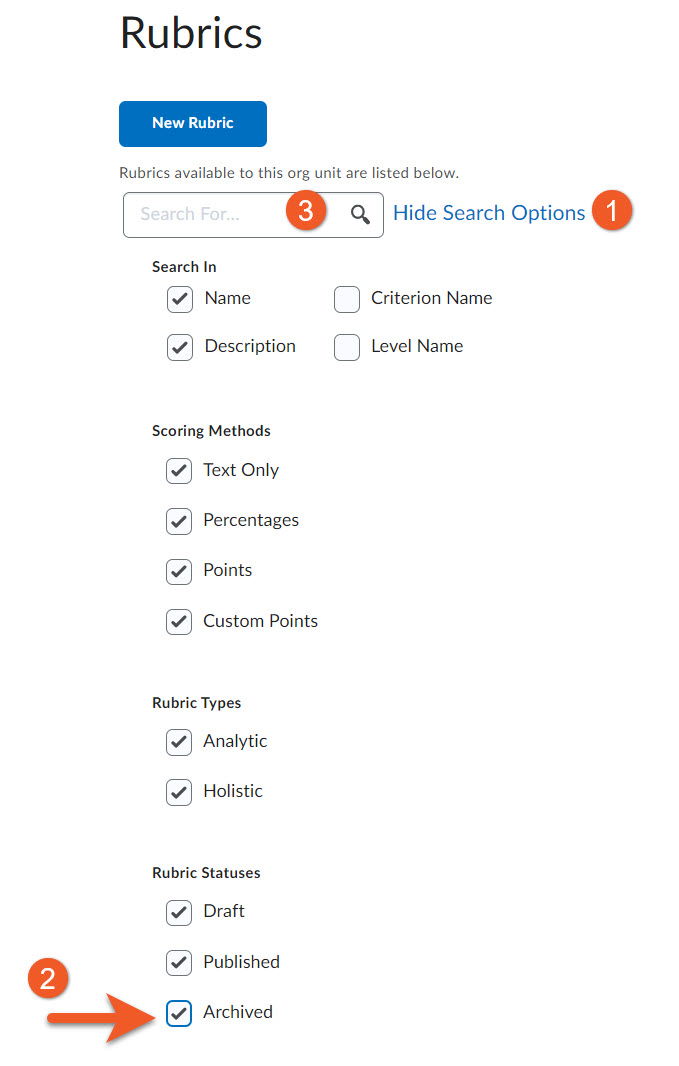
NOTE: All Archived rubrics seem to disappear from the list of rubrics, but if you need to look at any archived rubrics later:
- Click on Show Search Options.
- Select the checkbox beside Archived.
- Click on the magnifying glass icon in the search box, to update the page view. Scroll down below the filtering options, to see your updated list of rubrics.
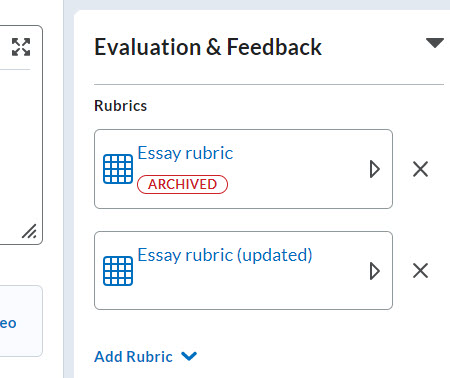
Edit the assignment, and connect the new rubric. You will notice that the assignment now has 2 rubrics associated with it. This is important, so that you retain any grading information from the original rubric and can still refer to it, if needed. Make sure to save!
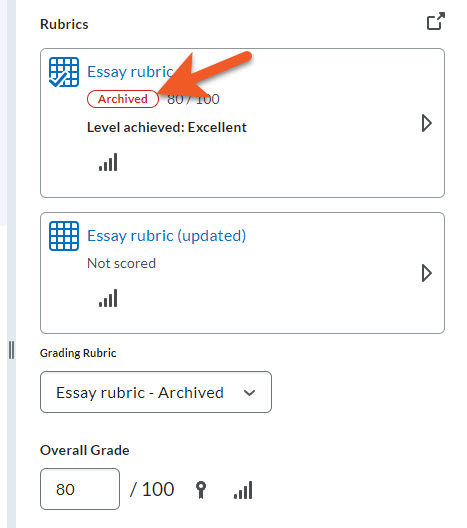
Now, you can decide how to continue grading. As usual, go to the evaluation screen for a student. You will notice that the old rubric has an "Archived" tag. Only you (and other graders) can see this. Your students do not see it. If you are okay with using the original rubric for this student, and have already graded completely, simply leave all settings as they are, and either Save Draft or Publish.
If you have only partially graded the student's submission using the old rubric, and want to finish grading with the same rubric, click on the rubric, and proceed as normal. Click on either Save Draft or Publish when you are done.
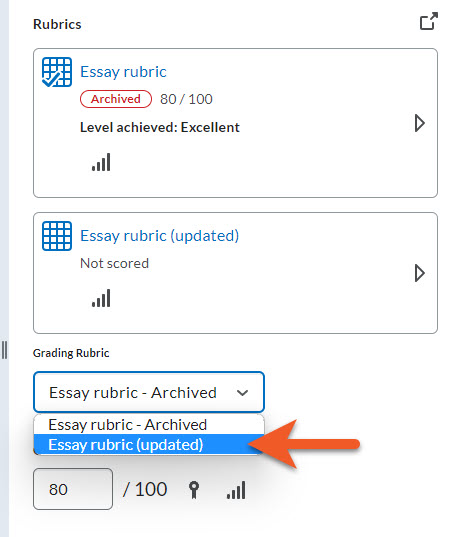
If you wish to grade using the new version of the rubric, first you need to tell D2L which rubric you are using:
- Click on the Grading Rubric dropdown, and select the new rubric. You will notice that the Overall Grade field is updated to zero.
- Click on the new rubric to mark the student's submission.
- If you want to see how you marked using the original rubric, simply click on the old rubric to expand it.
- Remember to click back on the updated rubric to proceed with grading and feedback as normal.
- Either click on Save Draft or Publish when you are done.