Crowdmark Instructor Guide

What is Crowdmark?
Crowdmark is an online collaborative grading and analytics platform that helps educators, working alone or in teams, to effectively evaluate student work. The platform allows for easy distribution and collection of student work, offers tools for the assembly and management of grading teams, and provides an online workflow that streamlines grading and the delivery of rich feedback to students.
What are the benefits of using Crowdmark in your course?
- Integrated with D2L Brightspace.
- Ease of collaboration; comments and results are visible among graders.
- Digital implementation of marking reduces the need to carry physical papers.
- Efficiency gains in exam administration, grading, data recording, and analysis.
Support
- Instructor Guide
- Crowdmark Help Centre (external link)
- Email support@crowdmark.com
- If you require assistance with Crowdmark's integration with D2L Brightspace, email us at courses@torontomu.ca
Crowdmark is an online collaborative marking tool for written exams and assignments.
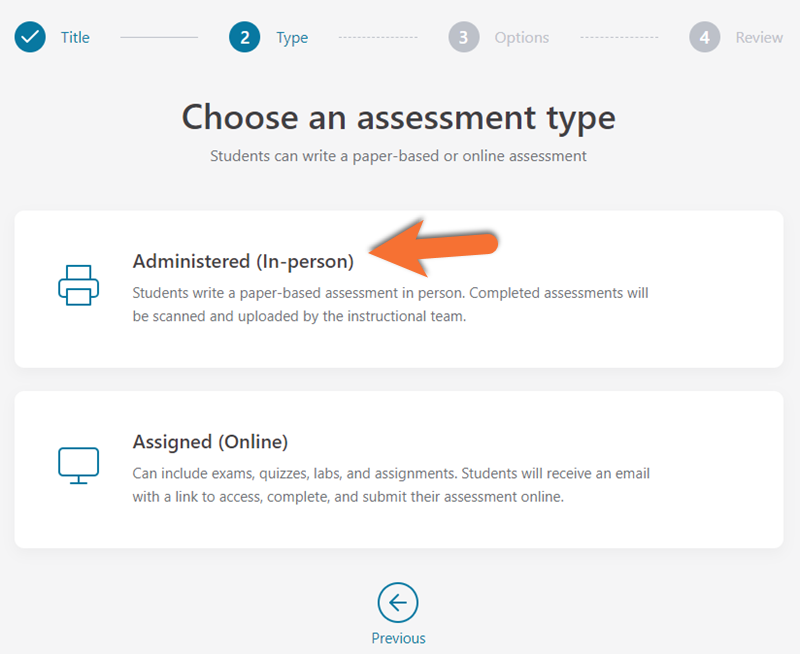
Administered (in-person) assessments allow you to upload existing test booklets to automatically assign them QR codes, allowing for easy printing, scanning, and uploading of assignments to Crowdmark’s online collaborative marking system.
Assigned (online) assessments allow you to create new assessments in Crowdmark and email them out to students. Completed assignments are submitted by students directly to the same online collaborative marking system.
Crowdmark’s collaborative marking system offers a set of intuitive grading tools for your teaching team to mark students' work simultaneously. The system keeps the student's identity anonymous during the grading process which enables unbiased grading. Crowdmark enables you to directly upload your grades to D2L Brightspace. Academic integrity is improved by archiving a digital copy of student work that cannot be altered.
Update your course outline
Several key considerations must be addressed when using educational technology tools in your course. It is your responsibility to ensure that students are fully informed about the tool, its costs, and other details to align with University policy and Provincial acts.
We strongly encourage you to include all of this essential information in your course outline, to ensure students are aware of how it impacts them.
Refer to the TMU course outline template for some ways to incorporate this information into your course outline and to the Senate Course Outline Policies for guidance on what needs to be included in your course outlines.
Sample course outline content
This course utilizes Crowdmark, an external educational technology tool in addition to D2L Brightspace. This tool is used to enhance your course learning experience by enabling collaborative evaluation of student work.
Costs: The tool does not result in additional costs to you.
Other requirements: There are no additional technical requirements for its usage.
Account creation: You are required to create an account for use of this tool.
Data privacy and usage: This tool will have access to your name, TMU email address, and academic work, and it is visible to All course instructors, Academic Assistants, and Graders. This information will be retained within Crowdmark for 2 years, in case of potential appeals or FIPPA requests.
Opt-out options: This tool does not have an opt-out policy.
For technical support regarding Crowdmark, please visit the Crowdmark Student Guide (external link)
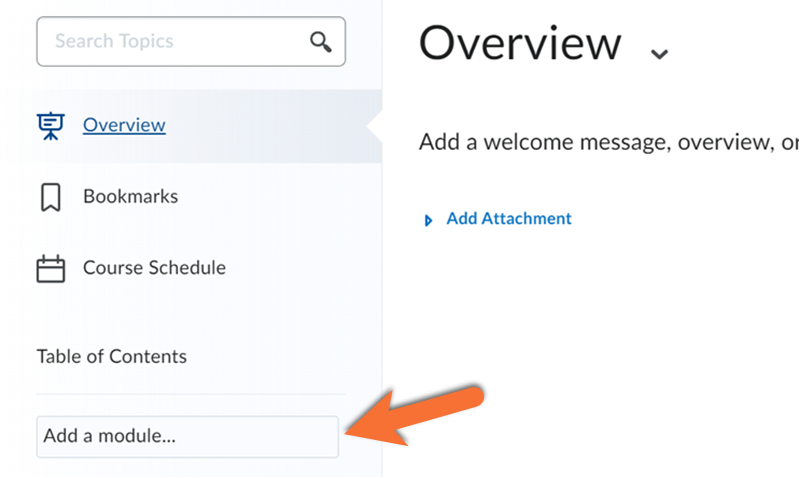
Access the Content tab in your D2L Brightspace course shell.
Add a module to the left-hand navigation bar by clicking Add a module… and give it a name.

As of Winter 2026, the method to launch Crowdmark has changed.
Inside your new module, click on the Existing Activities drop-down menu and select External Learning Tools.
From the list of options, select Crowdmark. This will add a link with the same name to your module.
Click on the link in your module to open the tool; your TMU account will auto-login, and your course will be created in Crowdmark.
Sync your classlist from D2L Brightspace before creating an assessment.
Note: Your classlist will not automatically update in Crowdmark. Please repeat the sync just before creating each assessment, to ensure accuracy. Students that have dropped the course will be removed in this process, and will not have an assessment generated for them. Their previous work will be retained, but they will be removed from the list of current students.
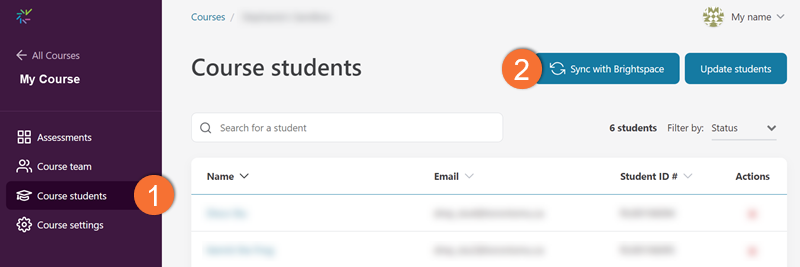
- Click on Course students in the left sidebar of your course shell.
- Click Sync with Brightspace.
You will be prompted to Map Brightspace Data to ensure that it is matched with Crowdmark's data structure.
Verify that Data 1 name, Data 2 email, and Data 3 first_name match their corresponding dropdown lists.
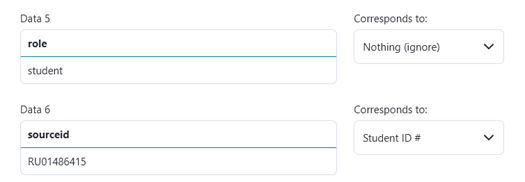
You may leave Data 5 role as Nothing (ignore).
Select Student ID # from the drop-down list next to Data 6 (sourceid).
Click Continue, then Save to confirm students' enrollment.
The student information from your Brightspace course will appear on the Course Students page.
For D2L Brightspace courses with multiple enrolled sections, if you need to divide students by section in Crowdmark (e.g., for distributing assessments or assigning grading based on sections), you must perform an additional import to include the students' section information.
The timing of this process depends on potential changes to your classlist:
- Stable Classlist: If your first assessment occurs after the Add/Swap deadline, you will only need to complete this process once, just before printing or distributing your first assessment.
- Volatile Classlist: If student enrollments or section changes are expected to occur after your first assessment (students switching sections or enrolling from a waitlist), repeat the section update process before each assessment until the Add/Swap deadline has passed.
Please contact courses@torontomu.ca if you have questions about this process, or experience issues.
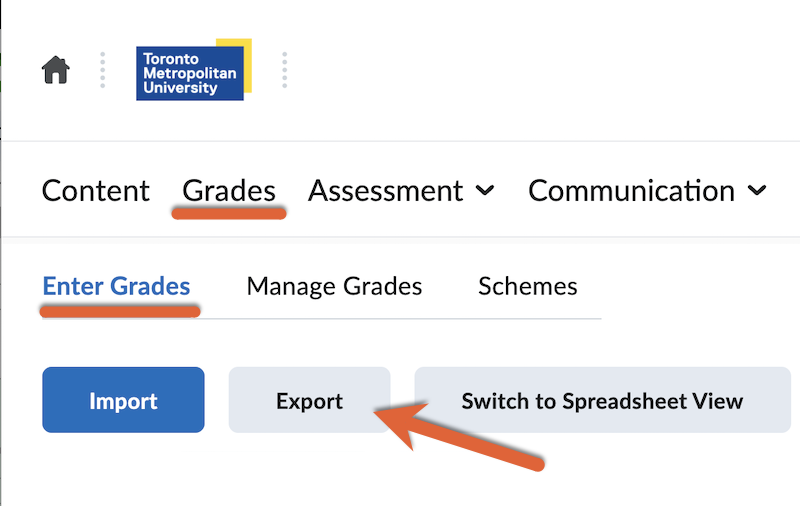
In your D2L Brightspace course, navigate to the Grades tool.
Switch to the Enter Grades view.
Select the Export button.
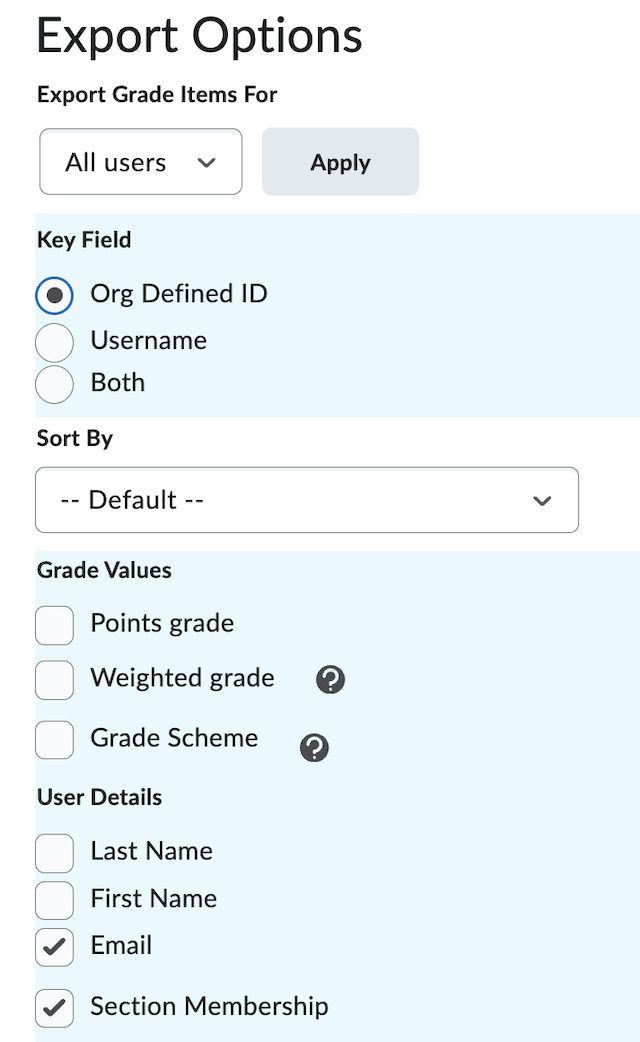
In the Export Options, select only:
- Key Field: Org Defined ID
- User Details: Email
- User Details: Section Membership
Deselect all other student information and any grade items. This will allow you to export just a classlist with sections.
Select the Export to CSV button at the bottom of the page.
Wait for the download link to be provided in the pop-up window, then download the file.
Open the downloaded file in Google Sheets or Excel.
Remove all instances of #
- Delete the “End of line indicator” column
- Use the Replace All feature in the in-application “Find & Replace” tool to bulk remove the additional # prefix from the Student ID column. Learn more about using this tool at the Google Find and Replace guide (external link) or the Excel Find and Replace guide (external link) .
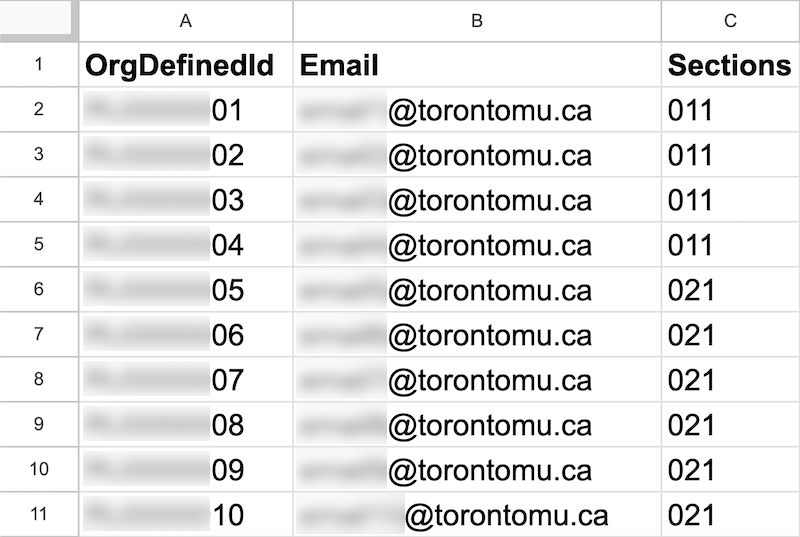
The spreadsheet will now include only 3 columns: OrgDefinedId (Student Number), Email, and Sections.
Optional: Shorten section titles
Brightspace exports a long identifier for each section (e.g. ABC101-011-W26). This level of detail may not be necessary in Crowdmark, and could be replaced with a shorter version of each section.
You can use the “Search & Replace All” tool in your spreadsheet tool to replace each longer section label with a shorter option (011, 021, 031, etc.). If you choose to do this, ensure you are consistent, as the text of the section is what Crowdmark uses to sort the students by section.
Save the file to your device as a CSV.
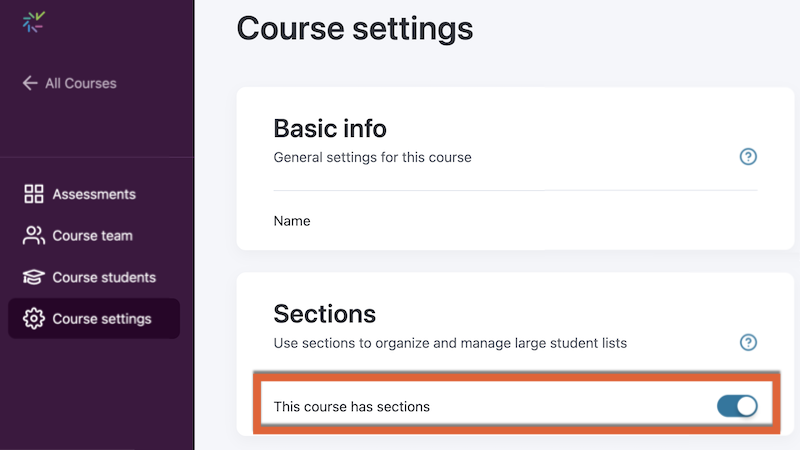
Launch Crowdmark from your Brightspace course.
Navigate to the Course settings in the left sidebar.
Set This course has sections to on.
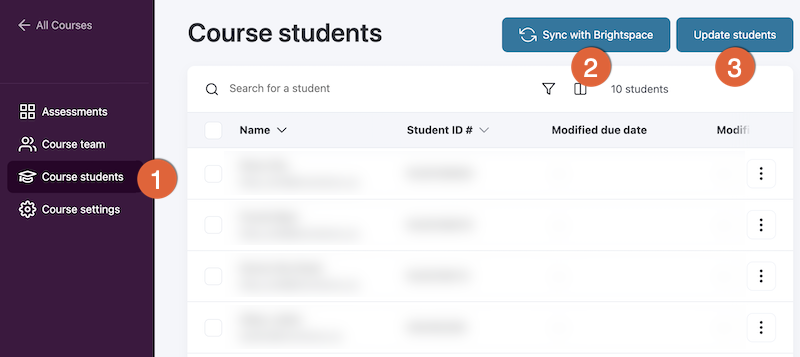
1) Navigate to the Course students list, in the left sidebar.
2) Sync with Brightspace, to ensure it is up to date. Verify that the labels for the data align with the type of data (i.e. email, student ID). Click Continue in the pop-up.
3) Select the Update Students button beside the sync option. When prompted, upload the CSV file that you modified.
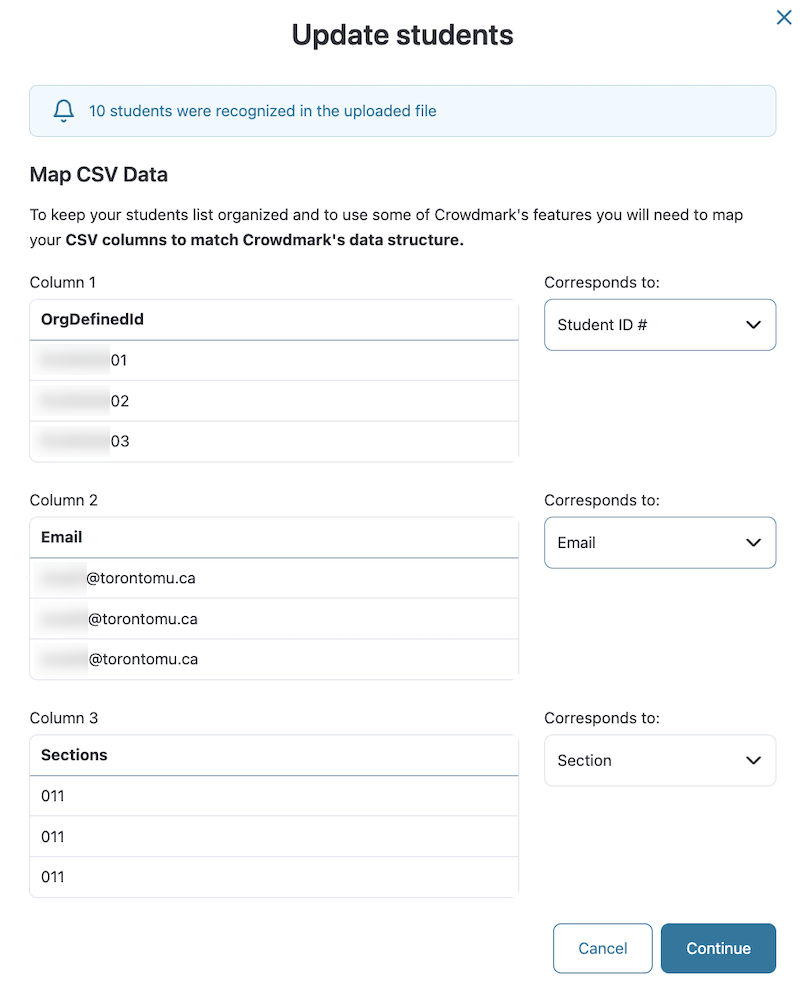
Verify the corresponding label for the imported data. Ensure the Student ID#, Email, and Section are each correctly paired.
Select Continue in the pop-up.
Your students’ sections are now added to Crowdmark.
Administered assignments are on-paper exams, facilitated in person.
Before beginning these steps, create your exam in your document editor of choice (Word, Google Docs, etc.) and save it as a PDF. The document must be set up to align with Crowdmark’s specifications.
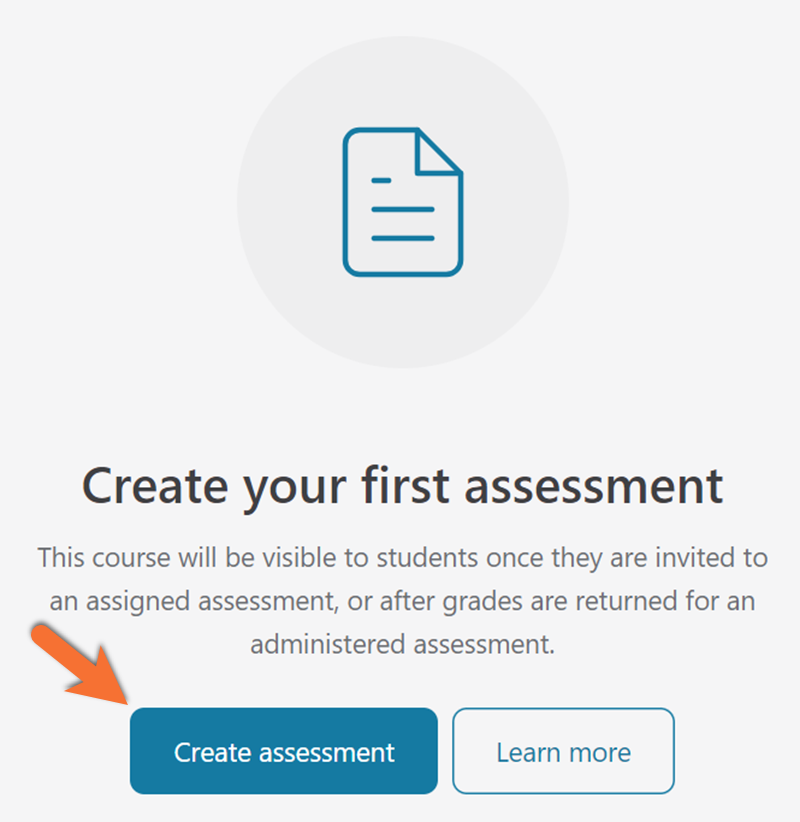
Choose Courses in the left sidebar, and then select on your course to access your Assessments dashboard.
Select Create assessment.
On the next page, title your assessment, then select Administered (In-person).
From the formatting options, select Crowdmark booklets, then Done.
If you would like to use Crowdmark to grade an assessment that students have already completed that was not made in Crowdmark, visit Crowdmark’s Ready to Grade resource (external link) .
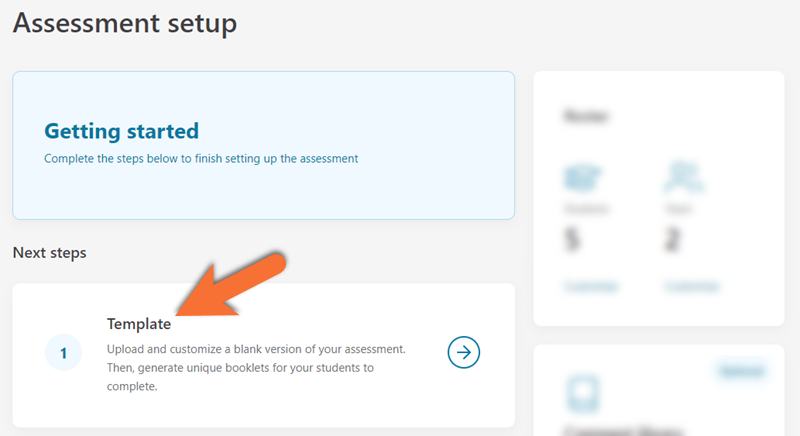
To continue the assessment setup, select Template.
When prompted, upload the PDF file of your assessment from your device.
Note: Before uploading your assessment template, verify that it follows Crowdmark’s assessment template specifications (external link) .
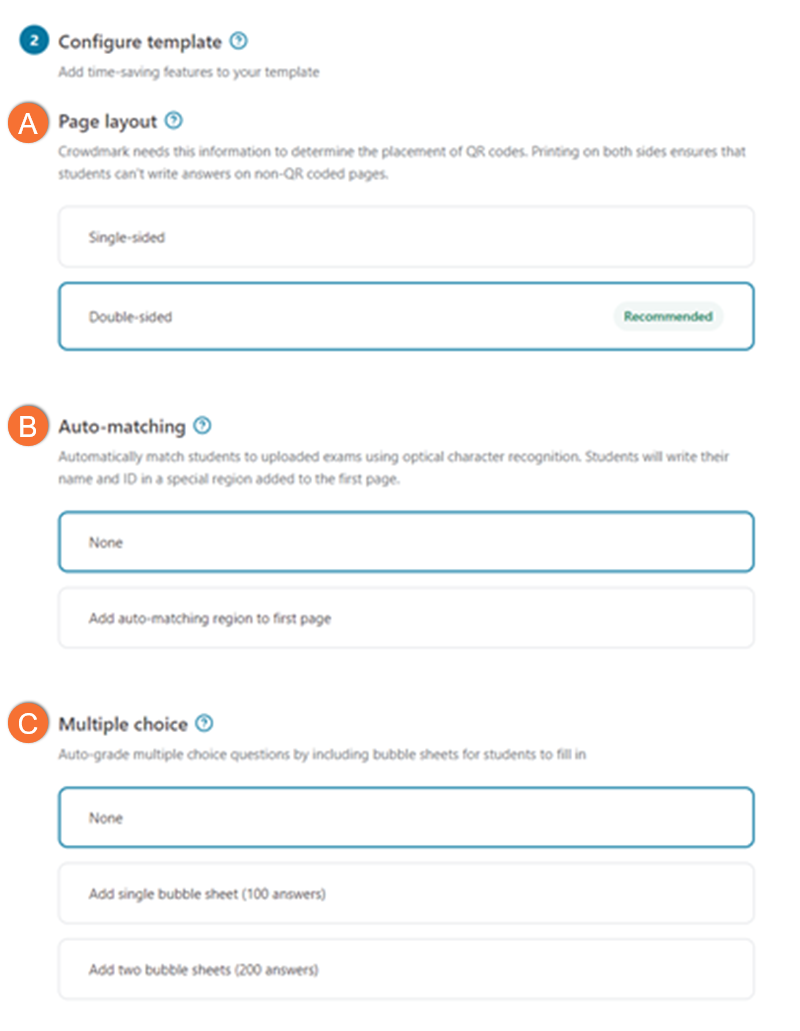
Configure your template to design your Crowdmark Booklet
QR Coded
- Each booklet is unique; you can only print as many as you initially create
- Booklets cannot be photocopied
- Student responses must fit in the spaces you designate in your document
- Pages can be scanned in any order
Non-QR Coded
- A single booklet is created; print or photocopy as many copies as needed (outside of Crowdmark).
- Student responses may extend onto extra pages
- Pages must be scanned in order; Crowdmark will automatically divide them into booklets.
Matching
- The process to pair a scanned booklet to the corresponding student’s TMU digital identity in Crowdmark.
- No match assistance: Students write their name anywhere on the first page of their booklet. A member of your teaching team will need to manually identify which student each booklet belongs to.
- Auto matched: Students write their names in a designated space, and are matched automatically
- Pre-matched: Booklets are generated and printed with identifying information for each student, and will be matched automatically. Note: Students must be provided with their specific booklet at the time of the assessment.
Multiple Choice
If your assessment includes Multiple Choice and written-response questions, select a bubble sheet layout that exceeds your number of questions.
If your assessment includes only multiple choice questions, TMU encourages use of Akindi’s Bubble Sheet Assessments instead. Visit our Bubble Sheet tool comparison guide to learn more.
Single or Double Sided
Make a note of your choice; this will impact the print settings, and you will be required to provide this information to any printers.
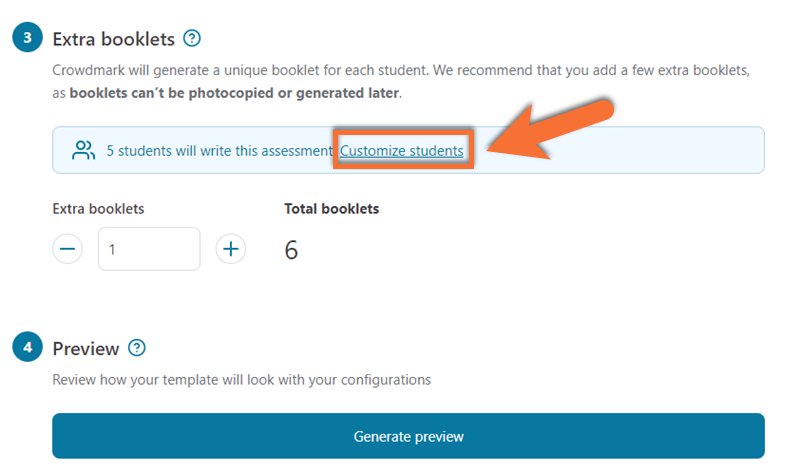
Select Customize students to add or exclude students from your assessment.
Set the number of extra booklets you would like to print. Extra booklets can’t be photocopied or generated later.
Click Generate preview to review the assessment templates.
If there are errors, make changes to your assessment template file, then click on Upload a different file then generate another preview.
Once you are satisfied with the layout, select Save template and generate unique booklets.
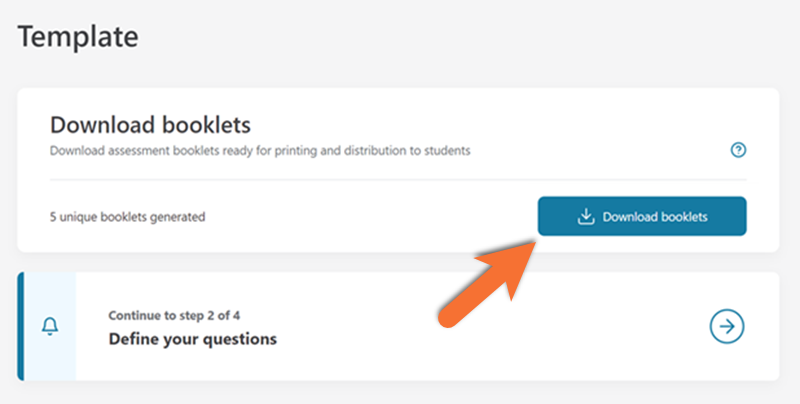
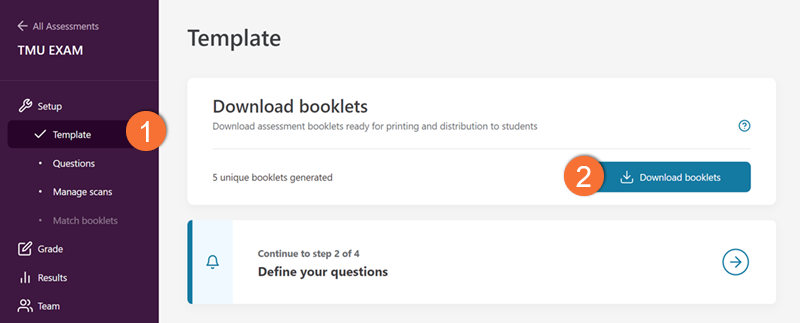
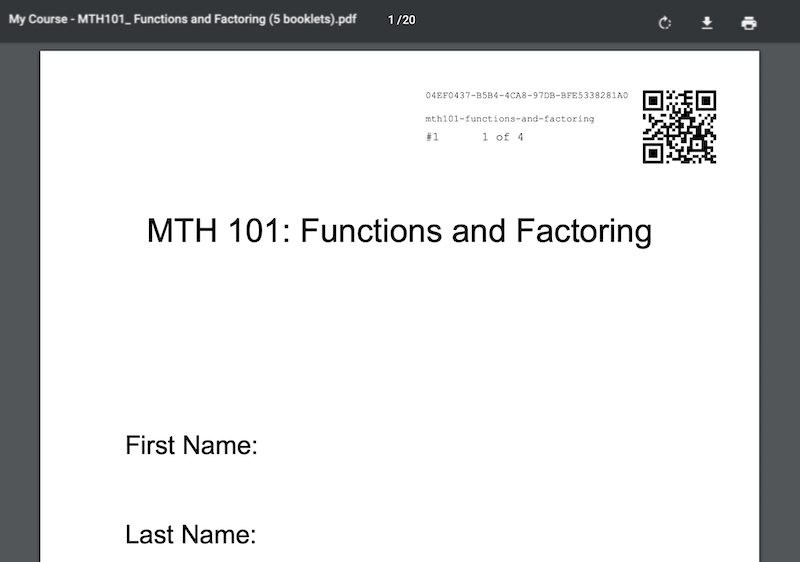
On your assessment’s Template page, click Download booklets to save a PDF copy for printing.
Select Define your questions to move on to the Questions page.
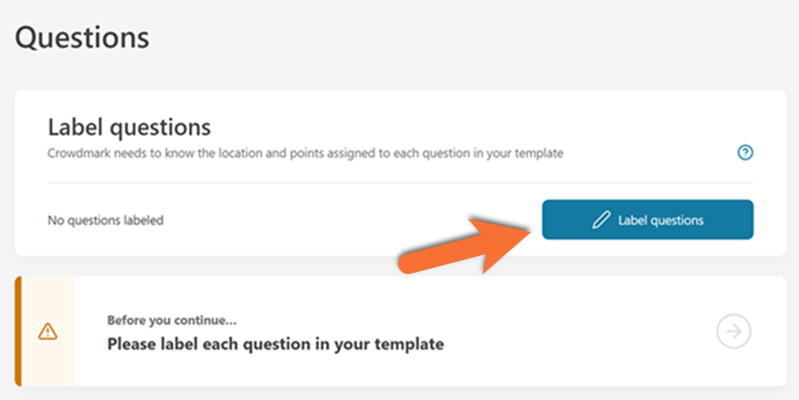
Click Label questions on the Questions page to locate and label each question on your assessment.
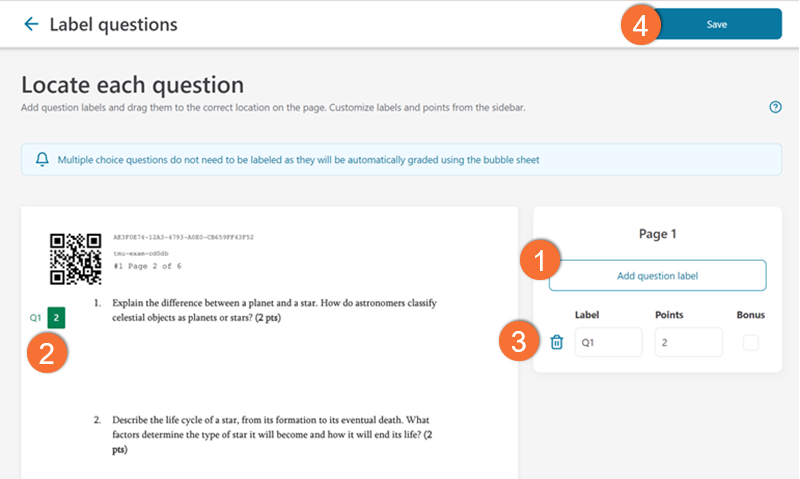
- Click Add question label. A green label will appear on your page.
- Click, drag, and drop the label to reposition it next to its corresponding question.
- Rename the label using the Label box and adjust the maximum allocated score using the Points box.
Repeat these steps to label every question on each page. - After labeling all questions, click Save in the upper right corner.
As of the Winter 2026 term, all pickup and drop-off of Crowdmark booklets are at 105 Bond St., through Duplicating and Printing Services (DPS) in their hours of operation: Monday to Friday, 8 a.m. to 4 p.m.
Printing and scanning on campus
DPS provides printing, scanning, and uploading services to TMU instructors for Crowdmark Assignments.
All Crowdmark print orders completed by DPS will be available for pickup within 3 business days of order, and scanned/uploaded within 3 business days of drop-off.
Printing and scanning with Ricoh
TMU has an agreement with an external company, Ricoh, for additional support for Crowdmark booklets. At times of high volume, Ricoh’s services are engaged for printing, scanning, and uploading Crowdmark booklets. If Ricoh’s services are suitable to your assessment, the TMU Brightspace Instructor Support Team (courses@torontomu.ca) will be in touch following your request form submission.
Note: As of January 2026, Ricoh deliveries and pick ups can only be made at DPS at 105 Bond St.
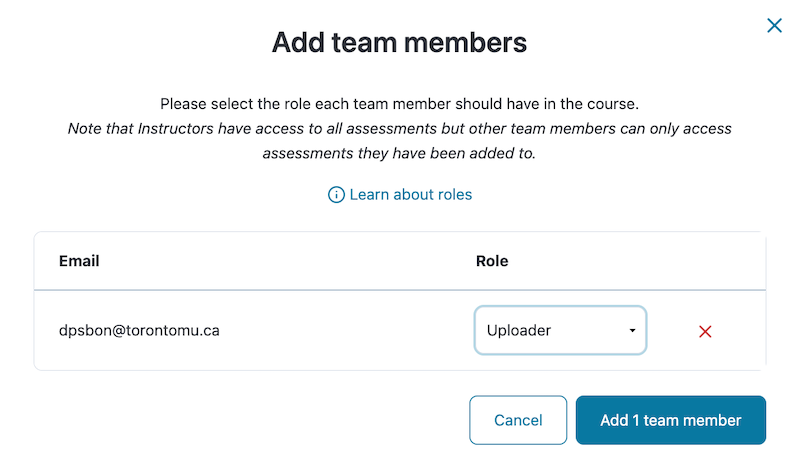
Invite DPS to your Crowdmark course as an Uploader before you submit a printing or scanning request.
- Navigate to your Crowdmark course dashboard and click on Course Team in the left sidebar.
- Click + Add by email and input the dpsbon@torontomu.ca
- Click continue, then select Uploader from the dropdown menu under Role, and select the confirmation button to add the team member.
Verify that the Team page lists the email address as an uploader.
Before submitting your print request (using the button below), download a PDF copy of the assessment booklets from Crowdmark.
In Crowdmark, navigate your course, and then on your assessment.
From your assessment:
- Click on Template in the left sidebar.
- Click Download booklets
- On your device, re-name the file to align with the printing file name format:
LastName-CourseCode-Section-Version
E.g.: Smith-SOC101-031-V1
To print booklets yourself:
Download a PDF copy of the assessment booklets from Crowdmark for printing by navigating to your Assessments dashboard: Click on Courses in the left sidebar, select your course, and then on your assessment.
From your assessment:
- Click on Template in the left sidebar.
- Click Download booklets
You can print your Crowdmark assessment yourself using any printer.
Note: As Crowdmark supports multiple paper sizes, the printer you use must support the paper size you created your assessment on.
Most printers default to 8.5x11" paper which matches the default page size in writing applications including Word and Google Docs.
To scan booklets yourself:
Scan the completed booklets. If relevant, clearly include the QR code as this uniquely identifies each sheet without requiring specific labeling or ordering. Crowdmark supports the upload of PDF and JPG booklets as either individual files or packaged PDFs.
Go to your Assessments dashboard by clicking on Courses in the left sidebar, select your course, then your assessment.
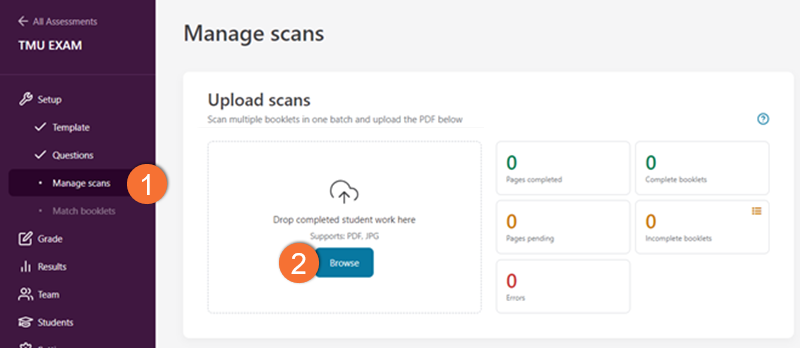
- Click on Manage scans in the left sidebar.
- Click Browse and select a file to upload your scanned booklets.
Note: You can upload multiple files at once. Wait until they have all been uploaded and all of your pages display the green pages completed indicator. Any issues will be indicated in red.
Upon completion, be sure that the green "Complete booklets" number matches the number of students that sat at the assessment.
Crowdmark requires you to complete Exam Matching, a process of digitally pairing your students' exam booklets to their university email within the online system.
Exam Matching: Match booklets online
After you have uploaded your assessment booklets, go to your Assessments dashboard: Click on Courses in the left sidebar, select your course, then your assessment.
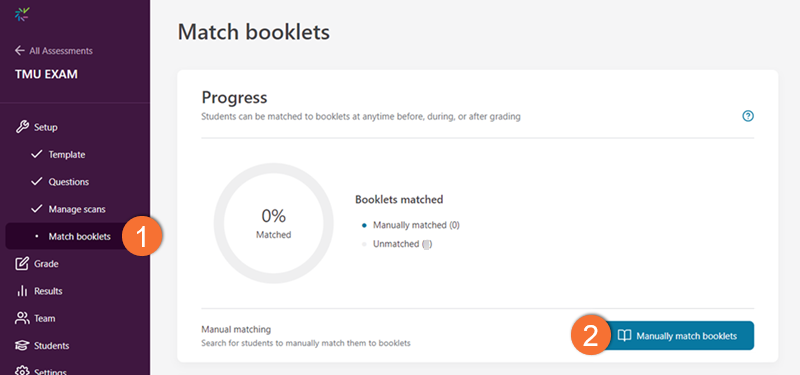
1. Click on Match booklets in the left sidebar.
2. Click Manually match booklets.
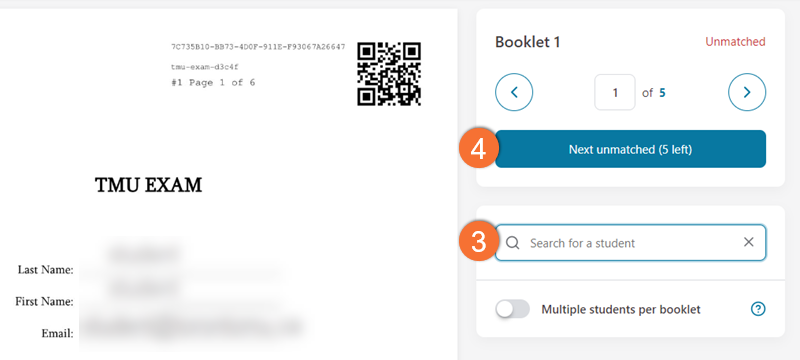
3. Search for the student's name, email, or student number as displayed on the first page of their assessment, and select the corresponding student from the drop-down list.
4. Click Next unmatched or the left and right arrows to navigate through student booklets.
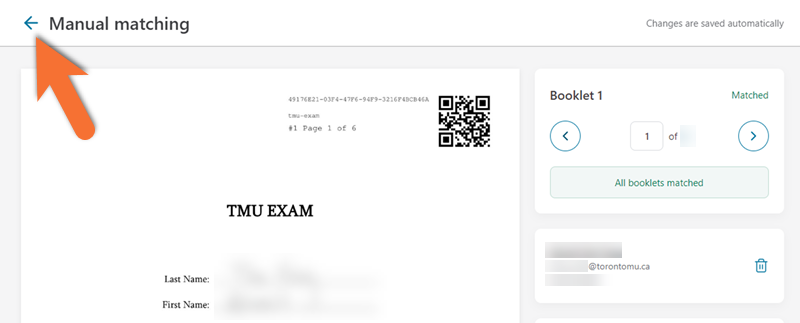
Once you have matched all booklets to a student, a green box will confirm that all booklets have been matched.
All changes are saved automatically and you are now ready to start the grading process.
Click on the blue arrow in the upper left corner of the screen to return to your Assessments dashboard.
Exam Matching: On Mobile
Crowdmark requires you to complete Exam Matching, a process of digitally pairing your students' exam booklets to their university email within the online system.
If you would like to take attendance and match students to booklets during the assessment, you can do so using any mobile device.
Assigned assessments are completed and submitted by students independently or in groups, such as assignments, homework, or take-home exams. Assessments are emailed to the students and they must either complete the assignment digitally or print and complete it on paper. Students must scan and upload their completed assignments to submit them as PDFs.
Navigate to your Assignment dashboard by clicking on Courses in the left sidebar and then on your course.
Click on Create assessment.
Title your assessment and click Next.
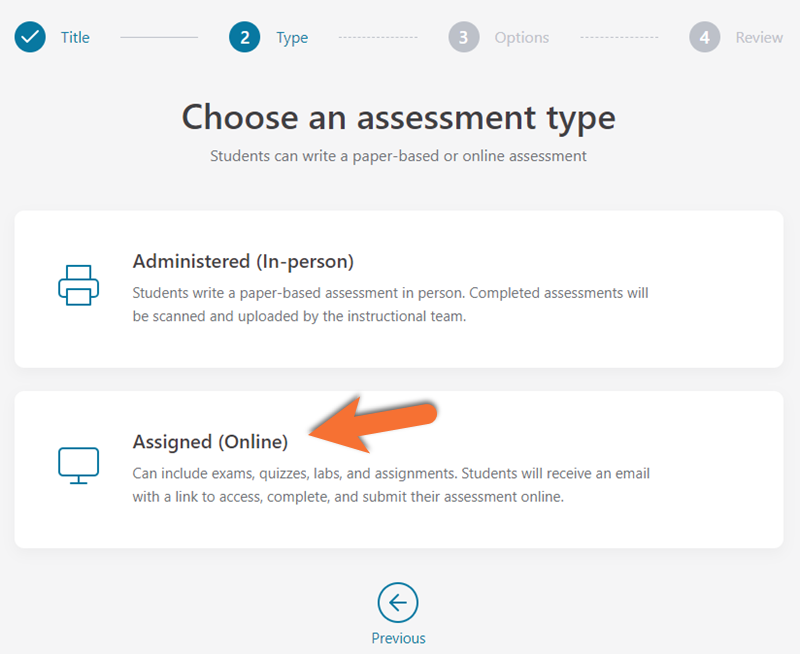
Click Assigned (Online).
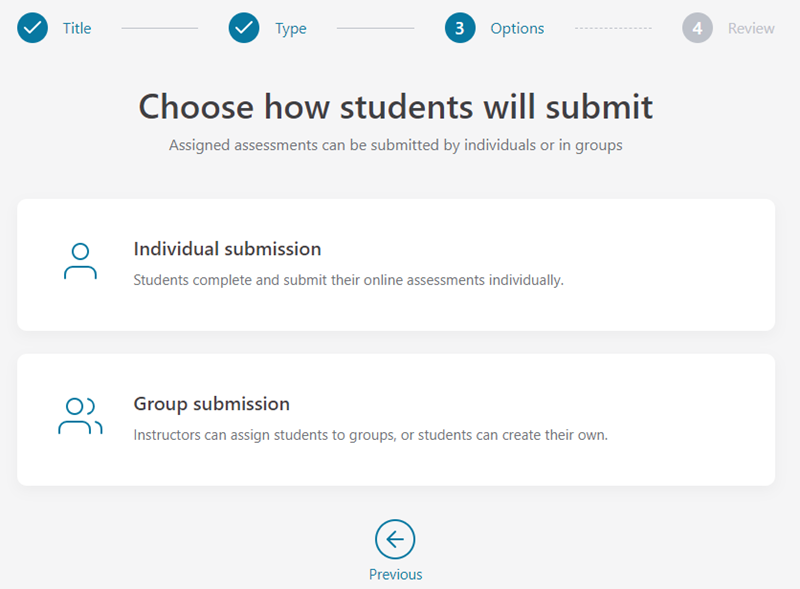
Select either Individual submission or Group submission.
Individual submission: Students complete and submit online assessments individually.
Group submission: Instructors can assign student groups or students can create their own.
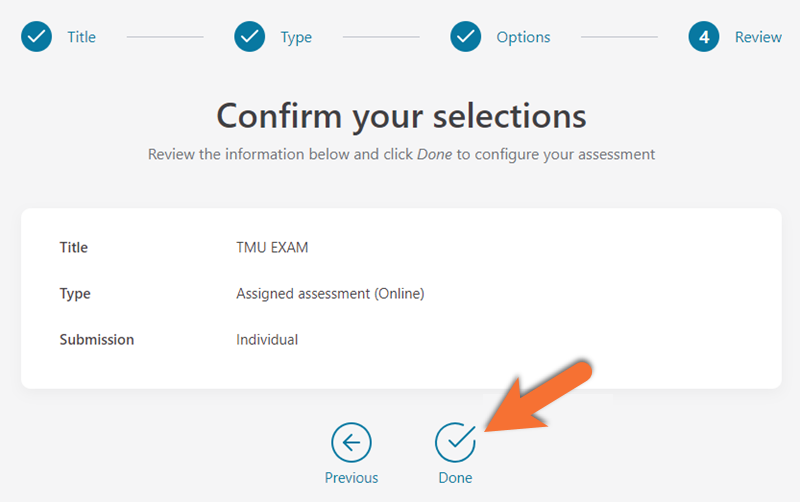
Click Done to confirm your selection and move on to the Assessment setup page.
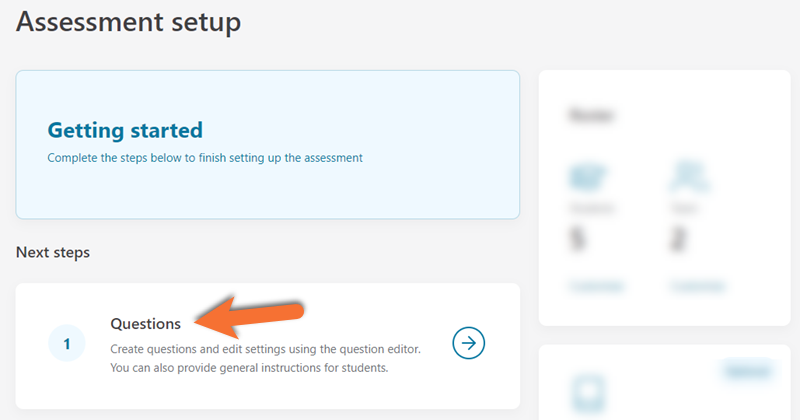
Click Questions to create and edit questions for students.
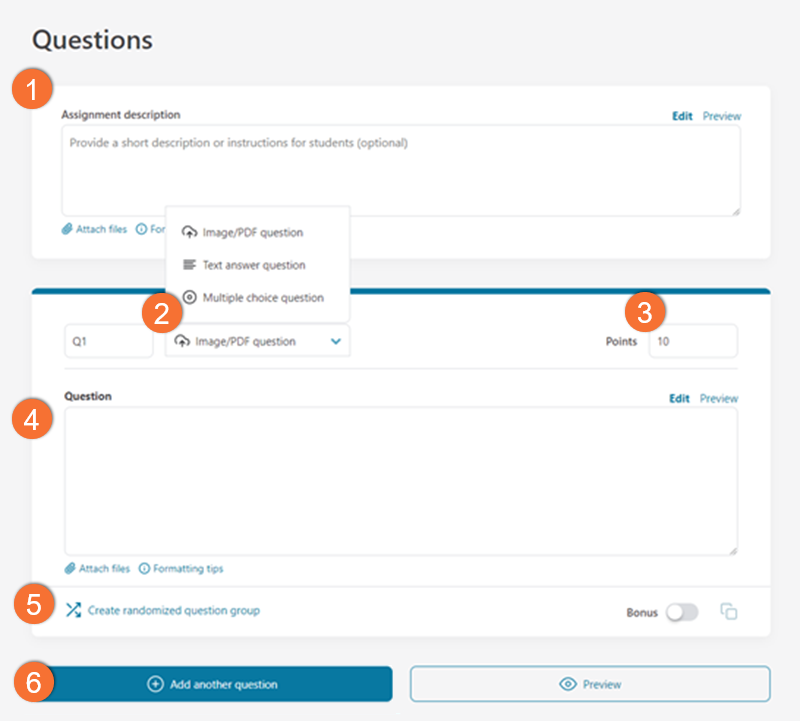
1. Optional: Select + Add assignment description at the top of the page. A textbox will appear where you can write a description or attach a file.
2. Select a question type from the dropdown menu. Learn more about Crowdmark’s questions and response types on their website (external link) .
3. Adjust the maximum score allocated for each question by editing the Points box on the right.
4. Write your question in the textbox.
5. Optional: Click Create randomized question group to create a new version of the question. These versions will be randomly and evenly distributed amongst students’ assessments.
6. Click Add another question to add additional questions to your assignment.
When you are done creating your questions, click Continue to step 2 of 2 Schedule your assessment at the bottom of the page.
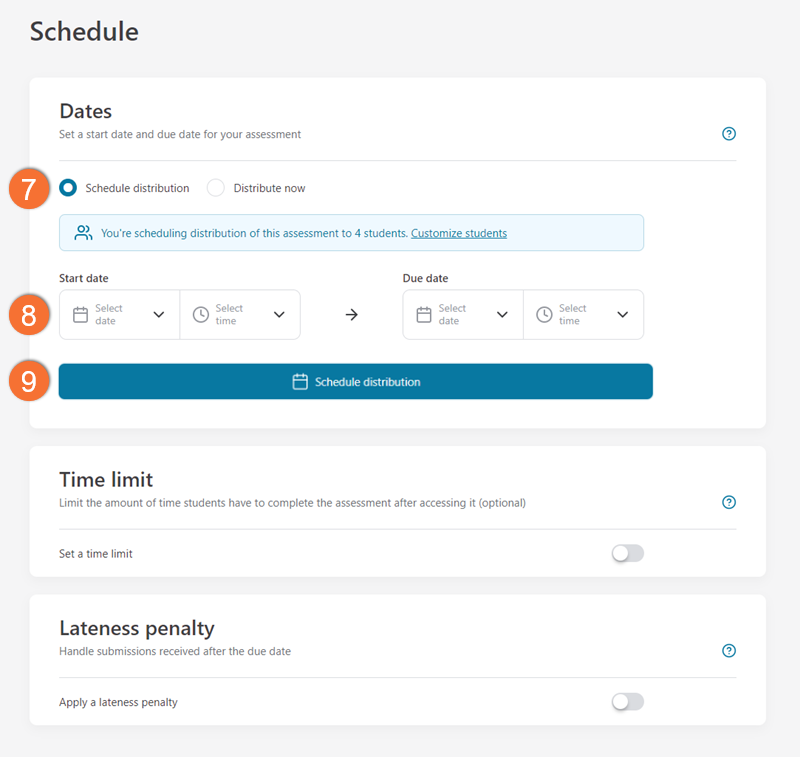
7. Select Schedule Distribution and adjust the Start date to schedule your assessment for the future.
OR
Select Distribute Now to distribute an assessment immediately.
8. Adjust your assignment’s due date.
Optional: Set a Time limit and a Lateness penalty. Learn more about Crowdmark's scheduling and distribution options on their website (external link)
9. When you are satisfied, click Schedule distribution or Distribute now. Crowdmark will email your assignment to students at your selected start date and time.
Before you start grading, you will need to import your team from Brightspace.
Note: Only users with roles within your Brightspace course should be added as graders to Crowdmark. To learn more about user roles within TMU's Brightspace, please see the Add users to your D2L shell resource.
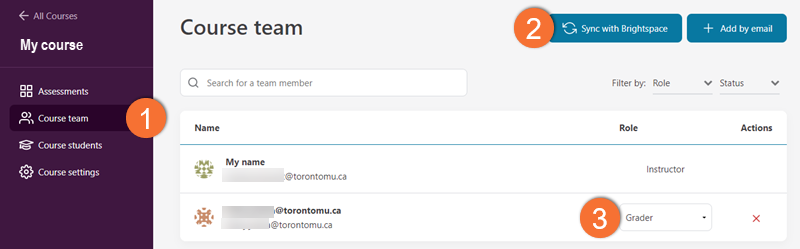
Navigate to your course dashboard by clicking on your course name in the Courses area of the platform.
- Click on Course team located in the left sidebar.
- Click on Sync with Brightspace.
- Select an appropriate role for each team member from the dropdown menu. Learn more about Crowdmark's team member roles on their website. (external link)
Added team members will receive emails from Crowdmark inviting them to the assessment.
Once all of the student booklets are uploaded to the system, grading can be conducted by members of your teaching team.
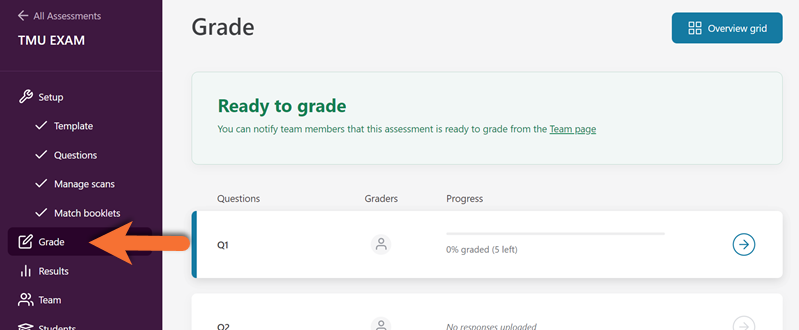
Navigate to your Assessments dashboard by clicking on Courses in the left sidebar, then on your course, and then on your assessment.
Click on Grade in the left toolbar.
Select the Question box (Q box) you would like to grade.
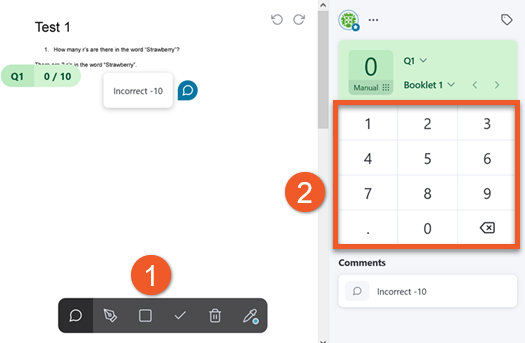
- Use Crowdmark’s grading tools in the bottom navigation bar to annotate responses. Learn more about Crowdmark’s Grading Tools on their website (external link)
- Provide a grade for the question by inputting a number using the number pad and clicking OK to save your grade.
Optional: Add a Tag to bookmark responses you would like to revisit with your grading team. Learn more about Crowdmark’s tagging feature on their website
Once all the questions of that specific Q box have been graded, click on your assessment's name in the upper left corner to return to your assessment's Grade page and move on to grading the next Q box.
Once all the booklets have been graded, you can export the scores to your Brightspace shell's Grade tool.
Navigate to your Assessments dashboard by clicking on:
- Courses in the left sidebar
- Your course name
- The assessment
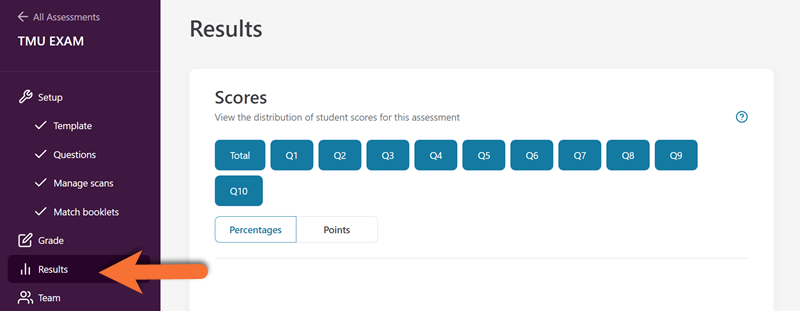
Click on Results on the left sidebar.
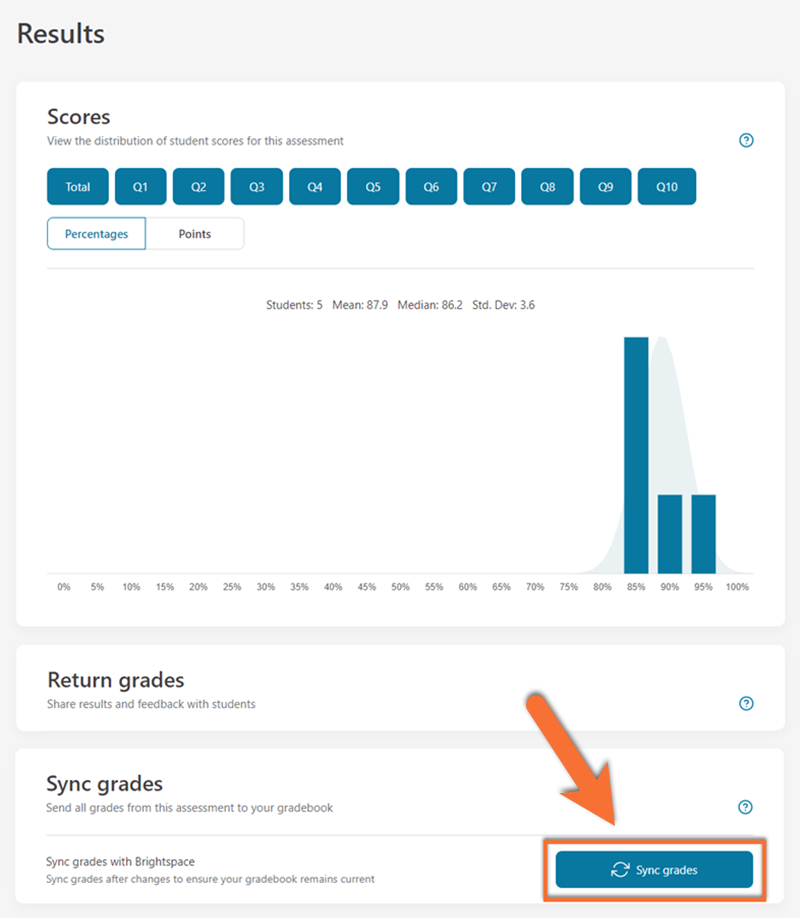
Scroll to the bottom of the Results page and click on Sync grades.
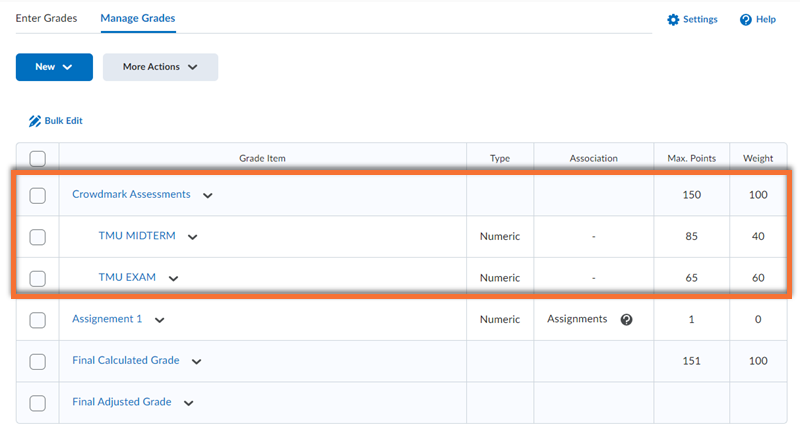
Once this step is completed, a new Grade Category will be created in your Brightspace shell's Grade tool with the same name as the Crowdmark assessment.
Within the Grade Category, be sure to set your grade item(s) from Crowdmark to sum 100% of the category weight.