Attendance
The attendance tool allows those with grading access in a course (Instructors, Academic Assistants and Graders) to track student attendance in sessions - especially those that happen face-to-face.
Here are some things you may want to track in your course:
- Attendance in an in-person class session or lab.
- Participation in in-person discussions.
- Participation in project presentations.
"Attendance Registers" are used to group different kinds of sessions.
"Attendance Schemes" allow you to set up the values that will be assigned to the students in the register. The default scheme is a Present/Absent scheme, with "P" and "A" selectors to identify each value in the register. Instructors may choose to create their own.
NOTE: There is no way to directly tie an attendance register to your gradebook. Please see advice under "Assess the attendance data" for advice about exporting attendance data, so that you can manipulate it, and import into the gradebook.
Find Attendance in the top menu, under Assessment. If it isn't there, review how to enable course tools.
Please note that there is currently no way for students to indicate their own attendance in a session. If that workflow is important to you, you will need to create something on paper or outside of D2L Brightspace, such as a Google Form.
The first thing you will need to do is create an 'attendance register'. This allows you to plan out the events for which you are tracking attendance - the most common example being the weekly class session.
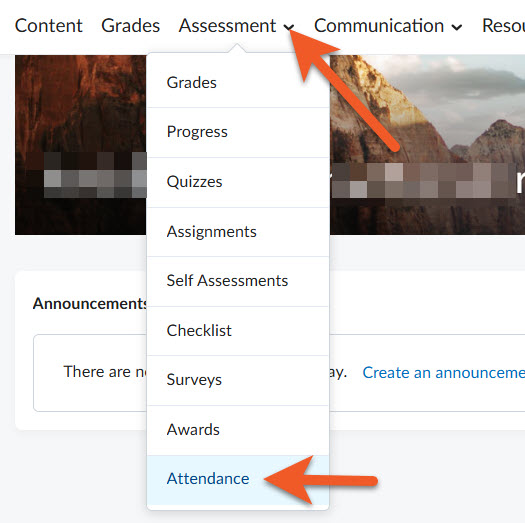
In your course shell, go to Assessment > Attendance.

Make sure that you are on the Attendance Registers tab of the Attendance tool.
Click on New Register.
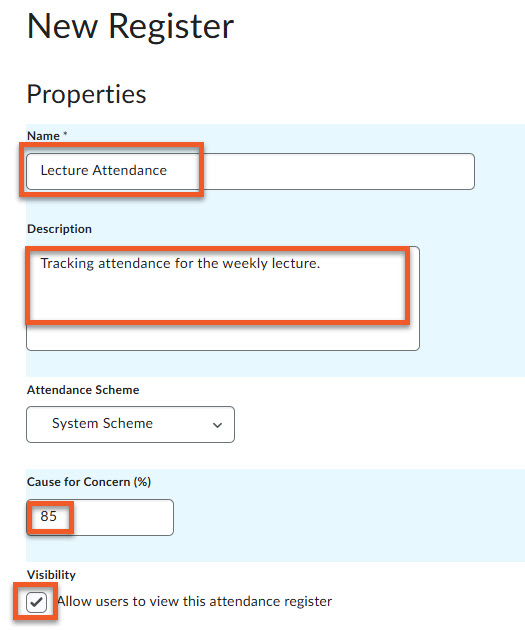
Give the register a concise and meaningful Name. If you think it would be helpful, you can also enter a longer Description.
Attendance Scheme: The default "System Scheme" is a Present/Absent scheme (all or nothing). If this doesn't meet your needs, you may create your own attendance schemes with different values on the main Attendance page, then return here, to select that scheme.
Cause for Concern (%): Set a percentage, below which the Attendance tool will highlight students' results. In this example, if students miss 15% of the lectures, this will be flagged.
Visibility: Choose whether the students see this particular attendance register. Keep in mind that if the tool is enabled in the course, the students will see it in the navigation menu. The "visibility" checkbox only controls the visibility of this specific register.
Users
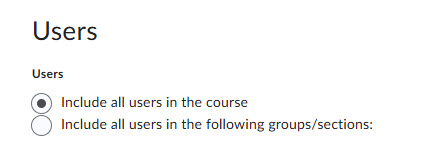
By default, you are assessing all of the users in the course.
If you wish to only track attendance for specific groups or sections, choose that option, then select the specific groups/sections.
Sessions
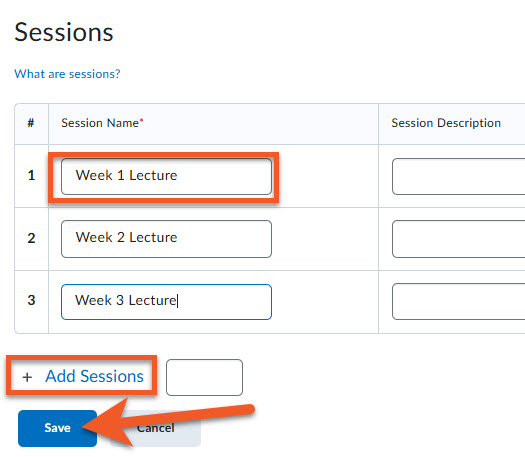
Create a session for each instance that you wish to track attendance for. For example, if you wanted to track lecture attendance in a 12-week course you would enter 12 sessions and could name them according to week.
Below the list of sessions, look for the Add Sessions link, if you need to add more than the default 3 sessions. You must type the number of sessions you wish to add before clicking on Add Sessions.
To the right, you will see fields where you can add a description for each session, change the order of the sessions, and delete a session, if it's not needed.
Click on Save to save your work.
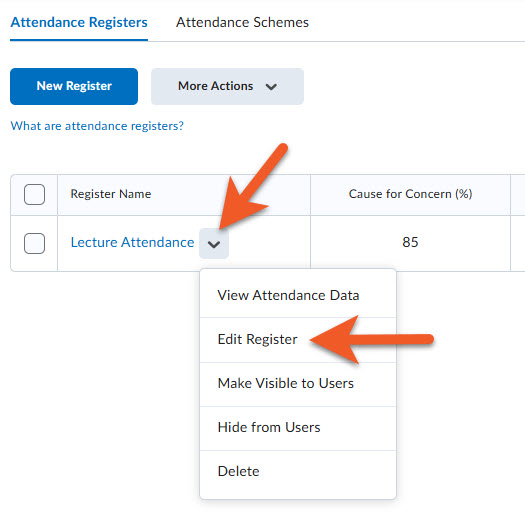
From the main Attendance tool page, locate the attendance register you wish to modify. Open the contextual menu next to the attendance register name, and click on Edit Register.

When you are ready, there are 3 different ways you can make the register visible to students (all accomplish the same result):
1. While editing the register, select the checkbox beside Allow users to view this attendance register.
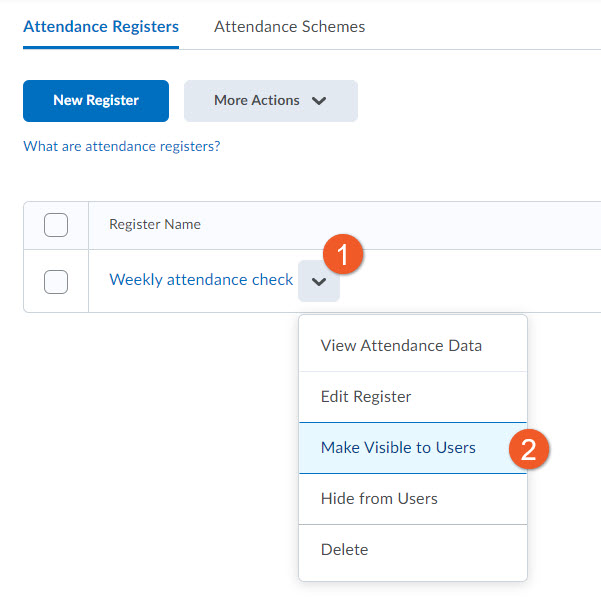
2. On the main Attendance page, click on the contextual menu to the right of the name of the attendance register, and select Make Visible to Users.

3. Select the checkbox to the left of the attendance register(s) you wish to make visible.
Click on More Actions > Make Visible to Users.
Next, you will need to enter the attendance data. Please note that there is currently no way for the students to indicate their attendance -- this must be entered by the Instructor or Academic Assistant in the course.
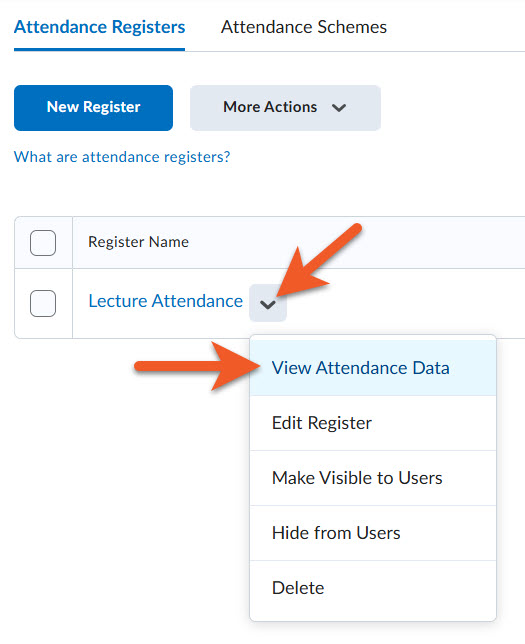
In the Attendance tool, locate the attendance register you wish to modify.
Click on the contextual menu to the right of the name of the register, and select View Attendance Data.
You see a list of all of the students in your course. Like the Classlist and Grades tools, above the list, you can choose to filter the students based on their section or group membership, or you can search for a specific individual.
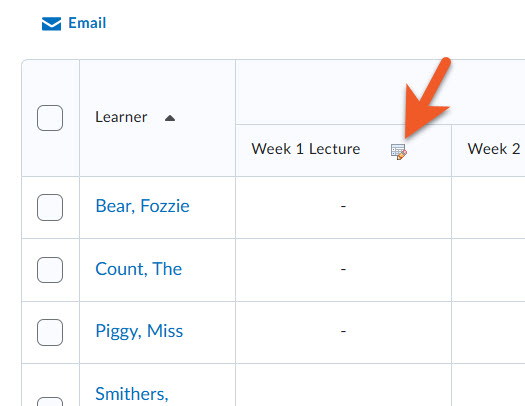
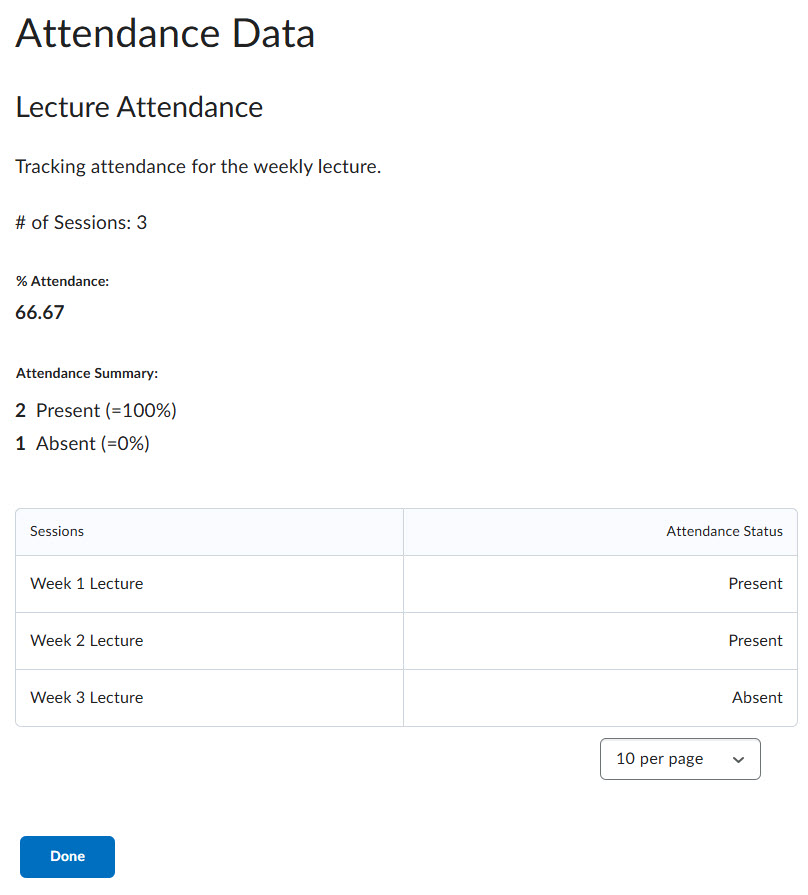
Note the "Sessions" section across the top of the table - each column corresponds to a session created in the register. Click the paper/pencil icon to go into a specific session.
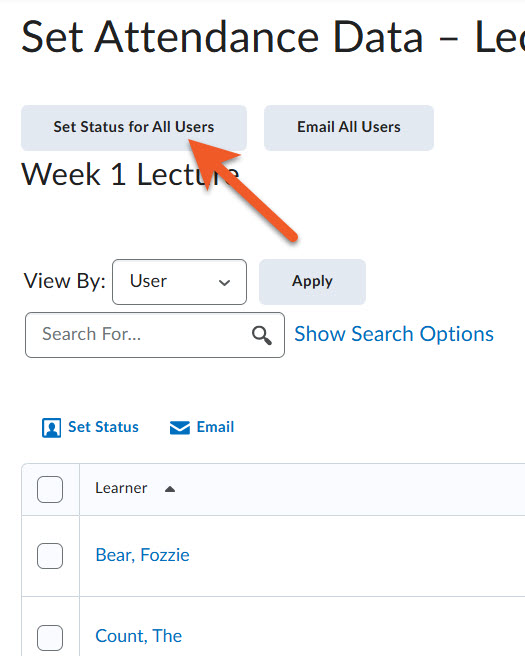
TIP: Instead of manually entering a value for EACH student, consider which value is most common ('present' or 'absent'). Click the Set Status for All Users button at the top of the screen.
Select the most common value from the dropdown menu, and click the Save button. This will set that status for ALL of the students.
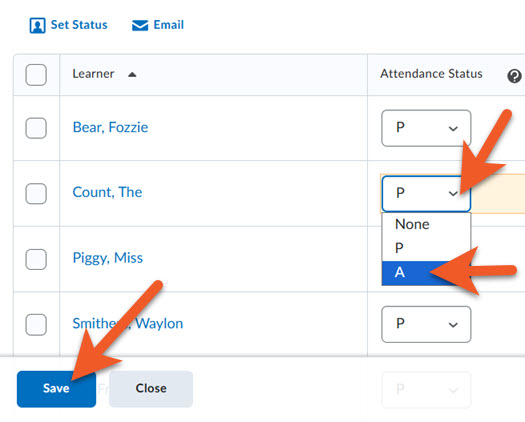
Manually edit the values for any students that did not match the value you set. In the Attendance Status column, select the correct value from the dropdown menu.
Click on the Save button to save the attendance data, then Close to return to the main page for that Attendance Register.
Locate the attendance register you wish to view. Click on the contextual menu to the right of the name of the register, and select View Attendance Data.
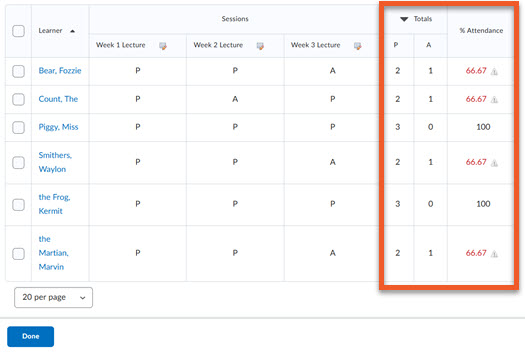
Look at the rightmost columns in the register:
% Attendance: This gives a percentage of the sessions that the student attended. If this percentage falls below the "cause for concern" threshold you set, it will be in red with an icon.
Totals: this section is divided based on the values outlined in the Attendance Scheme selected. If you are using the default, you will see separate columns for 'P' (Present) and 'A' (Absent).
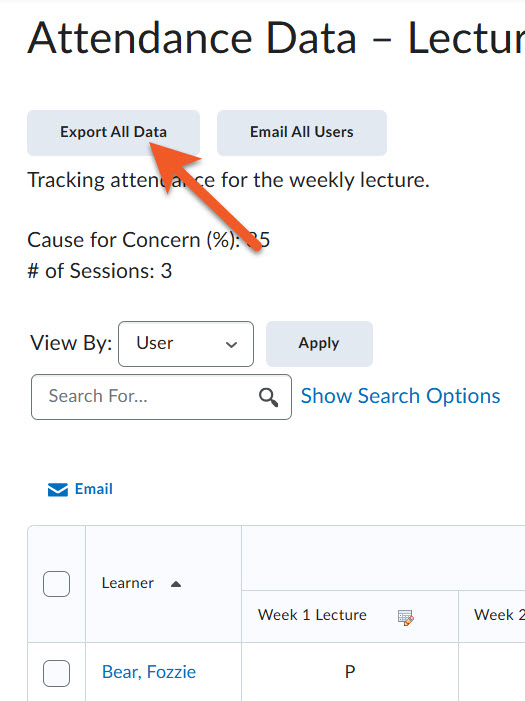
Export the Attendance Data
This option can be useful if you want to use the completed attendance data in grade calculations.
Click on Export All Data at the top of the attendance data screen.
Click on the link and download the CSV file to your computer. This file contains the attendance data for each session, the breakdown of totals per value type, as well as the overall percentage of attendance.
If your intent is to convert attendance into some sort of grade (ie. participation), you could then:
- Use our instructions to create a grade item.
- Export the grade book as a CSV.
- Copy/paste the information from the Attendance data into the exported gradebook CSV file.
- Import the updated gradebook CSV file into Grades.
NOTE: You may wish to consult with your department before doing this, as some departments may not allow attendance to be directly tied to the student's course grade.
Once the Attendance tool is enabled in the course, all users will be able to find the tool in the navigation menu, by going to Assessment > Attendance.
In the Attendance tool, students will only be able to see the attendance registers that haven't been hidden from them.
Students only ever see their own attendance record, and will never see the record of another student. This is consistent throughout all tools in D2L Brightspace.
Please note that there is currently no way for students to indicate their own attendance in a session.