Announcements
The Announcements tool should never be used to post student information, including their names or grades - or even partial information (such as partial student numbers). Doing so would be in violation of the privacy policy.
Use the announcements tool to post timely messages to the students.
This is a great place to provide a regular reminder of upcoming class outlines, deadlines, and topics of interest.
Try this: Post an announcement a couple of days prior to each week's class, with an agenda for the upcoming class, as well as due dates. These can be authored in advance and set to automatically publish!
Find Announcements in the top menu, under Communication. If it isn't there, review how to enable course tools.
This tool is best used as a means of communication and should not be used as the primary source of class content.
If you request a copy of a previous course, the announcements are not copied.

Click New Announcement from the Announcement widget menu or click New Announcement on the Announcements page.
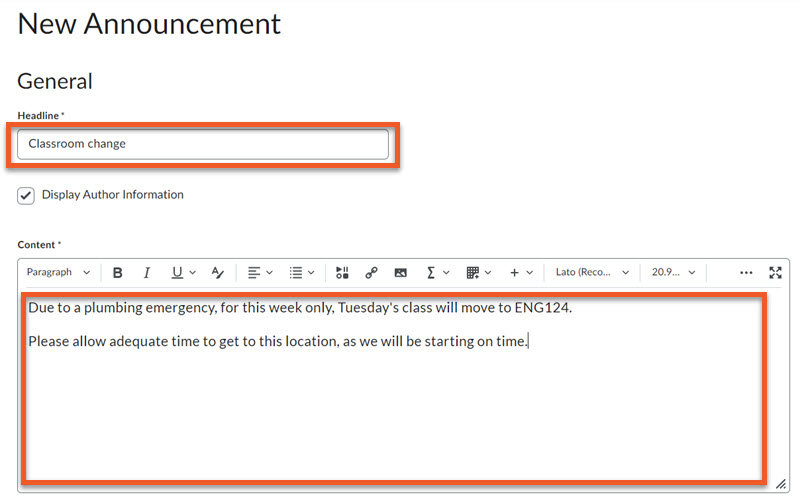
Enter the announcement headline in the Headline field.
Enter the announcement content in the Content field. You can use the options in the editor toolbar to format text, insert images, etc.
You can personalize content in the announcement with Replacement Strings. Enter the following replacement strings and personalized content will populate using the user's information:
- {FirstName} = The user will see their first name
- {LastName} = The user will see their last name
- {OrgUnitName} = The user will see their course name
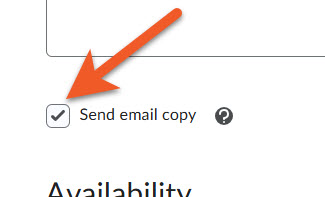
If the checkbox for Send email copy is selected, when the announcement is published, a copy will be emailed to all entitled users including those who have opted out of announcement notifications.
- The email will be “from” from the email address of the person who publishes the announcement, and you should receive a copy of the message in your inbox.
- This option will be automatically deselected when an announcement is copied or edited, and must be selected again before republishing.
- Please be aware that if users are already receiving an automated notification email about announcements, this may result in duplicate or similar emails.
- Note that any inline images will be included in the email, but inline audio/video will not, as this is not possible in email in general.

Availability settings
If you want to hide your headline's date and time, clear the Always show start date check box. By default, an announcement's start date and time appears below its headline when displayed in the Announcements widget. Most of the time, it can be helpful for students to know when the announcement was published.
Select the posting availability date in the Start Date and End Date fields. Announcements publish immediately unless you specify an alternate start date from Start Date. Do not set an End Date if you want the announcement to be visible through to the end of the course.
If there is a reason why students should stop seeing an announcement on a specific date, you can automatically remove an announcement on that day by selecting the check box Remove announcement based on end date. You and administrators can still see the news item after its end date, but it will not appear in the Announcements widget.
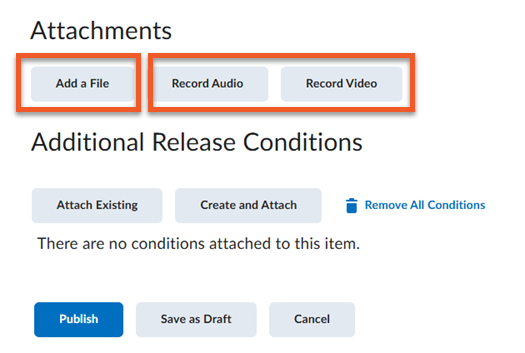
You can include attachments and audio recordings as part of your news item.
To add an attachment, click Add a File in the Attachments section.
To record audio or video:
- Click Record Audio or Record Video in the Attachments section.
- In the popup that appears near the top of your browser, select the appropriate settings to make adjustments to your microphone/camera selection and give permission for their use.
- In the regular popup, use the embedded tools to record, upload, listen to your recording, or clear your work, then click on Add to upload your audio/video.
Additional Release Conditions
Click Attach Existing or Create and Attach to include additional release conditions. See Release Conditions to learn about creating and setting up release conditions.
Save or Publish
Click Save as Draft to continue editing the announcement (students cannot see draft news items), or
Click Publish to release the announcement to students. If the start date is in the future, students will not see the news item until that date/time.
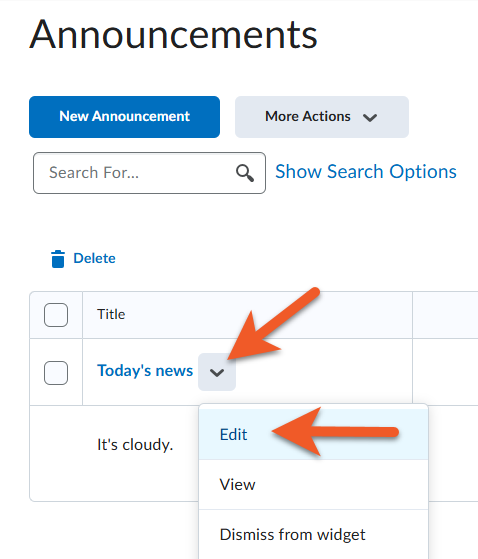
On the main Announcements page, click on the Edit button in the news item's context menu. You can also click directly on the item you want to edit on the Announcements page.
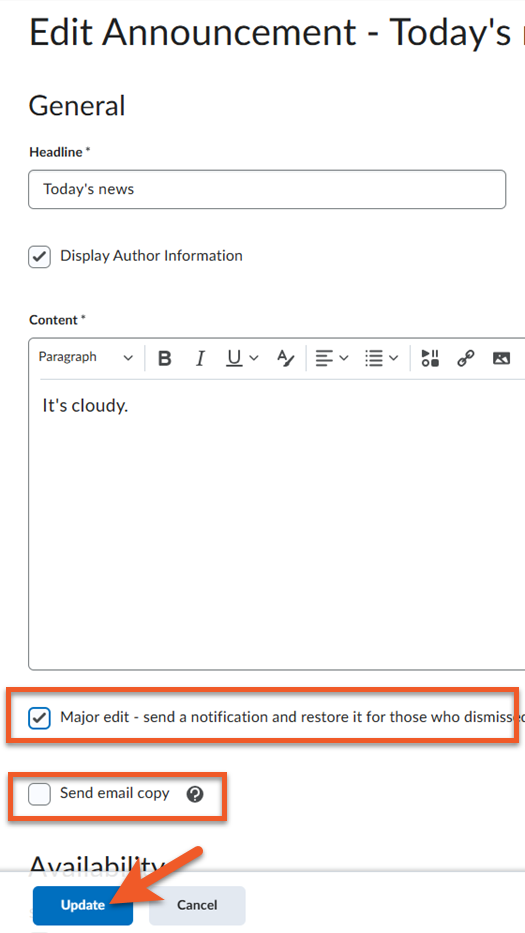
Edit your post - this can include changes to the headline, content, availability attachments or release conditions.
You can select the Major edit - send a notification and restore it for those who dismissed it check box to inform users who have opted into notifications of major changes and updates to postings they might have dismissed, ensuring those headlines reappear with current information.
You can also select Send email copy if you want all users to receive an email copy of the updated announcement.
Click Update to save your edits.
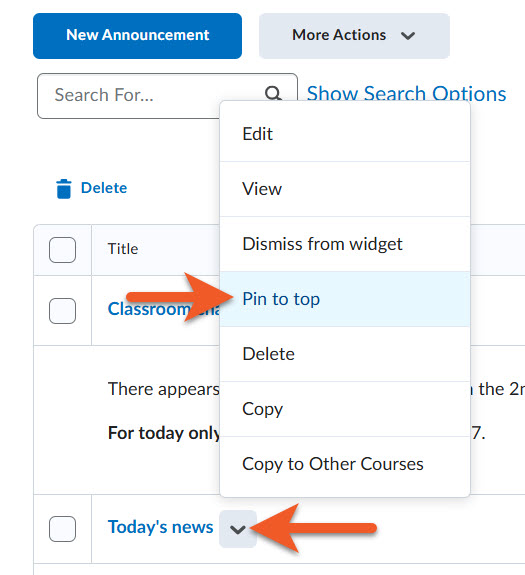
If you want an announcement to consistently appear at the list of announcements, you can do this from the main Announcements page.
Click on the contextual menu beside the announcement title, and select Pin to top.
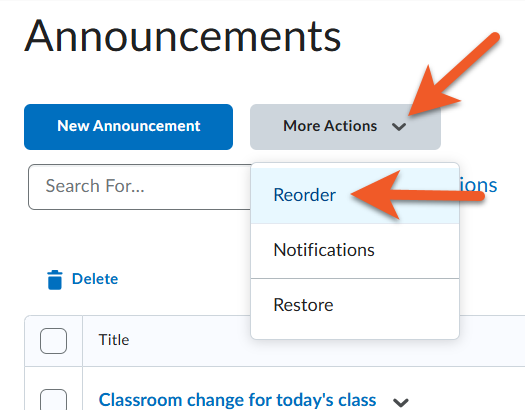
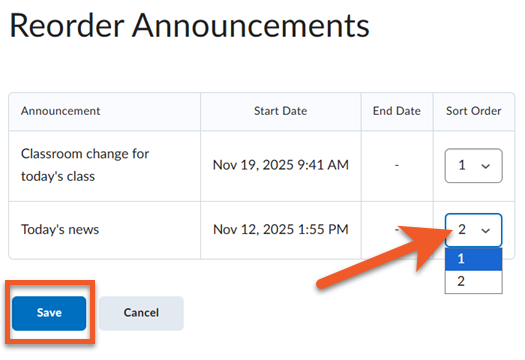
Use the drop-down lists in the Sort Order column to select an item's order. Other items automatically reposition themselves according to the new order.
Click Save.
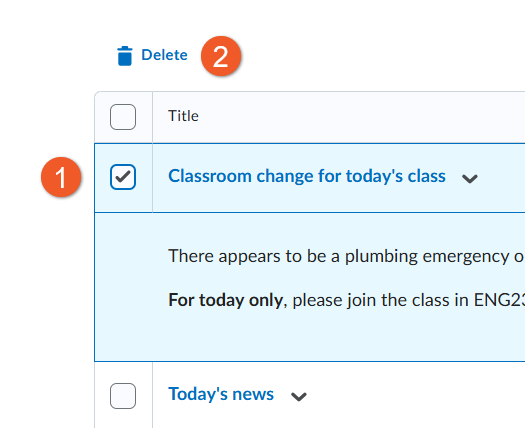
- From the Announcements page (Communication > Announcements), select the checkboxes to the left of the items to be deleted. You can select one or many items.
- Click Delete.
If you want to use an Announcement in multiple course shells, it is possible to create the announcement once, and then copy it to the other shells.
First, go into the first shell, and create the announcement, using the instructions found above on this page.
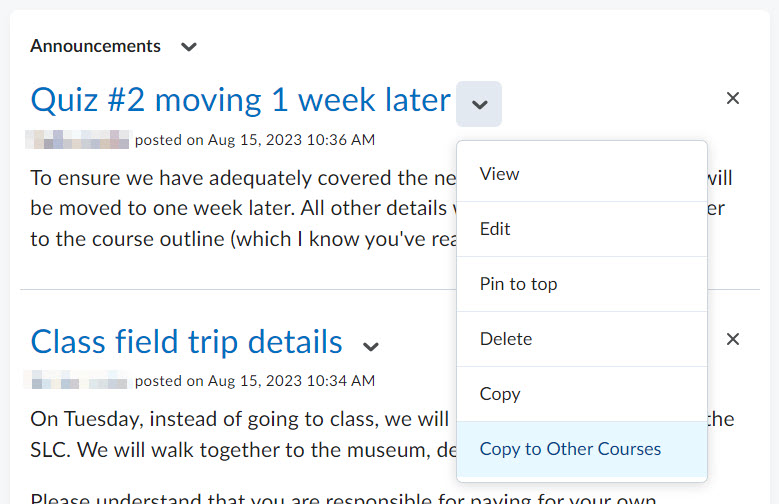
On either the main landing page of the course shell, OR in the Announcements tool, click on the contextual menu to the right of the announcement headline that you wish to copy, and select Copy to Other Courses.
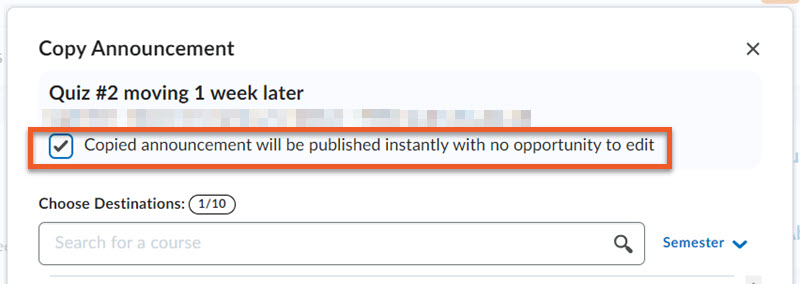
In the popup window that appears, pay close attention to the first checkbox.
ONLY select Copied announcement will be published instantly with no opportunity to edit if you do not need to make any changes to the copied announcement in the other shell(s). If you need to change dates or other details for each shell, do not select this option.
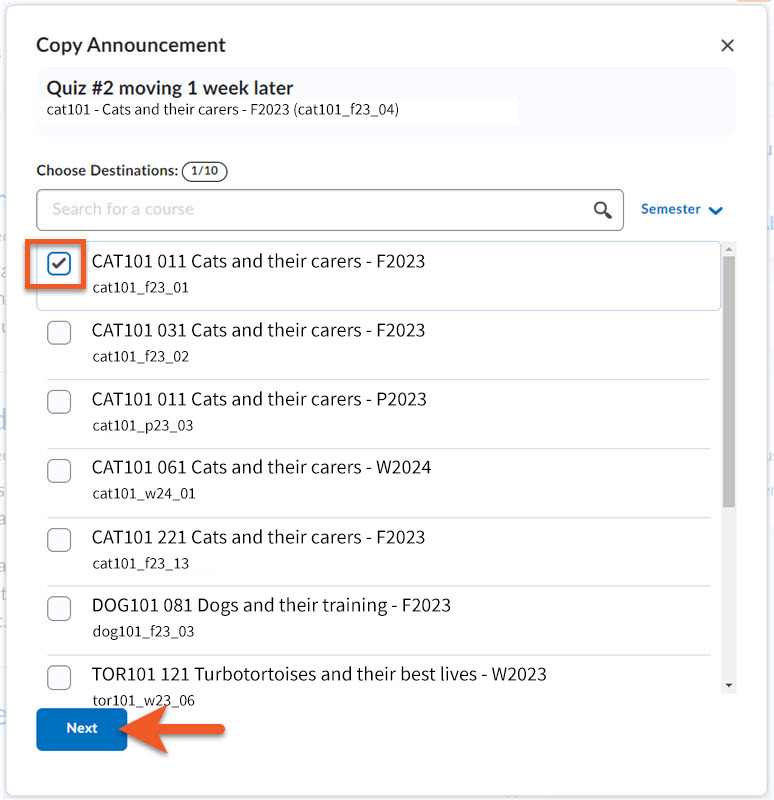
Select one or more course shells to copy the announcement to.
Please be very careful to select the correct shell(s). The names and shell codes can be very similar, and it's very easy to make a mistake. We advise that if you aren't sure, you exit this process, and go confirm the shell code of the course shell(s) you wish to copy to. Jot down the code(s). You can find the shell code either below the course title on your MyCourses page, or by going into each course shell, and clicking on Course Admin > Course Offering Information.
When you have selected all the course shell(s) you wish to copy the announcement to, click on the Next button.
On the next screen, confirm that the destination information is correct, then click on the Copy button.
On the following screen, you will see a "Copy Complete" confrmation message. Click on the Done button.
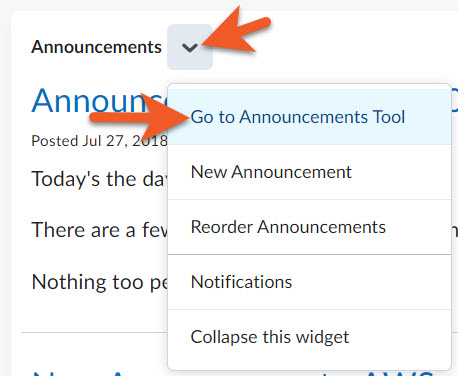
To confirm the announcement has been copied, to go each destination course shell, and navigate to the Announcements tool by clicking on the contextual menu beside "Announcements", then click on Go to Announcements Tool (or find it in the top navigation).
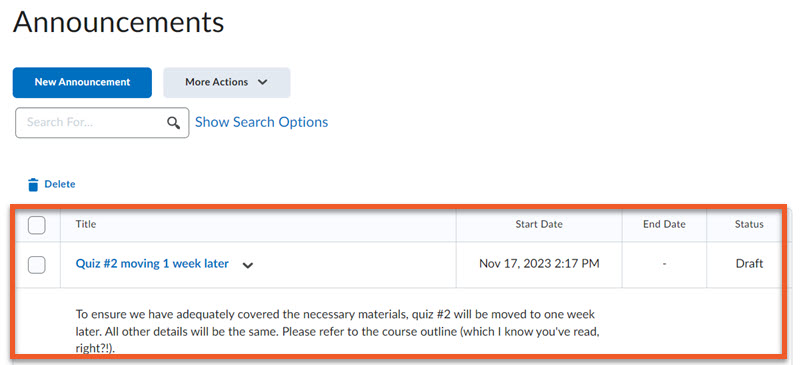
You should see the copied announcement at the top of the list of Announcements, with a start date that matches the date and time you copied the announcement.
Please Note: Copied announcements are set to Draft status until you publish them, so that you have a chance to make any changes that may apply to that particular course section.
Edit and publish the announcement when you're ready for students to view it.
Repeat for additional course shells, if applicable.
Related topics
Announcements and notifications