Content 7 Document Management

Content 7 is the official enterprise content management system of the Registrar’s Office.
Six departments and almost 1,000 users across campus currently use Content 7. The system can be accessed using any browser on any platform, including mobile. A client can also be installed on a Windows computer. Content 7 can store almost any file type and size.
The system is available 23 hours a day, seven days a week, with the exception of scheduled maintenance. The nightly backup outage occurs every night from midnight to 1 a.m.
To request access to Content 7 and for support, please contact your departmental representative. For training, please email content.training@torontomu.ca.
| Department | Access Contact | Support Contact |
|---|---|---|
Curriculum Management |
Ricky Szeto | Ricky Szeto |
Law |
Christina Mansour (ext. 556018) |
Shelly Evangelista (ext. 556003) |
Graduate Studies |
Program Administrator |
Program Administrator |
Student Records |
Ciro LeCompte (ext. 554803) |
Peter Norde (ext. 6047) |
Transfer Credit |
Illan Kandiah (ext. 2651) |
Illan Kandiah (ext. 2651) |
Undergraduate Admissions |
Shelly Evangelista (x556003) |
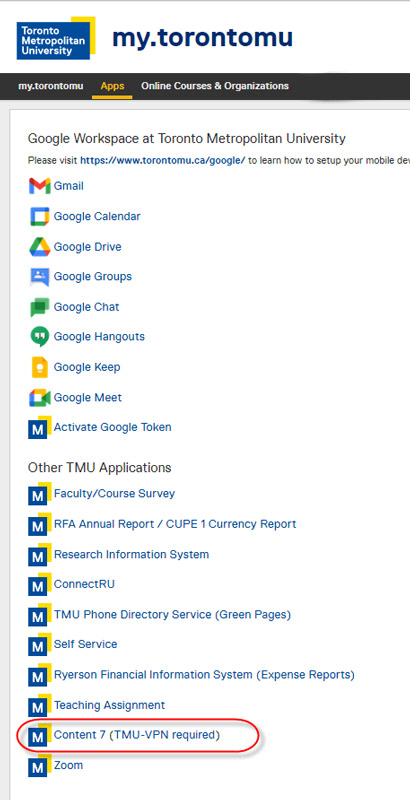
- Navigate to my.torontomu.ca (opens in new window) and log in using your TMU username and password
- Click the Apps tab
- Scroll through the list and select the Content 7 link
To use the client on a Windows computer, please follow the instructions on the CCS website.
Please note that VPN is required. Visit the CCS Security Software page for information on how to download the VPN client.
Content 7 has a new look and feel with many upgrades since its initial implementation in 2017. This includes an entirely new web interface called Experience that makes accessing documents more intuitive and is compatible with all major browsers. Content 7 will continue to evolve and improve.
Accessing Documents
Accessing documents within Content 7 is simple, fast and secure. Typically, documents are accessed by searching by Student ID. Other searches can be performed including individualized filters that can be created and applied.
Workflow within Content 7 allows a document to travel through a business process, to be accessed by different users along its path, with related materials immediately available, all while being securely stored.
Content 7 is tightly integrated with Campus Solutions (MyServiceHub). Information on forms and document data is pulled directly from Campus Solutions.
Uploaded Documents
Through graduate and undergraduate upload websites, applicants can provide documents to support their applications which are stored in Content 7. Through the transfer credit upload website, applicants and students can apply for transfer credits. Also through this process, they can provide course outlines allowing for immediate evaluation of the application.
For Windows users wishing to connect to Content 7 using the client version, please visit the Computing and Communications Services (CCS) website. VPN may be required and is also available from CCS.
Note: This option is not available for Mac users.
The following instructions are for both Mac and Windows users.
-
Confirm login credentials.
Once your my.torontomu username is added to Content 7 you will be able to sign in using your TMU username and password. To request access to Content 7 please contact your departmental representative.
-
Verify system requirements.
Supported browsers:
- Apple Safari (Mac OS v10.10)
- Google Chrome (Microsoft Windows OS)
- Microsoft Edge
- Microsoft Internet Explorer 11
- Mozilla Firefox (Microsoft Windows OS)
Supported browser versions are listed, however, it is recommended you upgrade to the latest patch of the supported browsers. Note that some browsers release automatic updates.
-
Launch a browser and navigate to my.torontomu.ca (opens in new window) and log in, select the Apps tab, then click on Content 7.
Troubleshooting
The following are common questions and fixes for items within Content 7. If you are in need of additional Content 7 support, please contact your departmental representative.
Please ensure your VPN is connected.
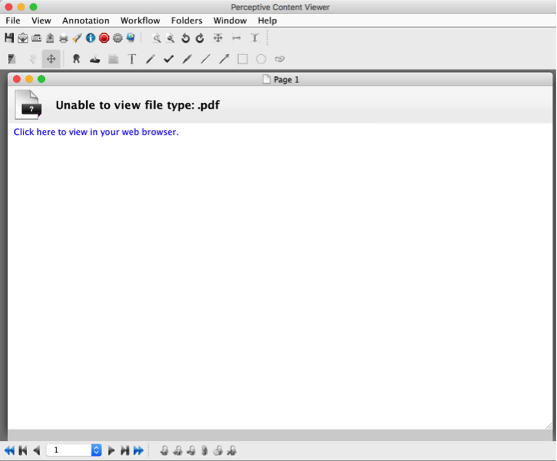
Single-click the Click here to view in your web browser link and the PDF will launch in a new tab.
Occasionally, a TIFF document that has multiple pages appears to be only one page. This is related to document compression.
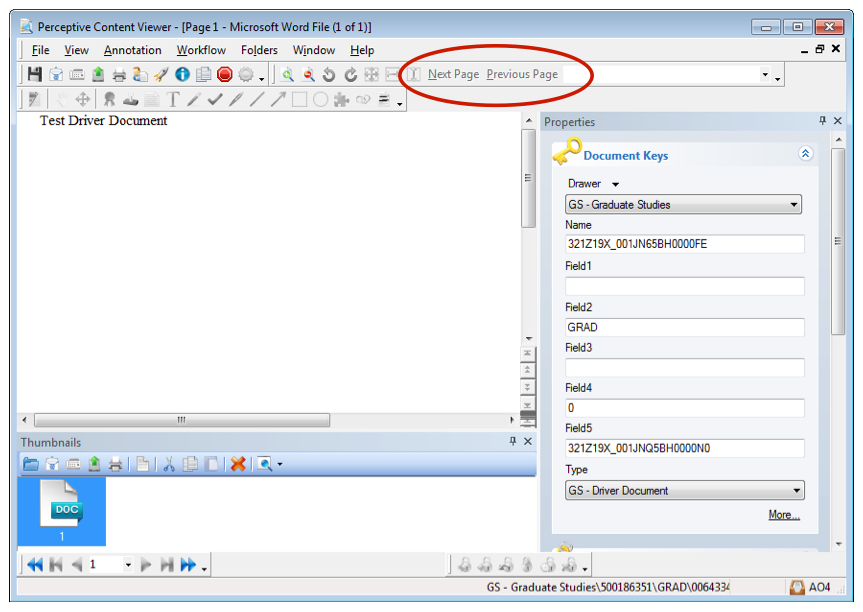
To assist with viewing these multi-page TIFF documents in the client, a button to navigate through the pages of the document can be added to the Content 7 Toolbar in the Perceptive Content Viewer window.
How to Add a Next and Previous Page Button
-
Launch the Perceptive Content client. Go to the Perceptive Content Viewer by opening any document.
-
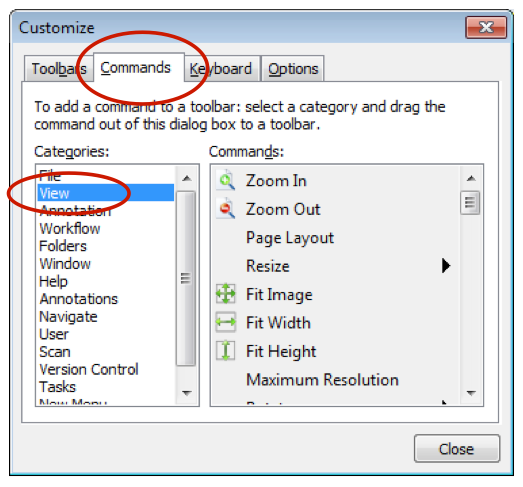
Click View > Toolbars > Customize…
-
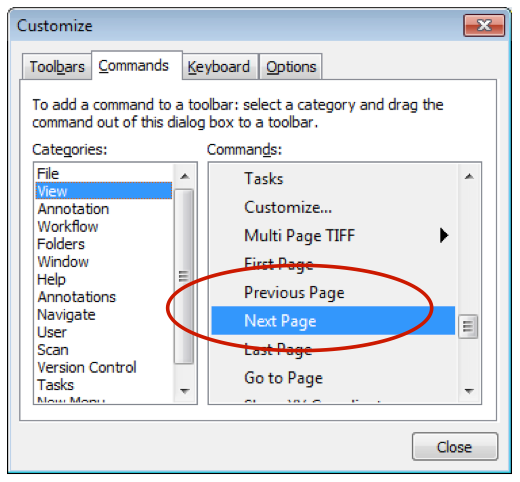
From the dialogue box, click the Commands tab. In the Categories, click View.
-
In the Commands list, click Next Page and drag it to the Toolbar.
-
Click Previous Page and drag it to the Toolbar.
-
Click Close. The Next Page and Previous Page buttons will appear similar to this.
Click on the Rocket Icon on the Perceptive Content Viewer toolbar.

If you are using a Mac and the document does not open in the associated application, follow the steps according to the version of Safari you are using.
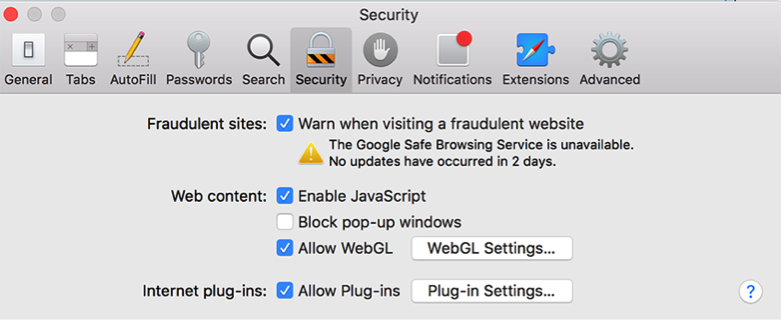
Safari 10 Users
- Open the Safari browser
- Go to Preferences > Security
- In the Internet plug-ins section, click Manage Website Settings
- In the left pane, click Java to open the settings for Java plug-ins
- In the main pane select On or Allow for content.torontomu.ca
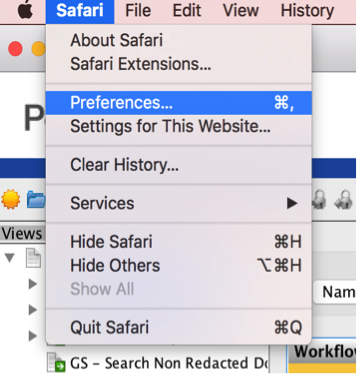
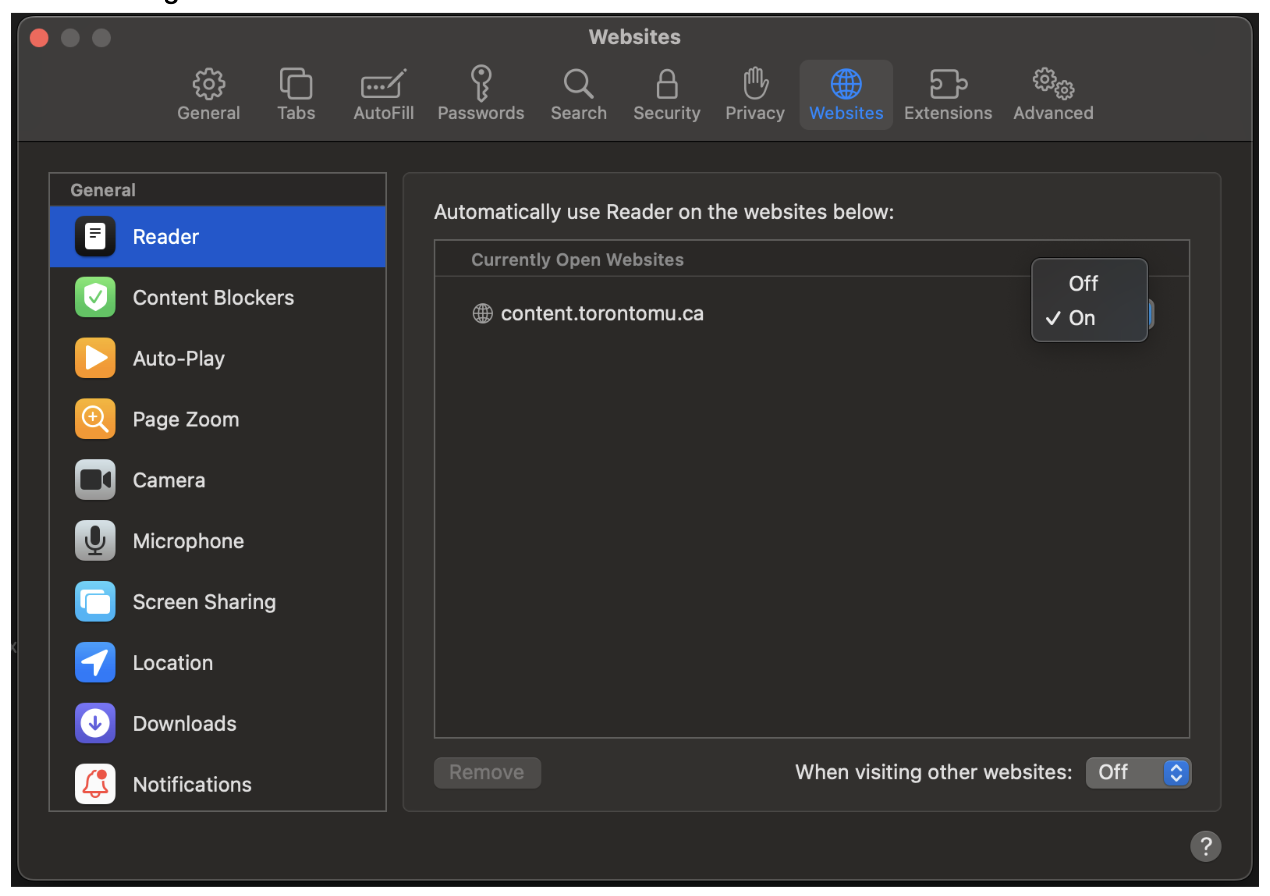
Safari 11 Users
- Select the Preferences option from the Safari menu
- Choose the Websites tab and select the Java setting on the left pane
- Note: If you do not have content.torontomu.ca as an allowed website (refer to the screenshot below), please add it now
- Ensure the checklist is set to On. While clicking this option, hold down the Option key and uncheck Run in Safe Mode
- Close the Preferences window
-
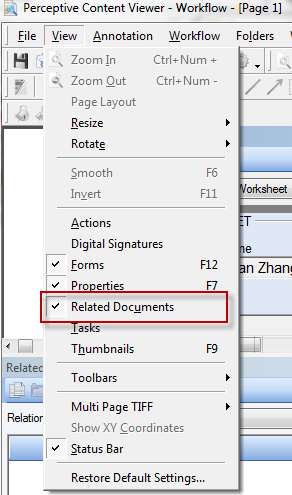
Click on View.
-
Select Related Documents.
-
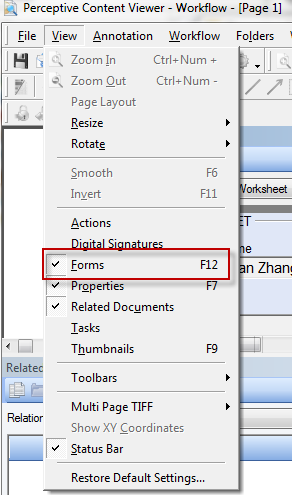
Click on View.
-
Select Forms.