Manage videos in Stream
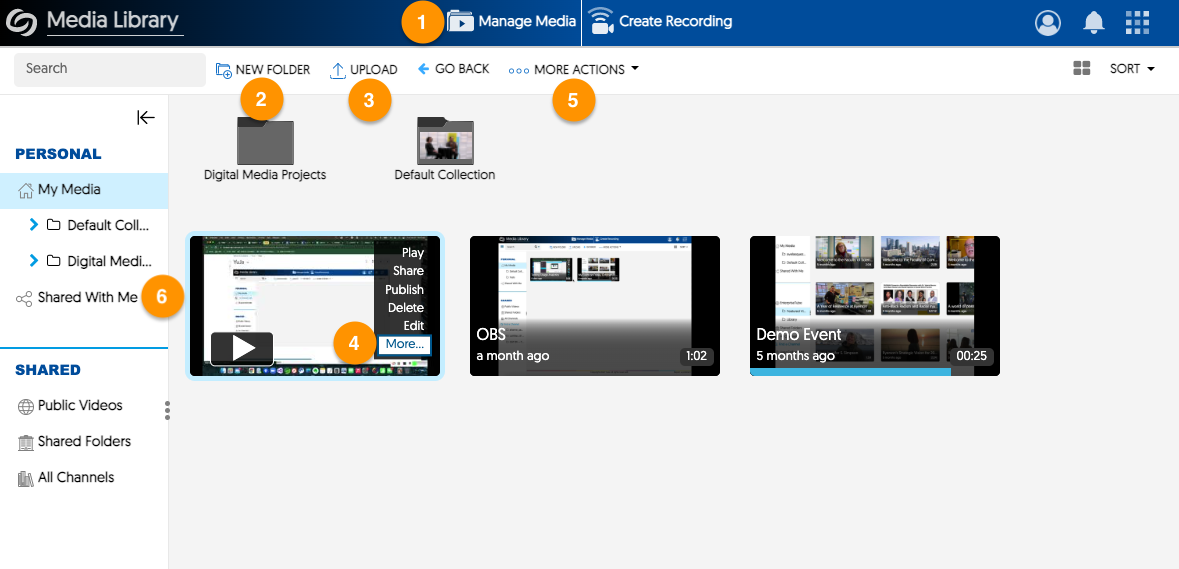
- On Stream Video Platform, click Manage Media. This is your home folder for all video content you own.
- Create New Folder: organize your videos into folders to keep them organized.
- Upload: drag-and-drop video files from your computer to upload to the current folder.
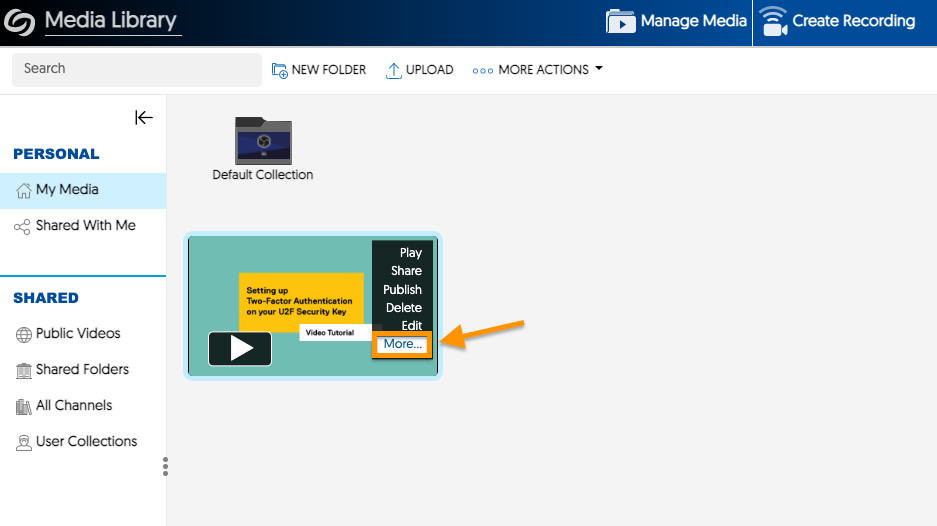
- Single select: Hover your mouse pointer over a video to reveal available actions. Click More to access other available actions.
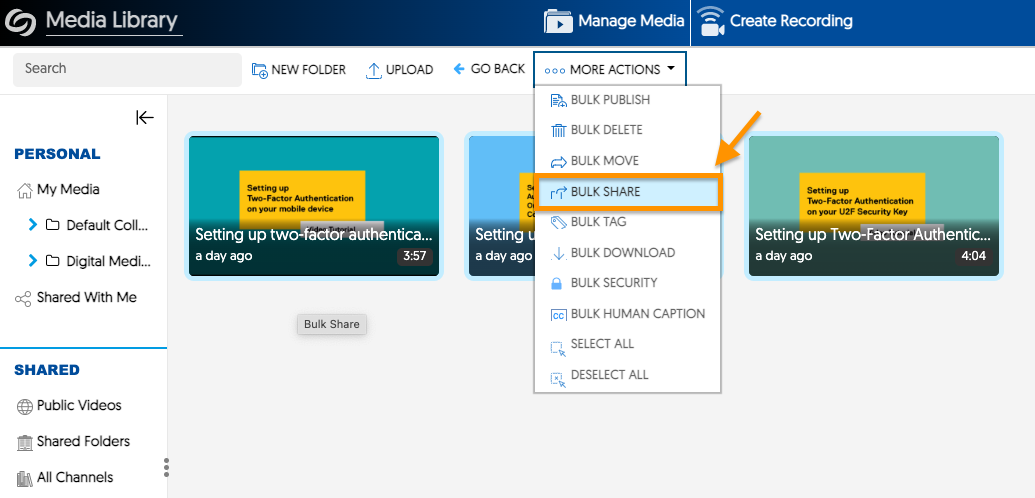
- Bulk select: On the video icons, click and drag to select multiple videos. Click More Actions, to reveal available actions.
- Shared With Me: contains links to videos that others own and have shared with you.
-
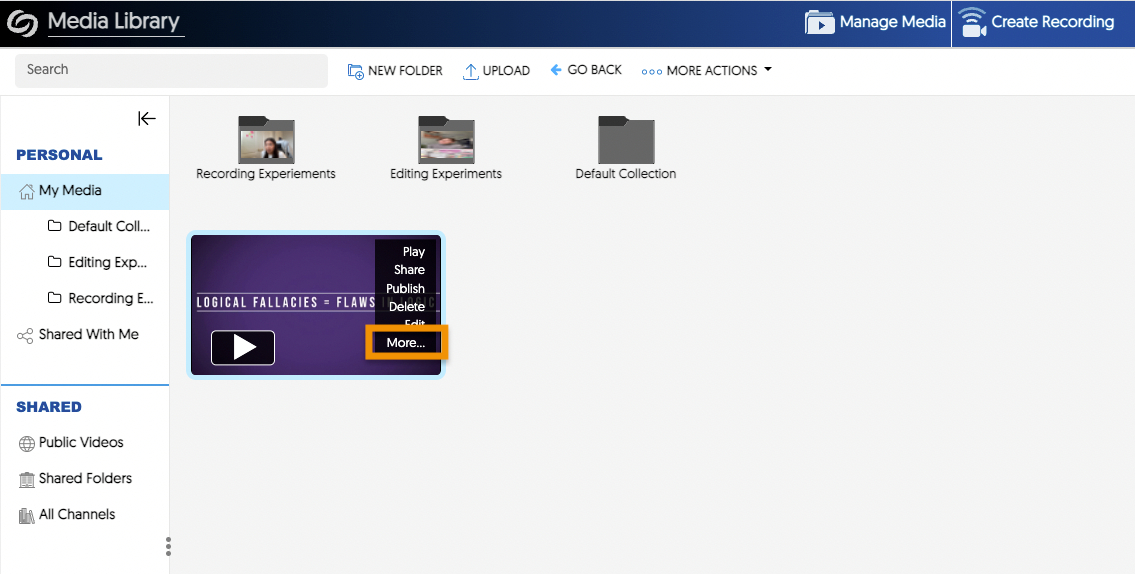
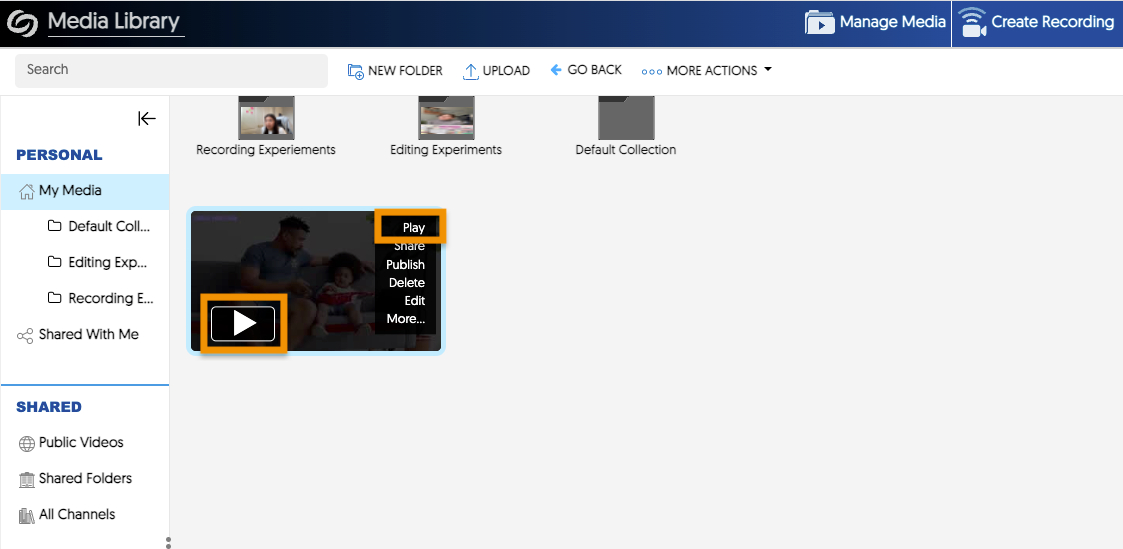
Hover your mouse on the video and click More…
-
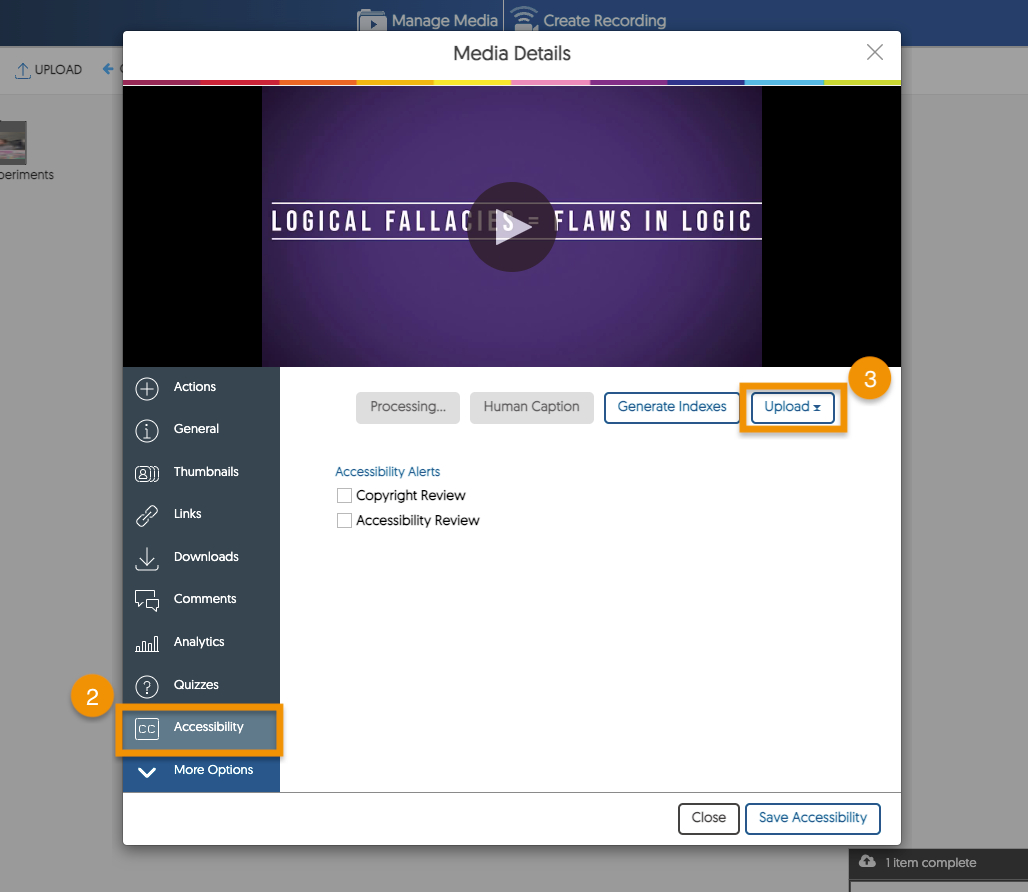
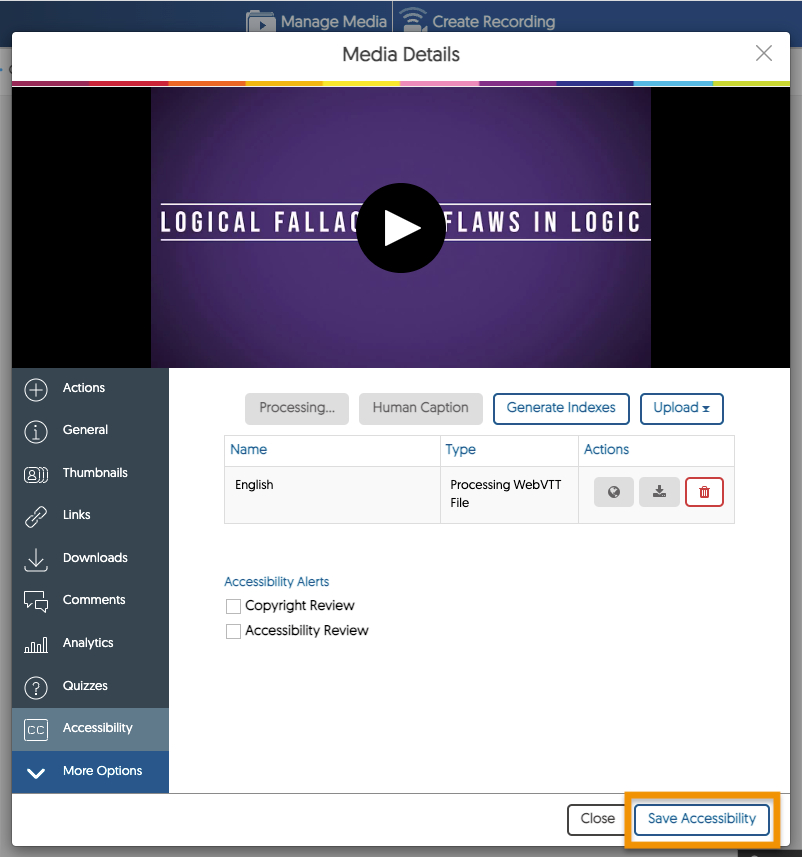
A pop-up window will appear; click Accessibility on the left menu pane.
-
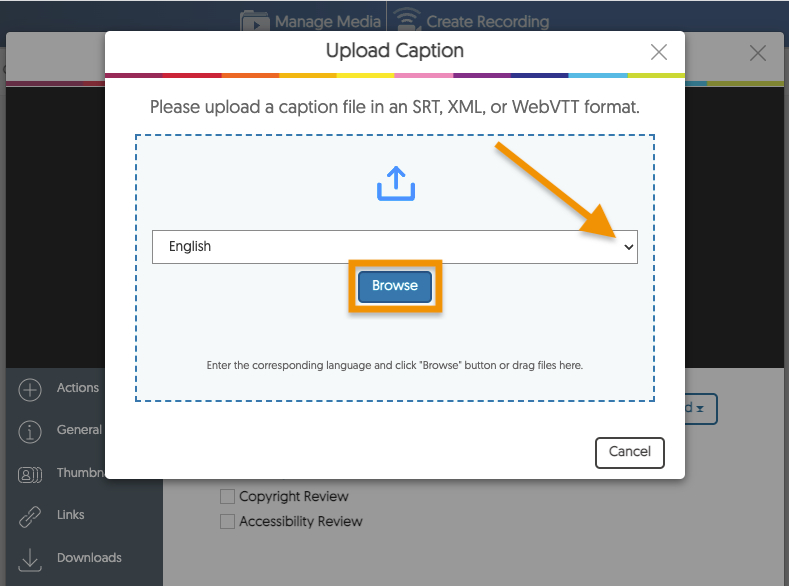
Inside the Accessibility menu, click Upload in the top right corner.
-
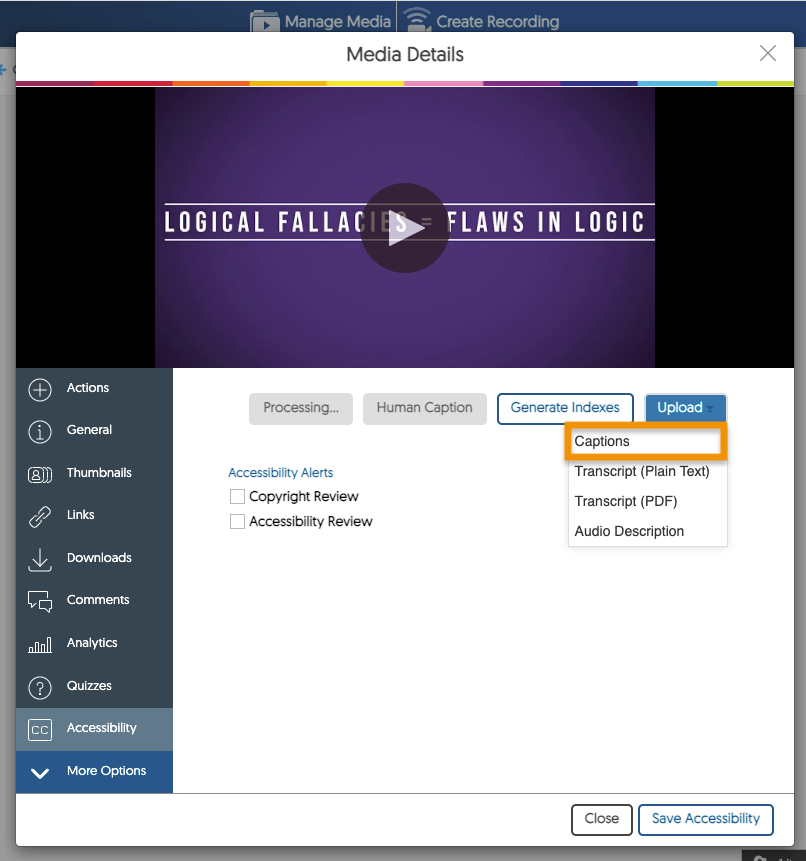
A drop-down menu will appear; click Captions.
-
Select a language and click Browse to choose a caption file on your computer.
-
Your caption file will upload to Stream; click Save Accessibility to save the captions and exit the menu.
-
To see your captions in the video, hover over your video in My Media and press Play.
-
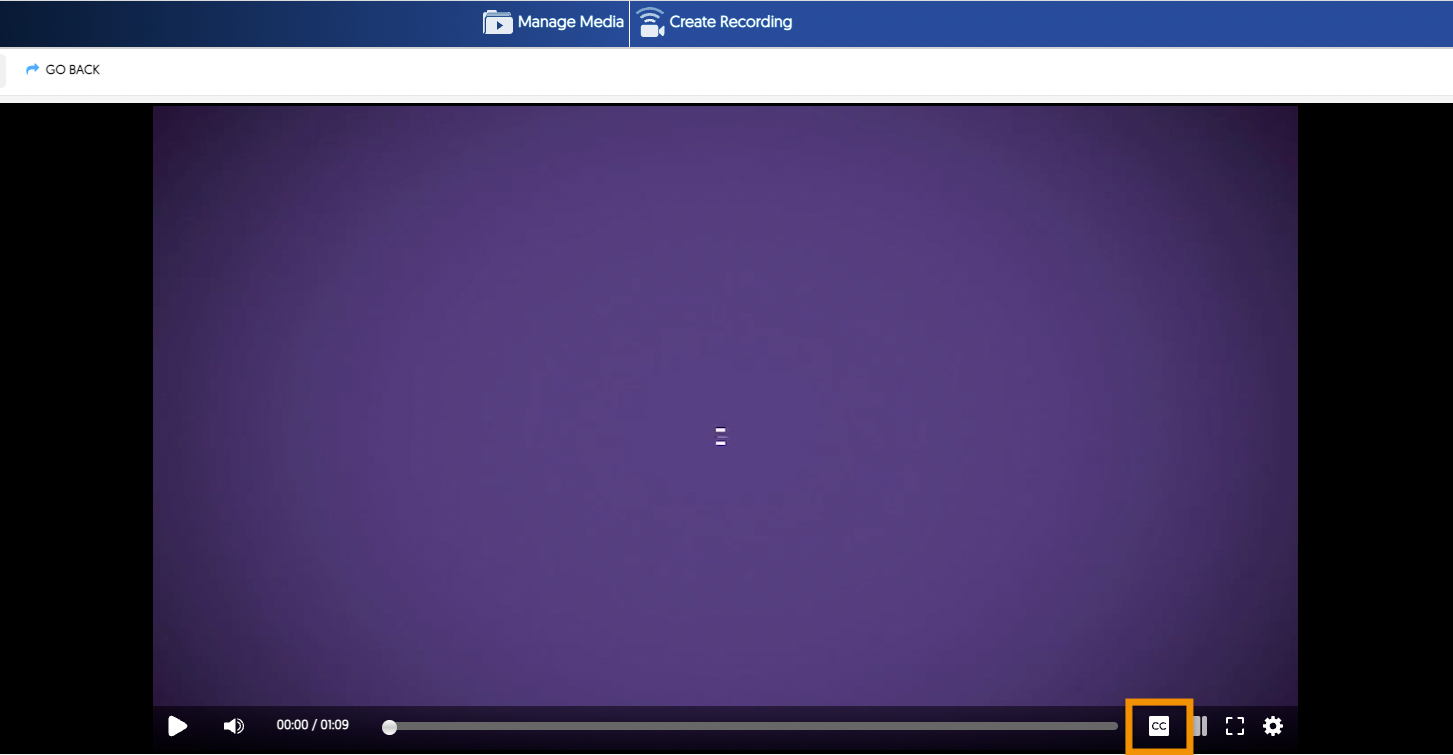
In the video player, use the Captions (CC) button to toggle the captions on or off.
-
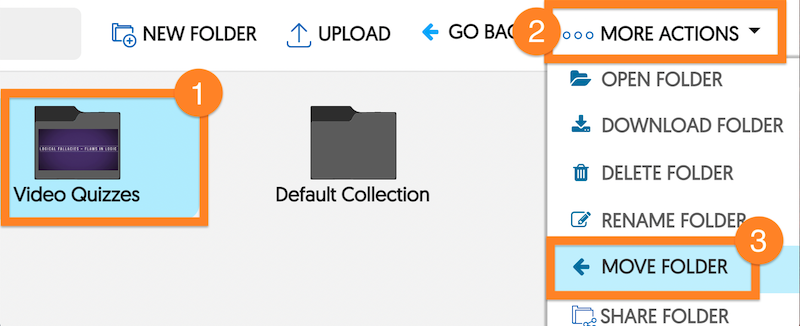
In My Media, select the folder to move.
-
Click More Actions in the Actions menu at the top of the screen.
-
A dropdown menu will appear with additional actions. Click Move Folder.
-
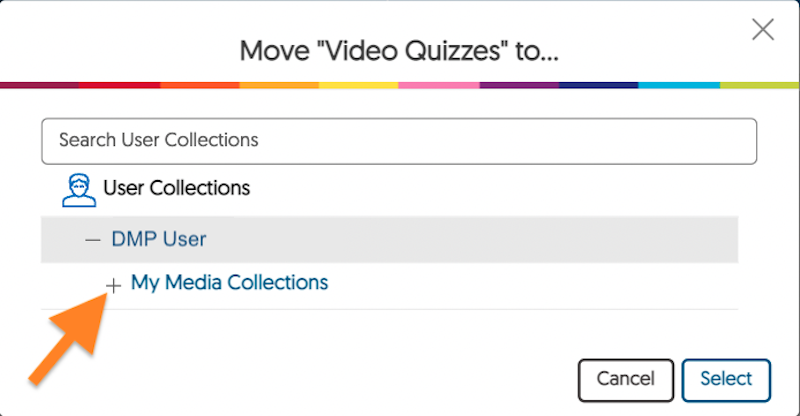
A pop-up window will appear to move the folder. Click the Plus Sign next to your User Collection and My Media Collections to access your folders.
-
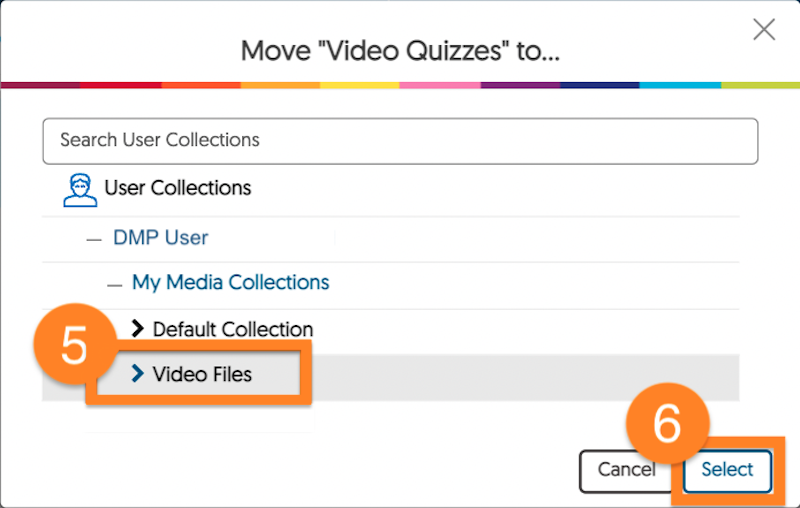
Choose and click the folder to move the selected one into. The Dropdown Arrow next to it will turn blue to indicate the selection.
-
Click Select to save the change.
-
In My Media, double-click on the folder to open it and check if the transfer was successful.
Content owners can share their content with other internal users of the platform.
-
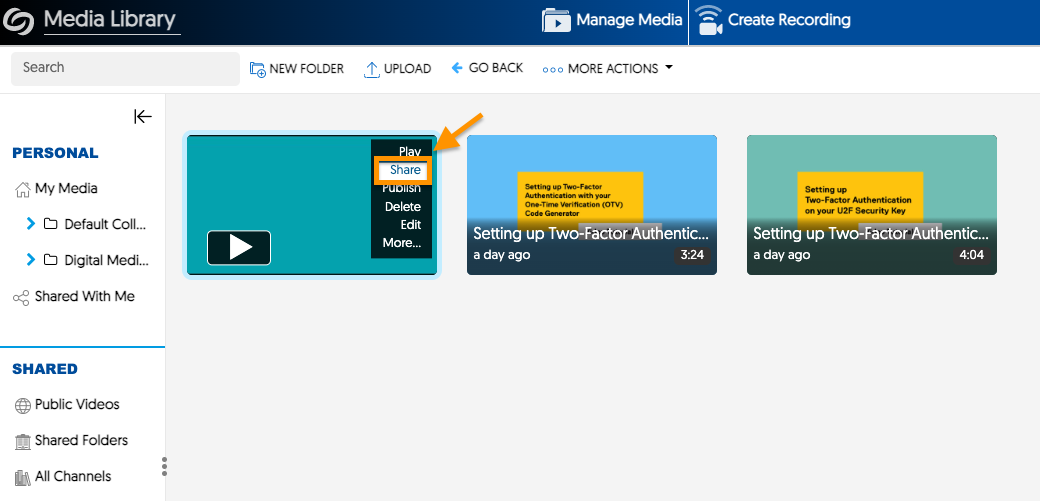
To share a single video, hover your mouse over media and click Share.
-
To share multiple videos, click and drag to select multiple videos. Click More Actions, then Bulk Share.
-
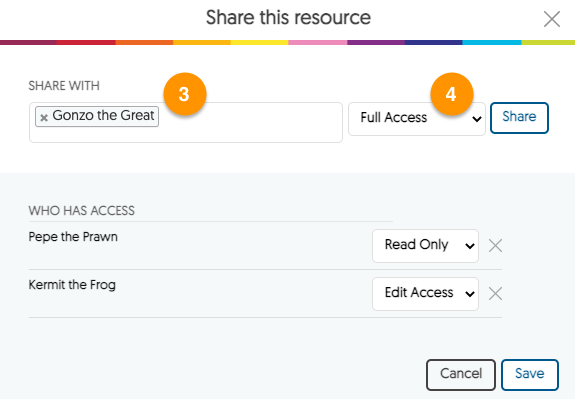
Under Share With, start typing the name of the user(s) you would like to share with.
-
Choose between Full Access (includes delete), Edit Access, and Read Only Access. You can provide different levels of access to users.
-
Click Share, then click Save.
If you need to share content with someone who does not use the platform, you can grab its direct link by going through the following steps.
-
On Stream Video Platform, hover your mouse over a video and click More…
-
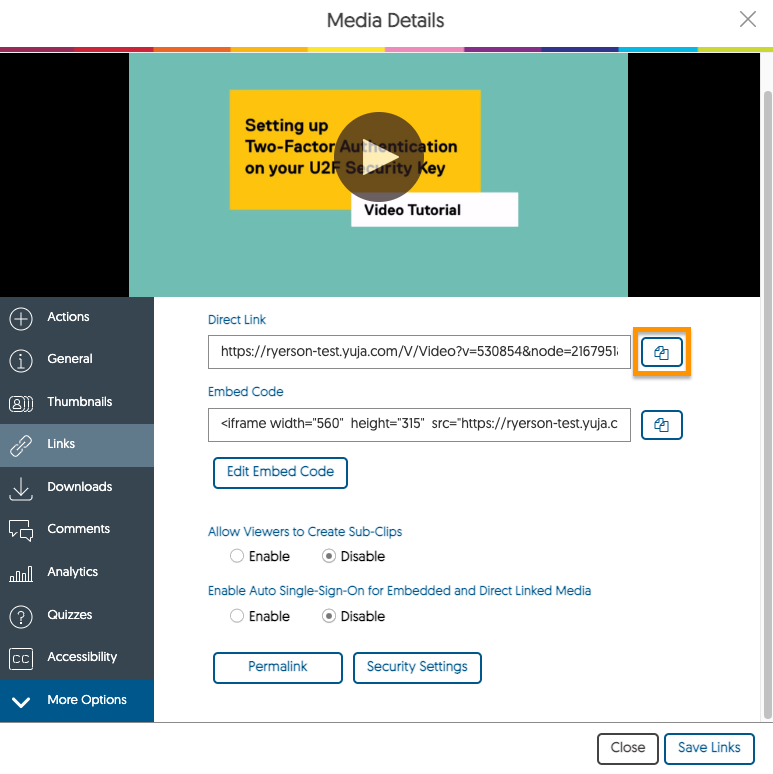
Click Links on the left sidebar.
-
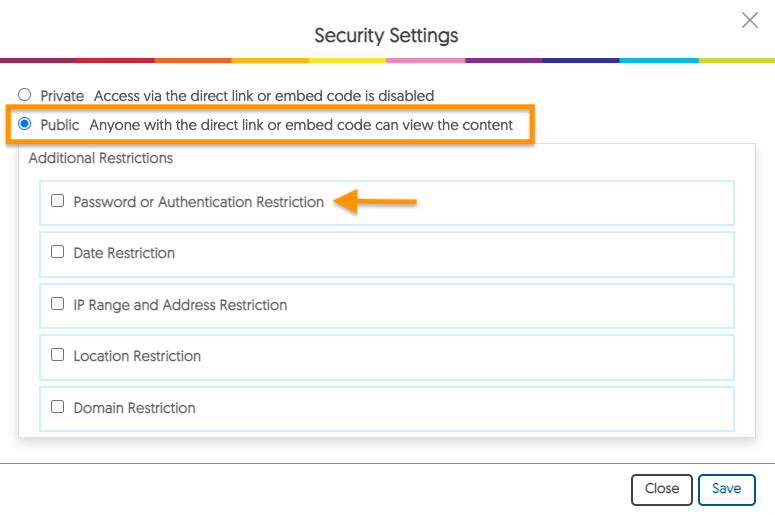
Click the Security Settings button and set the access to Public.
Note: you can also add more security restrictions here like Password or Authentication Restriction (Login Required).
-
Click Save and Close the pop up.
-
Copy the Direct Link by clicking the Copy Direct Link button beside it.
-
Share this link to the intended external users.
-
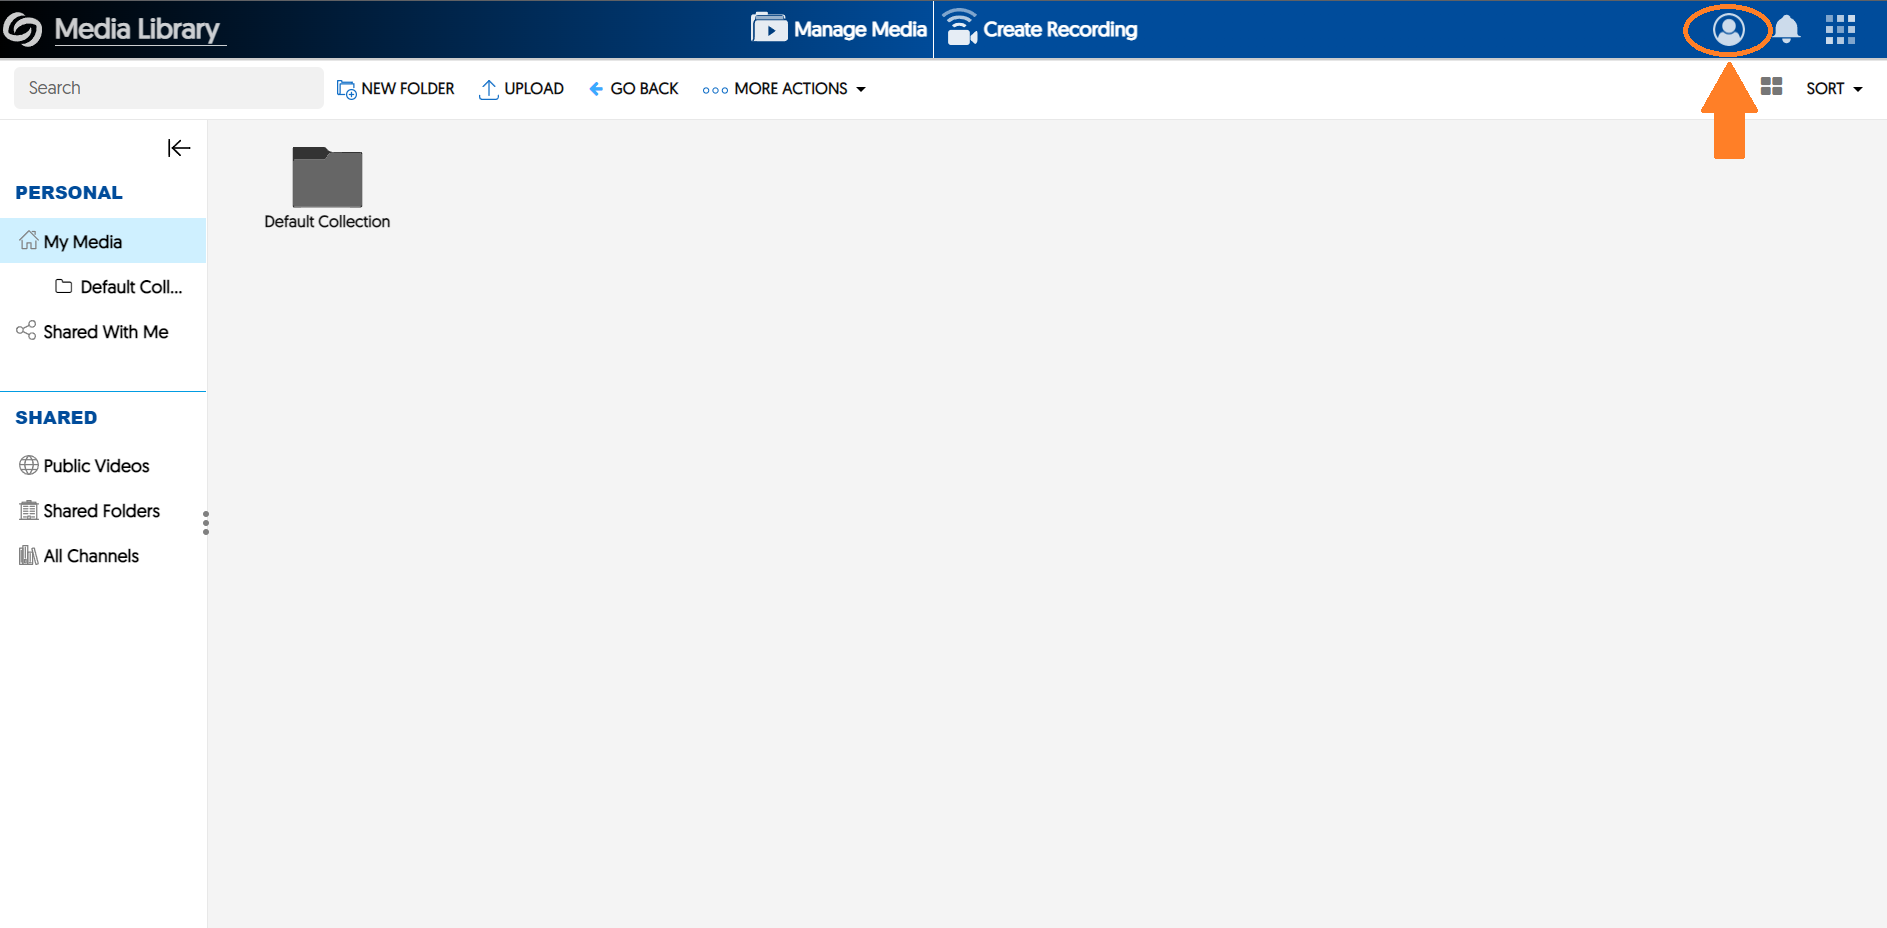
Click on the My Account icon on the top right. A dropdown menu will appear.
-
Click My Account.
-
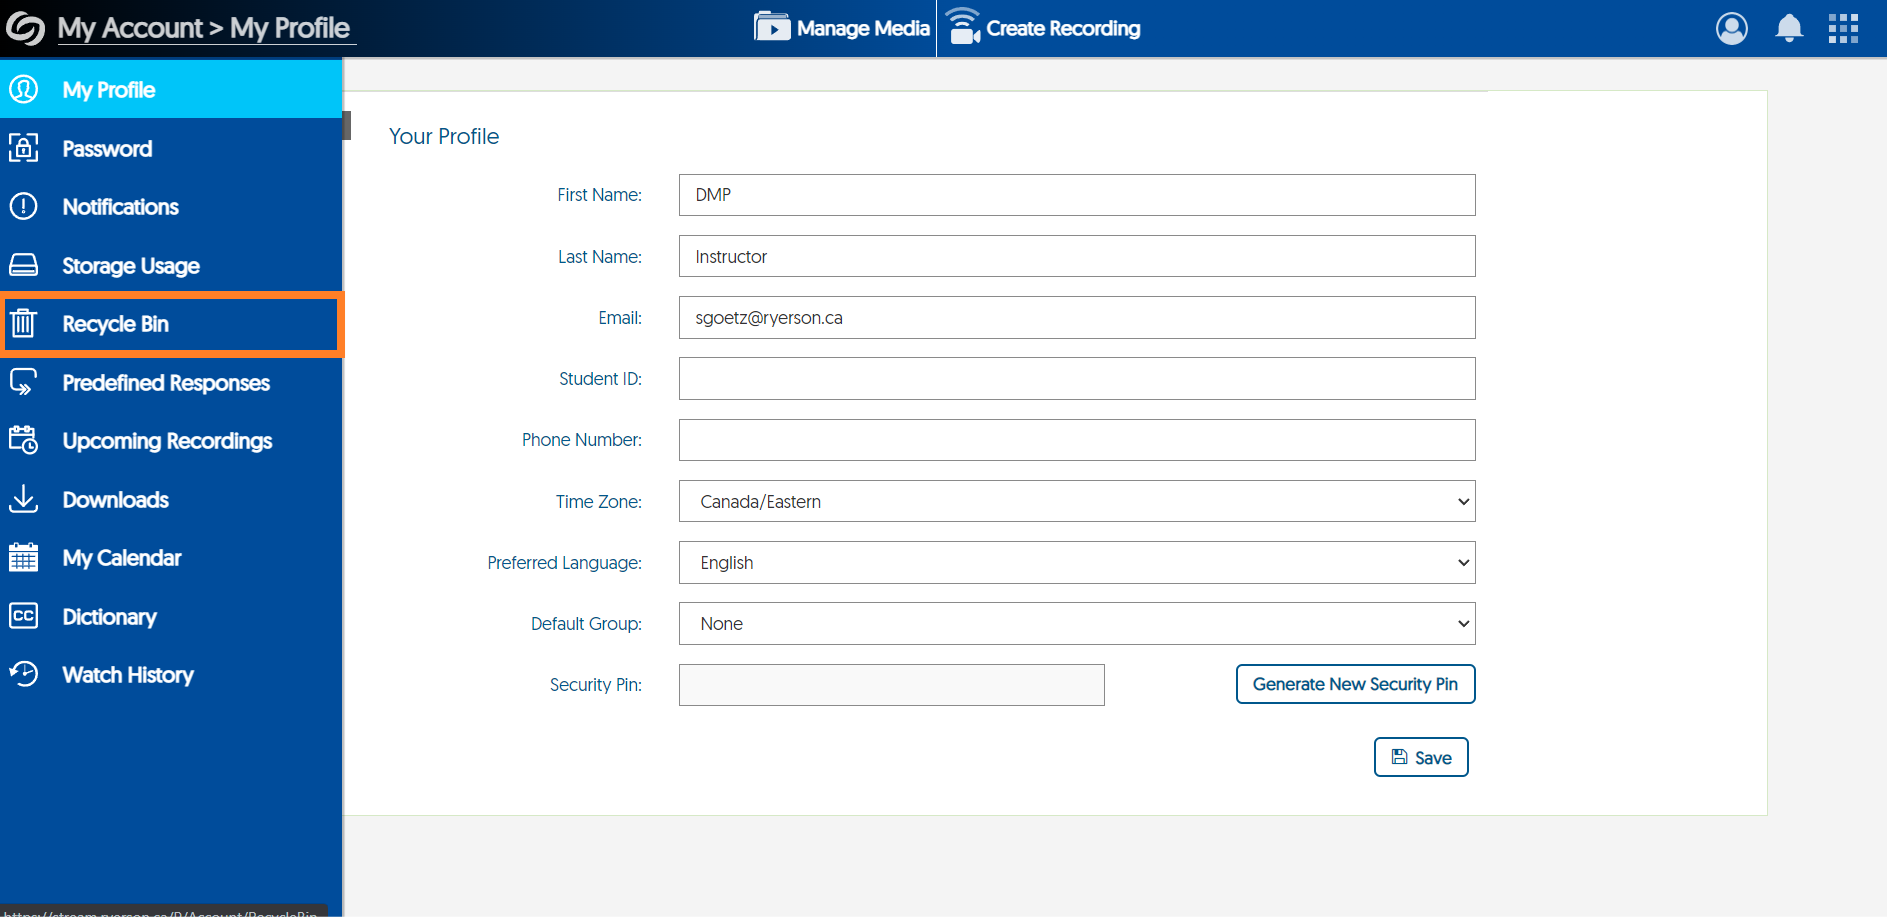
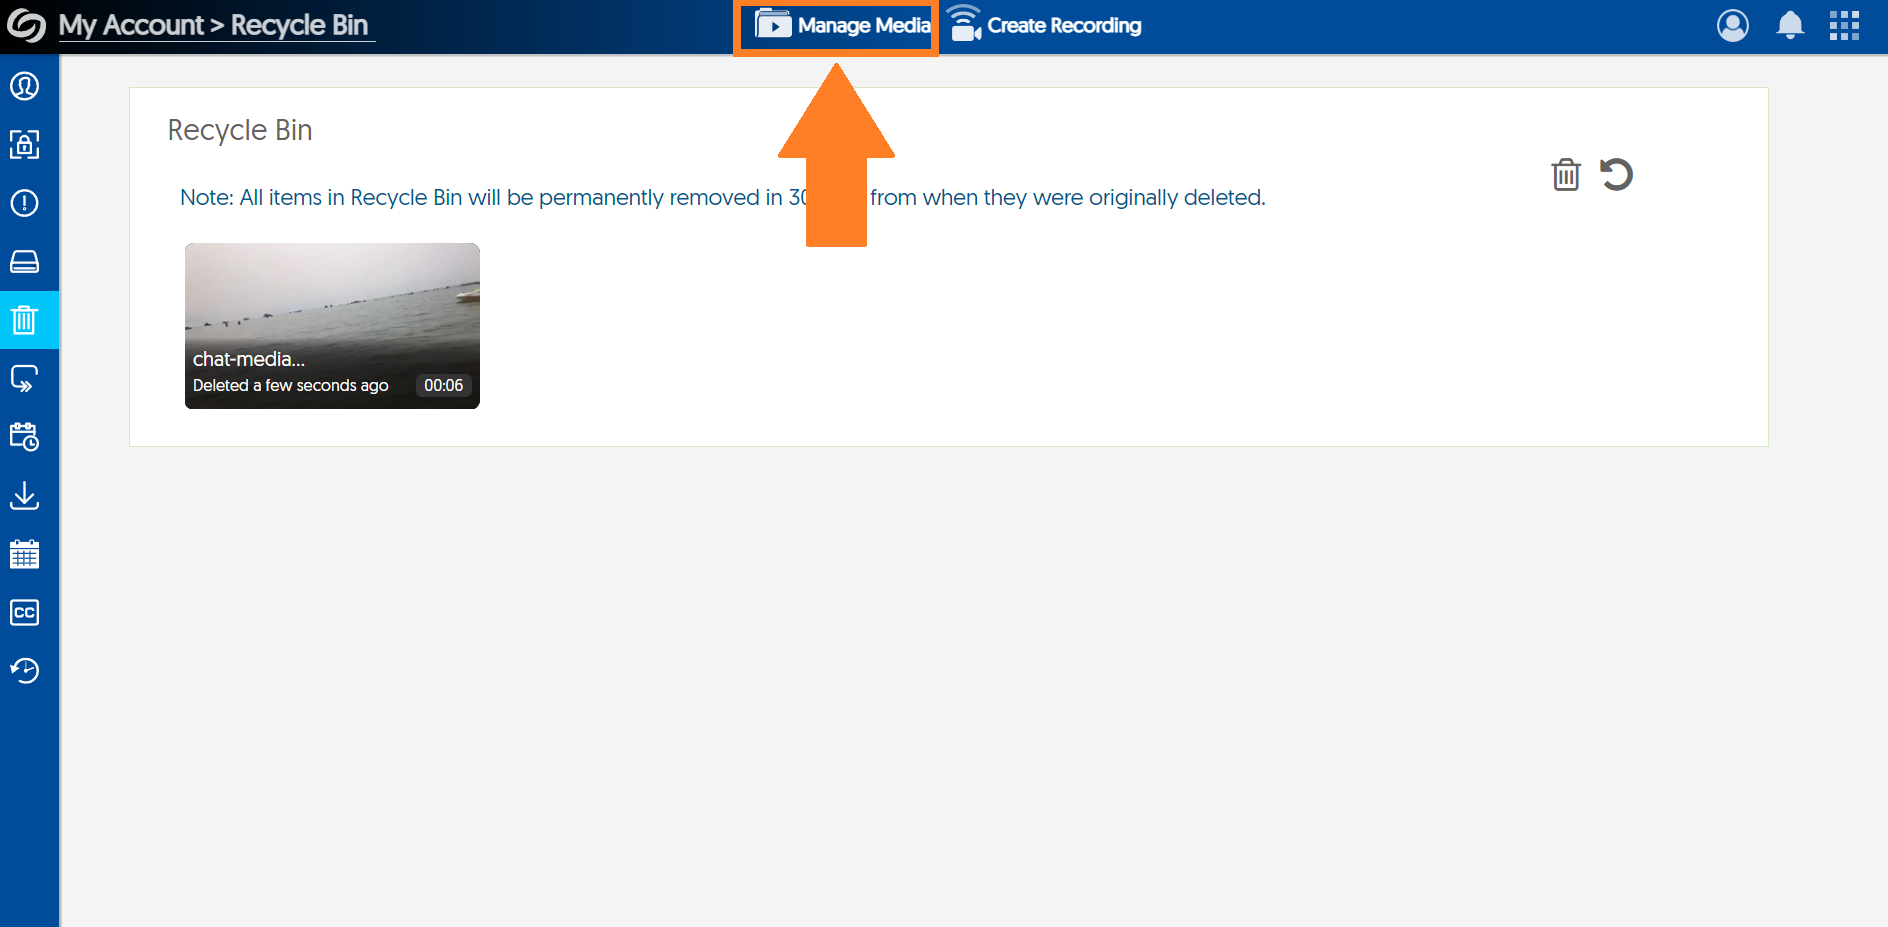
Hover to the left of your screen until the sidebar appears, then click Recycle Bin.
-
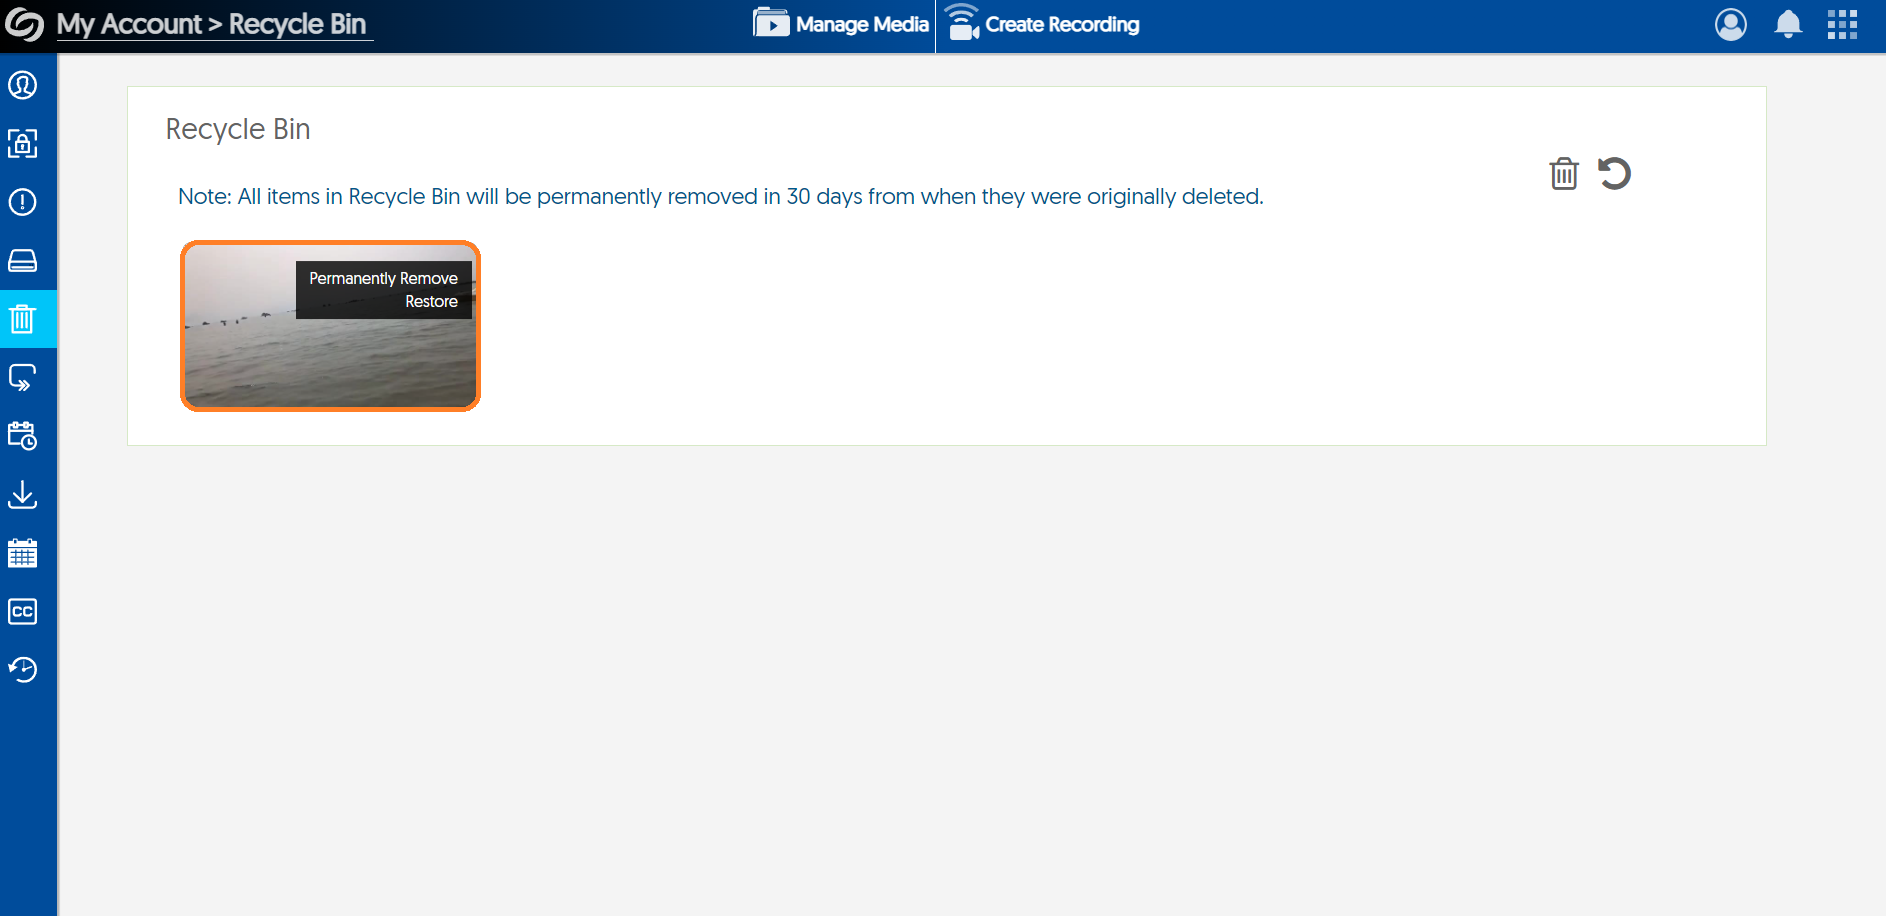
In the Recycle Bin, hover over the thumbnail of the video.
-
Select Permanently Remove to delete your video, or Restore it back to your My Media channel.
-
To return back to your My Media repository, click on Manage Media at the top of the page.
-
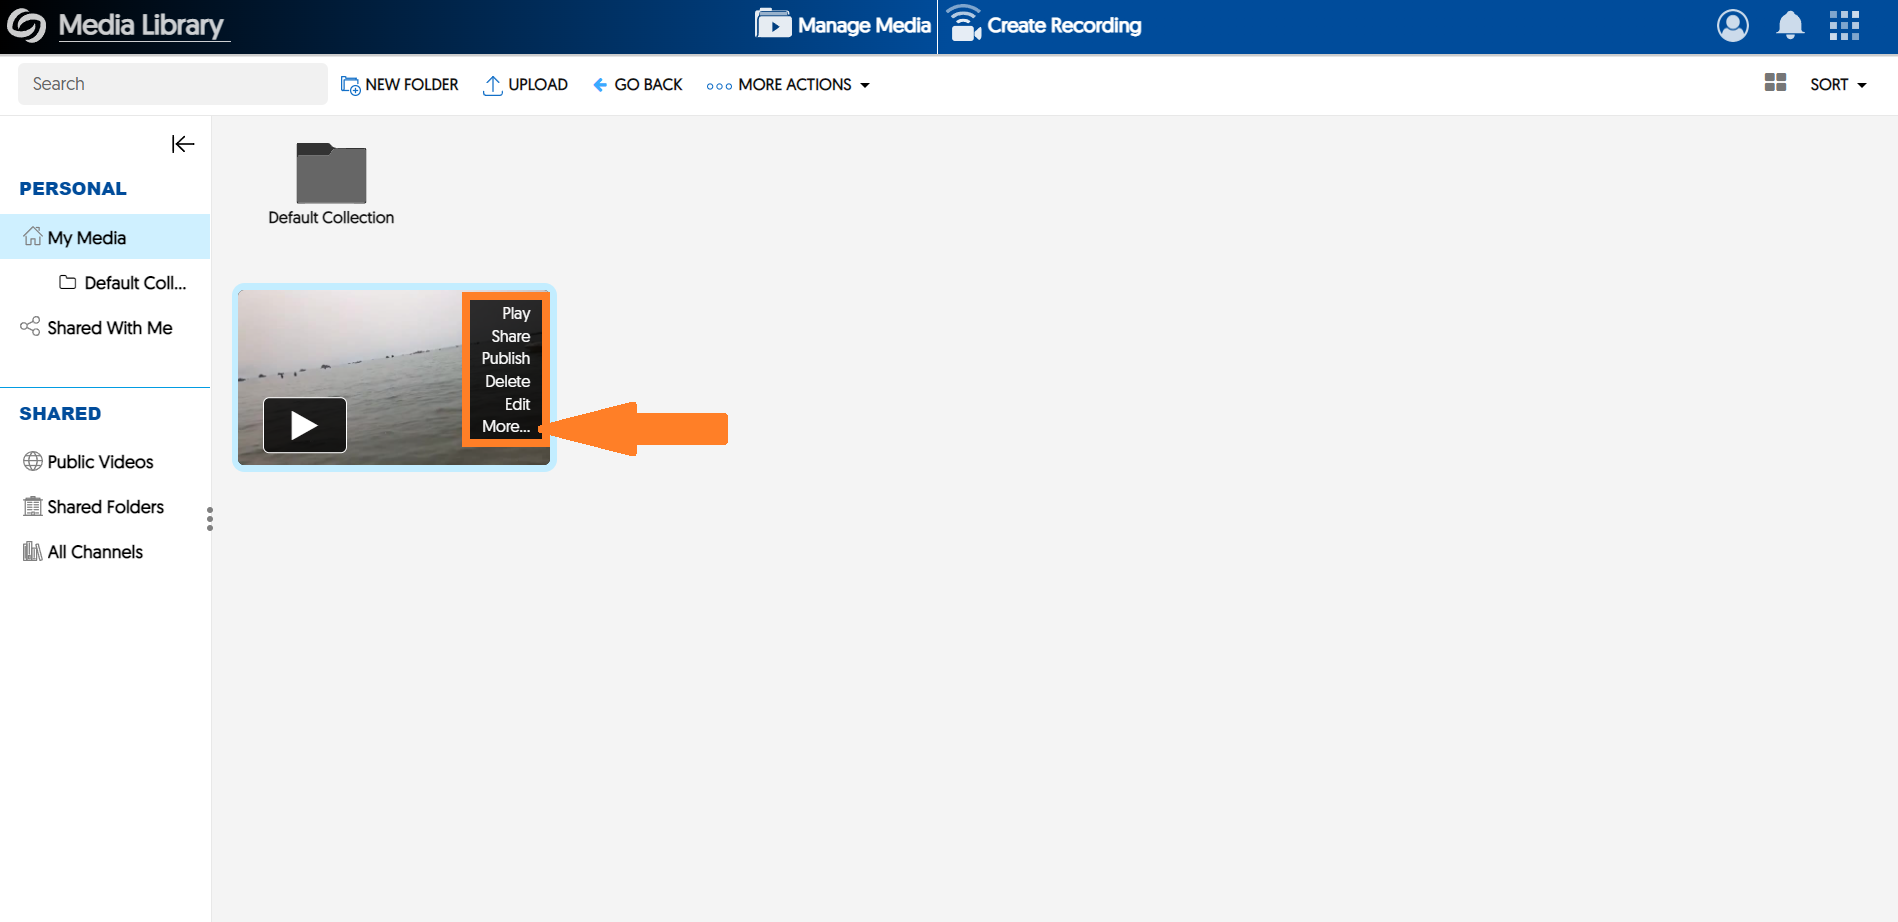
On My Media, hover your mouse over the video thumbnail. Click More…
-
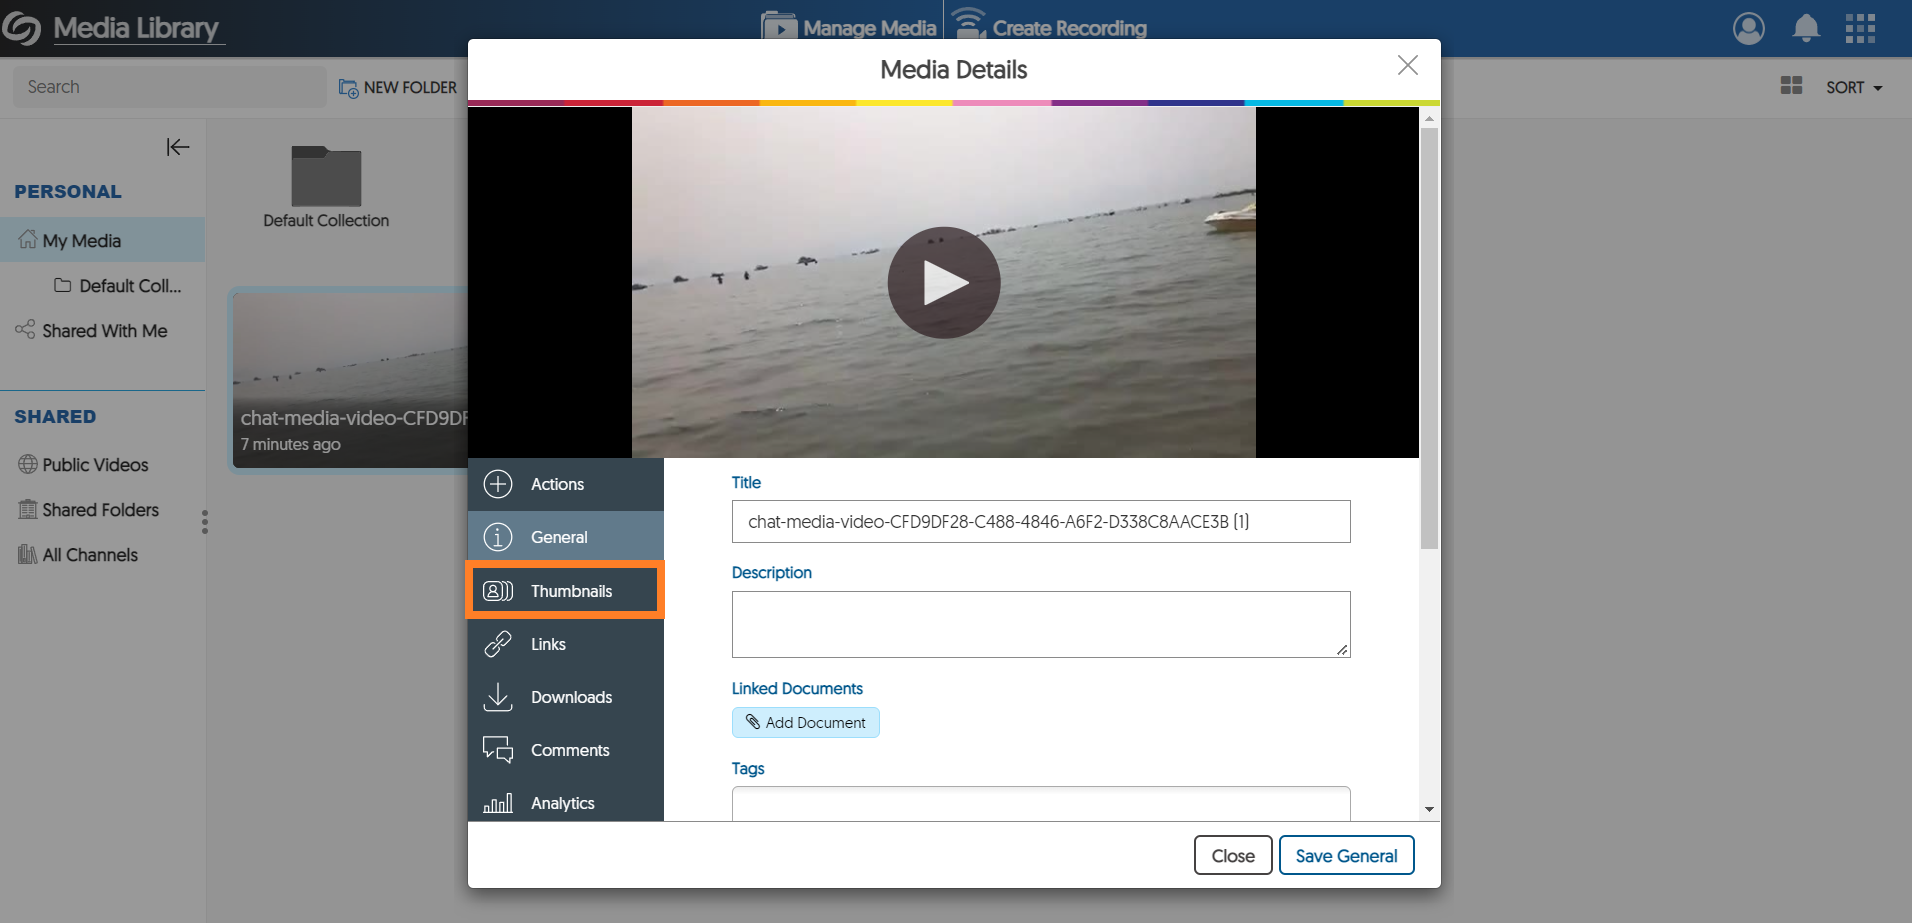
Click Thumbnails.
-
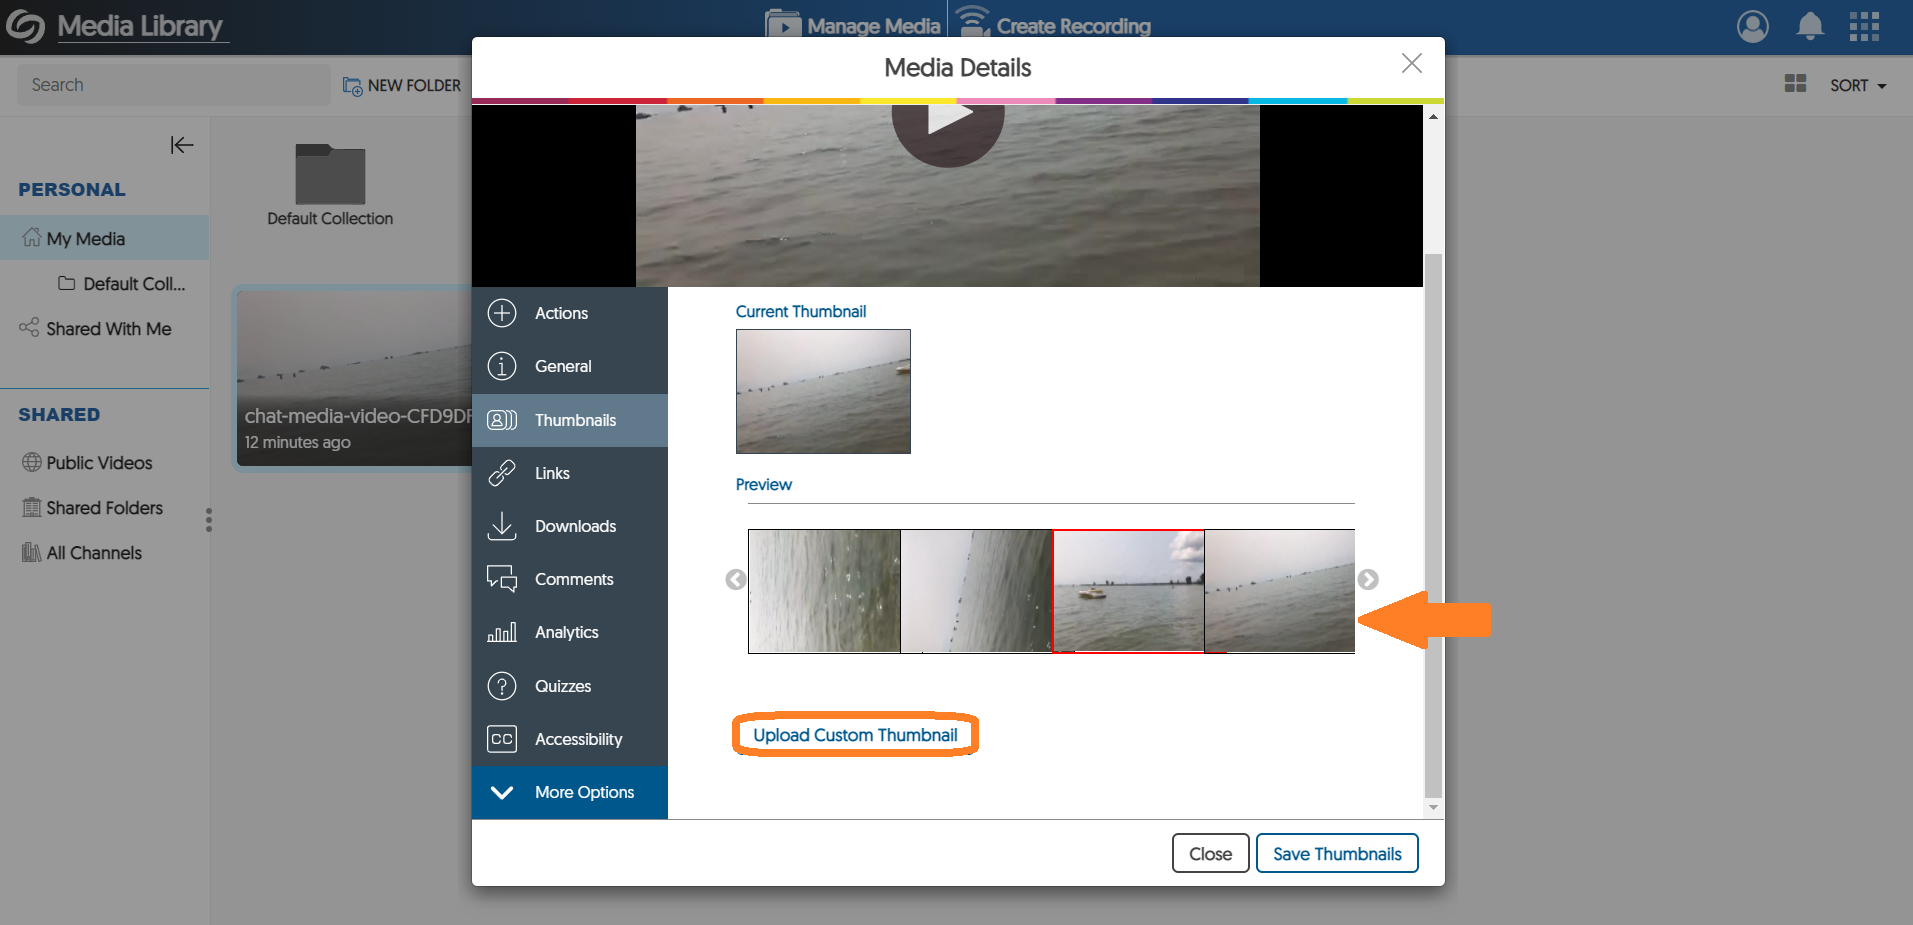
You can upload a thumbnail by clicking Upload Custom Thumbnail and selecting a file from your computer.
-
You can also select a thumbnail from the presets available on the Preview window.
-
Once the thumbnail is selected, click Save Thumbnails.
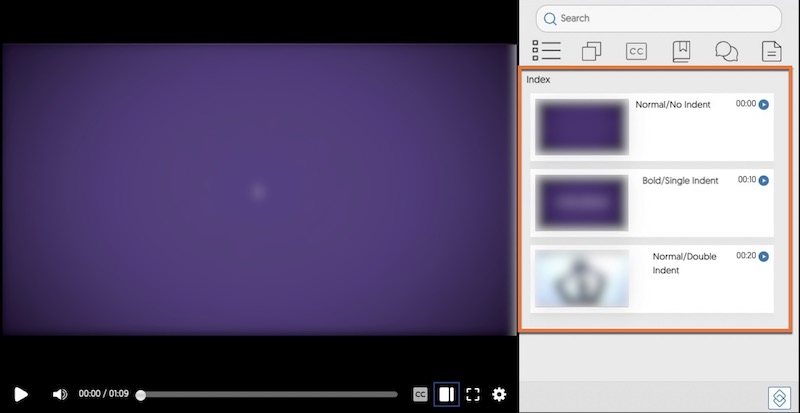
An index for a video is a list or "table of contents" of the video's content. Clicking on an index "card" will skip to that specific timestamp/section of the video.
Access the index settings
-
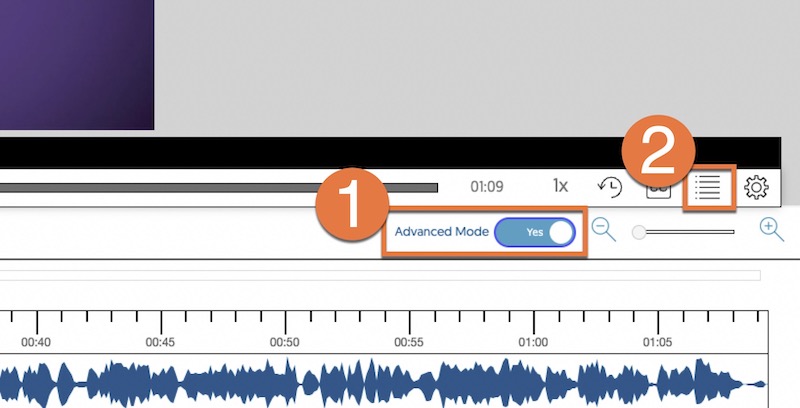
In Stream's video editor, turn on the Advanced Mode button on the right side of the screen to access the index settings.
-
Click on the Index button.
The index will appear next to the video previewer.
Add entries into the index
-
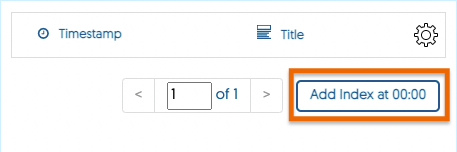
Click Add Index at xx:xx to make a card.
-
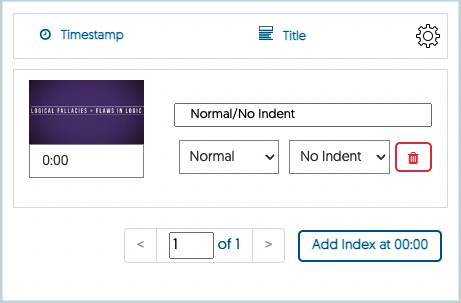
The card preview allows you to:
a. Title the card
b. Change/edit the card's Timestamp
c. Change the Font Style: Normal or Bold
d. Change the Indent: No Indent, Single Indent, Double Indent
e. Delete the card
-
Click and drag the blue progress bar to the desired timestamps to add other index cards.
You can also use the scroll bar under the video previewer.
-
Clicking on the Gear button gives the option to clear all index cards.
Save and preview the index
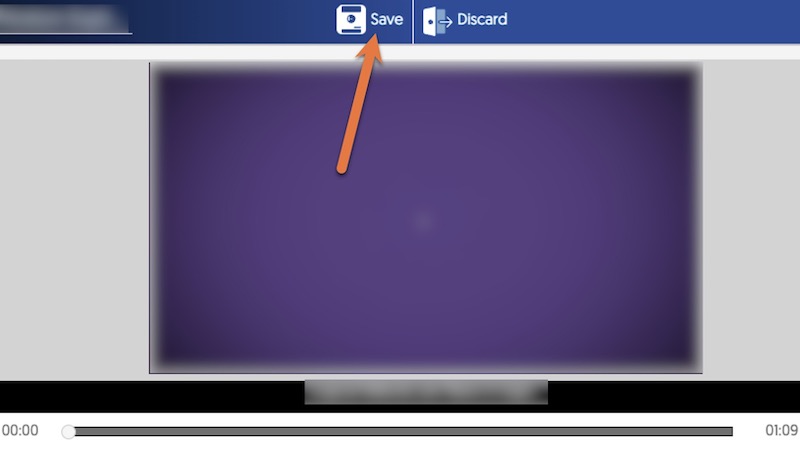
After creating the index, save the changes by clicking the Save button at the top of the screen.
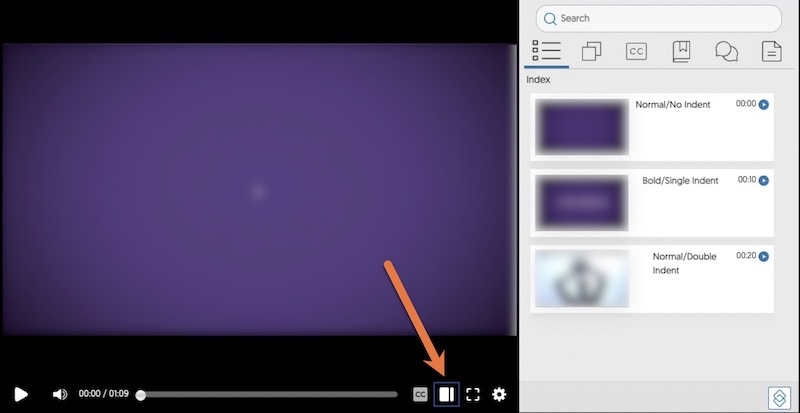
You can see and use the index when watching the video in My Media.
Press the Index button in the video menu to see and use the index on the right side of the screen.
Click on an index card to be taken to the video's timestamp.
Publishing content to Media Channels
Users may publish content from My Media to several Media Channels, including Public Videos and their own Course or Organization Channel that is created through the D2L Brightspace integration.
Publishing content makes them available to anyone with permission to access that Media Channel. The video also remains available in My Media. The steps to publishing videos to a course or public portal are similar.
If you require access to post on behalf of your school, department, or organization, please fill out the (google form) Stream Video Platform Request Form (external link) .
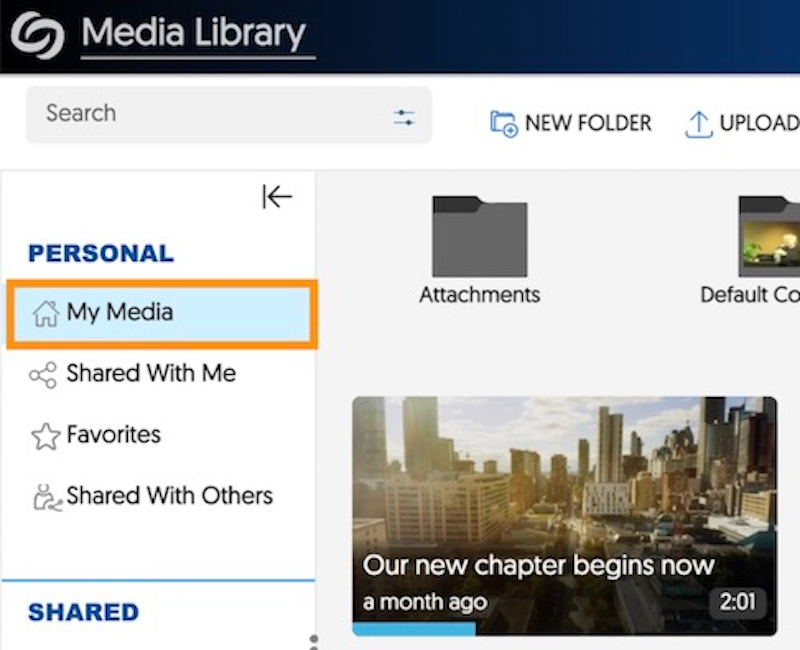
1. Under the Personal section, click on My Media.
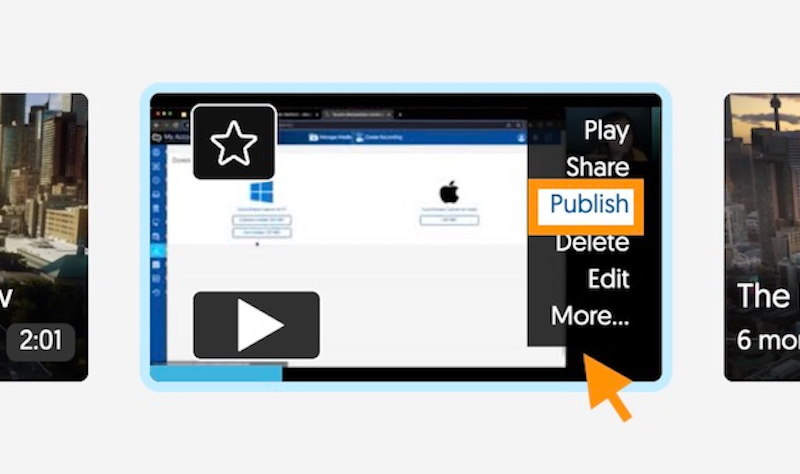
2. Hover your mouse over a video and click Publish.

3. To publish several videos, click and drag to select the videos, then select More Actions > Bulk Publish.
4. Select the Course or Organization Channel under All Channels, or your designated channel under Public Videos.
5. Select the folder you want to share to.
Note: For Public Videos, expand the Library folder to find your organization’s channel.
6. The Selected Channels will be listed at the bottom.
7. Click Select.
You should now find the video(s) added to your channel.
Media can be unpublished from a Media Channel so that it is no longer visible to viewers. The content itself is not deleted; it remains in the content owner’s My Media collection.

- Select the Course or Organization Channel or designated Public Videos folder.
- Hover your mouse over a video and click Unpublish.

3. Click on a Sub-Channel or Folder to select it.
4. Click on More Actions then select Unpublish Sub-Channel/Folder to make this channel unavailable to viewers.