Assignments
Overview
The Assignments tool in D2L Brightspace allows you to set up a place for students to submit their assignments digitally, with the ability to:
- Control the window for submission.
- Facilitate individual submissions or group submissions (provided the groups have been set up using the Groups tool first).
- Collect and assess submissions (with a connection to the Grades tool, if needed).
- Assess offline assignments, such as hard copies of essays, or in-class presentations.
- Enable plagiarism detection through Turnitin®.
Two main types of assignments:
- Individual assignment folders allow each student to submit to the assignment, and receive their own assessment and grade.
- Group submission folders allow each group to have one member submit the assignment, and all group members would receive the same assessment and grade (both in the assignment and any connected grade items)
Note that you must select the type of assignment when you first create it, and you will not be able to change it after the fact.
Assignments can be found in the top navigation, under Assessment. If it isn't there, review how to enable course tools.
Turnitin for Assignments
Some assignments require plagiarism detection using Turnitin This feature can be added to any D2L Brightspace assignment through the options in the Evaluation and Feedback panel. Since this process requires some special consideration, please review our instructions on how to Enable Turnitin for assignments.
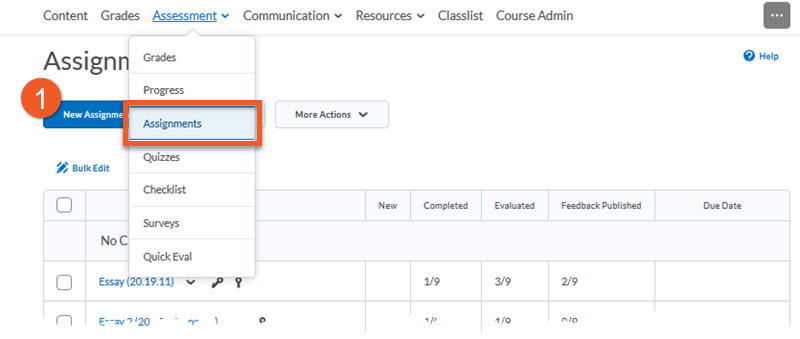
1. In your course shell, go to Assessment > Assignments, and click New Assignment.
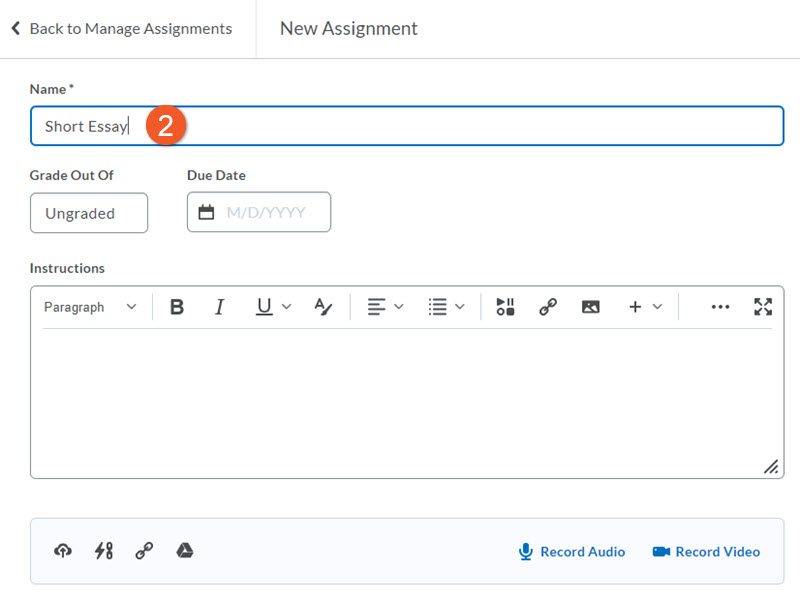
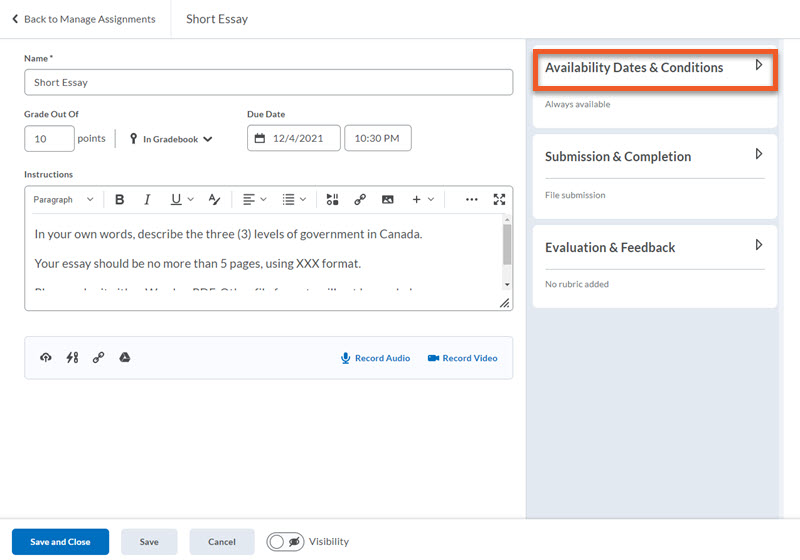
2. Enter the Name of the assignment. Ideally, this should be the same as the grade item that will connect with it, so that it’s easy to identify.
3. If you will be grading the assignment, click in the Grade Out Of field, and enter the number of points the assignment will be marked out of.
NOTE: This does not necessarily need to be the same as the weight toward the final grade in the course, but if the weight is different, you will need to confirm that the grade item settings reflect that.
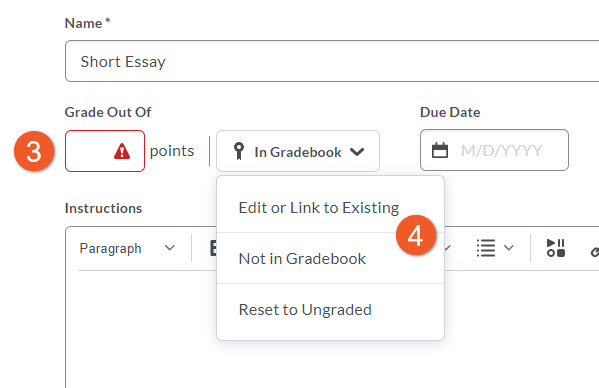
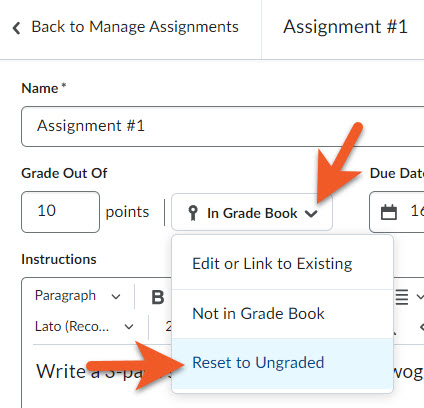
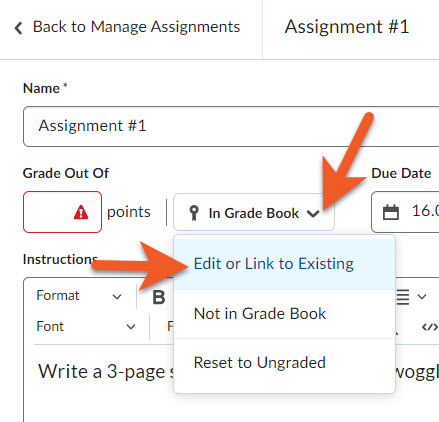
4. Click on the dropdown to the right of the “Grade Out Of” field, and choose one of the following, depending on your situation:
- Edit or Link to Existing - to select an existing grade item from Grades or change which existing grade item you are associating with this assignment.
- Not in Gradebook - if the assignment needs to be connected to a grade item that does not yet exist in Grades.
- Reset to Ungraded - if you will not be grading this assignment, and it will not count toward the final grade in the course.
See below for details of how to use each of these options.
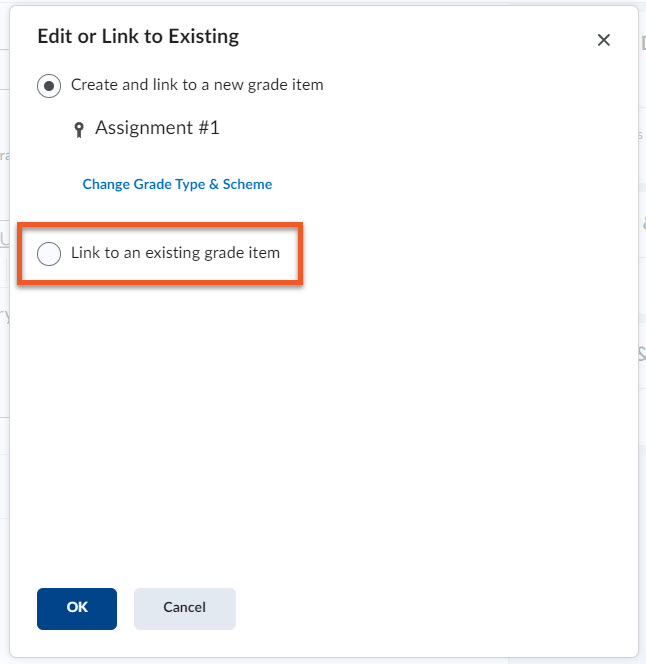
Click on the dropdown to the right of the “Grade Out Of” field, and select Edit or Link to Existing.
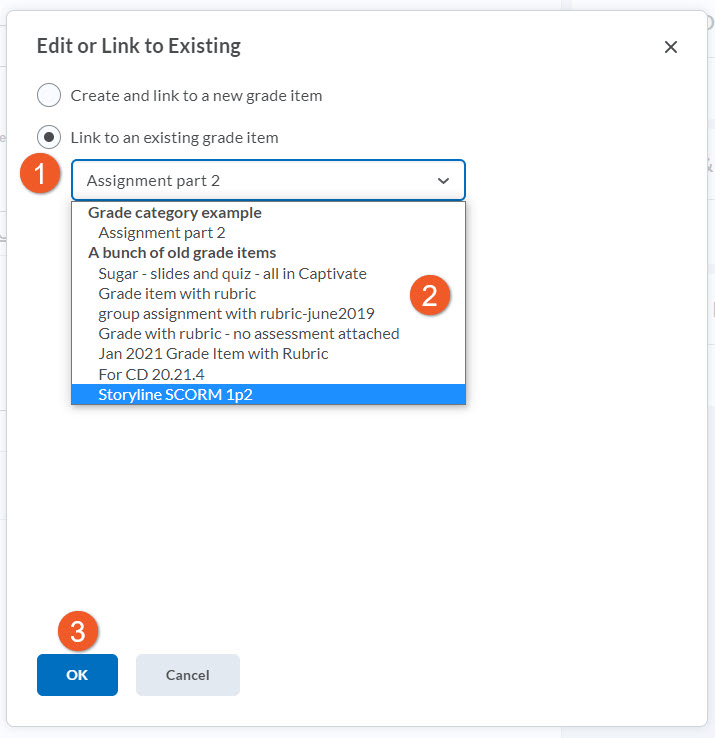
1. In the popup that appears, select Link to an existing grade item.
2. Click on the dropdown, and select the grade item you wish to associate with this assignment.
3. Click on OK.
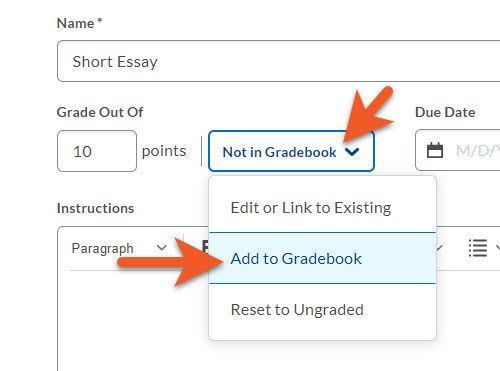
Click on the dropdown to the right of the “Grade Out Of” field, and select Not in Gradebook.
Click on the dropdown again, and select Add to Gradebook.
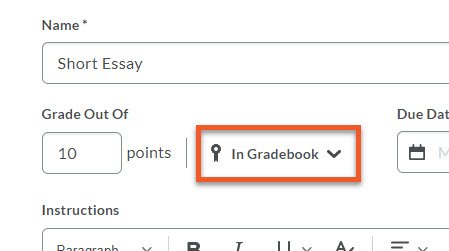
The grade item creation process has started, but you still have a few more steps to complete. You will now see the selection change to In Gradebook.

Click on the dropdown to the right of the “Grade Out Of” field, and select Edit or Link to Existing.
In the popup that appears, select Create and link to a new grade item.
If your grade item needs to be in an existing grade category (ie. a series of weekly assignments), click on Choose Grade Category, then select that category from the dropdown. Most of the time, you will probably not need a category.
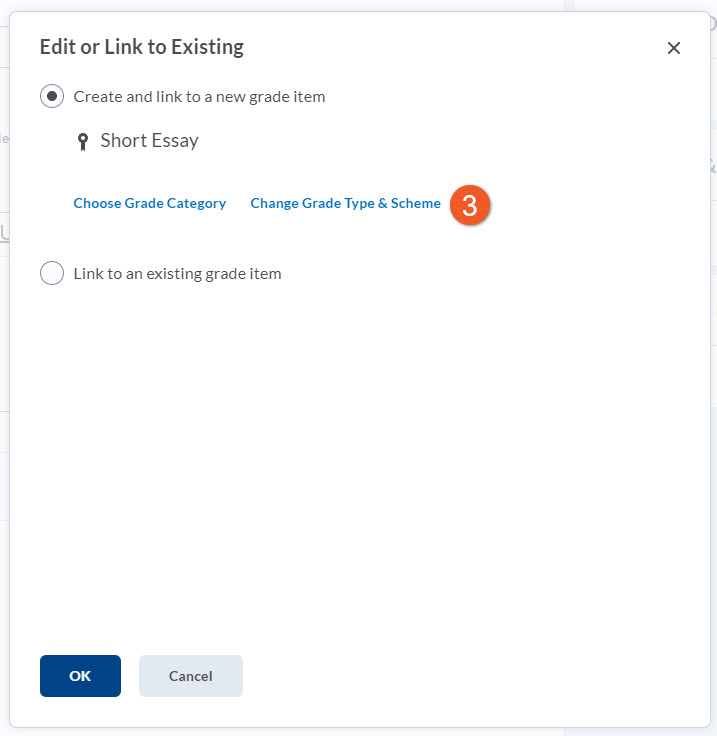
The other default settings will usually remain as they are. However, if you wish to give letter grades instead of numeric grades for this assignment, click on Change Grade Type & Scheme, and change the Grade Type to “Selectbox”.
Click OK to proceed.
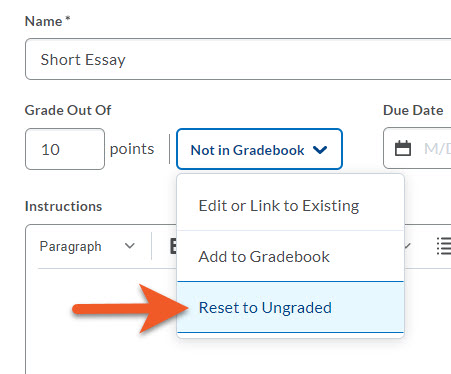
If you will not be grading this assignment, and you have not entered points, leave it as it is.
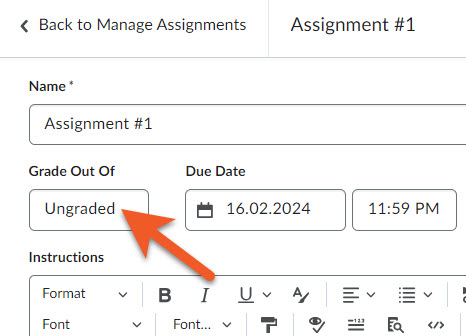
If you entered points, and the dropdown does not indicate “Ungraded”, click on the dropdown to the right of the “Grade Out Of” field, and select Reset to Ungraded.

The due date marks the exact time the assignment is due. This is an optional field. Setting the due date does not impact whether or not a student can submit, or if there is a penalty for submitting late. It merely tags the student’s submission in red, if it is submitted after the due date, so that you can take notice, and decide how to proceed.
To set a Due Date for the assignment, click on the Due Date field.
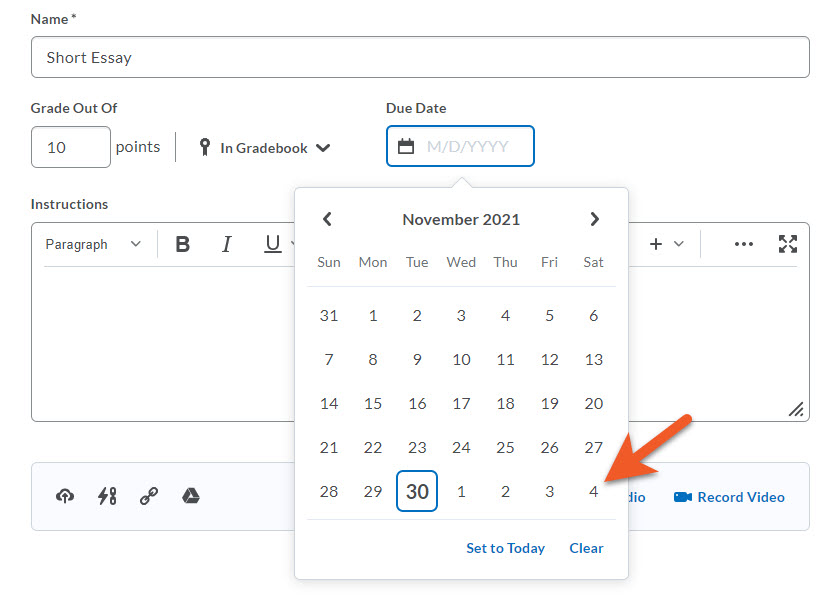
A calendar displaying the current month, with today highlighted will popup. Use the arrows to move to a different month, if necessary, and pick the date by clicking on the day.
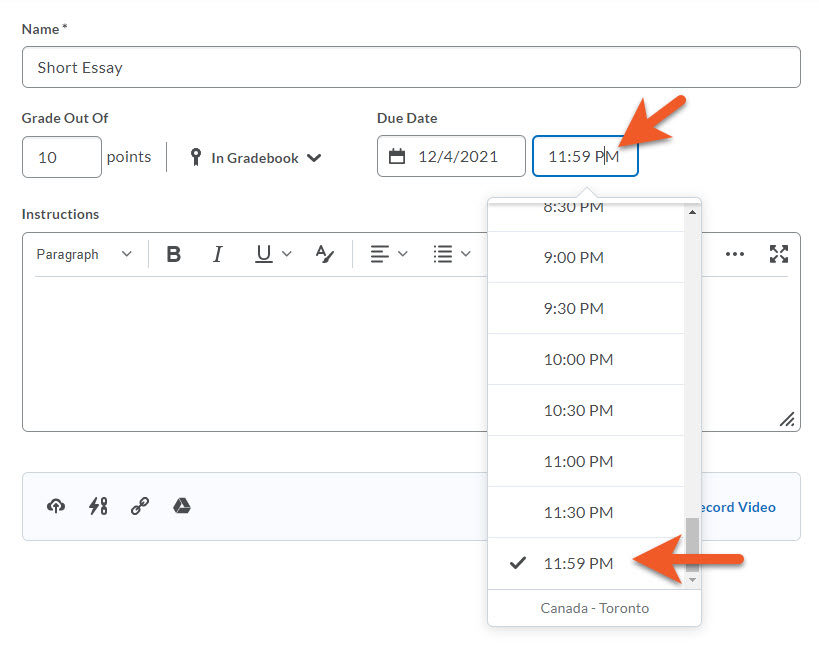
The calendar will collapse, and you will now see a time field. Click on the field, and you will see a dropdown list of times. You can select a time from the list, or type in the time you wish. Click outside of the box to close the picker.
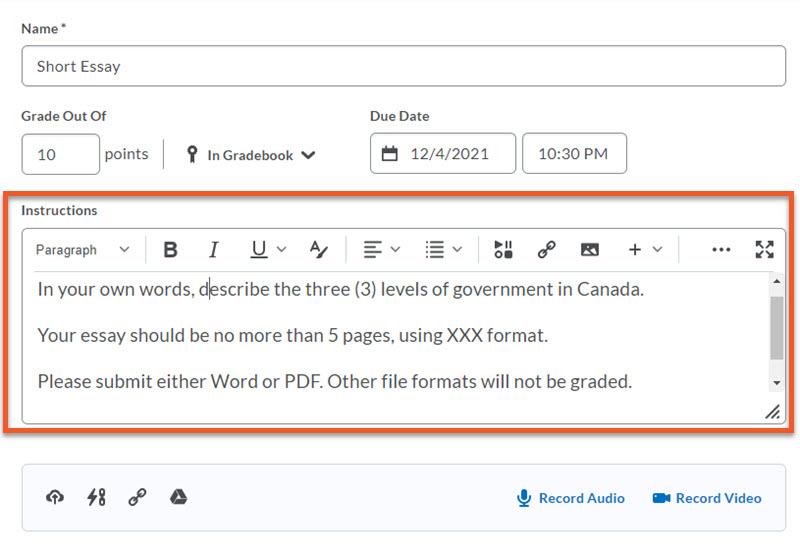
Type or copy and paste the instructions for students. You can include images, or formatting if needed.
This can include the assignment description from your course outline, desired file format, expected length, etc.
D2L Brightspace can accept a wide variety of file types. Many common file types will be displayed in the inline document viewer. However, we have noticed that files that have very precise layouts which are created in different versions of Word may display slightly differently, as they may not convert perfectly. If the document design is complex or contains different types of content, you may wish to recommend that your students submit PDF files, to ensure that page design, charts, etc appear consistently. If the assignment is a typical essay, composed of simple paragraphs, this is not a concern.
If students do not have Microsoft Word or Adobe Acrobat installed on their device, you can recommend that they create documents in Google Docs, then save to their desktop as PDF, before uploading the file to your assignment.
Attachments (optional)
Files, links and existing activities from your Brightspace course can be added to assignment submission folders as attachments.
These may be materials that will assist students with their assignment, such as guidelines, examples, templates or a “take home” exam.
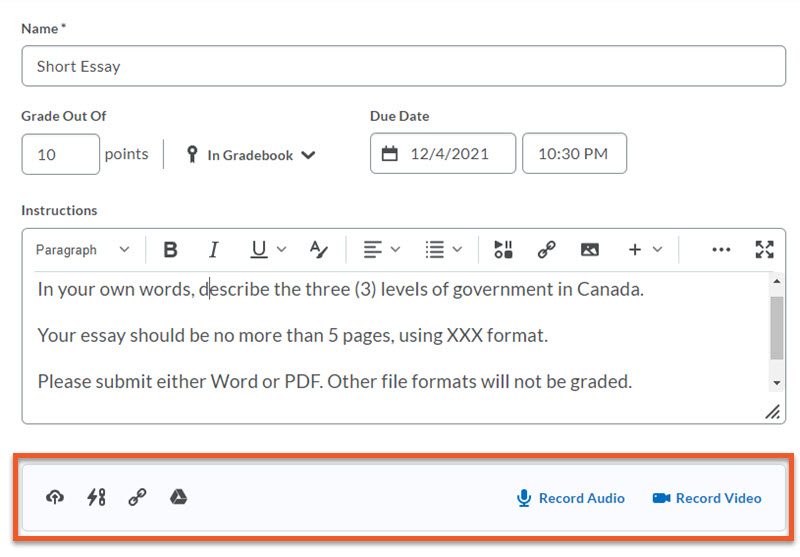
To attach an item to your assignment submission folder, click on the appropriate button near the bottom of the page, and follow the instructions to either drag and drop or navigate to add your file(s). You can upload a file, link to an existing D2L activity, attach a weblink, or link to a file on Google Drive. You also have the ability to record audio or video to be included.
Learn more about this in the section about leveraging different types of attachments near the bottom of this page.

Before you move to the next section, click on the grey Save button, to ensure your work is saved.
In fact, any time you spend more than a few minutes on one page while making changes, it’s a good idea to save, to make sure you don’t lose your work.

Visibility
This option completely hides the assignment and any results (grades, feedback) entered into the assignment from the students.
By default, while you are creating an assignment, it is hidden. After you have set a start date (see the availability section), you still need to unhide the assignment for that availability to take effect.

If the eye icon has a slash through it, the students will never see the assignment, regardless of the other availability settings.
This feature can be handy if you want to hide the assignment results after it has been completed. Check this box after all submissions are in to ensure the grades and feedback are not visible to the students after publishing, until you are ready to reveal that information to the class.
The availability section allows you to control the start and end date of your assignment folder. The start date marks the date and time students can begin submitting files to the folder. If an end date is set, students will no longer be allowed to submit a file to the folder. If there is no end date, or the end date is later than the due date, students can still submit an assignment past the due date but it is marked as late. All assignments are time-stamped.
To set availability and other conditions for your assignment, near the upper-right of the page, click on Availability Dates & Conditions (or the arrow to the right) to open the panel.
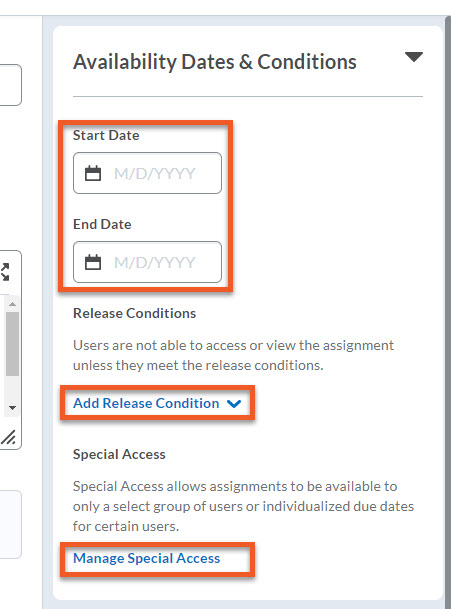
You will now see the expanded panel, where you can set the availability of your assignment, add release conditions, and manage students who require Special Access. See below for instructions for each of those settings.
Set the start date/time
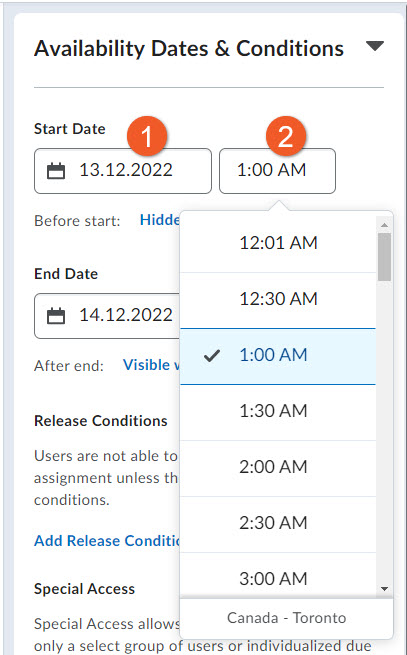
To set the start date and time, first click in the date field, and select the date from the calendar picker. Then, you will see the time field appear. Click in the time field, and type or select the desired time.
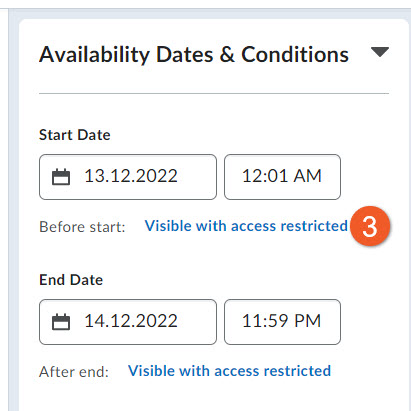
Determine what happens before the start date/time
Click on the Before start option to decide what happens before the start time you just set up.
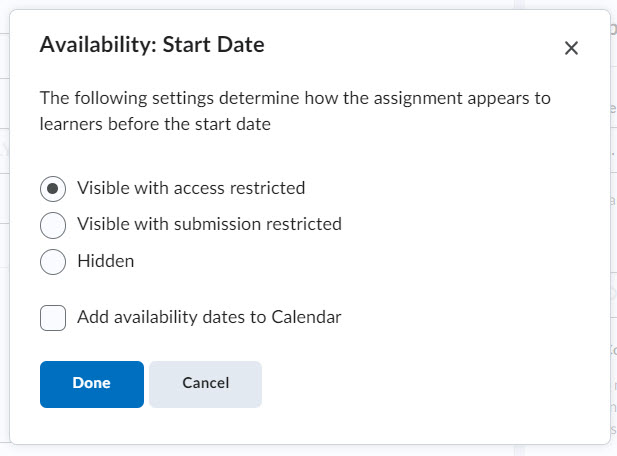
In the popup window, you will see your options:
- Visible with access restricted - Prior to the start date/time, students can see the name of the assignment, and the availability dates, but cannot click on it.
- Visible with submission restricted - Prior to the start date/time, students can see the assignment name and availability dates, and can click on the assignment name to read instructions for the assignment (if you have provided any).
- Hidden - Prior to the start date/time, students cannot see or click on the assignment.
You can also select Add availability dates to Calendar, if you want students to see this information in the D2L Calendar widget.
Click on Done when you have finished making your selection(s).
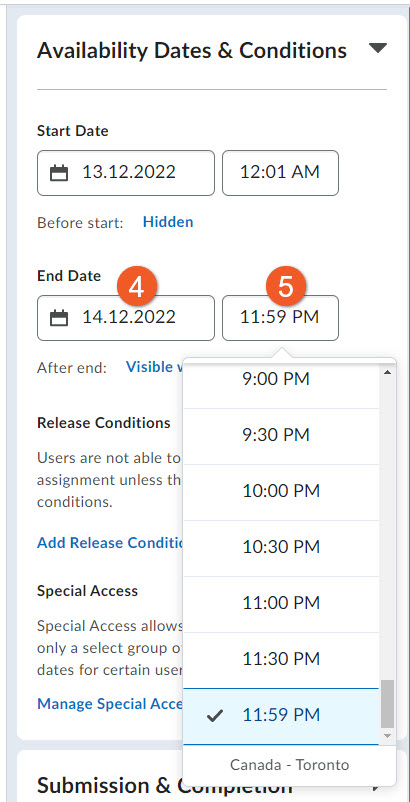
Set the end date/time
To set the end date and time, first click in the date field, and select the date from the calendar picker. Then, you will see the time field appear. Click in the time field, and type or select the desired time.
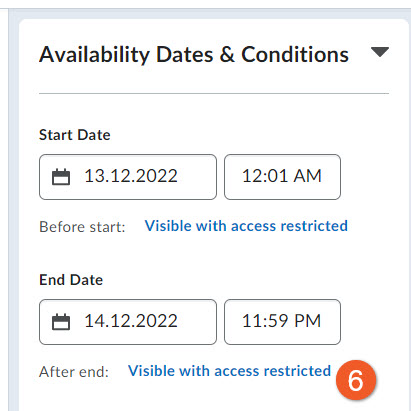
Determine what happens after the end date/time
Click on the After end option to decide what happens after the end time you just set up.

In the popup window, you will see your options:
- Visible with access restricted - After the end date/time, students can see the name of the assignment, and the availability dates, but cannot click on it.
- Visible with submission restricted - After the end date/time, students can see the assignment name and availability dates, and can click on the assignment name to read instructions for the assignment (if you have provided any).
- Hidden - After the end date/time, students cannot see or click on the assignment.
You can also select Add availability dates to Calendar, if you want students to see this information in the D2L Calendar widget.
Click on Done when you have finished making your selection(s).

What do students see?
If you have selected Visible with access restricted, students see the assignment name and availability date(s), but cannot click on anything.

If you have selected Visible with submission restricted, students can see the assignment name and availability date(s). Students can click on the assignment name to view instructions for the assignment, if you havve provided any.
If you have selected Hidden, students do not see the assignment in the list of assignments at Assessment > Assignments.
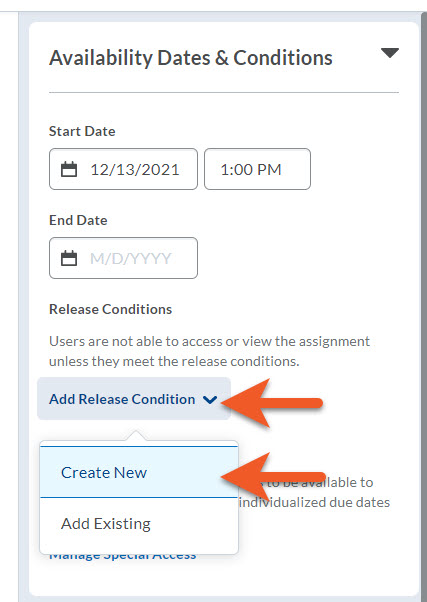
Add new release conditions if, for example, you want the assignment submission folder to be available to users only after they fulfill other specified tasks, or if they belong to a particular segment of students. You can edit and change release conditions by clicking the Remove icon or Remove All Conditions.
To add a new condition, click on Add Release Condition, then select Create New.
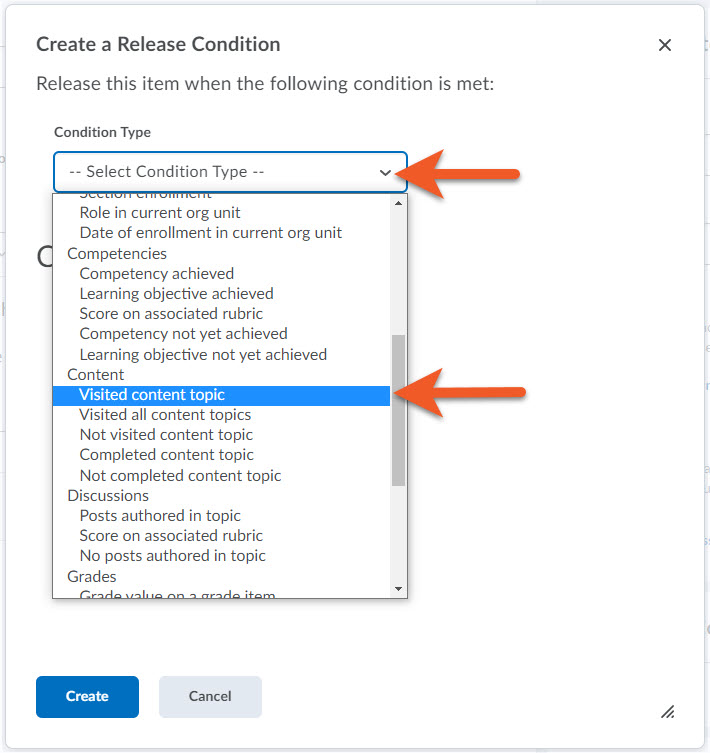
In the popup that appears, click on the Condition Type dropdown, and select the type of condition that applies (ie. visited a content topic, or submitted a different assignment).
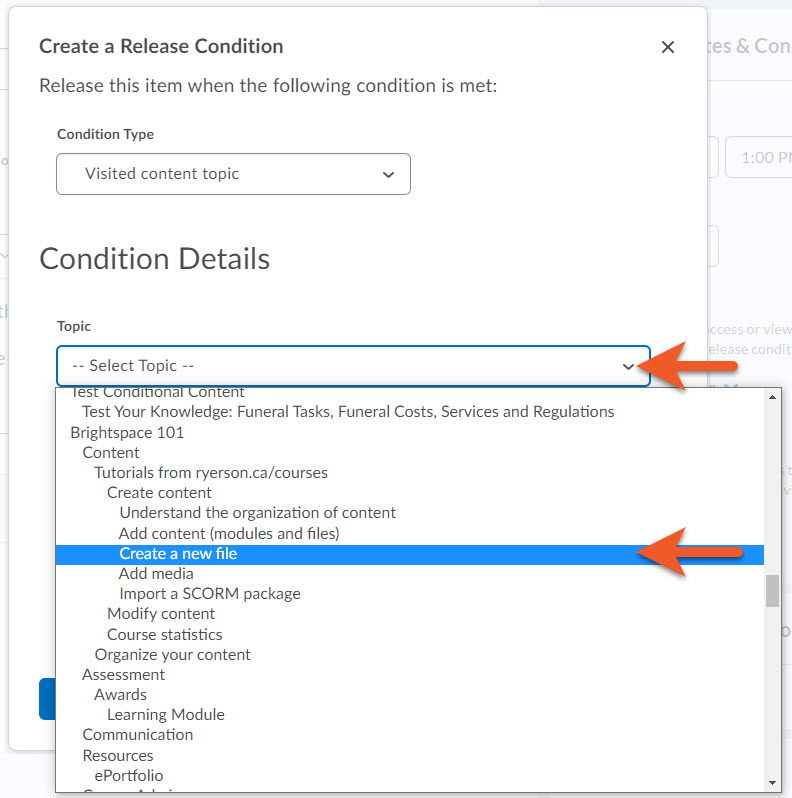
A Condition Details dropdown will now appear. Click on the dropdown, and select the specific detail that applies (ie. which piece of content, or which assignment).
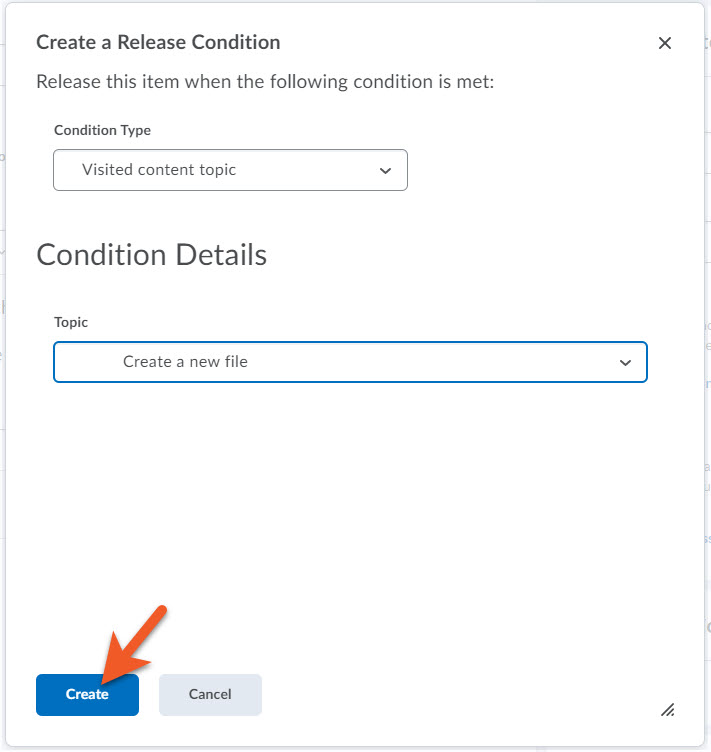
Click on the Create button to create your release condition.
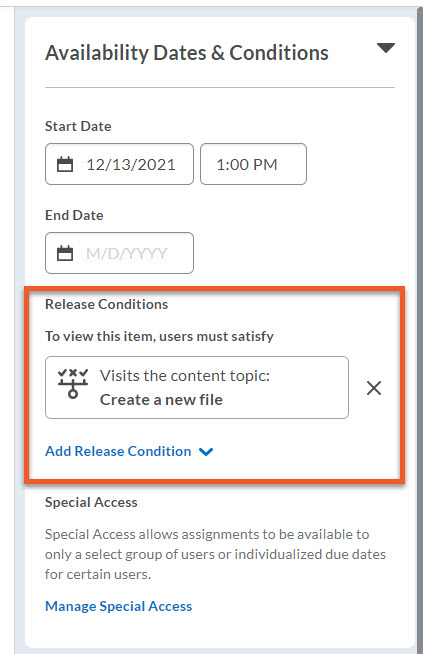
You will now see your release condition listed in the Availability Dates & Conditions panel.
If you realize you made a mistake, click on the X to the right of the release condition, to remove it.
If you wish to add an additional release condition, click on Add Release Condition.
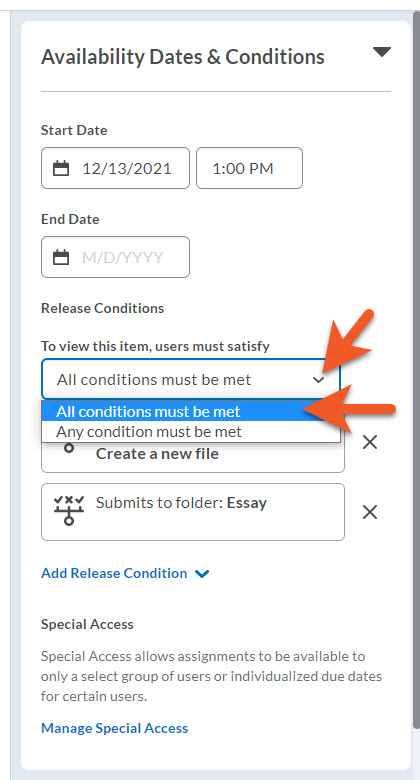
If you have added more than one condition to an assignment, you will see a dropdown appear above those conditions. You must decide whether the student should only see the assignment if:
- All conditions must be met
OR - Any condition must be met
NOTE: Sometimes, if a student can’t view an assignment, this setting may be preventing them, even though they have met the condition you intended.
Modifying Date/Time for Select Students
You can change the start, due, and end date of a particular assignment for students who require special access, allowing them extra time without a late designation to the assignment.
Release Conditions take precedence over Special Access.
Please keep this in mind when determining how to give someone access to an assignment.
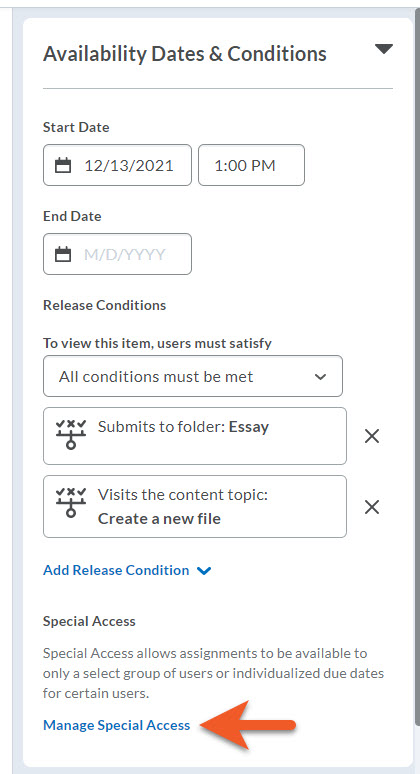
If students have accessibility requirements that allow them extended time to work on an assignment, you can grant students special access by clicking Add Users to Special Access. You can customize unique start, due and end dates for these students only.
In the Availability Dates & Conditions panel, click on Manage Special Access.
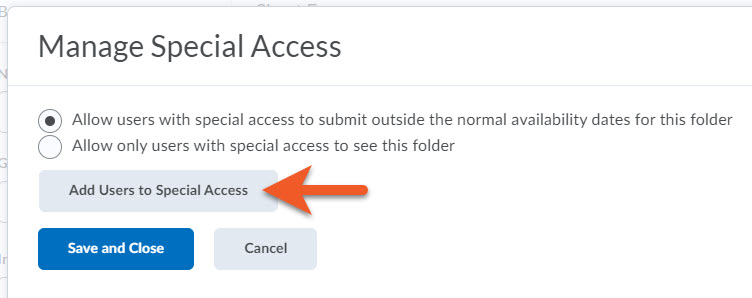
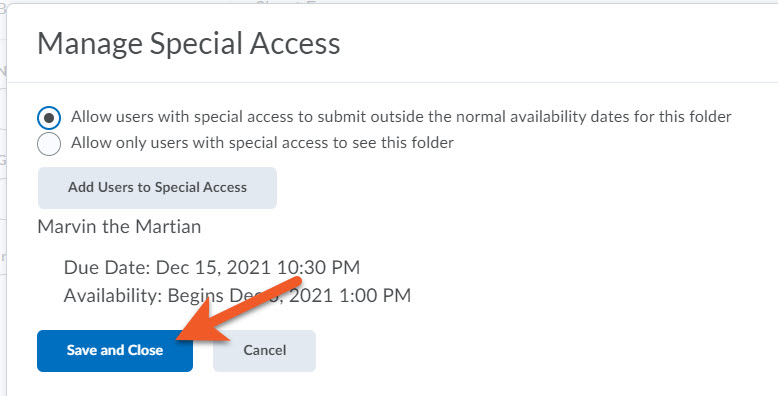
In the popup that appears, for most assignments, you will leave the first setting as it is, Allow users with special access to submit outside the normal availability dates for this folder. This will mean that most students will submit the assignment during the regular start/end window, and the students you add here will submit with alternate conditions.
If you select the second option, Allow only users with special access to see this folder, this means that most students in the class will not have access to this assignment, and ONLY students you add here will have access to this assignment, each with their own conditions. (An example of this might be a make-up test, where only certain students need access.)
Click on Add Users to Special Access to add students and their conditions.
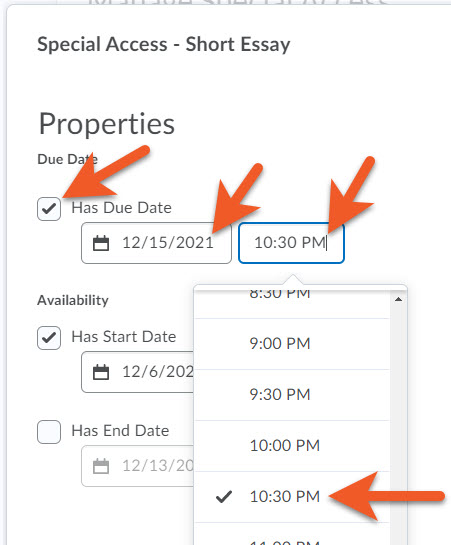
In the popup that appears, set the due/start/end dates and times for the first student. Keep in mind that if the student is provided additional time to submit the assignment, both the due and end dates must reflect this.
Click on the checkbox to enable “Has Start Date”, then click on the date field to see the date picker. Then you will see the time field appear. Click on the time field to type or pick the time. Repeat for each date option you wish to use.
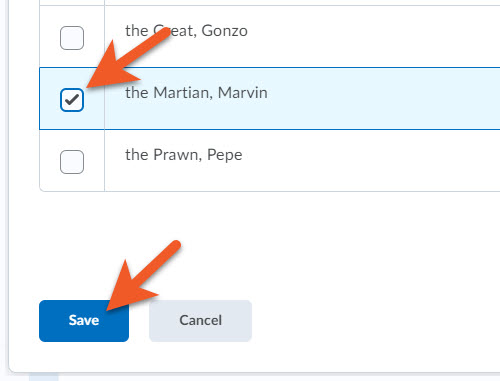
Scroll down and select the student you are adding to Special Access, by selecting the checkbox in front of their name. If you have multiple students with the same conditions, you can select them all now.
Click on Save.
You will return to the main popup, and will see the student(s) you added, and their conditions. If you realize you made a mistake, you can click on the pencil icon or the X to the far right of their name, to change their conditions, or remove the student from Special Access.
Repeat the process above to add additional students.
Click on Save and Close.
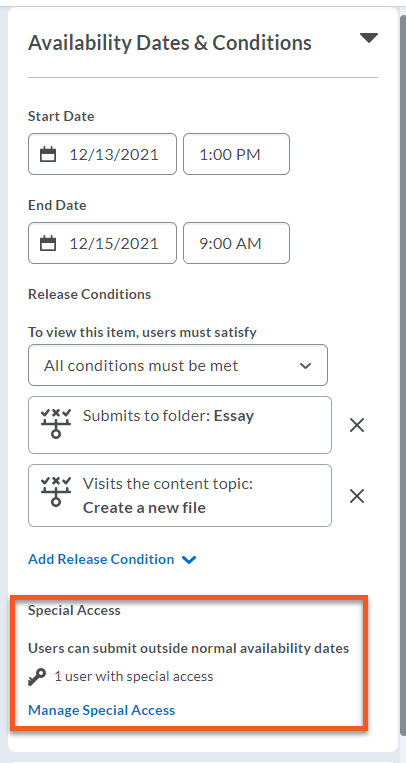
In the Availability Dates & Conditions panel, you will now see a summary that lists how many students have Special Access.
As long as the assignment is set as visible, you can add students to Special Access, even if the end date has passed.
For most typical assignments (individual, file upload), the default settings in the Submission and Completion Settings panel will be fine.
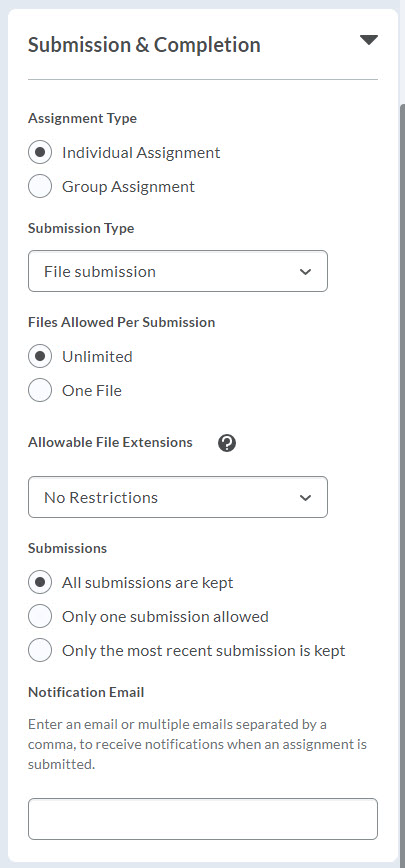
Assignment Type:
Please keep in mind that once you set the folder type, you cannot change it, so be certain of your decision before proceeding.
- Individual Assignment - each student will submit their own assignment.
- Group Assignment - students will work together in groups on the assignment, and one student will submit for their group. All students in each group will receive the same grade and feedback.
NOTE: You need to set up groups (found in Communication > Groups) before you set up a group assignment. Also, if students are not enrolled in their groups, they will not be able to see the assignment.
See the section below on Group assignments for more details.
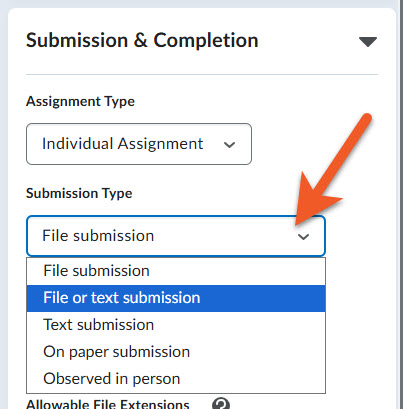
Submission Type:
Note that you cannot change the submission type after the assignment has been created.
- File submission - students upload 1 or more files to D2L. The Annotations tool can only be used to provide feedback with file submissions.
- File or text submission - this option is somewhat flexible. Students can upload a file and/or type their assignment directly into the text editor in Brightspace.
The text editor would also be an appropriate place for students to post a link to work that is hosted somewhere else (such as YouTube or Google Drive), if their file is too large to upload to D2L Brightspace.
Keep in mind that text submissions are intended to be quite brief, are not supported by the Annotations tool, and cannot be checked with Turnitin. If a student uploads a file submission, and you have enabled Annotations (see “Enable the annotations tool” further down on this page), you may use annotations to provide feedback. - Text submission - students enter their submission directly in the text editor in Brightspace. Keep in mind that text submissions are intended to be quite brief, are not supported by the Annotations tool, and cannot be checked with Turnitin.
- On paper submission - students submit a physical item to the instructor in person, and not online. This might be a printed paper, painting or model. On paper student work is not supported by the Annotations tool, and cannot be checked with Turnitin.
- Observed in person - students submit their work in a way that is observed but not collected (i.e. presentation or performance). Student work that is observed in person is not supported by the Annotations tool, and cannot be checked with Turnitin.
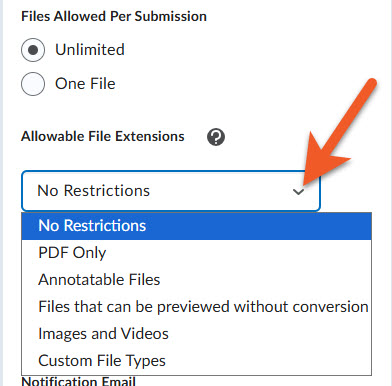
Files Allowed Per Submission:
You can decide whether students can only upload one file, or unlimited files. We recommend unlimited, in case an assignment requires multiple files/formats, and also if students notice a problem with their submission before the due date, they can upload again without the need to email you.
Allowable File Extensions:
This is a way to control the file types that you allow students to upload. This can help ensure that you receive assignments in the correct format, and that students do not try to upload dangerous files. When file type restrictions are used on an assignment, the list of allowable file types are listed on the Submit Assignment dialogue page.
- No Restrictions - students can upload any file type. If the file cannot be viewed in the document viewer, you will need to download and open using a program on your computer.
- PDF Only
- Annotatable Files - includes all file types that are supported by the Document Viewer and the Annotation tool in Assignments. For the complete list of file types, see File types supported by Annotations (external link) on the D2L Community website.
- Files that can be previewed without conversion - such as .HTM, .HTML, .MHT, .MHTML, and .BMP
- Images and Videos
- Custom File Types - Enter one or more allowable file extensions separated by a comma.
Note: If you neglect to provide the file extensions, you will see a warning, and will be unable to save the assignment until you update this field.
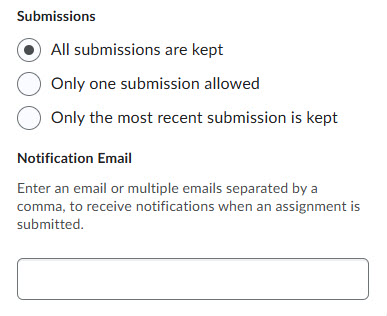
Submissions:
You can decide if all submissions are kept (recommended), only the most recent submission is kept, or only one submission is allowed. We usually recommend keeping all submissions. If there's a problem with the last submission, you can refer to previous submissions.
Notification email:
If you wish to receive an email notification each time a student uploads an assignment, type your email address into the Notification Email field.
Multiple email addresses can be comma-separated, if desired.
*Most instructors do not want this, as it could result in a lot of emails in your inbox.

Save Now!
Click Save to save your settings so far, and then proceed to the Evaluation and Feedback settings (if needed).
OR
Click Save and Close if you are done setting up your assignment.
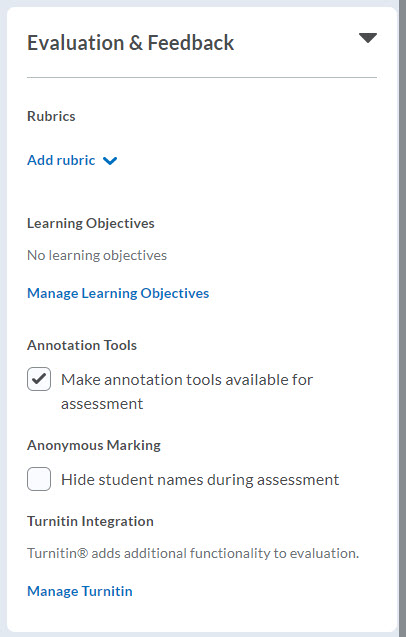
Click on Evaluation and Feedback to open the panel.
In this area, you can:
- connect a rubric (which you have already created in the Rubrics tool) with your assignment.
- make annotation tools available for assessment.
- hide student names during assessment.
- enable Turnitin similarity reporting for this assessment.
- for individual assignments, you can assign a grading team. (At this time, this is not available for group assignments.)
If you wish to grade the assignment using a rubric, it’s best if you go to the Rubric tool, and create the rubric, then return here to connect it.
Or, you can click on Add rubric > Create New, and follow these instructions to create your rubric. When you are done, you will return to the assignment settings.
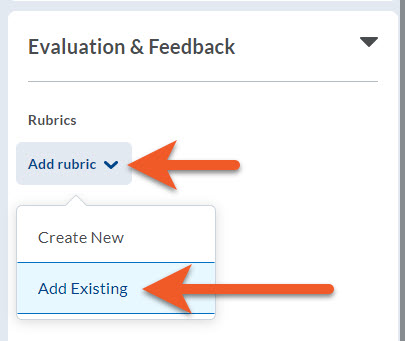
If you have previously created your rubric in the Rubrics tool in D2L (highly recommended!), and you are ready to connect your rubric to the assignment, click on Add rubric > Add Existing.
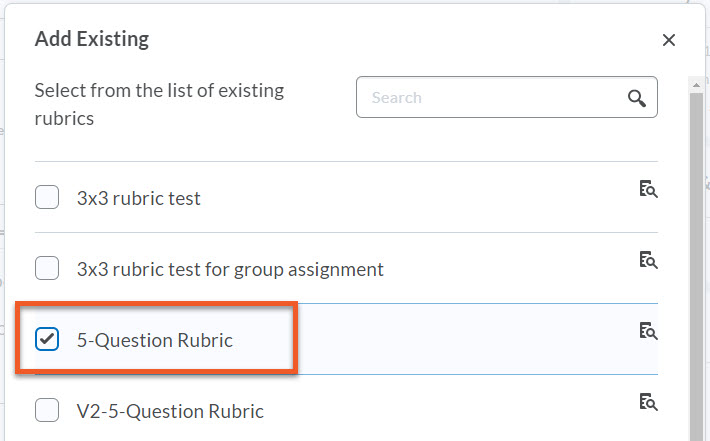
In the popup, you will see a list of rubrics that exist in this course shell. Select the checkbox to the left of the rubric(s) you wish to use.
NOTE: It is possible to have more than one rubric connected to an assignment, for example, if students have a choice between two options for the assignment. However, when grading, you will need to choose which rubric to use to grade each student’s assignment.
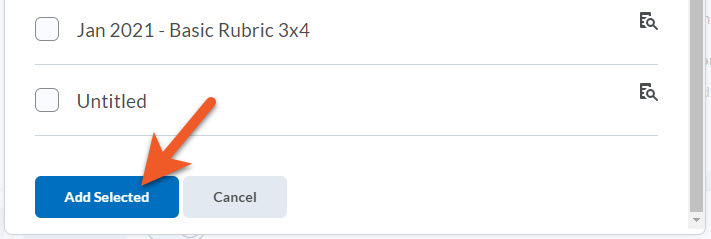
At the bottom of the popup, click on Add Selected, to connect the rubric with your assignment.
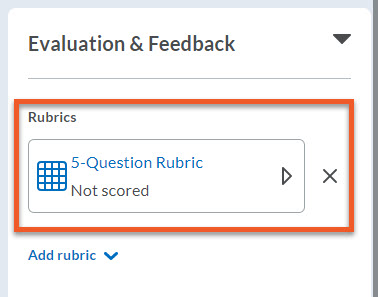
You will now see your rubric in the Evaluation & Feedback panel. If you made a mistake, click on the X to the right, to remove the rubric.
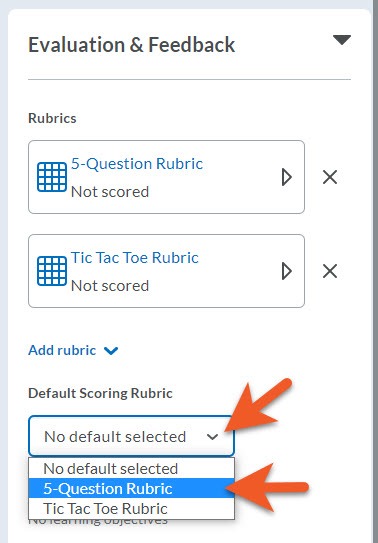
If you have added more than one rubric for this assignment, and you anticipate using one of the rubrics more often than the other(s), click on the Default Scoring Rubric dropdown, to select which rubric should be the default.
Please note: When you’re done setting up the assignment, and have saved your work, on the Assignments list page, you will now notice a “rubric icon” next to the assignment name. This indicates that this assessment has a rubric connected. It makes it easy to see at a glance that you have set this up.
Please note: You can only select this option if you have selected a Submission Type of “File submission” or “File or text submission” in the Submission & Completion panel, and you can only use the Annotations tool to provide feedback on File submissions.
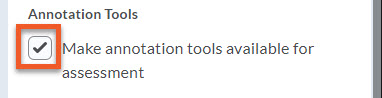
If you select the checkbox for Make annotation tools available for assessment, you can mark up submissions using highlighting, free hand drawing, shapes, and associated commenting directly from the Evaluate Submission page.
Annotations can be used on the following file types: DOC, DOCX, RTF, TXT, ODT, PPT, PPTX, PPSX, ODP, XLS, XLSX, JPG, JPEG, PNG, TIF, TIFF, and GIF.
When you're ready to grade the assignment and provide annotated feedback, please refer to our View and evaluate submissions instructions.
By default, the annotations tool is on. Even if you don’t anticipate using annotations, it won’t cause any problems if you leave the tool on.
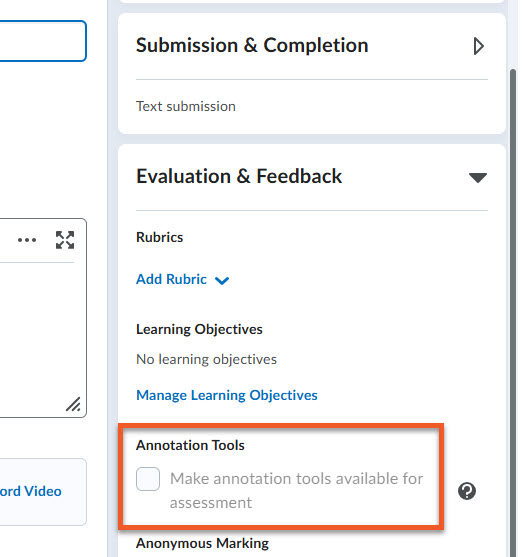
If you have selected other options (Text submission, On paper submission or Observed in person) as your Submission Type for this assignment, the option to Make annotation tools available for assessment will be greyed out, as the Annotations tool is not available for those submission types.
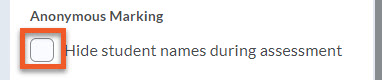
This is a way to avoid bias while grading, as the student's identity is disguised. If you wish to use anonymous grading, select this checkbox, then please visit our tutorial for more information.
Keep in mind that you will not be able to see student names until all submissions have been submitted, graded and published.
If you have a teaching team for your course shell, such as co-instructors, Academic Assistants (AA) and/or graders, you can have control over who can grade and provide feedback on an assignment, as well as who can publish the grades and feedback. For example, this can be helpful if you prefer to assign AAs to grade specific students/groups of students, or if you wish to review/approve grades and feedback before that information is released to students.
If you are the only person in your course shell who can assess student work, and you have an "instructor" role in the shell, you can disregard these instructions.
If you have a larger teaching/grading team in your course shell, please follow the instructions below.
Warning: Please make sure that if you have a grading team, you completely set up this section correctly, prior to opening the assignment to students. Once the 1st student submission is received, some of these settings will be LOCKED.
If you realize too late that you cannot make the changes you need, consider creating a brand new assignment with the correct settings, then ask students to resubmit, or reach out to our team at courses@torontomu.ca, so we can look at your specific situation, to see if any other workaround is possible.
Create your assignment
Create your assignment as usual.
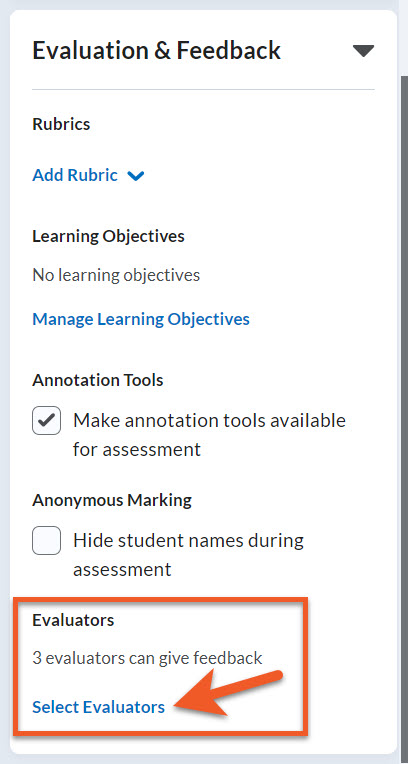
Expand the "Evaluation & Feedback" panel.
Set up who can evaluate students' work
Under "Evaluators", click on Select Evaluators.
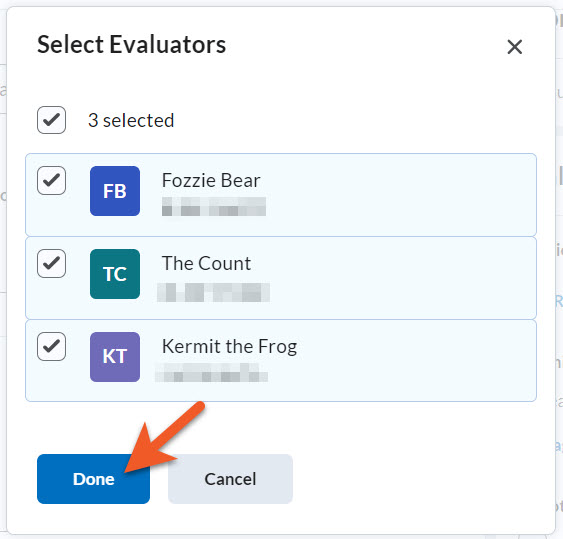
In the "Select Evaluators" dialogue box that appears, you can see a list of all the people who have eligible roles in the course shell for evaluating assignments.
Select the checkboxes beside the names of people you wish to allow to evaluate this assignment.
Please note: You will not be able to assess student work (or make corrections to your Academic Assistant/grader's work) if you do not include yourself as an evaluator.
Click on Done.
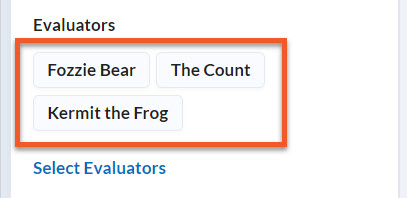
You will now see those users listed under "Evaluators", and if you made a mistake, you can click on "Select Evaluators" to make changes.

Set up who can publish grades and feedback
You will notice that more options now appear.
In the "Publishers" section, click on the dropdown menu to determine who can publish evaluations. Your options are:
- All evaluators can publish any evaluations
This is the most open option, but may be prone to errors if one evaluator publishes another evaluator's incomplete work. If an evaluator's work should be checked by the lead instructor in the course, do not choose this option.
- Evaluators can only publish their evaluation
This might be ideal if you have co-instructors or Academic Assistants who are responsible for a specific group or section of students within the course shell, and there is little risk of their work overlapping. If an evaluator's work should be checked by the lead instructor in the course, do not choose this option.
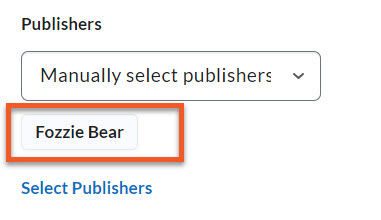
- Manually select publishers (recommended)
This selection would suit a situation where you have a grading team, and then a smaller team of instructors or just one instructor, who will review the evaluations before publishing.
Once the first student submission is received, this setting is locked, so if you are unsure whether your team will change, please select this option, as it provides the most flexibility later.
If you are using anonymous grading (hide student names during assessment), make sure that you select the last option, because one person needs to be able to "publish all" at the same time.

If you select "All evaluators can publish any evaluations" or "Evaluators can only publish their evaluation", that concludes your Publishers setup. Skip ahead to the instructions to assign evaluators to students.
If you select "Manually select publishers", you will see that currently there are "0 publishers selected". Click on Select Publishers.
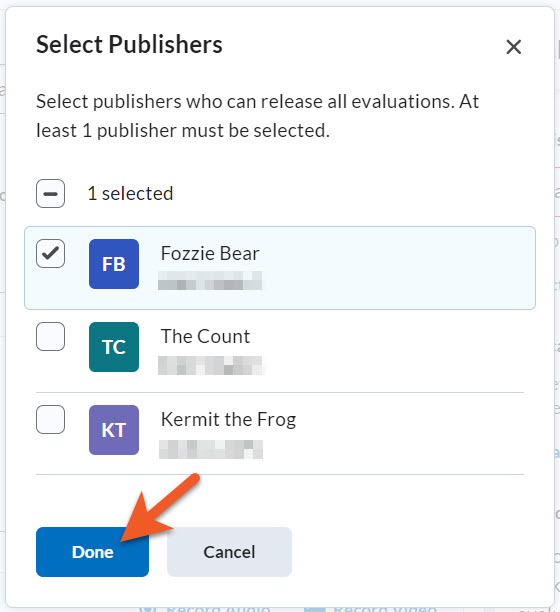
In the "Select Publishers" dialogue box that appears, you can see a list of all the people who have eligible roles in the course shell to publish assignment evaluations.
Select the checkboxes beside the names of people you wish to allow to publish evaluations for this assignment.
Click on Done.
You will now see those user(s) listed under "Publishers" , and if you made a mistake, you can click on Select Publishers to make changes.
Keep in mind that only Publishers can push grades and feedback to the gradebook, so that the information is available to students.
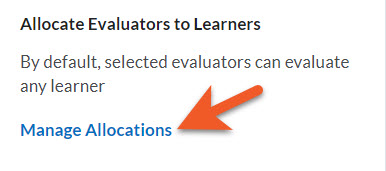
Assign evaluators to students
Next, you need to allocate evaluators to learners, to control which students each member of your evaluation team can grade.
Click on Manage Allocations.
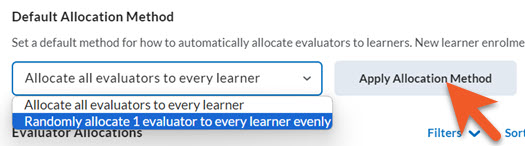
Method 1: Assign evaluators either to all students OR randomly allocate evenly
If your evaluation situation is quite simple, you can use one of the "Default Allocation Methods" at the top of the screen. You can choose to:
- Allocate all evaluators to every learner
This means that any evaluator can grade any student's submissions. If you only want each student to be evaluated once, your team would need to coordinate their efforts outside of Brightspace, to avoid duplication of effort or accidentally changing a completed evaluation.
- Randomly allocate 1 evaluator to every learner evenly
This is a good choice if it doesn't matter which evaluator grades particular students, only that the grading is divided evenly among your team.
If one of these scenarios matches your needs, select that option, and click on Apply Allocation Method.
When you are finished allocating evaluators to students, click on Done, in the lower-left of the window.
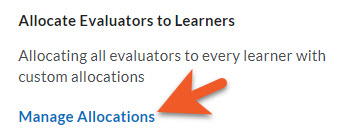
If you need to confirm or change allocations, simply click on Manage Allocations to return to that page.
Method 2: Assign evaluators to a specific section or group of students
You might have specific evaluators that you want to grade a particular section or group of students. To do this:
- Depending on whether your course shell contains sections and/or groups, you may see slightly different options just above the table on this screen, as well as in the menus.
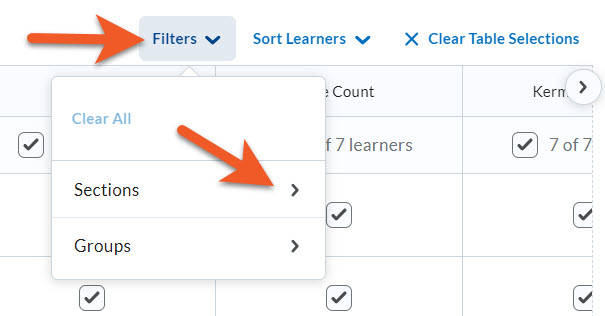
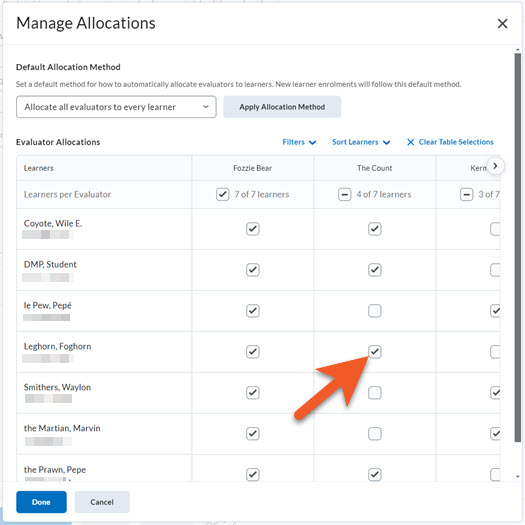
In this example, this shell contains both sections and groups, so you will click on Filters to see filtering options. In your course shell, this may simply say "Sections" or "Groups", depending on what you have.
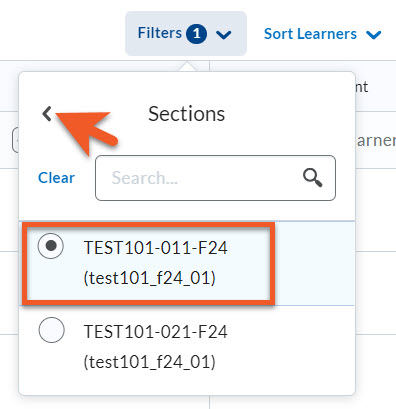
- Depending on what your course contains, you will then click on the option you wish to filter by. In this example, I want to assign section 011 to The Count, so I will click on Sections, then select section 011.
Note that the number beside the word "Filters" indicates that there is currently a filter in place. Simply click on Clear if you wish to remove the filter.
- Click on the "back" arrow to return to the sections/filters options, or click outside of this popup, to return to the "Manage Allocations" screen.
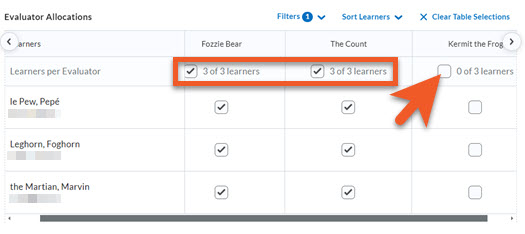
In this example, I want Fozzie Bear (the instructor) to be able to evaluate these students, so that if they wish to correct the Academic Assistant's work, they can, and I want The Count (one of the AAs in the course) to evaluate these students. I do not want Kermit the Frog (one of the other AAs) to see the section 011 student submissions, so I deselect the checkbox below Kermit's name.
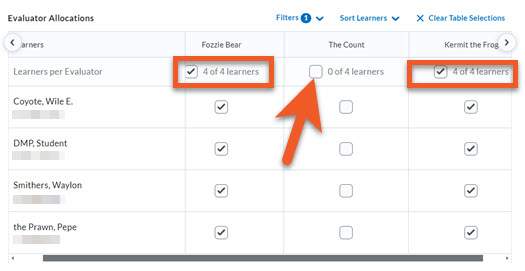
Continuing with this particular example, this course shell has 2 course sections. I want Kermit the Frog to evaluate section 021, so I clicked on Filters > Sections, changed the selected section to section 021, then clicked on the back arrow to return to this screen.
Then, I made sure that Fozzie and Kermit are selected, and The Count is deselected.
If you have numerous sections or groups and Academic Assistants/graders, you would repeat this until all are assigned.
When you are finished allocating evaluators to students, click on Done, in the lower-left of the window.
If you need to confirm or change allocations, simply click on Manage Allocations again to return to that page. If you see a number beside the word "Filters", you may need to click on it, and clear the filters to view all of the allocations at once.
Method 3: Manually assign evaluators to specific students
If you wish to manually assign an evaluator to certain students, you can do this by selecting the checkbox for that student in the evaluator's column.
If you want an evaluator, such as the lead instructor in the course, to have the ability to edit/override evaluations for all students, select the "all" checkbox located directly below the evaluator's name.
In this example, the two Academic Assistants (The Count and Kermit) have been assigned specific students to evaluate, and Fozzie (the instructor) has the ability to view and edit all of the students.
Take care not to select more than one evaluator for a student unless you intend for the student to be evaluated multiple times.
When you are finished allocating evaluators to students, click on Done, in the lower-left of the window.
If you need to confirm or change allocations, simply click on Manage Allocations again to return to that page. You may need to clear the filters to view all of the allocations at once.
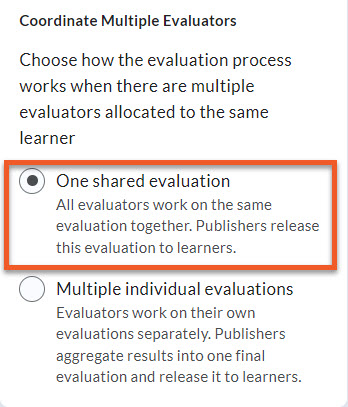
Coordinate Multiple Evaluators
The final step is to select what should happen if there are multiple evaluators assigned to the same student.
In most situations, you will want to choose the first option, One shared evaluation.
Make sure to either Save or Save and Close to save your work.
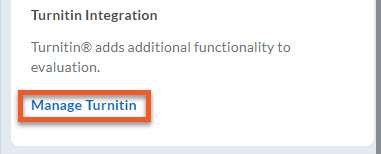
Some assignments require plagiarism detection using Turnitin. This feature can be added to any D2L Brightspace assignment through the options when you click on Manage Turnitin. Since this process requires some special consideration, please review our instructions on how to Enable Turnitin for assignments.
If you want to set up group assignment submission folders, it's important that you first set up groups. You can choose to create the group assignment during the group creation process, or after the groups have already been created.
NOTE: We recommend creating the group assignment using the Assignments tool, after the groups have been created, as you will have easier access to all of the settings.
A group assignment:
- Allows any member of the group to submit on behalf of the group.
- Ensures the instructor only needs to grade one submission per group.
- Provides all group members the same grade and feedback (in both the assignment and any associated grade item).
Please see the page on creating groups for instructions.
Please note:
If you realize you've made a mistake when creating groups, or connecting groups to a group assignment, keep in mind that if you delete the group category/group, the associated assignment will also be deleted. If that is not what you want, make sure to associate the assignment with the correct group category/group first, then delete. Or switch the assignment to Individual, go to Groups to delete or create the groups you want, then edit the assignment to switch back to a Group Assignment,. and connect to the desired group/category. Learn about how to delete groups/group categories.
Changing assignment or submission type: If your assignment doesn't have any submissions yet, you can change the assignment type (individual vs group) and/or submission type (File submission, Text submission, On paper submission or Observed in person).
If you discover that you need to change one of these details after you have received student submissions, you will need to create a new assignment, and ask any students to resubmit to that assignment.
Some assignments require plagiarism detection using Turnitin. This feature can be added to any D2L Brightspace assignment through the options in the Evaluation and Feedback panel, under Manage Turnitin.
Since this process requires some special consideration, please review our instructions:
Text submission assignments tips: At this time, we do not recommend using Turnitin for a text submission assignment. The assignment will not display as expected in Turnitin. If you wish to use Turnitin, please use a file-based submission instead.
Please also note that if you create an assignment submission folder of a particular type (file, text, on paper or observed in person), and then change your mind, once the first student has submitted, you cannot change it to a different type of submission. You will need to create a brand new assignment.
The release will happen for all students at the same time, so if you have an assessment set to open at 3PM EST and close at 6PM EST, each student will need to adjust the time for their own time zone.
Have the students confirm the assessment times for their time zone in advance
There are two areas that will display the availability times in advance, provided they are not set to be "hidden from students":
- Assignments (under Assessments > Assignments)
- Content (under Content > locate the content)
In each of these areas, you will see the release date and time and the due date (if applicable), if they are not hidden from students. Each user will see it reflected in their own time zone.
Quizzes (under Assessments > Quizzes), unfortunately, do not always display the availability and end dates in advance. As such, it may be best to add the link to the quiz in the Content tool, where the dates will be displayed in advance (as described above). Quiz links can be added to Content using the Existing Activities feature.
Include the time zone if you reference assessment times in your communications
When posting information to your students using tools like Announcements, be sure to always include your local time zone when referencing the availability and due dates and times for your assessments.
For example, specify that a quiz will be available to start between 3:00 PM EST and 4:00 PM EST.
Other submission types
While file submission is the main type of assignment used in Brightspace, there are a few other options to choose from.
- Text submission - students enter their submission directly in the text editor in Brightspace. This is not recommended for Turnitin-enabled assignments.
- On-paper submission - students submit paper-based assignments to the instructor, and not online.
- Observed-in-person - students submit their work in a way that is observed but not collected (i.e. presentation or performance).
Settings specific to each of these options is available further down this page.
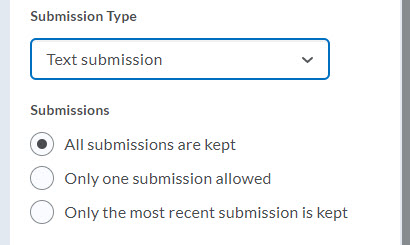
Text-based submissions
Submissions
You can decide if all submissions are kept (recommended), only the most recent submission is kept, or only one submission is allowed. We usually recommend keeping all submissions. If there's a problem with the last submission, you can refer to previous submissions.
On paper / Observed in person submissions
These submission options have the same settings.
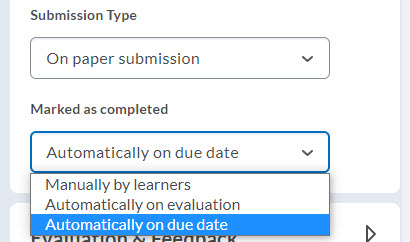
Marked as completed
You can decide what criteria determines if the assignment is marked as completed:
- Manually by learners
- Automatically on evaluation
When you publish a mark and/or feedback for a student in this assignment, it will be marked as completed.
- Automatically on due date
When the due date/time passes, this assignment will be marked as completed for all students.

Most of the time, instructors opt to attach a file to the assignment if they want to include content outside of the assignment instructions, but there are a few options:
- Upload a file
- Link to existing activities in your course
- Add a link (web address)
- Attach from Google Drive
- Record audio
- Record video

Upload a file
To upload one or more files from your computer, click on the “File Upload” icon, then click on My Computer and either drag and drop files onto the box, or click on Upload to navigate to the folder on your hard drive. Then click on Add.

Link to existing activities in your course
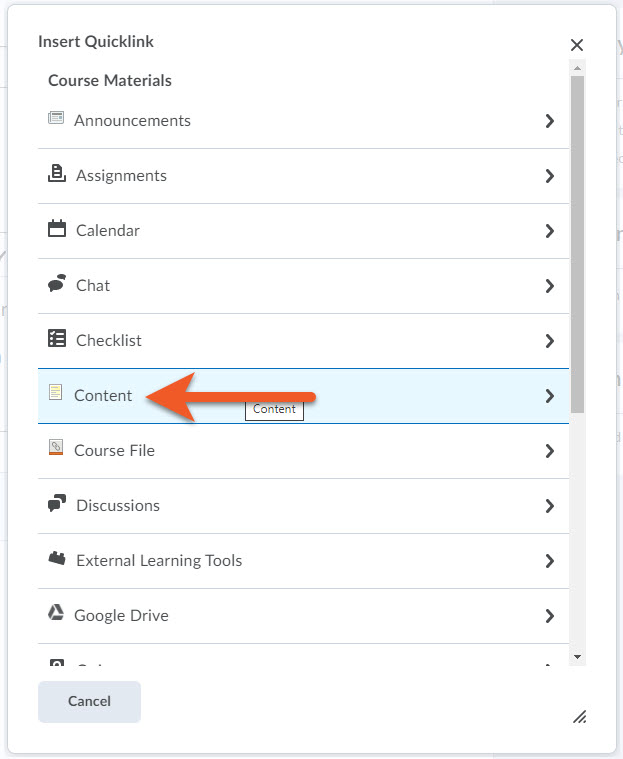
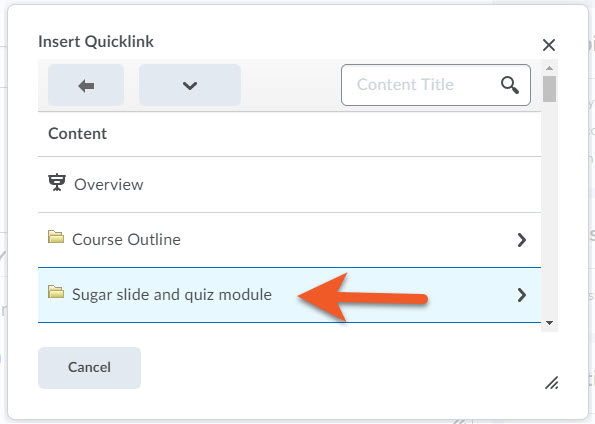
To link to existing activities in your course, click on the Attach Link to Existing Activity icon, and then navigate, first by type of course material, such as content or quizzes, then folders or modules/sub-modules if necessary, then select the particular item, and it will be loaded. When linking to an existing activity, the appropriate tool icon will be displayed next to the link.
NOTE: If the existing activity is hidden or has release conditions that the student does not meet, the link will not work for them.

Attach a web link
To link to a website, click on the Attach Weblink icon. In the popup, paste in the full link (including the leading “https://”), and type in the text that will be linked. Try to make the text descriptive. Then click on Insert.

Attach from Google Drive
To link to a document on your Google Drive:
- Go to your Google Drive
- Upload the file
- Ensure the sharing allows all users at Toronto Metropolitan University to view (or edit, if necessary)
- Copy the link.
Return to D2L to edit your assignment.
Click on the Attach from Google Drive icon.
Follow the instructions on the page.
If you have problems adding the link from this popup, try using Attach a web link instead.

Record Audio
- To record an audio message for your students, click on Record Audio.
- You may see a message asking permission to use your microphone. Click on Allow.
- Click on New Recording to start recording (and click on Stop Recording to end your message)
- ...or click on Upload File, if you want to find a file on your computer that you have already recorded.
- When you are done, click on Add.

Record Video
- To record a video message for your students, click on Record Video.
- You may see a message asking permission to use your camera. Click on Allow.
- Click on New Recording to start recording (and click on Stop Recording to end your message)
- ...or click on Upload File, if you want to find a file on your computer that you have already recorded.
- When you are done, click on Add.
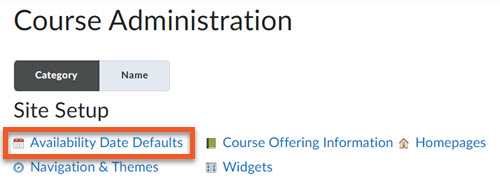
If you are confident that you want students to have the same kind of access to all assignments in this course shell before and after the start/end window, you can set up the default settings for your course.
In the top navigation, click on Course Admin, then Availability Date Defaults.
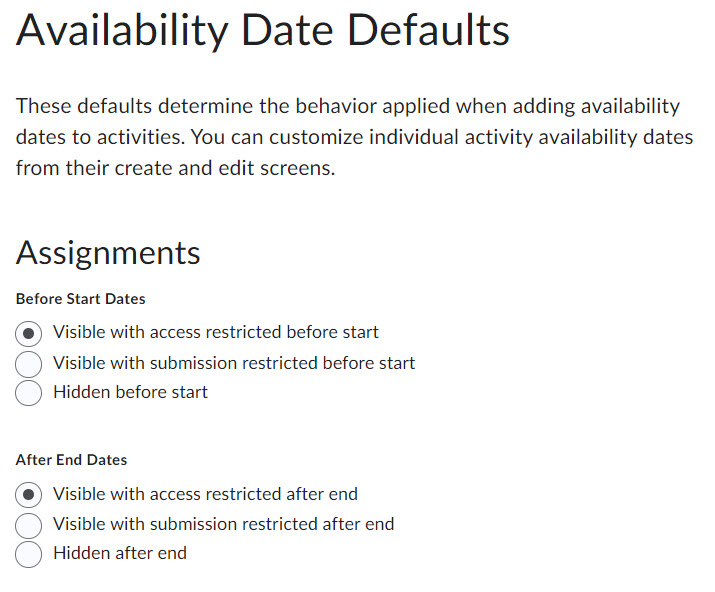
Determine what happens before the start date/time
- Visible with access restricted before start - Prior to the start date/time, students can see the name of the assignment, and the availability dates, but cannot click on it.
- Visible with submission restricted before start - Prior to the start date/time, students can see the assignment name and availability dates, and can click on the assignment name to read instructions for the assignment (if you have provided any).
- Hidden before start - Prior to the start date/time, students cannot see or click on the assignment.
Determine what happens after the end date/time
- Visible with access restricted after end - After the end date/time, students can see the name of the assignment, and the availability dates, but cannot click on it.
- Visible with submission restricted after end - After the end date/time, students can see the assignment name and availability dates, and can click on the assignment name to read instructions for the assignment (if you have provided any).
- Hidden after end - After the end date/time, students cannot see or click on the assignment.
Click on Save to save your changes.
If a part of your exam includes a question that requires longer-form writing, it can be challenging to decide whether to use the Assignments tool or the Quizzes tool in D2L Brightspace. Here are a few points of comparison that may help.
Quizzes
- Written and edited within the Brightspace Editor, which is fully-featured.
- No uploads necessary. Work is automatically saved.
- Can connect a rubric to Written Response (WR) questions.
- Brightspace Quizzes have NO access to Turnitin.
- Written Response (WR) questions can be a part of a larger quiz with a variety of question types, so the assessment is all in one place, with one setup for timing and access.
Assignments
- Written using software that the student must have access to on their computer (ie. Google Docs, Microsoft Word).
- Upload any file format, ‘though formats such as .doc, .pdf are preferable.
- Can attach a rubric to a Brightspace Assignment.
- Brightspace Assignments can be Turnitin-enabled for similarity checking.
- If you also have a more traditional kind of quiz for the exam, you will need to manage the access and timing of the quiz and the assignment.
You may also find our Online quiz tool comparison guide helpful for online exams that are more typical.
The recommended process for creating an assignment is to create the grade item first, then create the assignment. While setting up the assignment, connect to the existing grade item. If you didn't pay attention to the options on the screen, you may accidentally create another new grade item, instead of connecting to the previously created grade item. The new grade item will probably not have the correct settings.
Please go through the following steps to confirm and correct this problem:
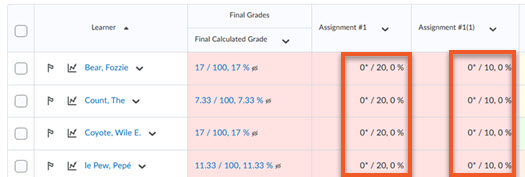
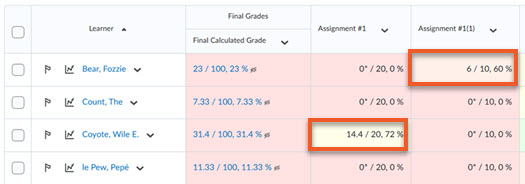
First, ensure that you have not entered any grades yet.
Go to Grades > Enter Grades. Look in both grade columns for this assignment, and confirm that the columns are empty, with no grades entered.
If the columns are empty, proceed with the steps below.
If there are grades in one or both of the columns, please see the 'If you already started grading" section further below.
Next, we need to check which grade item has the correct settings, and which grade item is currently connected to the assignment (unfortunately, they are probably not the same grade item).
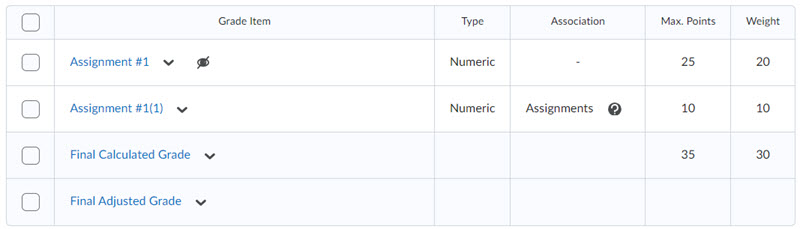
Go to Grades > Manage Grades.
Identify the two grade items in question.
To confirm which grade item has the correct settings, look in the columns on the right, to confirm the correct max points and weight values.

To confirm which grade item is currently connected to the assignment, look in the Association column. One grade item will likely have nothing in this column, and the other will say "Assignment". Make a note of where the two columns are in the overall list (ie. which version of the grade item appears first).
Now you need to disconnect the grade item with the incorrect settings from the assignment, delete that grade item, then connect the grade item with the correct settings to the assignment.
Go to Assessment > Assignments and edit the assignment.
Change "In Grade Book" to "Reset to Ungraded".
Click on Save and Close.
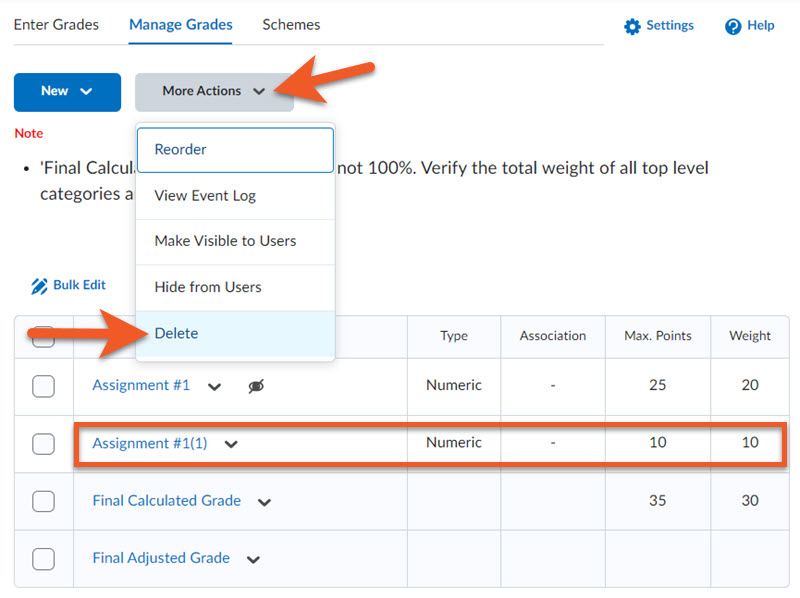
Go to Grades > Manage Grades.
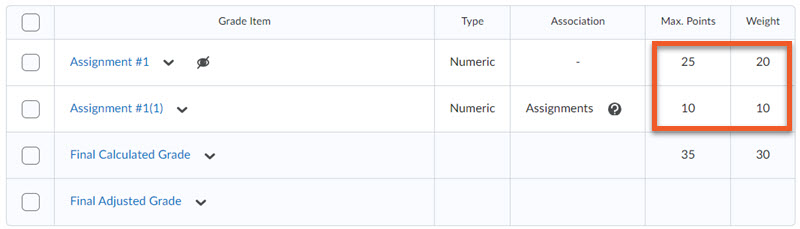
Double check which item has the incorrect settings (most likely, the max points and weight are both 10), and its position in the list of items.
Click on More Actions > Delete.
Select that grade item.
Click on Delete, and confirm.
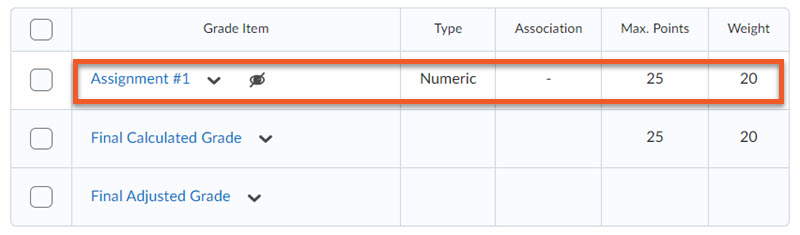
You will be returned to the Grades > Manage Grades page, where you will now see that there is only one grade item for the assignment. Confirm the max points and weight are correct. If needed, edit the grade item and fix the points and/or weight.
Go to Assessment > Assignments and edit the assignment.
Click on Grade Out of and the grade item connection options will appear just to the right of it.
Click on "Not in Gradebook" and select "Edit or Link to Existing".
Select the second option, "Link to an existing grade item".
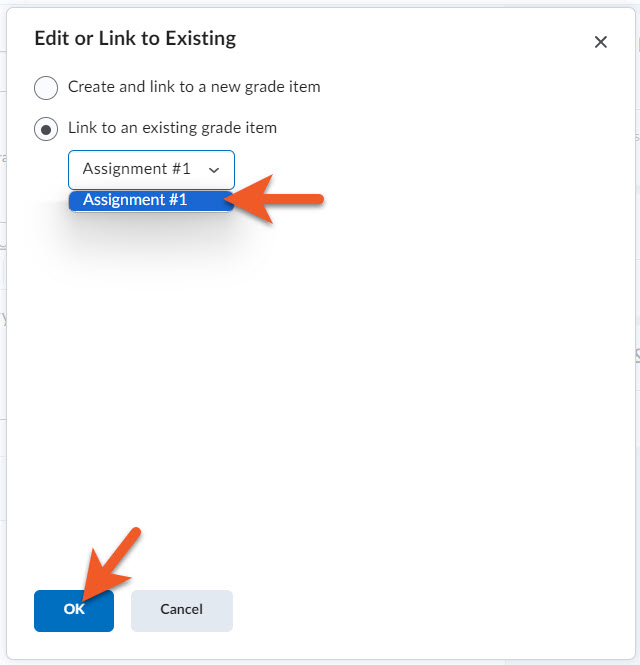
You will now see a dropdown menu appear.
Click on it, and select the correct grade item.
Click on OK.
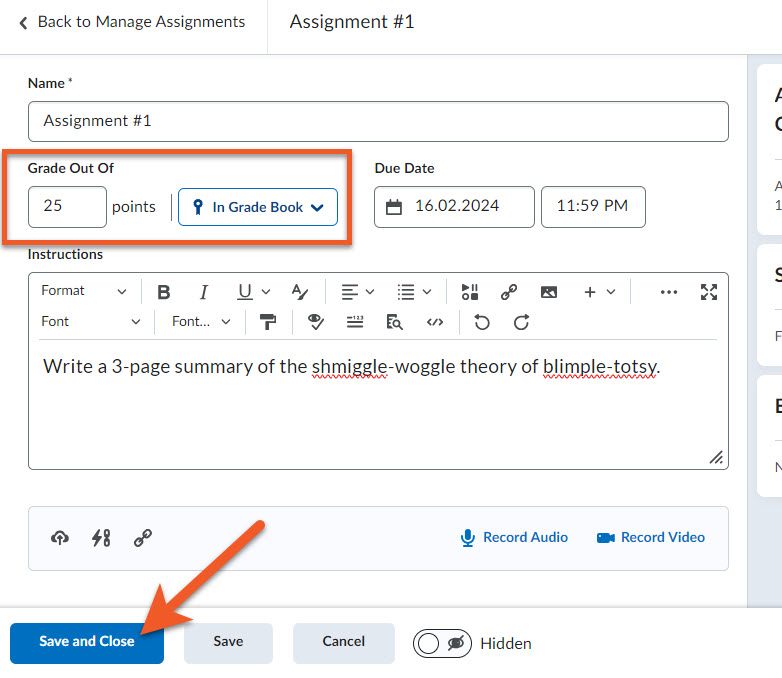
You should now see that the "Grade out of" value has been updated.
Click on Save and Close to save your changes.
The problem is now resolved, and you should be able to proceed with grading your students' assignment submissions, when you are ready.
If you already started grading
If you go to Grades > Enter Grades, and can see 1 or more grades entered into 1 or more of the grade items related to this assignment, it may be a little complicated to retain those grades, while ensuring the students' grades are calculated correctly.
Please contact our team at courses@torontomu.ca and include as many details as possible about which course shell, assignment, grade items, what you've done so far, etc. We will be able to take a look and provide some personalized guidance about how to proceed.
(...or...I want to delete a grade item, but it's attached to an assignment)
Whether you want to delete just the assignment, just the grade item, or both, it's important to remove the connection between the two items before you attempt to delete them, or you may have problems deleting. Please follow these steps:
Go to Assessment > Assignments and edit the assignment.
Change "In Grade Book" to "Reset to Ungraded".
Click on Save and Close.
If you want to delete a grade item, make sure there are no grades entered before you do so, as you will not be able to retrieve the grades if you make a mistake.
If your grade columns have some grades entered that you may need to refer to later, you can export a copy of the gradebook first, or email our team at courses@torontomu.ca for advice.
Now, you can proceed with deleting the assignment and/or grade item in the appropriate tool (Assignments or Grades).
There are two ways you can organize your assignments:
- Rearrange your list of assignments into a particular order
- Use categories to group assignments
Rearrange your list of assignments into a particular order
Go to Assessment > Assignments.
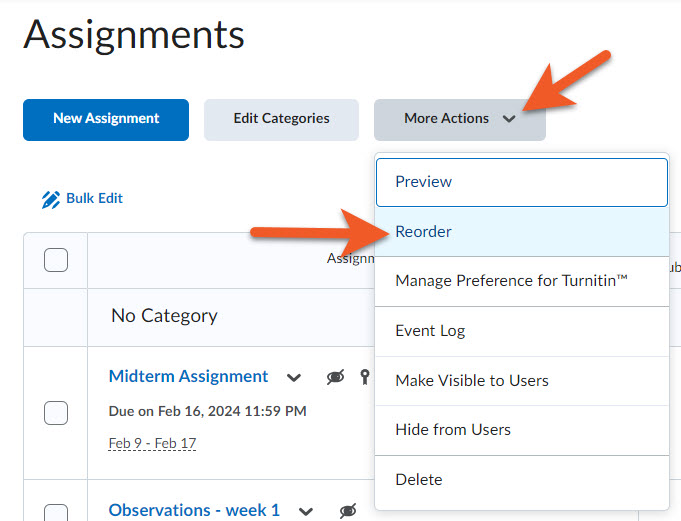
Click on More Actions > Reorder.
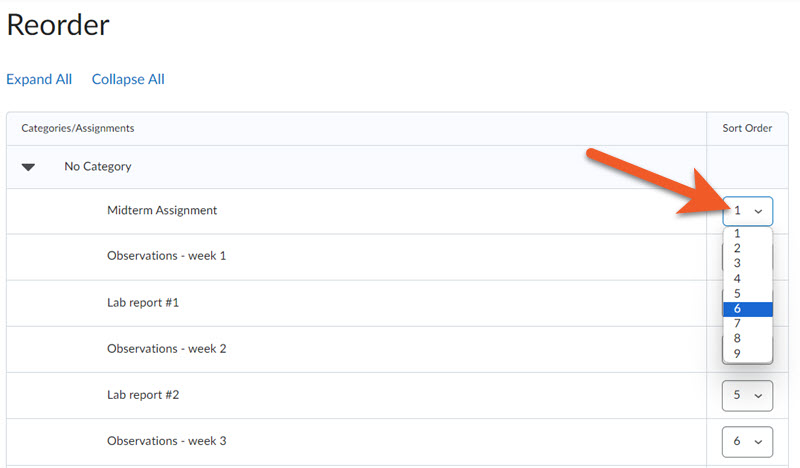
To change the position of an item in the list, click on the Sort Order dropdown to the right of that item, and select the number that represents the desired position.
Click on Save to return to the main Assignments page and view the items in the new order.
Use categories to group assignments
Unfortunately, you cannot use the categories tool while editing a particular assignment. You will need to create your assignments, then go to Assessment > Assignments.
Create a category
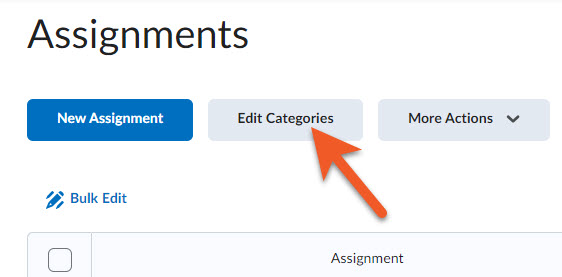
Click on Edit Categories to create categories.
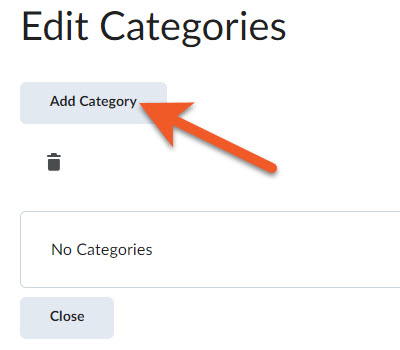
Click on the Add Category button.

In the popup that appears, in the Name field, type in the name of the category you wish to create.
Click on Create.
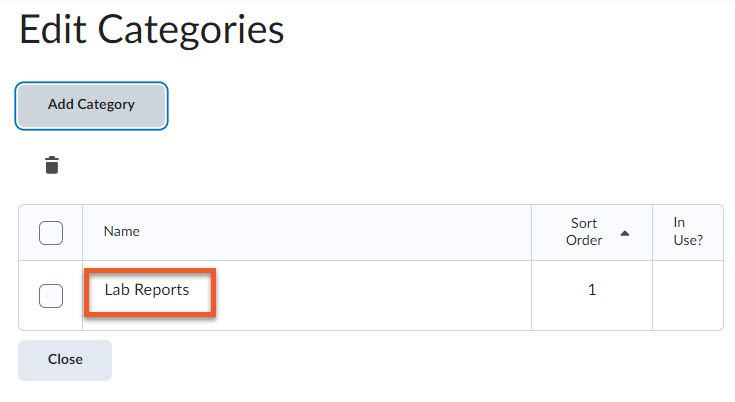
You can now see the list of categories. If you require more categories, click on Add Category, and repeat the process.
When you are done creating categories, click on Close.
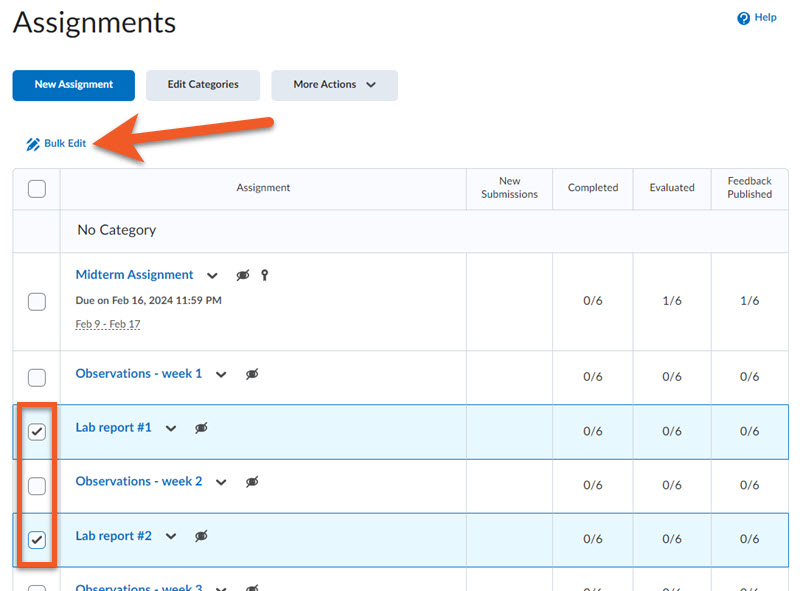
Move an assignment into a category
Select the checkbox in front of the assignments that you wish to organize.
Click on Bulk Edit.
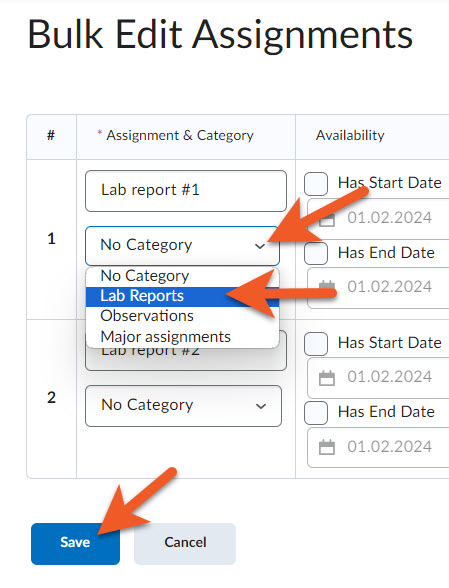
On the next screen, for each assignment, click on the category dropdown, and select the desired category.
When you're done, click on Save.
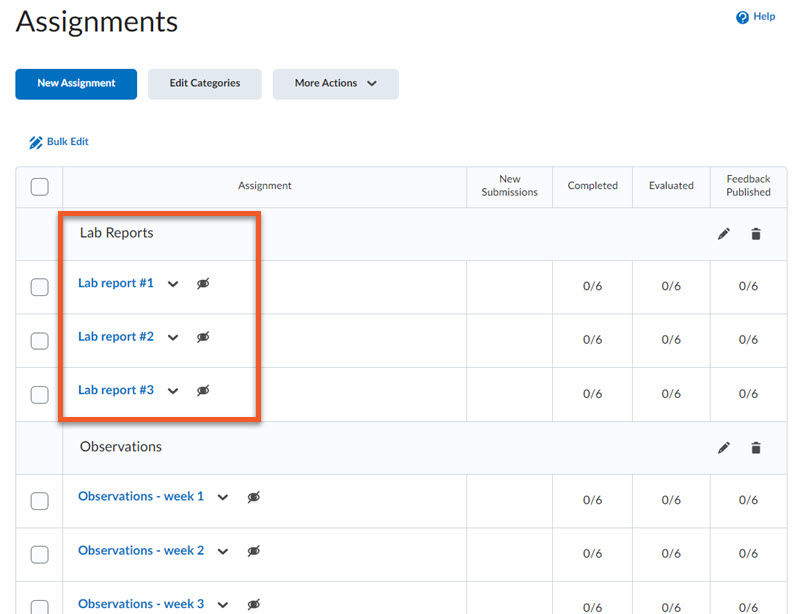
You will be returned to the main Assignments page, where you can now see your assignments arranged by category.
Occasionally, there is a staffing change, and you may lose or gain a co-instructor, Academic Assistant (AA), or grader, after you have already set up your assignment to use that team.
If a team member is removed from your shell, any students that were previously allocated to them in an assignment will no longer be allocated to that person.
If you manually remove someone's ability to evaluate or publish grades in an assignment, the same is true, they will no longer be allocated to the students that they were previously allocated to.
If you add a new instructor, Academic Assistant, or grader to your shell, they will not automatically be added to the evaluation team in each assignment.
While D2L does its best to reallocate students to the teaching team that is assigned, we've found that their automatic allocations do not always work in the expected way. This can result in some students having more than one evaluator assigned to them, or some students with no evaluator.
If you have removed or added someone to your grading team, we strongly recommend that you follow the instructions found further up on this page to go through the process again to select evaluators and publishers, and allocate evaluators to learners. This way, you can be confident that the settings are correct, and there will be fewer misunderstandings within your evaluation team.
Warning: Please make sure that if you have a grading team, you completely set up this section correctly, prior to opening the assignment to students. Once the 1st student submission is received, some of these settings will be LOCKED.
If you realize too late that you cannot make the changes you need, consider creating a brand new assignment with the correct settings, then ask students to resubmit, or reach out to our team at courses@torontomu.ca, so we can look at your specific situation, to see if any other workaround is possible.
We ask that you please take great care when deleting anything from your shell. It is risky to remove some items, as it may impact the ability for some students to complete their coursework, can result in incorrect final grades for your students, and/or may not follow the university’s student data retention policies.
If you are unsure of how to proceed with solving a problem, before you delete anything, please consult with our support team, at courses@torontomu.ca. If you provide a detailed explanation of the situation, we may be able to suggest solutions that are less risky.
If you have already deleted group(s), this may impact if you can access submissions for some of your students, and how their grades are calculated, so please refer to the following advice:
If you have only deleted a group
If you have deleted a group (under Communication > Groups) that contained students, and members of that group previously uploaded their work to the group assignment, keep in mind that content will no longer be visible to you or those students. You will not be able to evaluate their work.
Also, keep in mind that if the deleted group had students enrolled in it, and they are still enrolled in the class, Brightspace will automatically distribute those students into other remaining groups, and they will now have access to any group assignment submissions that their new group has submitted. In any group assignment evaluations that you complete after this point, these students will receive the same grade as their new group.
Please see “Remove a group from an existing group category” to learn more about this.
If you have deleted, then restored a group
If you have deleted, then restored a group (under Communication > Groups) that contained students, and members of that group uploaded their work to the group assignment under their original group, keep in mind that between the time that you deleted and restored the group, Brightspace redistributed those students into other remaining groups. Once their original group has been restored, they are now enrolled in two groups: their original group AND their “temporary” groups.
To avoid giving a student an incorrect grade, it’s vital that you check whether any students from the restored group(s) submitted any work while in their “temporary” group (in the time between when you deleted and when you restored their original group).
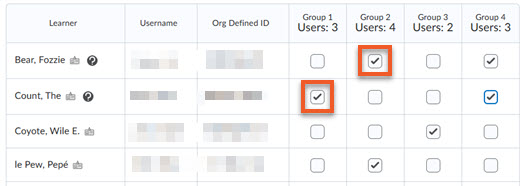
If they didn’t submit any work, you can go to Communication > Groups and use "Enroll users" to unenroll the students from their temporary groups. It's absolutely vital that you do this BEFORE grading any group work, or the student may end up with an incorrect grade.
In the example on the left, "Group 3" was deleted, and then restored. Therefore, you can delete these students from the group that is not "Group 3".
If the student did submit work during their temporary enrollment in a different group, you’ll need to take care when grading the group work, and may need to take notes, and manually update the individual students’ grades after you grade the group submissions, to ensure they do not receive a group grade for the incorrect group.
Please see “Remove a group from an existing group category” to learn more about this.
Related video tutorials and webinars
Find all of our D2L Brightspace video tutorials and webinars on our Brightspace Stream Page