Akindi Online assessments (integration with Brightspace)
Akindi is an assessment tool used to deliver bubble sheet or online multiple-choice examinations. It is integrated with D2L Brightspace, which means it is accessed through your course shell.
There are two types of Akindi assessments:
- Online Assessments, which are delivered entirely online via Brightspace.
- Paper-Based Assessments, where you can print and scan the bubble sheets yourself using any printer and scanner, or easily send it off to be done for you on campus.
See the benefits of the online option below, with instructions for use.
On this page:

Support
- Visit the Akindi Help Center (external link)
- Akindi’s Getting Started Guide (external link)
- Contact Akindi Support using the blue live-chat button in the bottom right corner of the screen while using the tool.
If using an Online Assessment, you can distribute directly to learners via Brightspace.
Features include:
- Integrated with D2L Brightspace
- Brightspace Quiz alternative
- Import questions from a Word document
- Set a hard deadline for completion
- Easily update grading
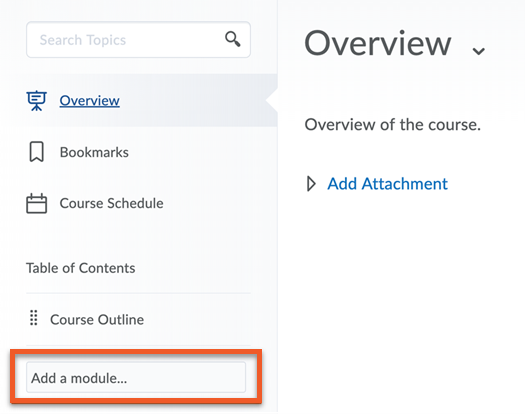
Access the Content tab in your D2L Brightspace course shell. Add a module to the left-hand navigation bar by clicking Add a module… and give it a name.
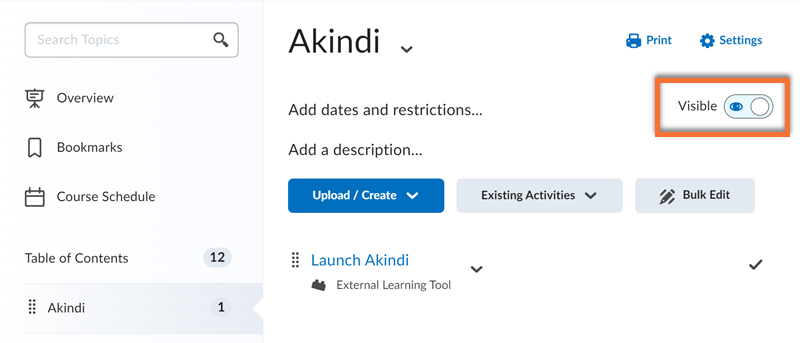
For online assessments, the module must be visible for students to access the quiz.
Ensure that the module is set to “visible” by clicking on the eye icon in the top right corner.
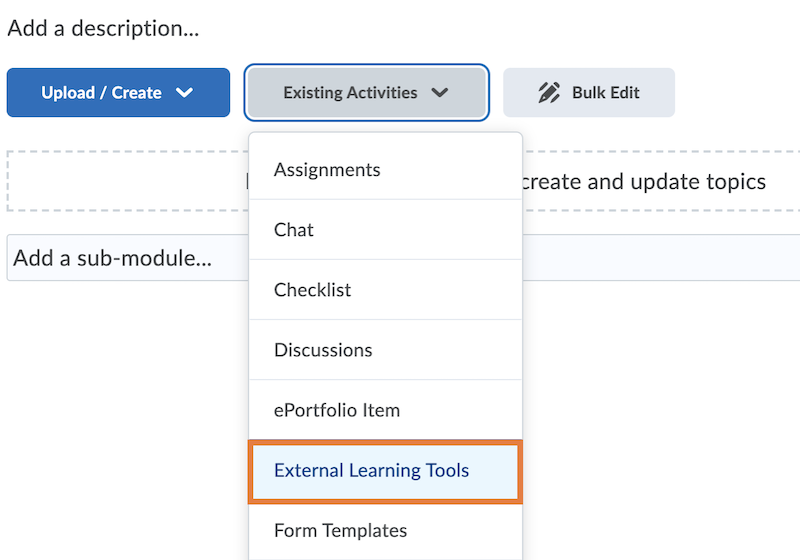
Inside your new module, click on the Existing Activities drop-down menu and select External Learning Tools.
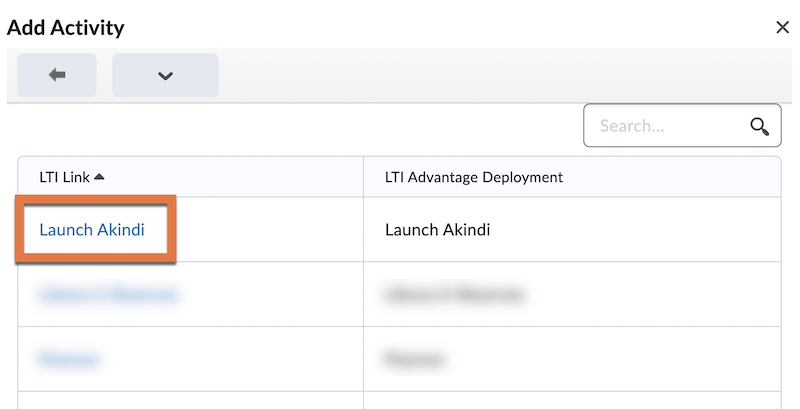
Select Launch Akindi.
This will add a link with the same name to your module; click it to open the tool.
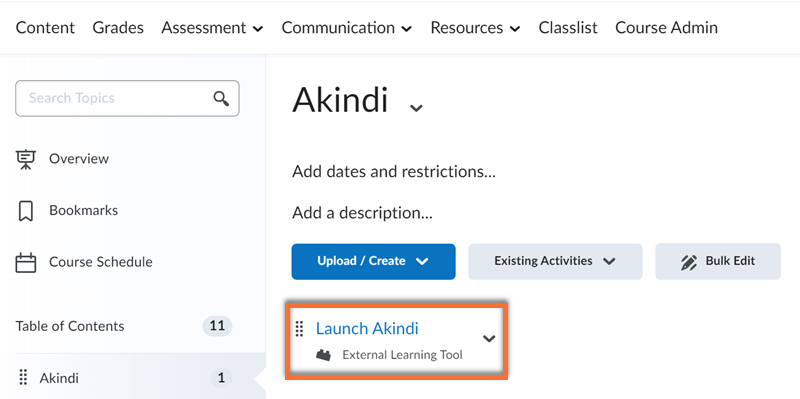
Access the tool by clicking on the Launch Akindi link in your module.
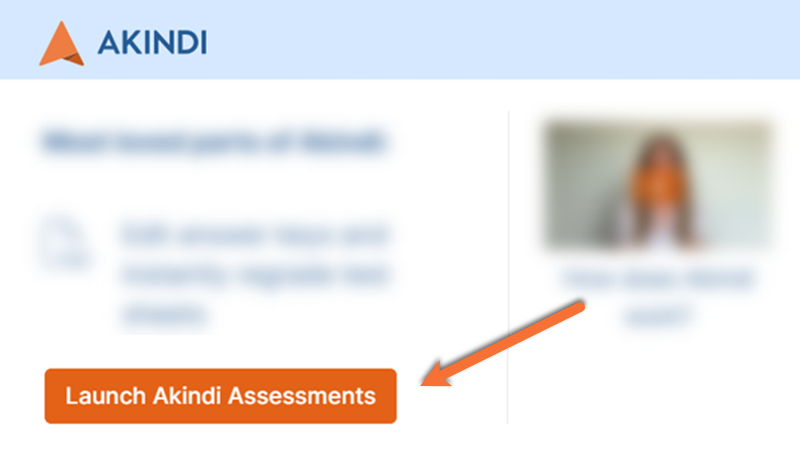
Click on the orange Launch Akindi Assessments button in the bottom left of the new window.
This will take you to Akindi on an external site.
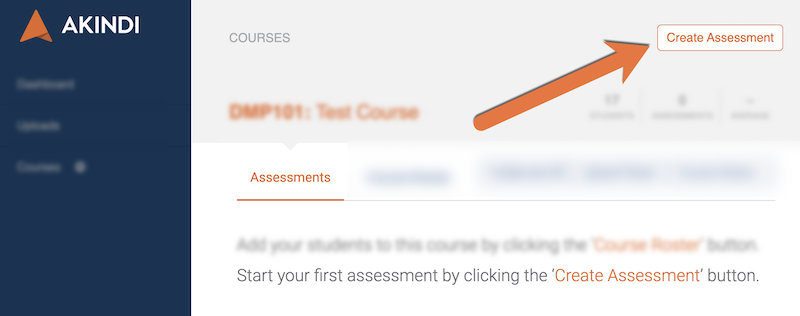
After launching Akindi, click Create Assessment.
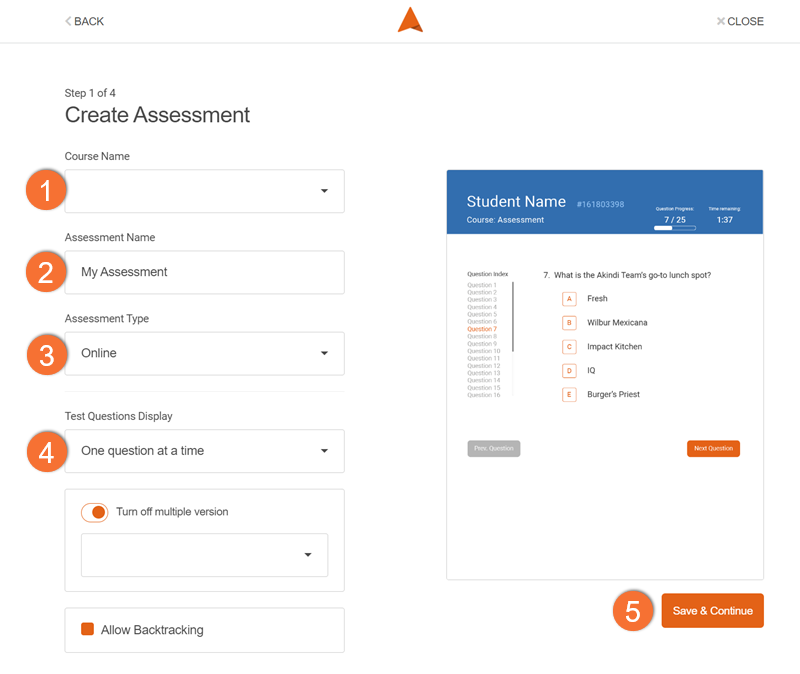
1. Select your course from the drop-down.
2. Name the assessment.
3. Set the assessment type to "Online".
4. Select a Test Question Display:
- Display full PDF will replicate the bubble-sheet experience. Select the layout and ensure that your question sheet matches your selected settings. You can enable Multiple Versions to support up to six separate versions of the assessment.
- One question at a time presents each question with clickable answers. This option is more flexible, supporting any number of questions and multiple-choice options. You can enable Automated Scrambling to shuffle the order in which questions are presented to students. You can also select to Allow Backtracking.
- I don’t want to upload test questions can be used when you would like students to only select answers with the questions shared separately. You will have to select an appropriate layout that matches the number of questions in your assessment.
5. Click Save and Continue.
If you have opted to Display full PDF:
Select to upload your test question document into the box as a PDF. When successfully uploaded, click Continue.
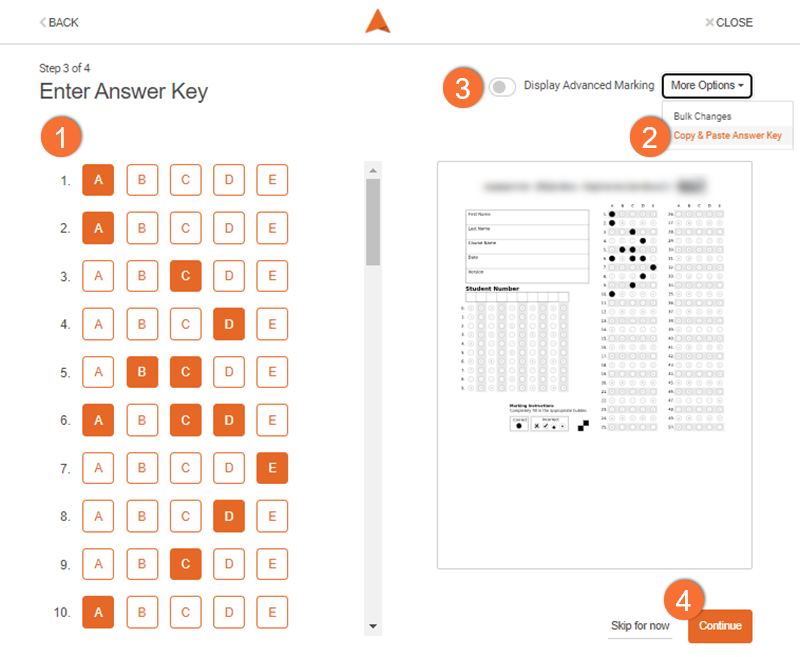
A separate answer sheet will display:
- Create an answer key by clicking on the correct option for each question. Questions can have multiple correct answers.
- You can bulk upload answers using the Copy and Paste Answer Key option. Details about formatting can be found at Akindi’s Copy and Paste Answer Key (external link) resource.
- Question type and weighting can be changed using the advanced marking options.
- Click Continue.
If you are presented with error messages or unexpected behaviour, please visit Akindi’s Advice and Answers resource (external link) .
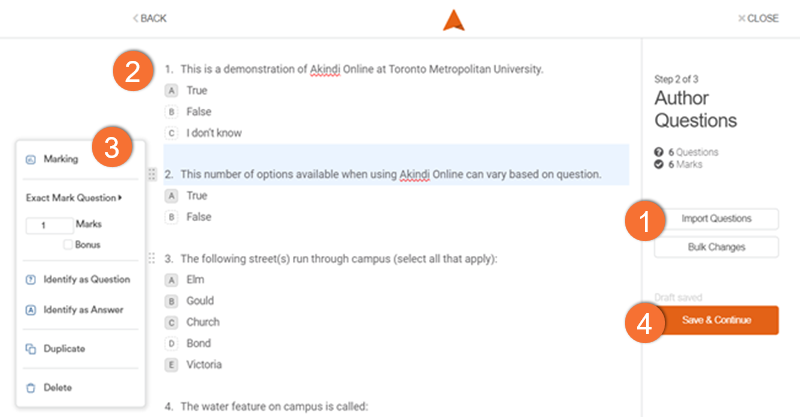
If you have opted for "One question at a time":
- Select Import Questions to upload your test question document as a .docx file. Individual questions will be loaded with the answers below them.
- Identify correct answers by clicking on the letter beside them, and turning it blue. Questions can have multiple correct answers. Before uploading, the correct answers can be identified in the document by using boldface, italics, or different coloured fonts.
- Question type and weighting can be changed using the advanced marking options, accessed through the 6-dot grid beside the question.
- Click Save & Continue.
If you are presented with error messages or unexpected behaviour, please visit Akindi’s Advice and Answers resource (external link) .
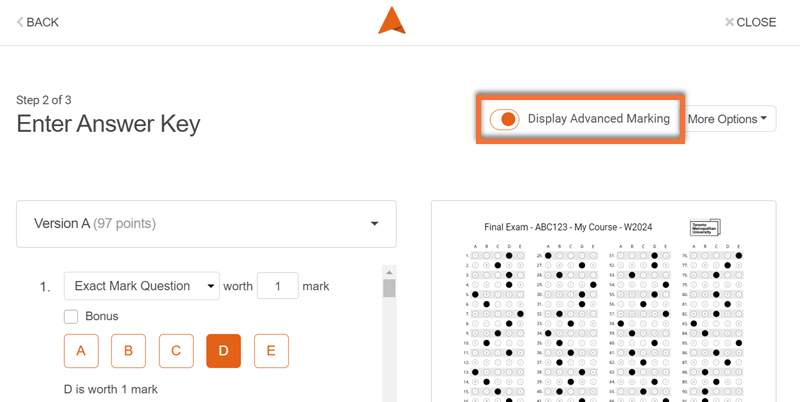
You can toggle advanced marking by clicking the on/off slider at the top right of your screen. If the slider is orange, advanced marking is turned on.
Setting advanced marking options is only necessary for your assessment if your assessment has bonus questions, questions worth different amounts, or questions with multiple answers.
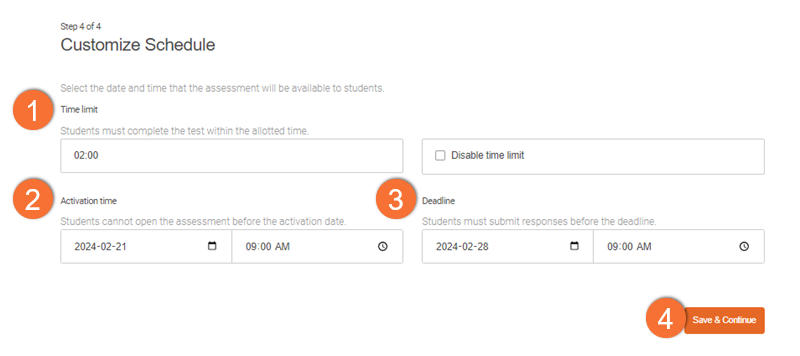
- Time limit: Optional. Acts as an individual timer for each student, starting when they begin the assessment.
- Activation date: Determines when the assessment becomes available to students. If they navigate to Akindi in advance, they will not be able to start before this time.
- Deadline: After this date and time, even if their individual timer has not run out, students will not be able to continue the assessment.
- Click Save & Continue.
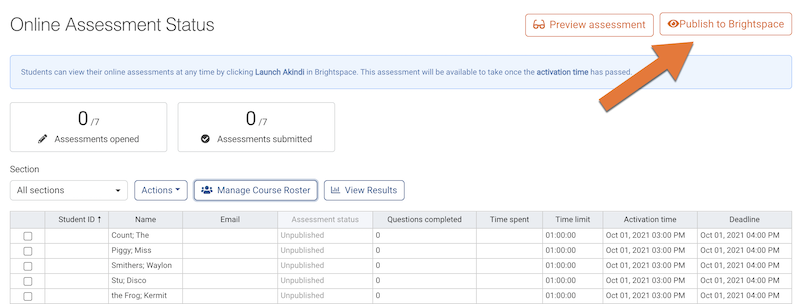
Click Publish to Brightspace. This will make upcoming assessments visible to students when launching Akindi from within Brightspace.
Note: After publishing, the assessment will only be accessible to students after the activation date.
The option to alert students by email will be provided; this will inform them of the timing restrictions you set, but will not provide them with a direct link.
Additional or Alternate Time
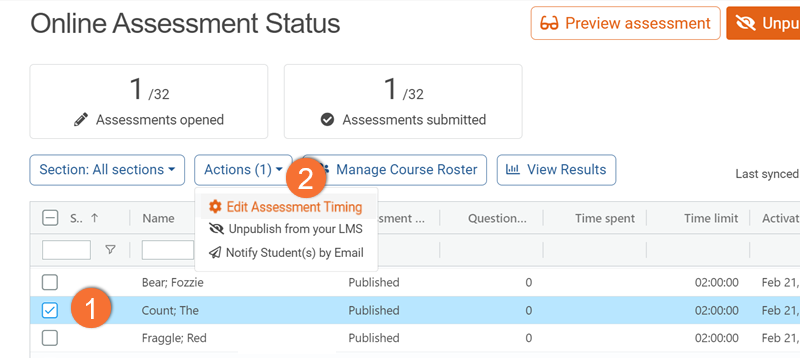
1. Select the checkbox beside the name of the student who requires alternate timing. Multiple students can be selected if the same change is to be applied to them all.
2. Click the Actions option, and select Edit Assessment Timing.
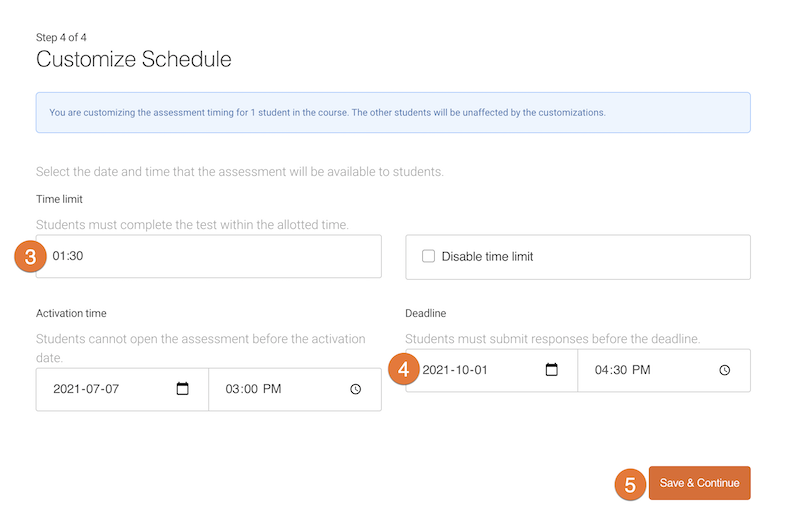
3. If a time limit is enabled for the assessment, adjust it to include the total time the student is eligible for.
4. Be sure to change the deadline to consider the additional time; if you do not do this, the student will automatically be stopped at the time of the default deadline.
5. Click Save and Continue.
Additional Attempt
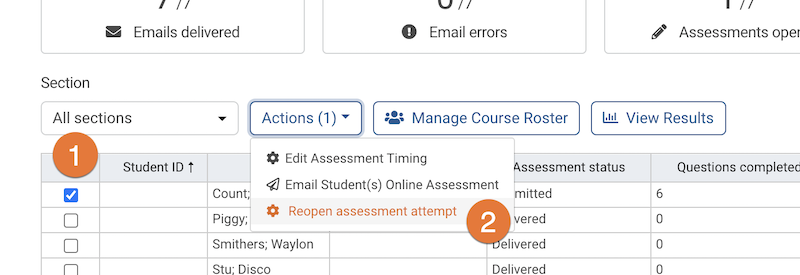
1. From the assessment dashboard, select the checkbox beside the name of the student who requires a new attempt.
2. Click the Actions option, and select Reopen assessment attempt. If this option is not listed, confirm the Assessment status of that student in the table below to ensure that they have completed an attempt.
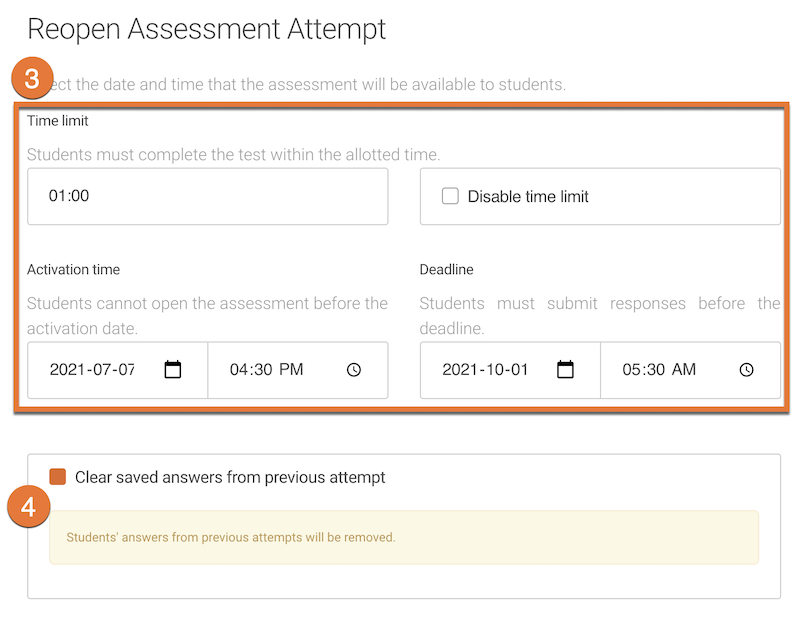
3. Set the new activation time, deadline, and any changes to the time limit that you would like to implement for this student
4. The student's saved responses from their previous attempt will appear when they access the assessment. To remove all the previous responses, select the 'Clear saved answers from previous attempt' option.
Students cannot see the Akindi Online Assessment.
- Verify that you have published to Brightspace (see “Publishing Akindi Online Assessment to Brightspace” above)
- Ensure the Akindi Module in Content is set to visible (See “Getting Started” above)
- Confirm that the Activation Date and Deadline are correct (See “Setting Time Restrictions” above).
I need to change which answer is correct
One of the benefits of Akindi Online is the ease at which you can modify the answer key, both before and after students have completed attempts. Once the correct answers are modified, student scores are automatically recalculated.
There are multiple possible ways of accessing the Answer key to make changes:
From the course dashboard, select Edit Questions & Answers for the relevant assessment.
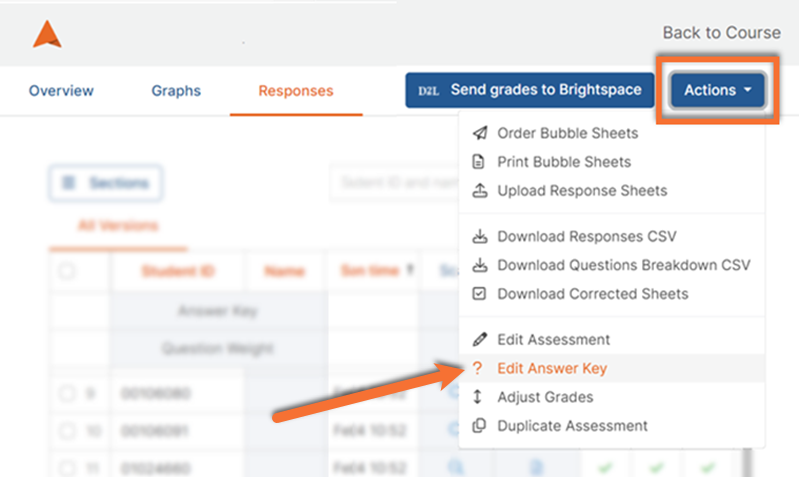
From the response summary, select the Actions button, then choose “Edit Answer Key” from the drop-down list.

1. Once at the "Answer Key", you can click on the letter beside the answers to toggle if they are considered correct (filled in orange), or incorrect (white). To remove a question from the assessment calculation, set all possible answers to incorrect.
2. When all changes have been made, click “Continue”, and then "Save & Continue".

Once your tests are completed, you can view your results from the Akindi Dashboard by clicking on View Results under the relevant assessment.

The first tab of your results is the Overview.
Here you can see:
- Statistics on how well your students did on the test
- Which questions were easiest and most difficult for them
- A breakdown of your Akindi discriminatory score, summarizing how well your test was designed based on the results
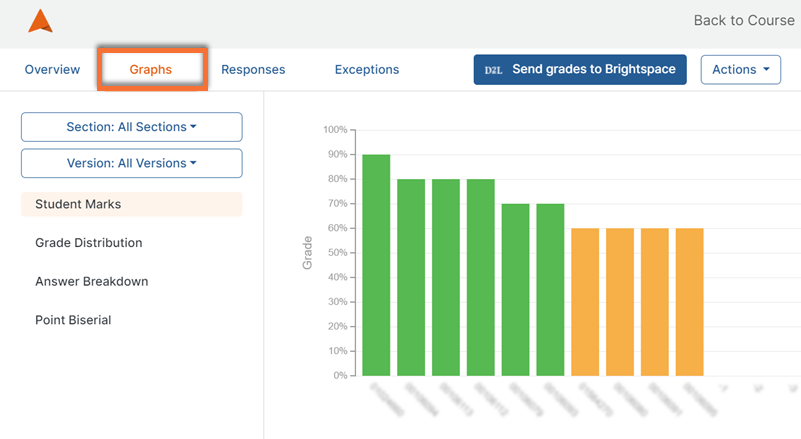
The second tab of your results is the Graphs tab.
This displays visualizations of your student marks, grade distribution, answer breakdown, and point biserial.

The third tab of your results is the Responses tab. This will give you a spreadsheet of each student's completed attempts.
For each student, you can see their response to every question, and if it was correct or not. To view an annotated scan of their response sheet, click the corresponding icon in the “Reports” column.
Using the Actions dropdown menu in the top right corner, you can make changes to the assessment and answer key.
Akindi provides detailed explanations of all the information presented on the "Results" page, including how to use it. Learn more at the Akindi Results Resource (external link) .

When you're ready to export the grades to your D2L Brightspace course shell, click Send Grades to Brightspace in the top right corner of your “Results” page to sync all students' scores to your Brightspace Grades tool.
You can also send grades to select individual students by navigating to the "Responses" tab and selecting individual students using the left column, before clicking Send Grades to Brightspace.
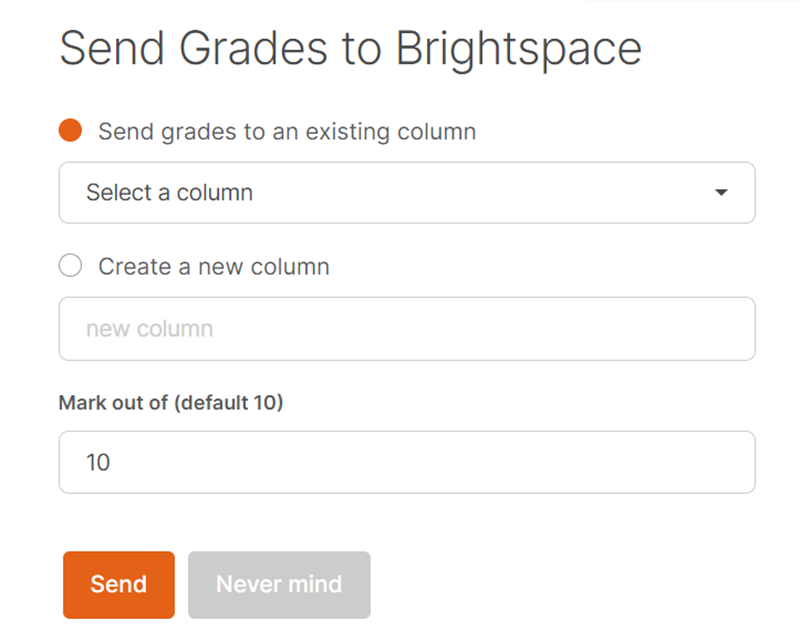
You can choose to:
- Create a new column (which will automatically be visible to students)
- Select an existing column from your Brightspace course
It is recommended to create your intended column in advance, as a Numeric Grade in the Brightspace Grades tool. This allows you to set visibility options and the intended overall course weight of the assessment before syncing the scores from Akindi.