Keep it Simple
Keeping it simple is more than just minimalist design. It's about designing with intention and a clear purpose. Each time you add a new item to a page, it adds complexity which can potentially decrease usability and accessibility.
Simple and intentional
Design for clarity.
- Simple, consistent, and predictable layouts.
- Clear visual hierarchy using effective structure and headings.
- Use design elements like colour, spacing, and text size consistently and intentionally.
- Have sufficient spacing to visually help differentiate content and make the page look less overwhelming.
Things to avoid while designing
- Avoid excessive uppercase text.
- Some screen readers may interpret all caps text as an acronym and will read each letter individually. Additionally, some people find all caps more difficult to read and it may give the appearance of SHOUTING.
- Avoid bolding or italicizing entire paragraphs.
- Bolded text should be used to provide strong emphasis on a word or phrase.
- Italics should be used to highlight proper names (i.e. book and article titles), foreign words, quotes.
- Long quotes should be formatted as a blockquote on web pages.
- Avoid using underlined text for emphasis.
- Underlined text can be confused with links. Consider using bold for emphasis.
- Avoid long walls of text.
- Organize and chunk information into sections using headings and lists.
- Avoid justified aligned text.
- Justified text can sometimes create large, uneven spaces between words, which may cause readability issues. Left aligned text is the most readable.
- Avoid excessive motion or animation.
- Motion effects can trigger vestibular disorders and distract from content. Use only when necessary for conveying meaning.
Plain language
Plain language is clear, concise, and well-organized writing that is free of jargon and complex words. Plain language helps everyone find what they need, and understand it the first time they read or hear it.
- Write short but logical sentences.
- Use active voice.
- Use common, everyday words (avoid jargon).
- Be concise. Remove unnecessary words.
- Expand each acronym when it first occurs.
Plain numbers
Show numbers plainly and in a way that is easy for everyone to understand.
- Remove unnecessary numbers and remove decimal places when possible.
- For example, 10 a.m. is the same as 10:00 a.m. and $20 and $20.00 is the same amount. However, $20.00 may look like $200 (two hundred) or $2000 (two thousand) for people with dyscalculia or Irlen syndrome. It's ok to display exact amounts of money, like $20.35.
- Write large numbers, like millions or billions, in words. For example, $8 million and not $8,000,000.
- Explain numbers and data. Provide summaries, explain trends, and use data visualizations to help illustrate data better.
Tables
Tables should be used to present tabular data, and not used to create document layouts for visual aesthetics. Tables should have a simple structure with properly formatted column headers to help convey their relationships. Poorly formatted and inconsistent table layouts are difficult to navigate with screen readers. Accessible tables should:
- Indicate row and/or column headers to convey their relationship.
- Whenever possible, have a single header row only.
- Avoid split and merged cells, empty table headers, and nested tables (tables within tables).
- Avoid using semantic Headings 1 to 6 within tables. Semantic headings should only be used for sections of content.
- Have a visible caption or title introducing the table, as it would provide context for sighted and non-sighted readers alike.
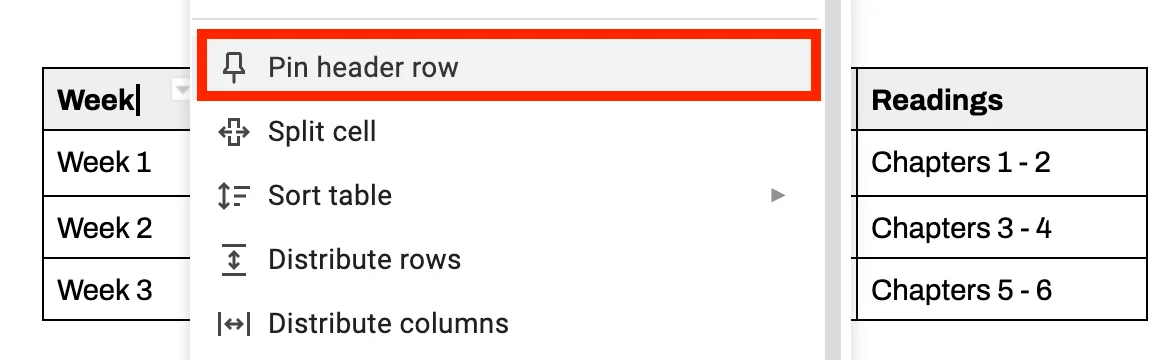
To assign a header row to the table, right click on the top row of the table, and then select Pin Header Row.
Notes
- In Google Docs, it is only possible to assign header rows, not header columns. Please consider the orientation of your table.
- Assigning a header row also benefits sighted readers, especially when tables span more than one page!
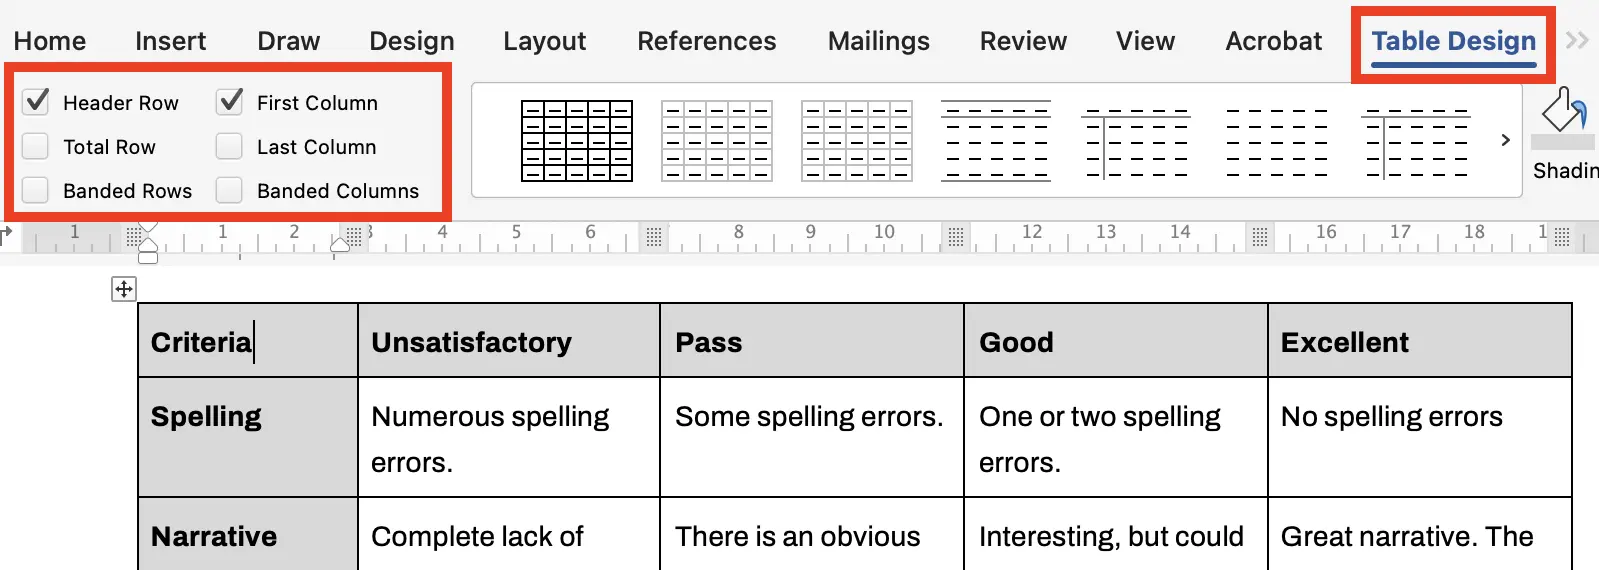
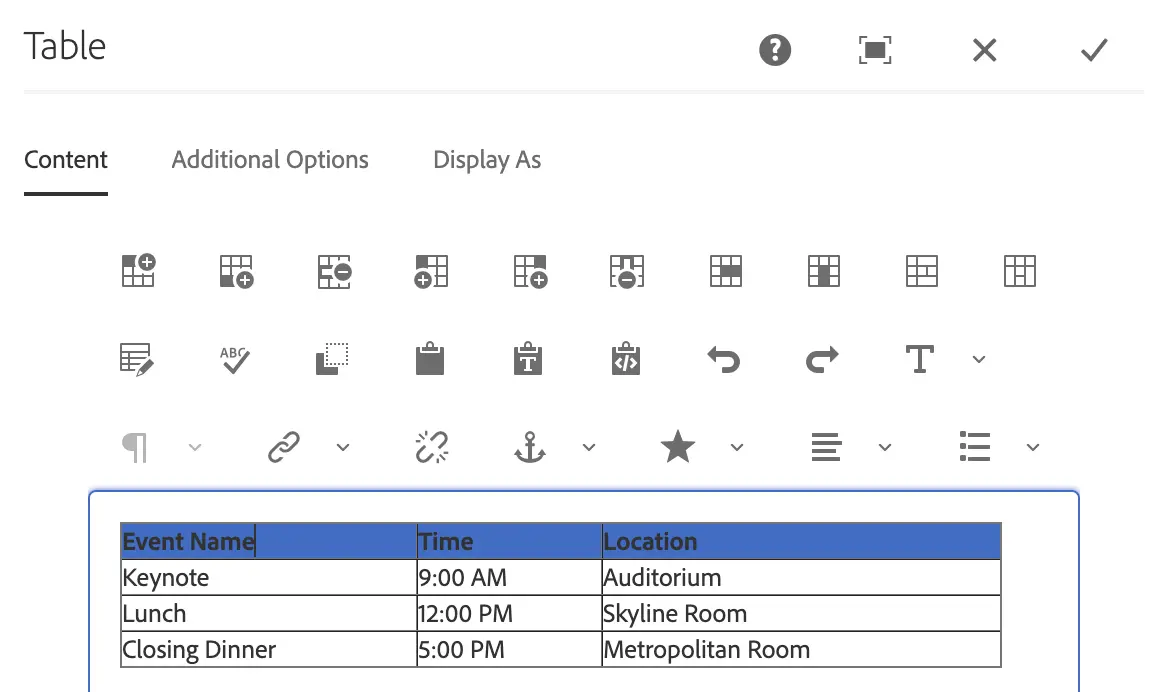
Table headers
In this example, the table also has a column header.
- Place your cursor within the table.
- Select the Table Design tab.
- Select the Header Row checkbox.
- If your table has a column header like the rubric below, check the First Column checkbox.
Additional table properties
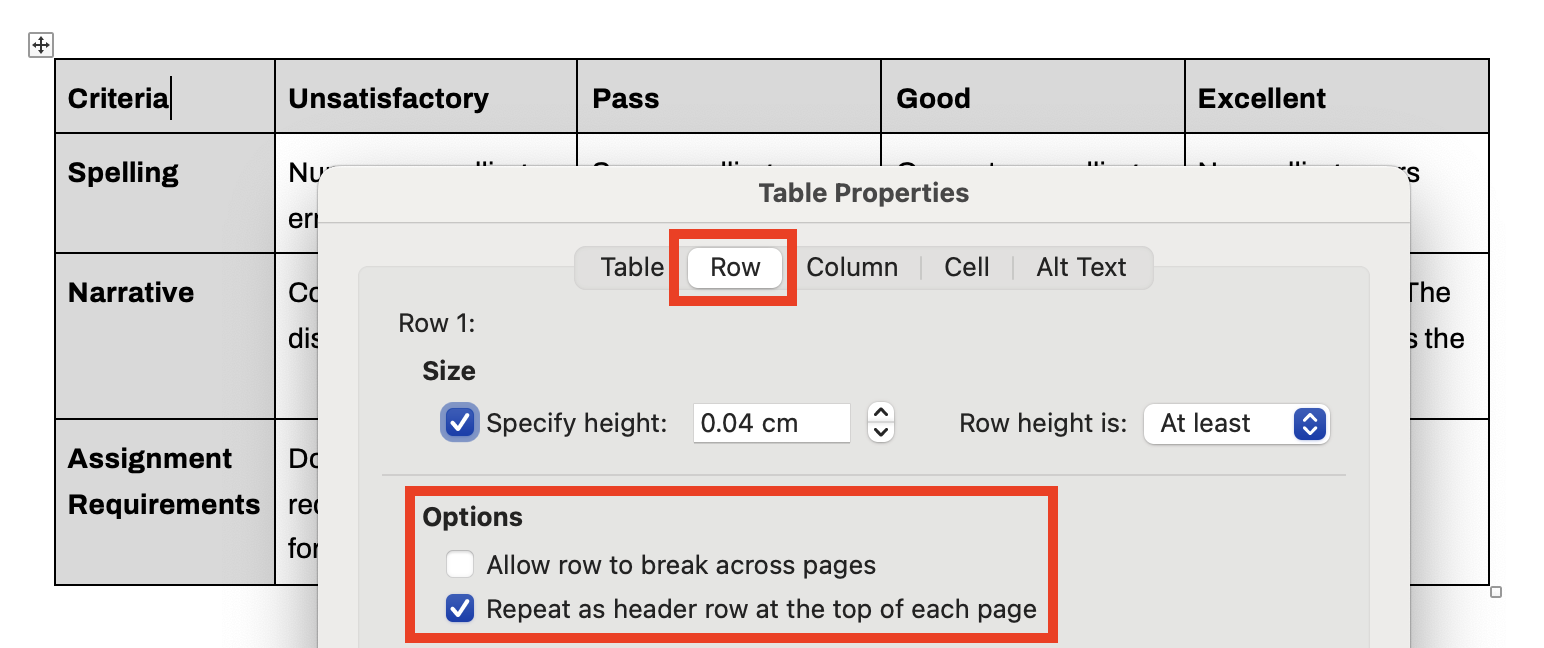
Review these additional table properties if your table spans more than one page.
- Right click on the table, and select Table Properties from the utility menu.
- Select the Row tab.
- Uncheck the Allow row to break across pages checkbox.
- Ensures that a row won't be broken up into two when the table spans on another page, which may be visually confusing.
- Select the Repeat as header row at the top of each page checkbox.
- Ensures that the header row remains visible on each new page the table spans across.
Alt text for tables
Microsoft Word is the only authoring tool that gives you the ability to add alt text to tables. For most tables, a visible caption or title introducing the table should suffice, as it would provide context for sighted and non-sighted readers alike.
Unlike images, tables are inherently textual, and their content is already accessible using a screen reader. Screen readers can navigate and read the content of tables, without the need for alt text.
However, there may be situations where providing a concise description or title for a table could be helpful, especially if the table serves a specific purpose or conveys complex information.
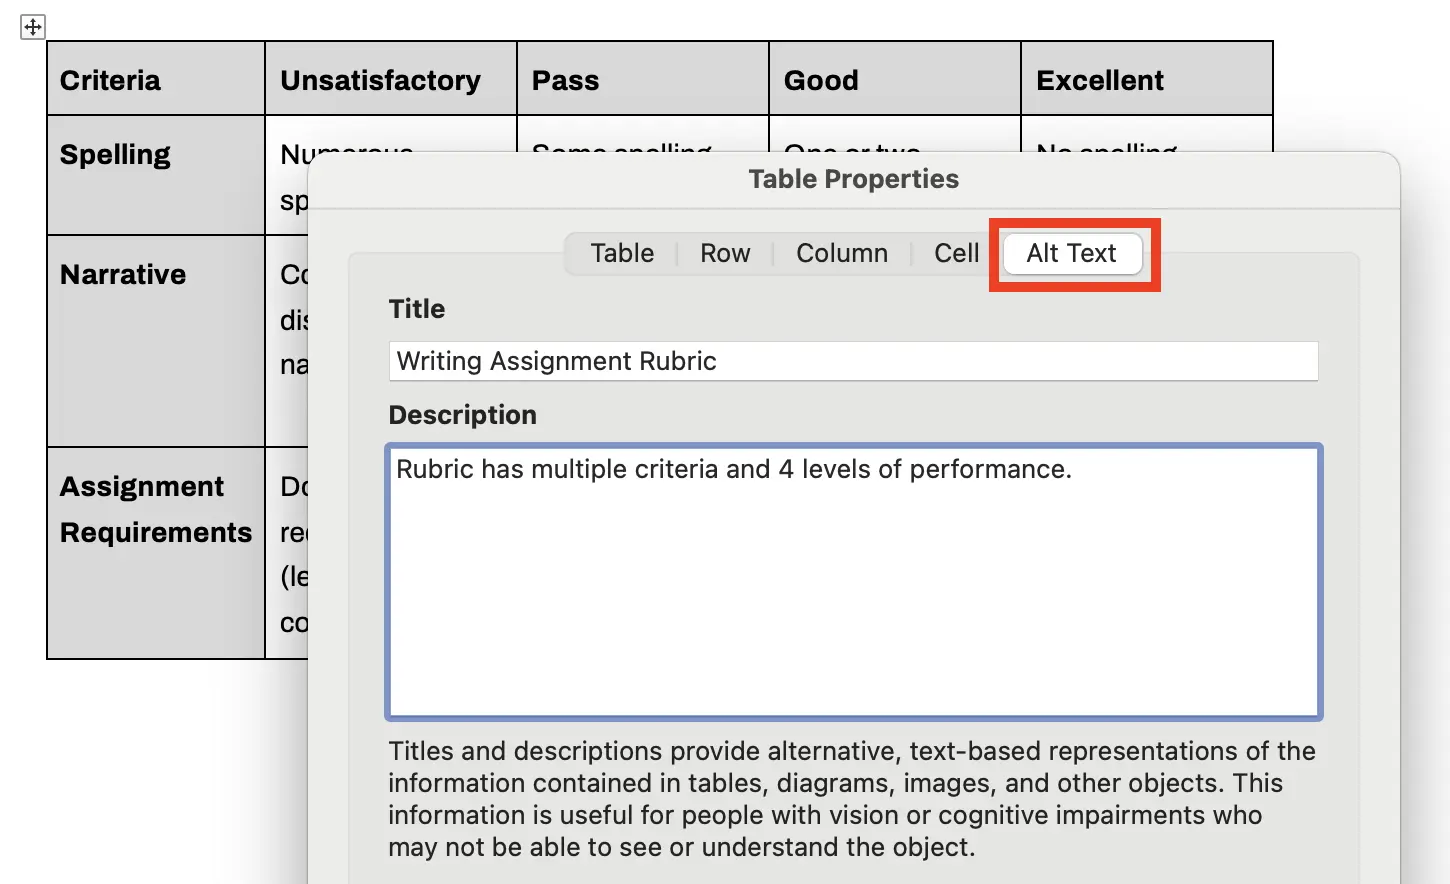
- Select the Alt Text tab.
- Add a concise Title.
- Add clear, concise alt text in the Description field.
- Describe the purpose of the table. Avoid including information that can easily become out of date or is redundant, such as describing the number of rows or columns.
- Select OK once you are done.
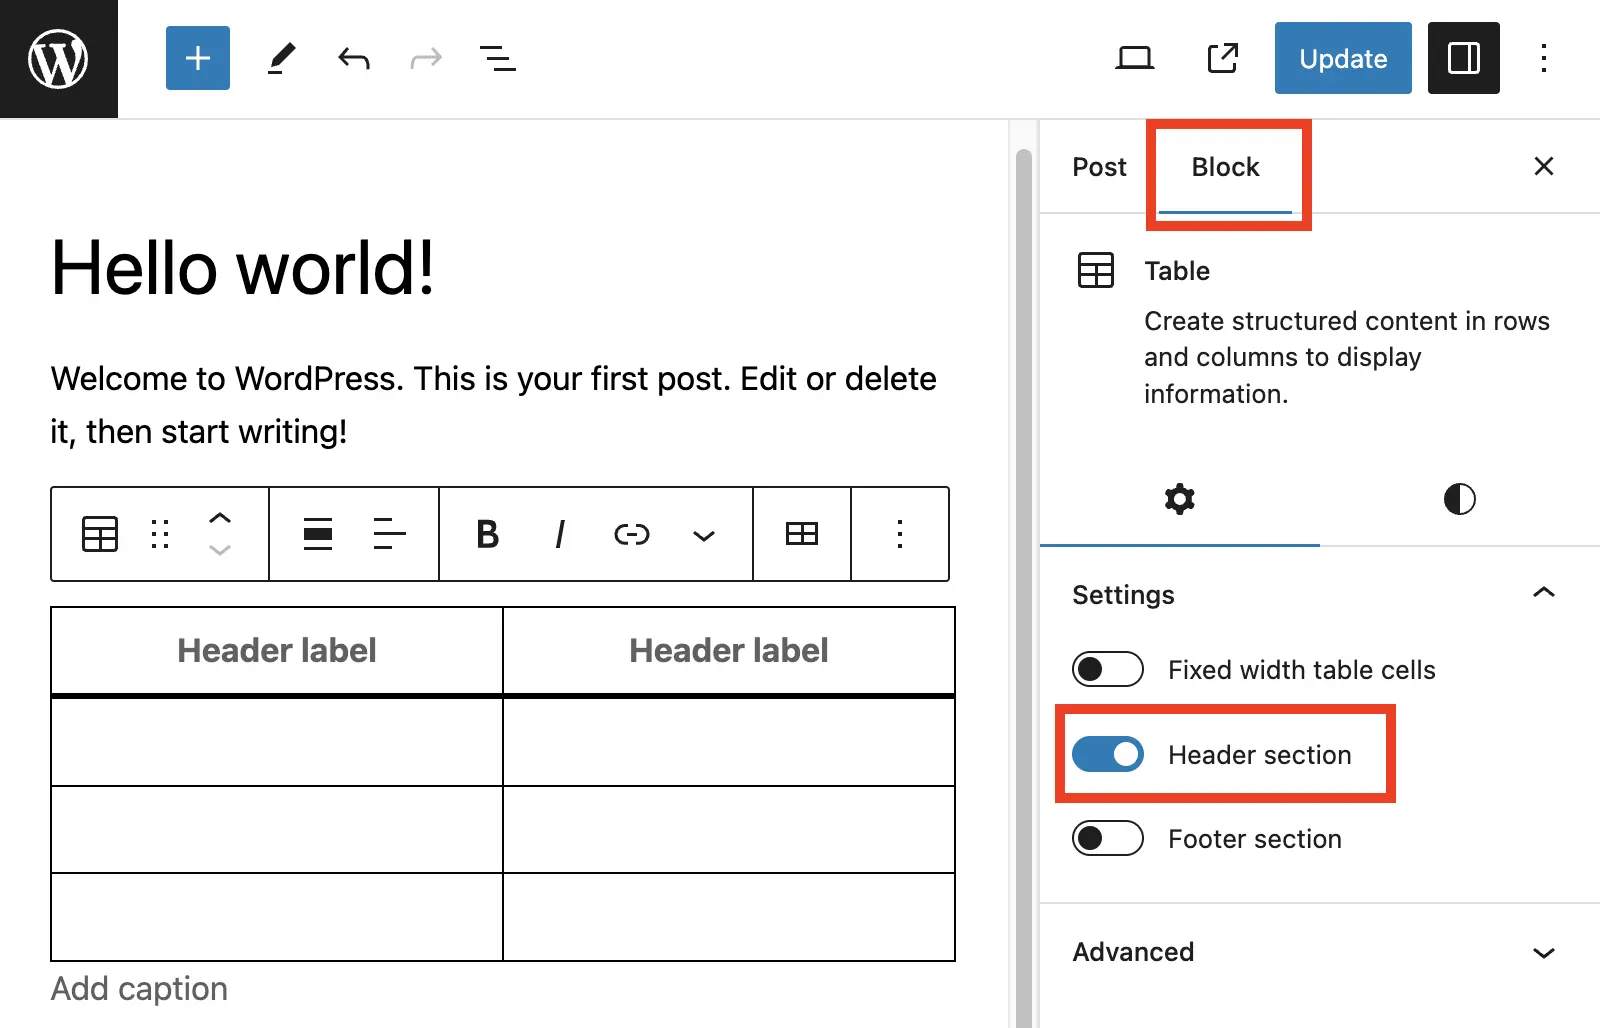
- Toggle the visibility of the Settings sidebar.
- Select the Table.
- Select the Block tab within the sidebar.
- Enable the Header section toggle.
- Populate the Header label within the table.
Complex tables in WordPress
WordPress currently only permits horizontal headers using the block settings. To indicate vertical column headers, you would need to edit the table as HTML: Select the Options button, then Edit as HTML. When editing as HTML, follow the W3C's Table Tutorial. (external link)
Use of Scope attribute
The use of the scope attribute may be required for complex tables. For example, tables where the data is ambiguous or difficult to distinguish, and tables that have multiple header rows or columns. The scope identifies whether the cell is a header for a row, column, or group of rows or columns. For more guidance, refer to different examples from the W3C's Table Tutorial. (external link)
When creating tables via the Table component in AEM, indicate headers within the table properties.
Step 1
Hold the Control key while clicking on all header cells. Each selected cell will have a blue background.
Step 2
- Select the Table Edit button.
- Under Cell Properties, go to Cell Type.
- Select Header from the dropdown.

Use of Scope attribute
The use of the scope attribute may be required for complex tables. For example, tables where the data is ambiguous or difficult to distinguish, and tables that have multiple header rows or columns. The scope identifies whether the cell is a header for a row, column, or group of rows or columns. For more guidance, refer to different examples from the W3C's Table Tutorial. (external link)